Content
Outline
To make App icon and Splash image in React Native, I use generator-rn-toolbox until now. the links below are about it.
Until now, I was using generator-rn-toolbox well, I got a comment on my blog post, that there is a new library, from generator-rn-toolbox developer who is very kind.

I have checked it. generator-rn-toolbox is Deprecated, and he has made and provided new react-native-make.
In this blog post, I will introduce how to make App icon and Splash image via react-native-make library, and compare the previous library.
Install react-native-make
Execute the command below to install react-native-make.
npm install --save-dev @bam.tech/react-native-makeThat’s all. We are ready to use react-native-make. A comparison with the previous generator-rn-toolbox is below.
When install generator-rn-toolbox, we need to install globally like below.
npm install -g yo generator-rn-toolboxAnd then, we need to install additional library, imagemagick, like below.
brew install imagemagickBy comparison, we can install react-native-make locally and don’t need to install any additional libraries.
App icon
When you use react-native-make to create App icon, you need a 1024x1024 px size png image.
If the file is ready, execute the command below to make App icon.
# react-native set-icon --path [path-to-image]
react-native set-icon --path [path-to-image] --background ["color"]
For example,
# react-native set-icon --path ./src/Assets/images/app_icon.jpg
react-native set-icon --path ./src/Assets/images/app_icon.jpg --background "#FFFFFF"
Splash image
Create Splash image
When you use react-native-make to make Splash image, you need a minimum 3000x3000px size png file.
If the image is ready, execute the command below to create Splash image.
# react-native set-splash --path [path-to-image]
# react-native set-splash --path [path-to-image] --resize [contain|cover|center]
react-native set-splash --path [path-to-image] --resize [contain|cover|center] --background ["background-color"]
For example,
# react-native set-splash --path ./src/Assets/images/splash.jpg
# react-native set-splash --path ./src/Assets/images/splash.jpg --resize cover
react-native set-splash --path ./src/Assets/images/splash.jpg --resize center --background "#FFFFFF"
The resize option default is contain. And, if you use cover option, the main image should be located 1/3 padding on background image, not to crop the main image.
You can see the image status by each option on the link below.
In my case, I use multiple colors background in Splash image. In this case, cover options is the best choice to create Splash image.
iOS
To use Splash image on iOS, you need to set the Storyboard for Splash image. Execute the Xcode by opening ./ios/[Project Name].xcworkspace file to set the Storyboard.

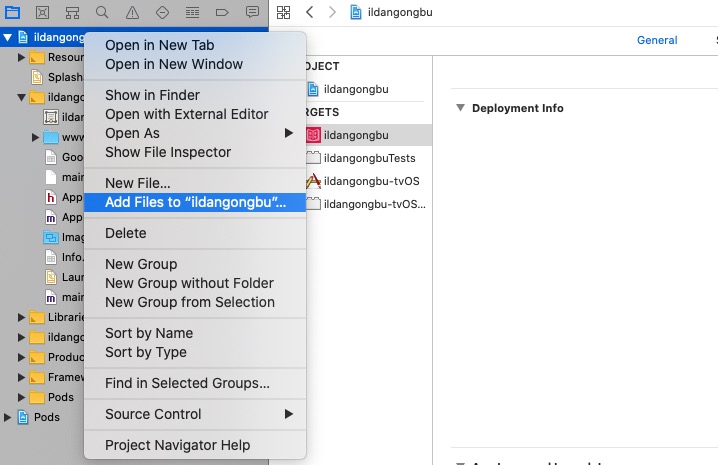
When the Xcode is executed, right-click the project name on the left top, and click the Add Files to "Project Name" menu.
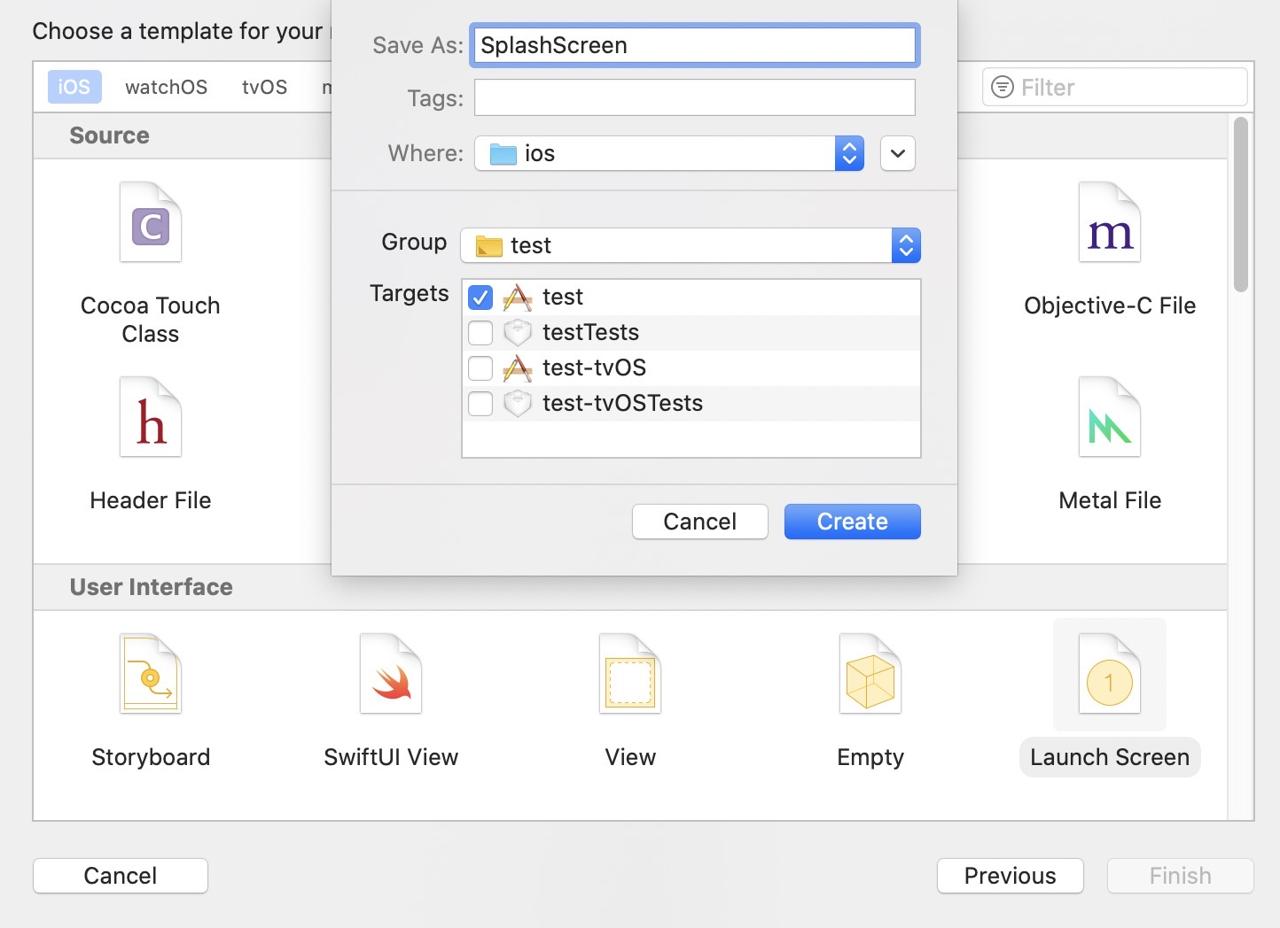
And then select the ios/SplashScreen.storyboard file to add it.

After adding the file, insert SplashScreen on Launch Screen File field in General tab.
react-native-splash-screen
The reason to make Splash image and to apply it is to manage login or data processing in the background of Splash image.
For this, react-native-make uses react-native-splash-screen.
We can use react-native-splash-screen to easily control Splash image in React Native not only for react-native-make. I’ve written the blog post about this subject. you can see this on the link below.
Completed
For me who design and develop the app by alone, when I created App icon and Splash image, generator-rn-toolbox is very helpful. And I think the new react-native-make is also very helpful.
Let’s try to use react-native-make to easily make App icon and Splash image!
Was my blog helpful? Please leave a comment at the bottom. it will be a great help to me!
App promotion
Deku.Deku created the applications with Flutter.If you have interested, please try to download them for free.


