Content
Outline
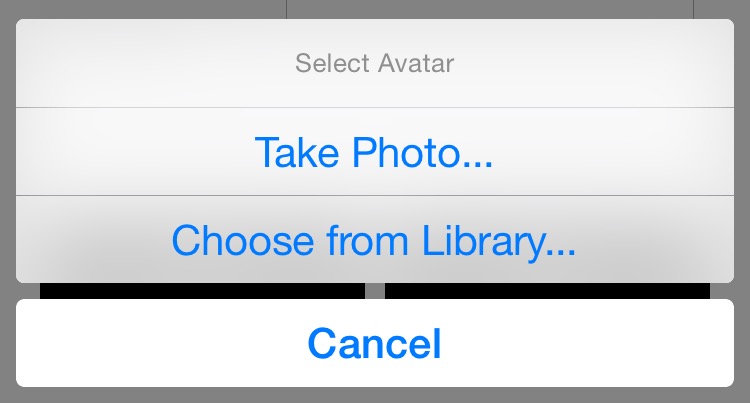
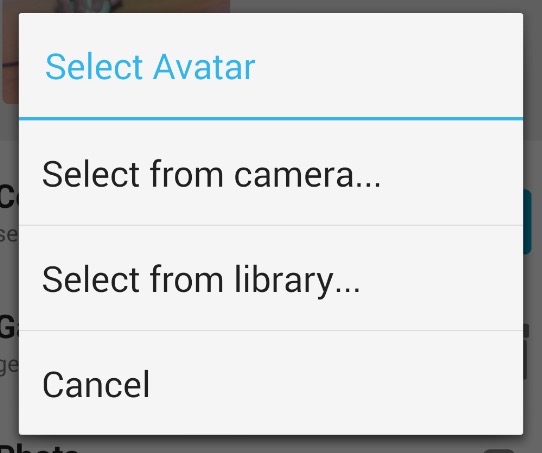
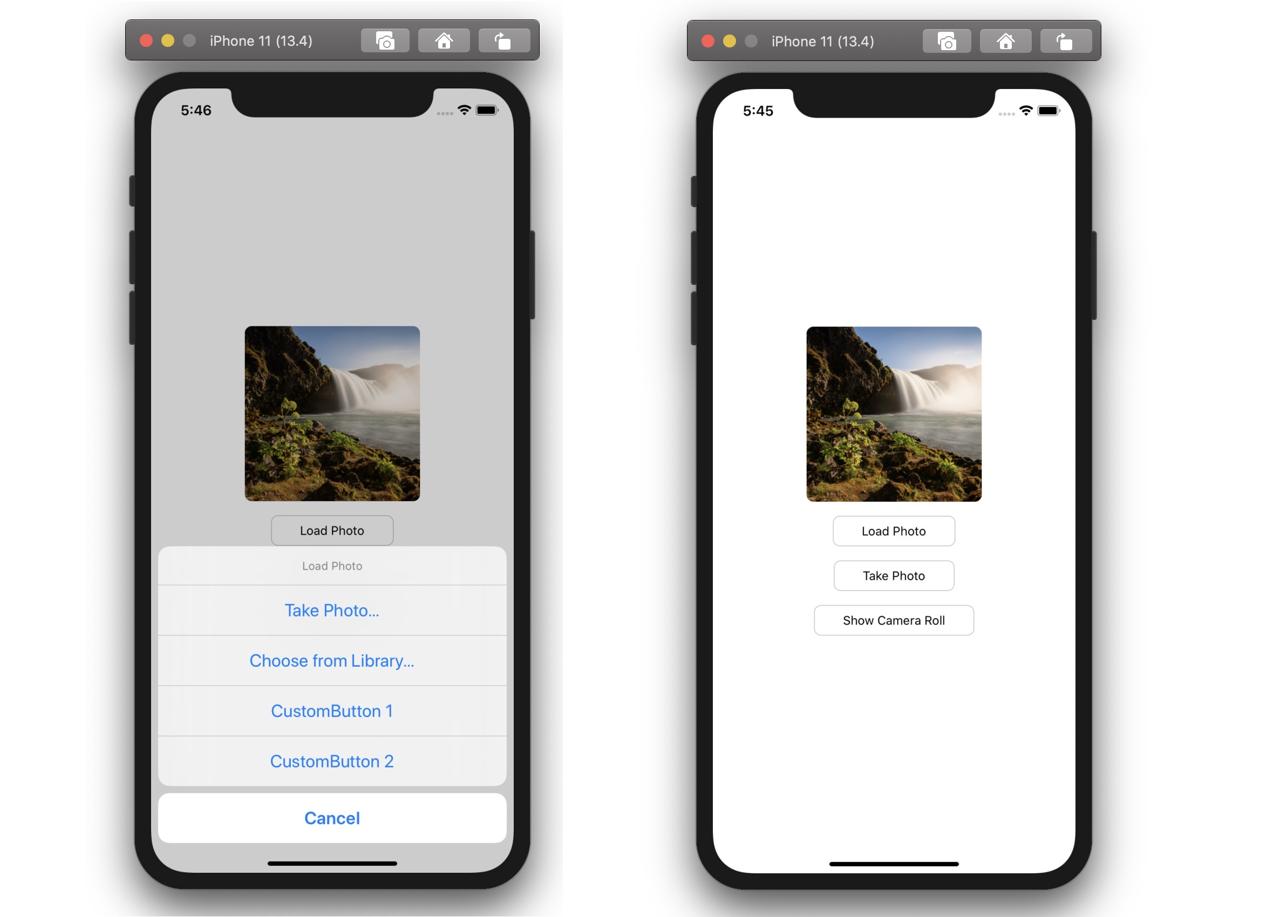
In React Native, you can implement taking a photo feature and accessing the image on the Camera-roll like below.
| iOS | Android |
|---|---|
 |  |
[Image: react-native-image-picker official site]
To implement it, I will show you how to use react-native-image-picker library.
- Official site: react-native-image-picker
You can see the example source code on Github.
This example source code includes the below.
Install react-native-image-picker
Execute the command below to install react-native-image-picker.
npm install --save react-native-image-picker
To use react-native-image-picker on iOS, execute the command below.
cd ios
pod install
cd ..
Permissions
Next, you need to set the permissions to use react-native-image-picker for the image features.
iOS permissions
To use react-native-image-picker on iOS, open ios/[project name]/Info.plist and modify it like below.
<?xml version="1.0" encoding="UTF-8"?>
<!DOCTYPE plist PUBLIC "-//Apple//DTD PLIST 1.0//EN" "http://www.apple.com/DTDs/PropertyList-1.0.dtd">
<plist version="1.0">
<dict>
  ...
  <key>NSPhotoLibraryUsageDescription</key>
  <string>$(PRODUCT_NAME) would like access to your photo gallery</string>
  <key>NSCameraUsageDescription</key>
  <string>$(PRODUCT_NAME) would like to use your camera</string>
  <key>NSPhotoLibraryAddUsageDescription</key>
  <string>$(PRODUCT_NAME) would like to save photos to your photo gallery</string>
  <key>NSMicrophoneUsageDescription</key>
  <string>$(PRODUCT_NAME) would like to use your microphone (for videos)</string>
</dict>
</plist>
Android permissions
To use react-native-image-picker on Android, open android/app/main/AndroidManifest.xml file and modify it like below.
<manifest xmlns:android="http://schemas.android.com/apk/res/android"
  package="com.reactnativeimagepickerexample">
    ...
    <uses-permission android:name="android.permission.CAMERA" />
    <uses-permission android:name="android.permission.WRITE_EXTERNAL_STORAGE"/>
    ...
</manifest>
How to use
First, import the library like below to use react-native-image-picker.
import ImagePicker from 'react-native-image-picker';
And then, you can use it like below.
Show Camera, Camera-roll, and Custom buttons.
const options = {
  title: 'Load Photo',
  customButtons: [
    { name: 'button_id_1', title: 'CustomButton 1' },
    { name: 'button_id_2', title: 'CustomButton 2' }
  ],
  storageOptions: {
    skipBackup: true,
    path: 'images',
  },
};
...
ImagePicker.showImagePicker(options, (response) => {
  console.log('Response = ', response);

  if (response.didCancel) {
    console.log('User cancelled image picker');
  } else if (response.error) {
    console.log('ImagePicker Error: ', response.error);
  } else if (response.customButton) {
    console.log('User tapped custom button: ', response.customButton);
    Alert.alert(response.customButton);
  } else {
    // You can also display the image using data:
    // const source = { uri: 'data:image/jpeg;base64,' + response.data };
    setImageSource(response.uri);
  }
});
Open Camera feature
const options = {
  storageOptions: {
    skipBackup: true,
    path: 'images',
  },
};
...
ImagePicker.launchCamera(options, (response) => {
  if (response.error) {
    console.log('LaunchCamera Error: ', response.error);
  }
  else {
    setImageSource(response.uri);
  }
});
Open Camera-roll
const options = {
  storageOptions: {
    skipBackup: true,
    path: 'images',
  },
};
...
ImagePicker.launchImageLibrary(options, (response) => {
  if (response.error) {
    console.log('LaunchImageLibrary Error: ', response.error);
  }
  else {
    setImageSource(response.uri);
  }
});
Options
You can use the options below on react-native-image-picker.
| Option | Required | Type | iOS | Android | Description |
|---|---|---|---|---|---|
| title | X | string | ○ | ○ | Title on the top of ImagePicker |
| cancelButtonTitle | X | string | ○ | ○ | Cancel button title on ImagePicker |
| takePhotoButtonTitle | X | string | ○ | ○ | Photo button title on ImagePicker |
| chooseFromLibraryButtonTitle | X | string | - | ○ | Camera-roll button title on ImagePicker |
| chooseWhichLibraryTitle | X | string | ○ | ○ | Selection dialog title that is shown up If various camera applications is installed on Android. |
| customButtons | X | [{name?: string; title?: string;}] | ○ | ○ | Custom buttons except Camera button and Camera-roll button. |
| cameraType | X | ‘front’, ‘back’ | ○ | - | which do you use the front camera or the back camera? |
| mediaType | X | ‘photo’, ‘video’, ‘mixed’ | ○ | ○ | Show images only or videos only or both. |
| maxWidth | X | number | ○ | ○ | Maximum width (Photo only) |
| maxHeight | X | number | ○ | ○ | Maximum height (Photo only) |
| quality | X | number | ○ | ○ | Image quality (0 to 1, photos only) |
| videoQuality | X | ‘low’, ‘medium’, ‘high’ | ○ | ○ | Video quality (iOS: low, medium, high / Android: low, high) |
| durationLimit | X | number | ○ | ○ | Maximum video record time. (second) |
| rotation | X | number | - | ○ | Image rotation angle (Photo only, 0 to 360) |
| allowsEditing | X | boolean | ○ | - | Allow resizing the image. |
| noData | X | boolean | ○ | ○ | Get base64 data when the image is selected. If true is set for big size images, performance is improved. |
| tintColor | X | number, string | ○ | - | ImagePicker button text color. |
| storageOptions.skipBackup | X | boolean | ○ | - | If true is set, skip to backup to iCloud. |
| storageOptions.path | X | string | ○ | ○ | Image path configuration. (iOS: Documents/[path]/, Android: Pictures/[path]/) |
| storageOptions.waitUntilSaved | X | boolean | ○ | - | If true is set, waiting until saving the image/video is saved on Camera-roll. |
| storageOptions.privateDirectory | X | boolean | - | ○ | If true is set, the image/video is saved on Android/data/your_package/files/Pictures. |
| permissionDenied.title | X | string | - | ○ | Permission dialog title. (default: Permission denied) |
| permissionDenied.text | X | string | - | ○ | Permission dialog message. (default: To be able to take pictures with your camera and choose images from your library.) |
| permissionDenied.reTryTitle | X | string | - | ○ | Re-try button title (default: re-try) |
| permissionDenied.okTitle | X | string | - | ○ | OK button title (default: I’m sure) |
Response result
| Option | Required | Type | iOS | Android | Description |
|---|---|---|---|---|---|
| customButton | ○ | string | ○ | ○ | If the user presses the custom button, the custom button name is passed. |
| didCancel | ○ | boolean | ○ | ○ | Whether the Cancel button is selected in the ImagePicker |
| error | ○ | string | ○ | ○ | If the error is occurred, the error message is passed. |
| data | ○ | string | ○ | ○ | Image Base64 string (Photo only) |
| uri | ○ | string | ○ | ○ | Image/video local file URI |
| origURL | X | string | ○ | - | image/video URL on Camera-roll |
| isVertical | ○ | boolean | ○ | ○ | Whether the image/video is Vertical. |
| width | ○ | number | ○ | ○ | Image width (Photo only) |
| height | ○ | number | ○ | ○ | Image height (Photo only) |
| fileSize | ○ | number | ○ | ○ | File size (Photo only) |
| type | X | string | ○ | ○ | File type (Photo only) |
| fileName | X | string | ○ | ○ | File name (iOS: Photo, Video / Android: Photo) |
| path | X | string | - | ○ | File path |
| latitude | X | number | ○ | ○ | Image/video latitude (If the info exists) |
| longitude | X | number | ○ | ○ | Image/video longitude (If the info exists) |
| timestamp | X | string | ○ | ○ | Image/video Metadata Timestamp (ISO8601 UTC format) |
Precautions
If you use iOS simulator or Android emulator, you can not use taking a photo feature. If you want to use this feature, you should use the device.
react-native-image-picker example

I’ve created react-native-image-picker example. see the link to check it out.
Completed
We’ve seen how to use react-native-image-picker. I hope this blog post helps someone to implement Photo/Camera-roll feature on React Native.
Was my blog helpful? Please leave a comment at the bottom. it will be a great help to me!
App promotion
Deku.Deku created the applications with Flutter.If you have interested, please try to download them for free.


