目次
概要
今回のブログポストではTypeScriptをベースにしたNext.jsプロジェクトにStorybookを入れてコンポーネント主導開発(Component Driven Development)をやってみましょう。
ここで紹介するソースコードは下記のリンクで確認できます。
ブログリスト
このブログポストはシリーズで作成されています。次はNext.jsのシリーズリストです。
- [Next.js] 始まる
- [Next.js] TypeScript
- [Next.js] Prettier
- [Next.js] 絶対パスでコンポーネント追加
- [Next.js] テスト
- [Next.js] Storybook
- [Next.js] Storybookのバックグラウンド変更
- [Next.js] 多言語
- [Next.js] MUI
TypeScriptベースのNext.jsプロジェクトの生成
TypeScriptが適用されたNext.jsでStorybookを使うため、下記のコマンドを使ってTypeScriptが適用されたNext.jsプロジェクトを生成します。
npx create-next-app --typescript start-storybookStorybookのインストール
TypeScriptが適用されたNext.jsプロジェクトでStorybookを使ってコンポーネント主導開発をするためにはStorybookをインストールする必要があります。次のコマンドを実行してStorybookをインストールします。
# cd start-storybook
npm install --save-dev sb
Storybookの初期化
Storybookを使うためにはStorybookを初期化して必要なライブラリをインストールする必要があります。次のコマンドを実行してStorybookを初期化します。
npx sb init --builder webpack5その後、次のように自動でStorybookが初期化されることが確認できます。
 sb init - the simplest way to add a Storybook to your project.

 • Detecting project type. ✓

    There seems to be a Storybook already available in this project.
    Apply following command to force:

   sb init [options] -f

🔎 checking 'cra5'
🔎 checking 'webpack5'
🔎 checking 'angular12'
🔎 checking 'mainjsFramework'
Unable to find storybook main.js config, skipping
🔎 checking 'eslintPlugin'
最後に、次のような質問が出ます。
? Do you want to run the 'eslintPlugin' fix on your project? › (y/N)ESLintを使ってコードを検査している場合はyキーを押して、違う場合はNキーを押して進めます。このブログポストではyキーを押して進めました。
その後、次のようにStorybookに必要なライブラリが自動でインストールされることが確認できるし、Storybookを実行するスクリプトが自動で作成されることが確認できます。
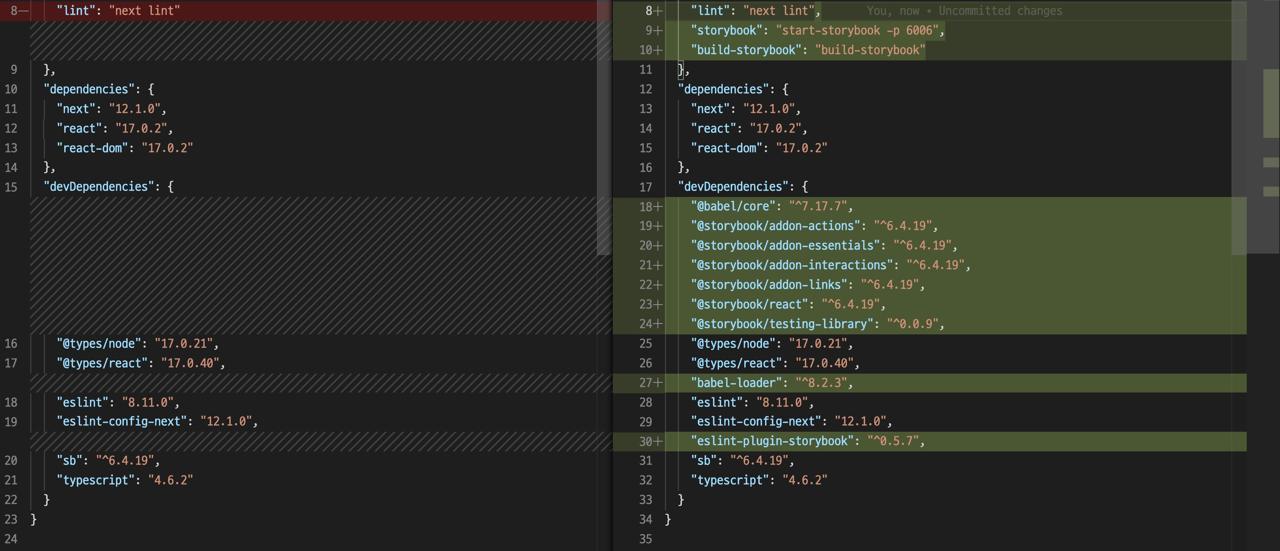
{
   ...
   "scripts": {
    ...
    "storybook": "start-storybook -p 6006",
    "build-storybook": "build-storybook"
  },
  ...
  "devDependencies": {
    "@babel/core": "^7.17.7",
    "@storybook/addon-actions": "^6.4.19",
    "@storybook/addon-essentials": "^6.4.19",
    "@storybook/addon-interactions": "^6.4.19",
    "@storybook/addon-links": "^6.4.19",
    "@storybook/react": "^6.4.19",
    "@storybook/testing-library": "^0.0.9",
    "babel-loader": "^8.2.3",
    "eslint-plugin-storybook": "^0.5.7",
    ...
  }
}また、次のようにStorybookを使う方法を教えるため、サンプルコードが一緒に生成されることが確認できます。
./.storybook/...:Storybookに関する設定ファイル./stories/...:Storybookのサンプルファイル
publicフォルダ設定
Next.jsのpublicフォルダにあるstaticファイル(イメージ)をStorybookでも認識できるようにするためscriptsを次のように修正します。
{
   ...
   "scripts": {
    ...
    "storybook": "start-storybook -p 6006 -s ./public",
    "build-storybook": "build-storybook -s public"
  },
  ...
}
Storybookの実行
今まで設定したStorybookを実行して、Storybookが上手くインストールされたか確認してみましょう。次のコマンドを実行してStorybookを実行します。
npm run storybookそしたら、ブラウザにhttp://localhost:6006/が事項で開いて、次のような画面が表示されることが確認できます。
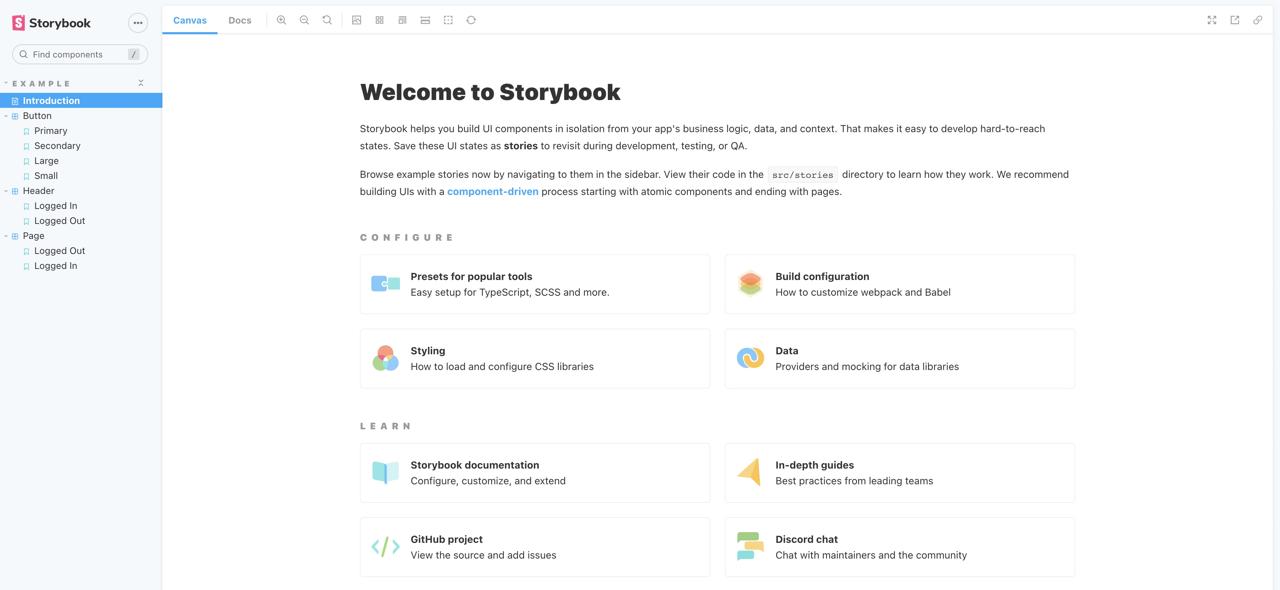
この画面は./stories/Introduction.stories.mdxファイル内容が表示された画面です。
Storybookの確認
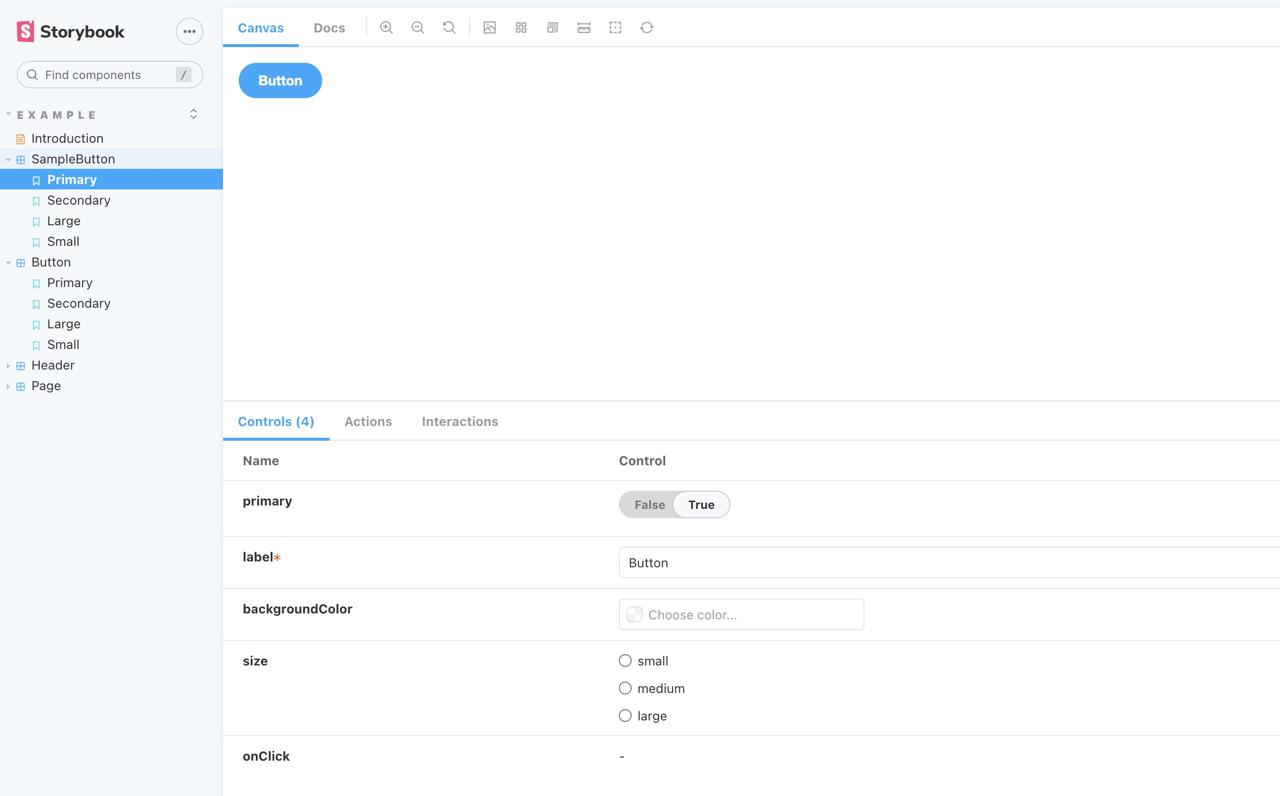
実行されたStorybookの左メニューのButton > Primaryを押すと次のような画面が表示されます。
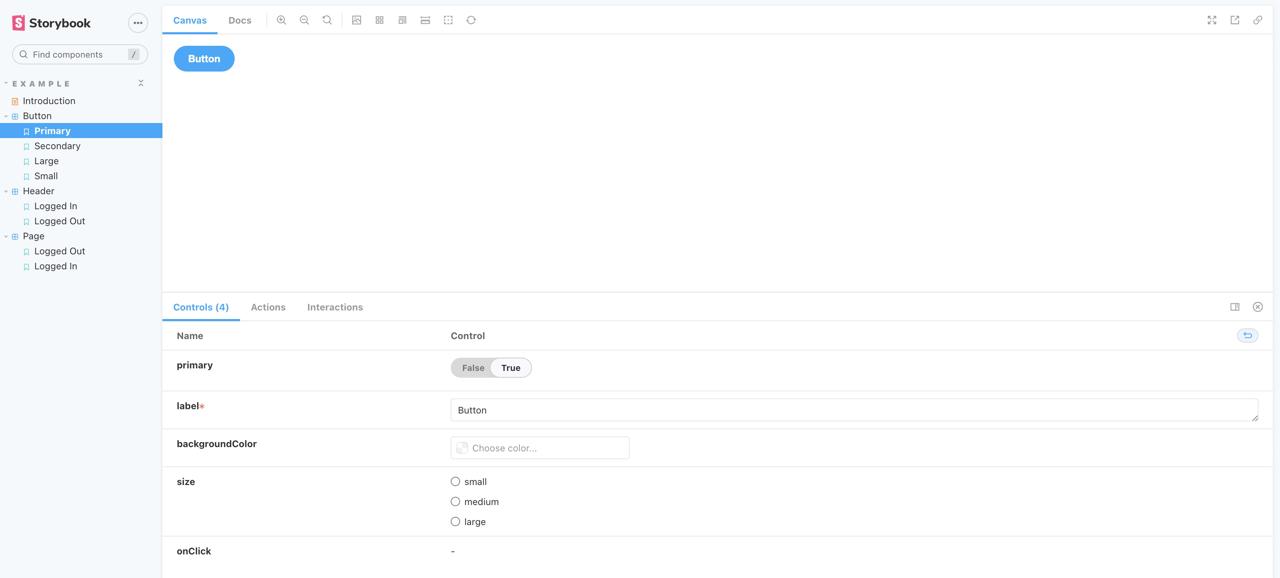
この画面は./stories/Button.stories.tsxファイルの内容が表示された画面です。
サンプルコード確認
もっと詳しくサンプルコードを確認してみましょう。Buttonコンポーネント(./stories/Button.tsx)は次のようになります。
import React from 'react';
import './button.css';

interface ButtonProps {
  primary?: boolean;
  backgroundColor?: string;
  size?: 'small' | 'medium' | 'large';
  label: string;
  onClick?: () => void;
}

export const Button = ({
  primary = false,
  size = 'medium',
  backgroundColor,
  label,
  ...props
}: ButtonProps) => {
  ...
};Buttonコンポーネントはprimary, backgroundColorなど色んなPropsを持っていることが確認できます。次はStorybookファイル(./stories/Button.stories.tsx)の内容を確認してみましょう。
import React from 'react';
import { ComponentStory, ComponentMeta } from '@storybook/react';

import { Button } from './Button';

export default {
  title: 'Example/Button',
  component: Button,
  argTypes: {
    backgroundColor: { control: 'color' },
  },
} as ComponentMeta<typeof Button>;

const Template: ComponentStory<typeof Button> = (args) => <Button {...args} />;

export const Primary = Template.bind({});
Primary.args = {
  primary: true,
  label: 'Button',
};

export const Secondary = Template.bind({});
Secondary.args = {
  label: 'Button',
};

export const Large = Template.bind({});
Large.args = {
  size: 'large',
  label: 'Button',
};

export const Small = Template.bind({});
Small.args = {
  size: 'small',
  label: 'Button',
};まず、Storybookに表示されるコンポーネントを用意します。
import React from 'react';
import { ComponentStory, ComponentMeta } from '@storybook/react';

import { Button } from './Button';

export default {
  title: 'Example/Button',
  component: Button,
  argTypes: {
    backgroundColor: { control: 'color' },
  },
} as ComponentMeta<typeof Button>;

const Template: ComponentStory<typeof Button> = (args) => <Button {...args} />;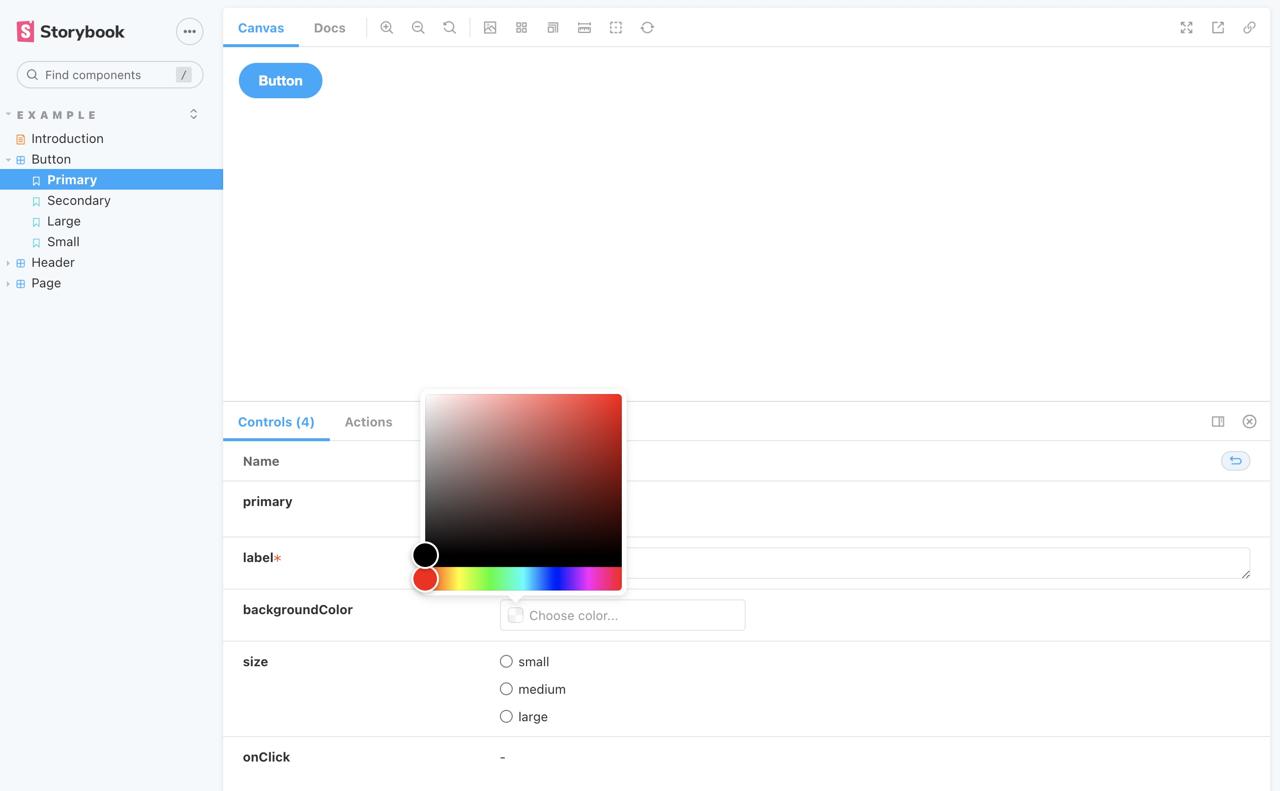
...argTypesのbackgroundColorにcontrol: 'color'を設定すると、次のようにStorybookで色を選択することができます。
その後、画面に表示されるStoryを作成します。
...
export const Primary = Template.bind({});
Primary.args = {
  primary: true,
  label: 'Button',
};
...ここではargsにButtonコンポーネントのPropsを設定して色んなStoryを作ることができます。
Storybookの設定
まずNext.jsのglobals.cssをStorybookでも使えるように設定する必要があります。./storybook/preview.jsファイルを開いて下記のように修正します。
import '../styles/globals.css'

export const parameters = {
  ...
}現在はStorybookを作成するためには./storiesフォルダに作成する必要があります。しかし、普通コンポーネントは./componentsフォルダを生成して管理をします。
このようにStorybookを他のフォルダで作成するためには./.storybook/main.jsファイルを修正する必要があります。./.storybook/main.jsファイルを開いて下記のように修正します。
module.exports = {
  "stories": [
    "../**/*.stories.mdx",
    "../**/*.stories.@(js|jsx|ts|tsx)"
  ],
  ...
}今後はどんなフォルダでも.stories.tsxファイル名を持ってれば、Storybookがこれを認識して画面に表示させます。これを確認するためん./components/SampleButtonフォルダを生成して次のようにファイルをコピーしてみます。
./stories/button.css>./components/SampleButton/index.css./stories/Button.stories.tsx>./components/SampleButton/index.stories.tsx./stories/Button.tsx>./components/SampleButton/index.tsx
そして、./components/SampleButton/index.tsxファイルを開いて下記のように修正します。
...
import './index.css';
...
export const SampleButton = ({
   ...
}: ButtonProps) => {
   ...
};その後、./components/SampleButton/index.stories.tsxファイルを開いて下記のように修正します。
...
import { SampleButton } from '.';
...
export default {
  title: 'Example/SampleButton',
  component: SampleButton,
  ...,
} as ComponentMeta<typeof SampleButton>;

const Template: ComponentStory<typeof SampleButton> = (args) => (
  <SampleButton {...args} />
);
...Storybookの設定を変更したので、これを反映されるため、現在実行中のStorybookを終了して、再び実行します。Storybookが再び実行されると次のように私たちが作ったSampleButtonが上手く表示されることが確認できます。
完了
今回のブログポストではTypeScriptをベースにするNext.jsプロジェクトにコンポーネント主導開発をするため、Storybookを設定する方法についてみてみました。今度からアプリを開発するとき、Storybookを見ながら、コンポーネントに集中して開発してみてください。
私のブログが役に立ちましたか?下にコメントを残してください。それは私にとって大きな大きな力になります!
アプリ広報
Dekuが開発したアプリを使ってみてください。Dekuが開発したアプリはFlutterで開発されています。興味がある方はアプリをダウンロードしてアプリを使ってくれると本当に助かります。