概要
リストを持ってるアプリで引っ張って更新(Pull to refresh)は今基本的に提供するUI/UXになりました。今回のブログポストではFlutterで開発したアプリで引っ張って更新を使って表示されたリストを更新する方法について説明します。
ここで紹介したソースコードはGitHubで確認できます。
RefreshIndicator
Flutterで引っ張って更新を使うためにはRefreshIndicatorウィジェットを使う必要があります。
- Document: RefreshIndicator class
このブログポストではRefreshIndicatorウィジェットを使って引っ張って更新を実装する方法について説明します。
ListView
まずはListViewウィジェットを使って一般的にリストを表示するコードを作成してみましょう。
class _MyHomePageState extends State<MyHomePage> {
  final List<String> _list = ['Apple', 'Banana', "Strawberry", "Watermelon"];

  @override
  Widget build(BuildContext context) {
    return Scaffold(
      appBar: AppBar(title: const Text('RefreshIndicator')),
      body: ListView.builder(
        itemCount: _list.length,
        itemBuilder: (context, index) {
          return ListTile(
            title: Text(_list[index]),
          );
        },
      ),
    );
  }
}RefreshIndicatorウィジェットを使って画面に表示されたリストをアップデートする予定なので、State Widgetを使いました。
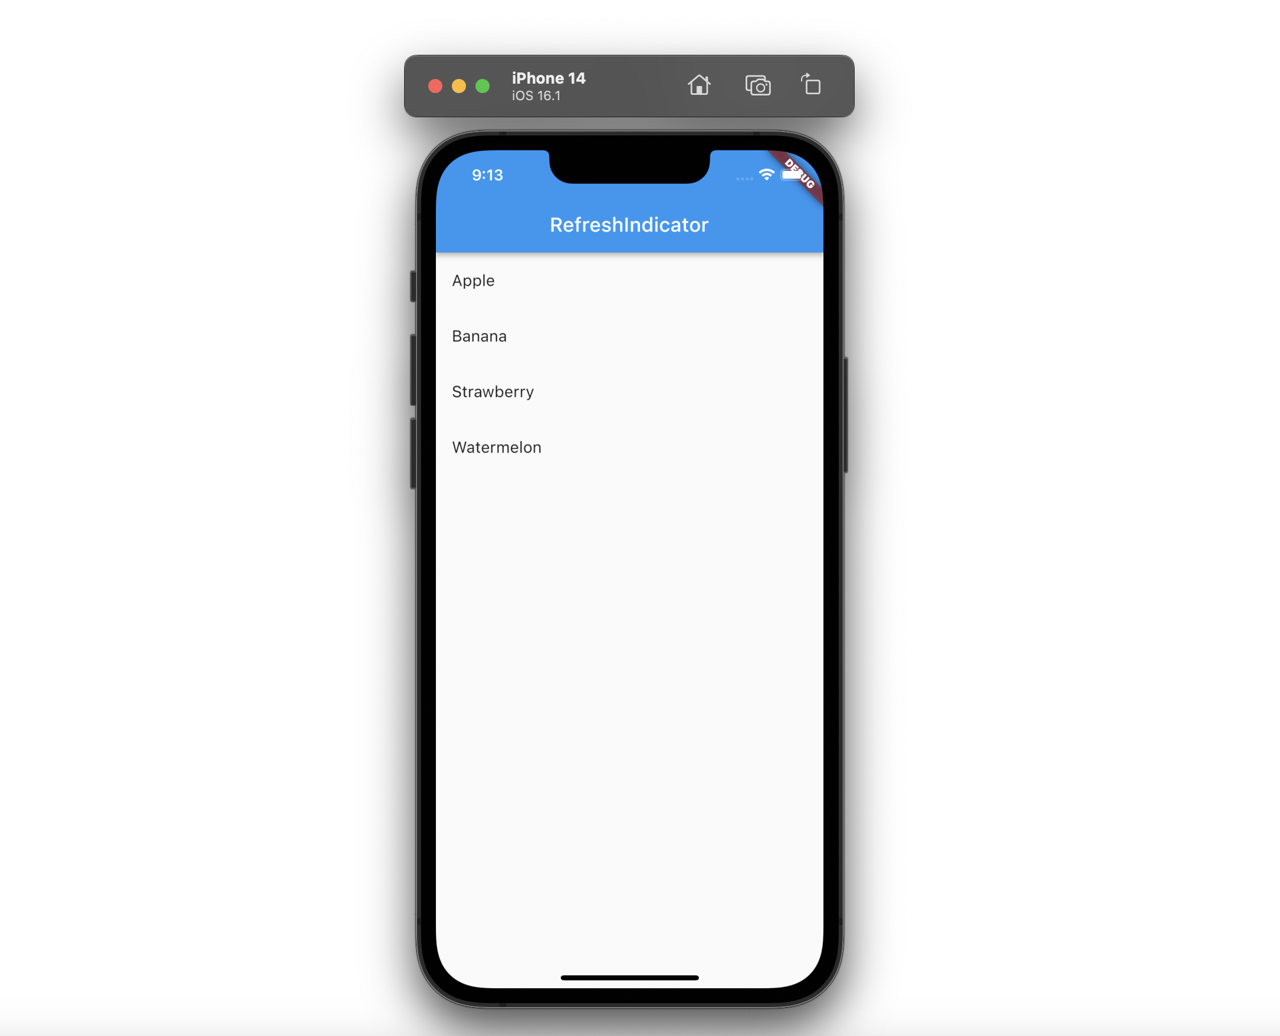
このようにコードを作成すると、次のようにListViewウィジェットが表示されることが確認できます。
このように表示されたListViewウィジェットを次のように引っ張るとリストの上のエリアが大きくなるだけで、更新の動作が発生しないことが確認できます。

RefreshIndicatorウィジェットの使い方
次はRefreshIndicatorウィジェットを使って引っ張って更新を実装してみましょう。RefreshIndicatorウィジェットは次のようにonRefresh関数とchildを使うことができます。
RefreshIndicator(
  onRefresh: ...,
  child: ...,
)そしたらListViewウィジェットを使ってリスト画面を実装したコードにRefreshIndicatorウィジェットを適用してみましょう。
class _MyHomePageState extends State<MyHomePage> {
  List<String> _list = ['Apple', 'Banana', "Strawberry", "Watermelon"];

  @override
  Widget build(BuildContext context) {
    return Scaffold(
      appBar: AppBar(title: const Text('RefreshIndicator')),
      body: RefreshIndicator(
        onRefresh: () async {
          setState(() {
            _list = [..._list, ..._list];
          });
        },
        child: ListView.builder(
          itemCount: _list.length,
          itemBuilder: (context, index) {
            return ListTile(
              title: Text(_list[index]),
            );
          },
        ),
      ),
    );
  }
}ListViewウィジェットの親ウィジェットとしてRefreshIndicatorウィジェットを使って、onRefresh関数には画面に表示されたリストを更新するコードを作成しました。
このように作成したアプリの画面を見ると以前と同じようにリストがうまく表示されてることが確認できます。

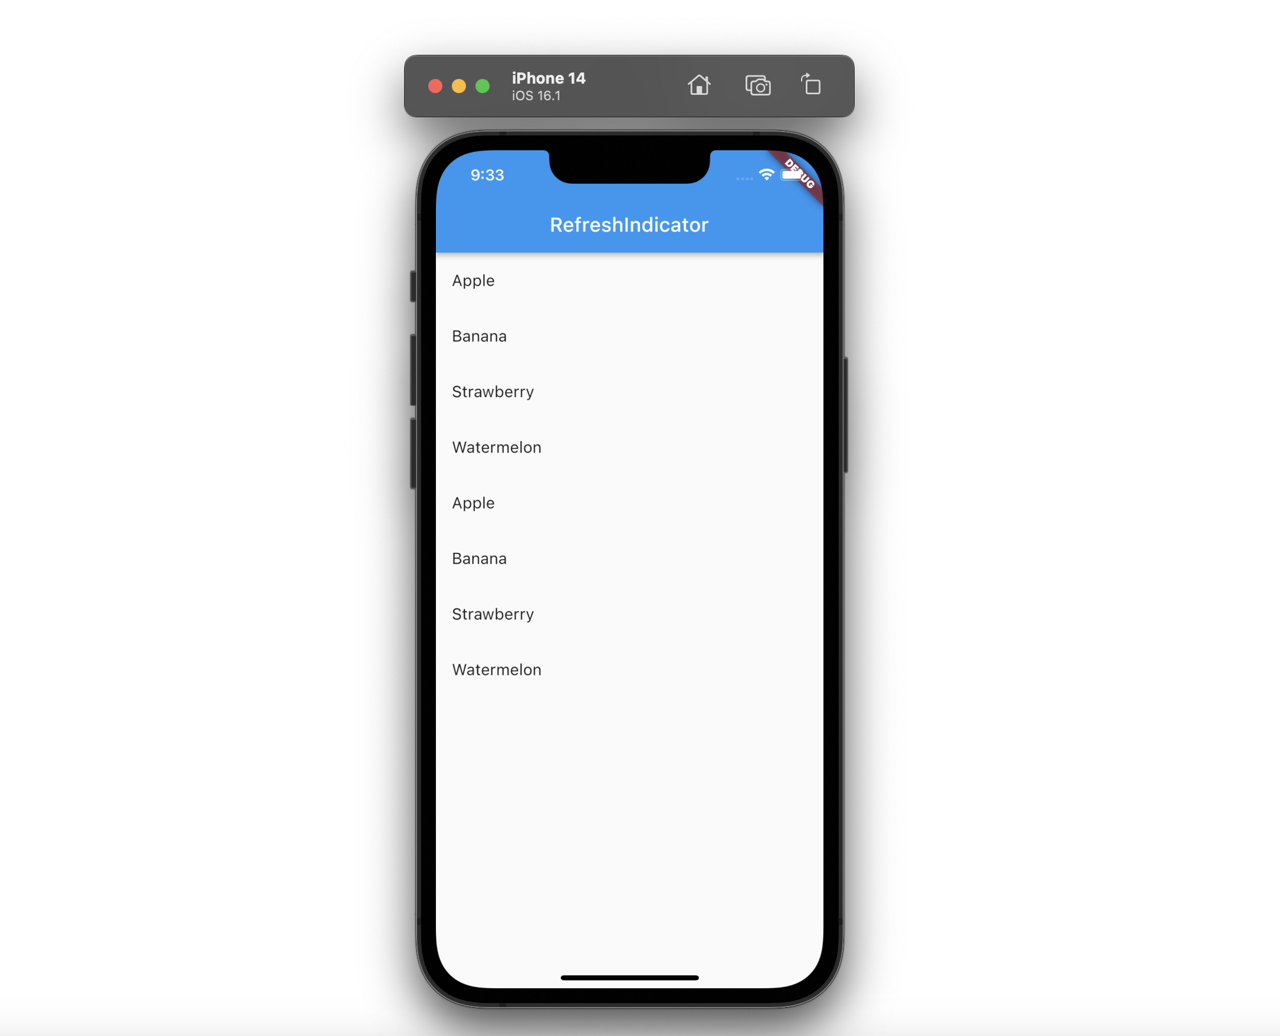
このように表示されたリストを下に引っ張ると以前とは違ってローディングアイコン(Indicator)が表示されることが確認できます。

そして、引っ張った画面を放すと次のようにデータが追加されたリストがうまく表示されることが確認できます。
リストがない空の画面に適用
最初から画面に表示されるデータがある場合、今まで実装した方法だけで大丈夫です。しかし、データがない場合、空の画面を表示して、同じ方法で引っ張って更新ができるようにする場合、次のようにSingleChildScrollViewウィジェットのAlwaysScrollableScrollPhysicsを使って実装することができます。
class _MyHomePageState extends State<MyHomePage> {
List<String> _list = [];
@override
Widget build(BuildContext context) {
return Scaffold(
appBar: AppBar(title: const Text('RefreshIndicator')),
body: RefreshIndicator(
onRefresh: () async {
final newList = ['Apple', 'Banana', "Strawberry", "Watermelon"];
setState(() {
_list = [..._list, ...newList];
});
},
child: _list.isNotEmpty
? ListView.builder(
itemCount: _list.length,
itemBuilder: (context, index) {
return ListTile(
title: Text(_list[index]),
);
},
)
: LayoutBuilder(
builder: (context, constraints) {
return SingleChildScrollView(
physics: const AlwaysScrollableScrollPhysics(),
child: SizedBox(
height: constraints.maxHeight,
child: Center(
child: Column(
mainAxisAlignment: MainAxisAlignment.center,
children: const [
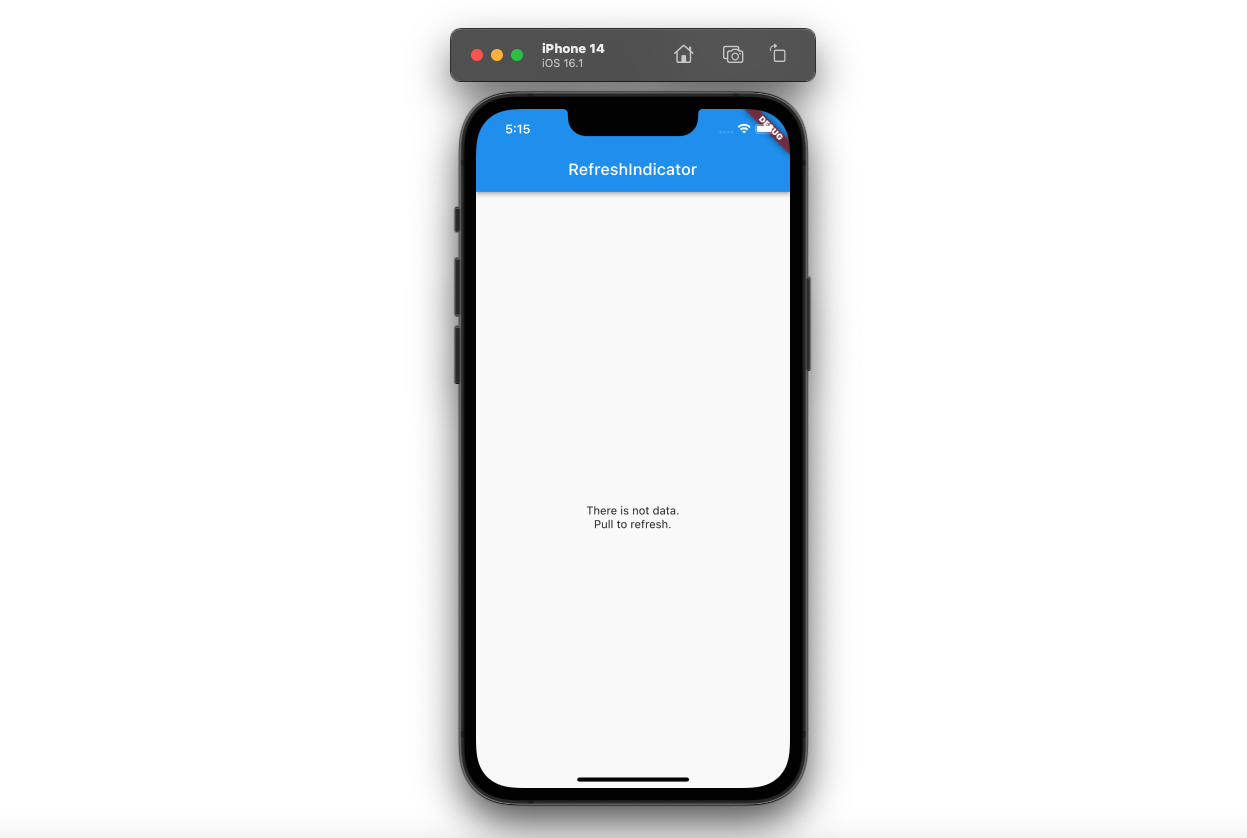
Text('There is not data.'),
Text('Pull to refresh.'),
],
),
),
),
);
},
),
),
);
}
}データがない場合の部分のコードだけ見ると次のようです。
LayoutBuilder(
  builder: (context, constraints) {
    return SingleChildScrollView(
      physics: const AlwaysScrollableScrollPhysics(),
      child: SizedBox(
        height: constraints.maxHeight,
        child: Center(
          child: Column(
            mainAxisAlignment: MainAxisAlignment.center,
            children: const [
              Text('There is not data.'),
              Text('Pull to refresh.'),
            ],
          ),
        ),
      ),
    );
  },
)SingleChildScrollViewウィジェットにAlwaysScrollableScrollPhysicsオプションを使うとコンテンツのサイズと関係なく、いつでもスクロールができるようにすることができます。このように作ったスクロールでLayoutBuilderウィジェットを使って画面全部のサイズでデータがない場合の空の画面を表示すると、データがない場合の画面を作ることができます。
このようにコードを修正すると次のような画面が確認できます。
そして、次のように画面を引っ張ると更新アイコンが表示されることが確認できます。

そして、更新をすると、次のようにデータが追加された画面が確認できます。

完了
これでRefreshIndicatorウィジェットを使って引っ張って更新を使う方法について見てみました。引っ張って更新はほぼ全リスト画面で使うので、覚えておくと役に立つと思います。
私のブログが役に立ちましたか?下にコメントを残してください。それは私にとって大きな大きな力になります!
アプリ広報
Dekuが開発したアプリを使ってみてください。Dekuが開発したアプリはFlutterで開発されています。興味がある方はアプリをダウンロードしてアプリを使ってくれると本当に助かります。