Outline
my company starts a new React project. so I try to configure React based on Webpack. in this blog post, we’ll see how to use Resources(Images and Web font) in React project based on Webpack.
on Github, you can see full source code that I use in this blog post.
Prepare Project
React project introduced in here was applied the contents below. you can see more details on each link.
- Start React With Webpack
- Use Typescript In React
- Use styled-components in React
- Make Import path based on Root in React
- React Router
if you make React project by following the previous blog posts, you can get the folder structure like below. I’ve created react_image_font instead of react_router.
|-- src
|   |-- Components
|   |   |-- Title
|   |   |   |-- index.tsx
|   |-- Features
|   |   |-- Page1
|   |   |   |-- index.tsx
|   |   |-- Page2
|   |   |   |-- index.tsx
|   |   |-- Top
|   |   |   |-- index.tsx
|   |-- index.html
|   |-- App.tsx
|-- .babelrc
|-- package.json
|-- webpack.config.js
Install Modules
we need Webpack file-loader and url-loader to use images and web font in React project based on Webpack. execute the command below to install file-loader and url-loader.
npm install --save-dev file-loader, url-loader
- file-loader: this module will copy the file used in the project by Webpack.
- url-loader: this module makes bundle file with small size file in Webpack.
Modify Webpack
open webpack.config.js and modify it like below to use installed modules(file-loader, url-loader).
...
module.exports = {
  mode: process.env.NODE_ENV,
  entry: {
    ...
  },
  output: {
    ...
  },
  module: {
    rules: [
      ...
      {
        // write image files under 10k to inline or copy image files over 10k
        test: /\.(jpg|jpeg|gif|png|svg|ico)?$/,
        use: [
          {
            loader: 'url-loader',
            options: {
              limit: 10000,
              fallback: 'file-loader',
              name: 'images/[name].[ext]',
            },
          },
        ],
      },
      {
        // write files under 10k to inline or copy files over 10k
        test: /\.(woff|woff2|eot|ttf|otf)$/,
        use: [
          {
            loader: 'url-loader',
            options: {
              limit: 10000,
              fallback: 'file-loader',
              name: 'fonts/[name].[ext]',
            },
          },
        ],
      },
    ],
  },
  resolve: {
    ...
  },
  plugins: [
    ...
  ],
  devServer: {
    ...
  },
};
two configurations are almost same, so let’s see one configuration more deeply.
{
  // write image files under 10k to inline or copy image files over 10k
  test: /\.(jpg|jpeg|gif|png|svg|ico)?$/,
  use: [
    {
      loader: 'url-loader',
      options: {
        limit: 10000,
        fallback: 'file-loader',
        name: 'images/[name].[ext]',
      },
    },
  ],
},
test: /\.(jpg|jpeg|gif|png|svg|ico)?$/,: these files will be used by this setting.loader: 'url-loader',: use url-loaderlimit: 10000,: if file size is less than 10k, the file will be inserted into the location that the file is used on(make bundle).fallback: 'file-loader',: if file size is bigger than 10k, the file is copied by file-loader.name: 'images/[name].[ext]',: when the file is copied, the file will be[name].[ext]inimagefolder.
Apply Web Font
in here, we use and Google Font(Aguafina Script) to see web font applied surely. first, click the link below and download web font.
- Aguafina Script Font: https://fonts.google.com/specimen/Aguafina+Script
after downloading, create src/Assets/Fonts folder and copy web font file to it. and open src/App.tsx and modify it like below.
import * as React from 'react';
import * as ReactDOM from 'react-dom';
import { createGlobalStyle } from 'styled-components';

import Router from './Router';

const GlobalStyles = createGlobalStyle`
  @font-face {
    font-family:'AguafinaScript';
    src: url(${require('~/Assets/Fonts/AguafinaScript-Regular.ttf')});
  }
  body {
    font-family: 'AguafinaScript', sans-serif;
  }
`;

interface Props {}
const App = ({  }: Props) => {
  return (
    <>
      <GlobalStyles />
      <Router />
    </>
  );
};

ReactDOM.render(<App />, document.getElementById('app'));
our React project is based on styled-components. so we use createGlobalStyle in styled-components for global style like below.
const GlobalStyles = createGlobalStyle`
  @font-face {
    font-family:'AguafinaScript';
    src: url(${require('~/Assets/Fonts/AguafinaScript-Regular.ttf')});
  }
  body {
    font-family: 'AguafinaScript', sans-serif;
  }
`;
src: url(${require('~/Assets/Fonts/AguafinaScript-Regular.ttf')});: we’ve used url-loader and file-loader, so we need to userequireto load the files.
and apply this global style like below.
const App = ({  }: Props) => {
  return (
    <>
      <GlobalStyles />
      <Router />
    </>
  );
};
Use Images
create src/Assets/images folder and copy image files to it. I added 2 files(one is bigger than 10k and another is smaller than 10k) to see difference. and then, open the file that you want to use images(src/Features/Top/index.tsx) and modify it like below.
...
const Top = ({ match, history, location }: Props) => {
  ...
  return (
    <div>
      ...
      <img src={require('~/Assets/Images/logo.jpg')} />
      <img src={require('~/Assets/Images/ic_account.jpg')} />
      <img src={require('~/Assets/Images/ic_account.svg')} />
    </div>
  );
};

export default Top;
we’ve used require to load files like when we’ve loaded Web font.
Check
execute the command below to start Webpack dev server.
npm start
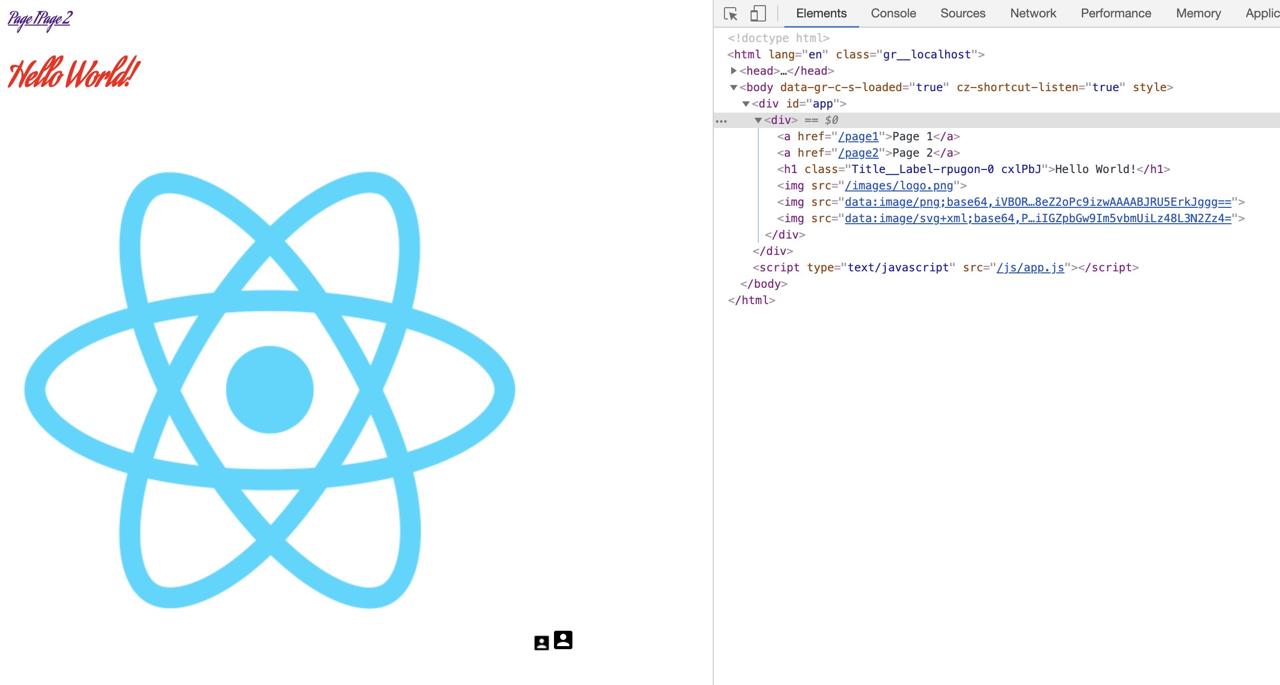
and, you can see Web font applied and Images loaded on the screen well.

as you can see the source code on the right side, files that file size is less than 10k are bundled.
execute the command below to build.
npm run build
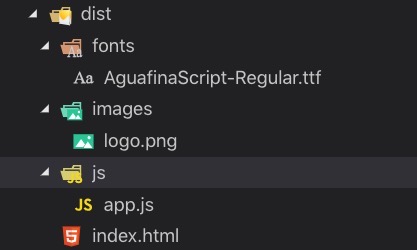
and you can see the image file and font file in dist folder because that file size is bigger than 10k.

Was my blog helpful? Please leave a comment at the bottom. it will be a great help to me!
App promotion
Deku.Deku created the applications with Flutter.If you have interested, please try to download them for free.


