Outline
when we develop apps with RN(React Native), sometimes we need to use local database. for example, the the Japanese words app which I developed for Korean(일단공부(일본어 단어 공부) - JLPT 단어 공부) is not to download the words, just use the local database. in this blog, I will introduce how to use the database in the app.
in here, I will introduce sqlite DB, and how to use it by react-native-sqlite-storage library in RN(React Native).
- react-native-sqlite-storage official site: https://github.com/andpor/react-native-sqlite-storage
Prepare DB
let’s prepare the DB to use in RN(React Native). in here, we will make the sample database. if you have the sqlite database, please skip this section.
the link below is the sqlite tool which I use. click the link and download for your OS.
- download sqlite tool: https://sqlitebrowser.org/dl/
after downloading and installing, execute the tool.
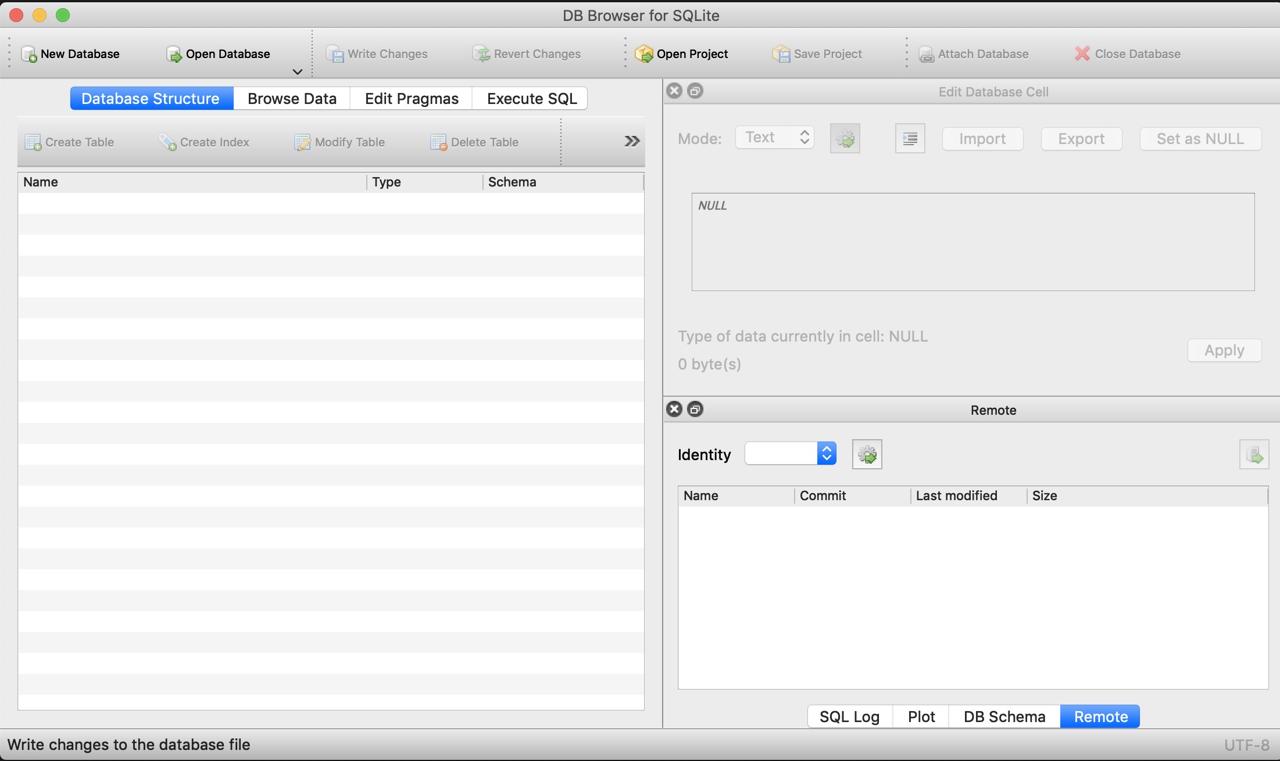
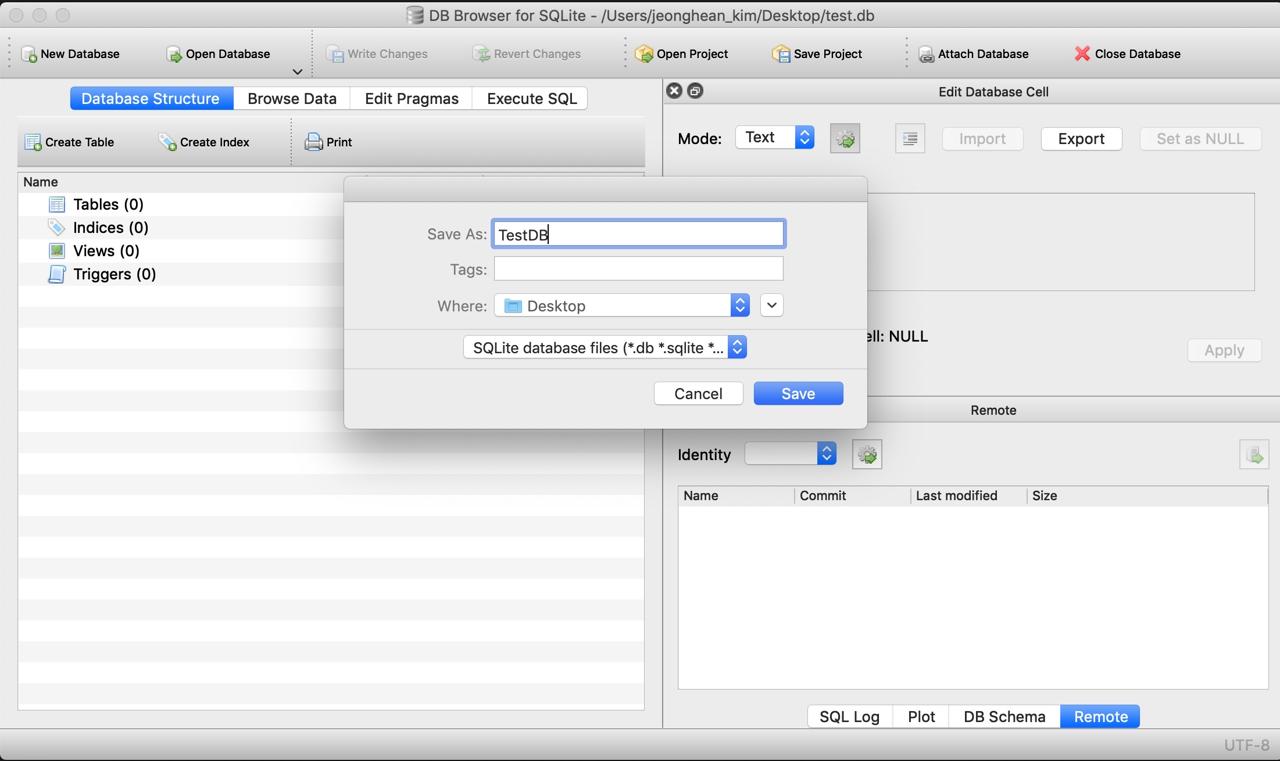
click New Database on the left top, and create the database named TestDB.
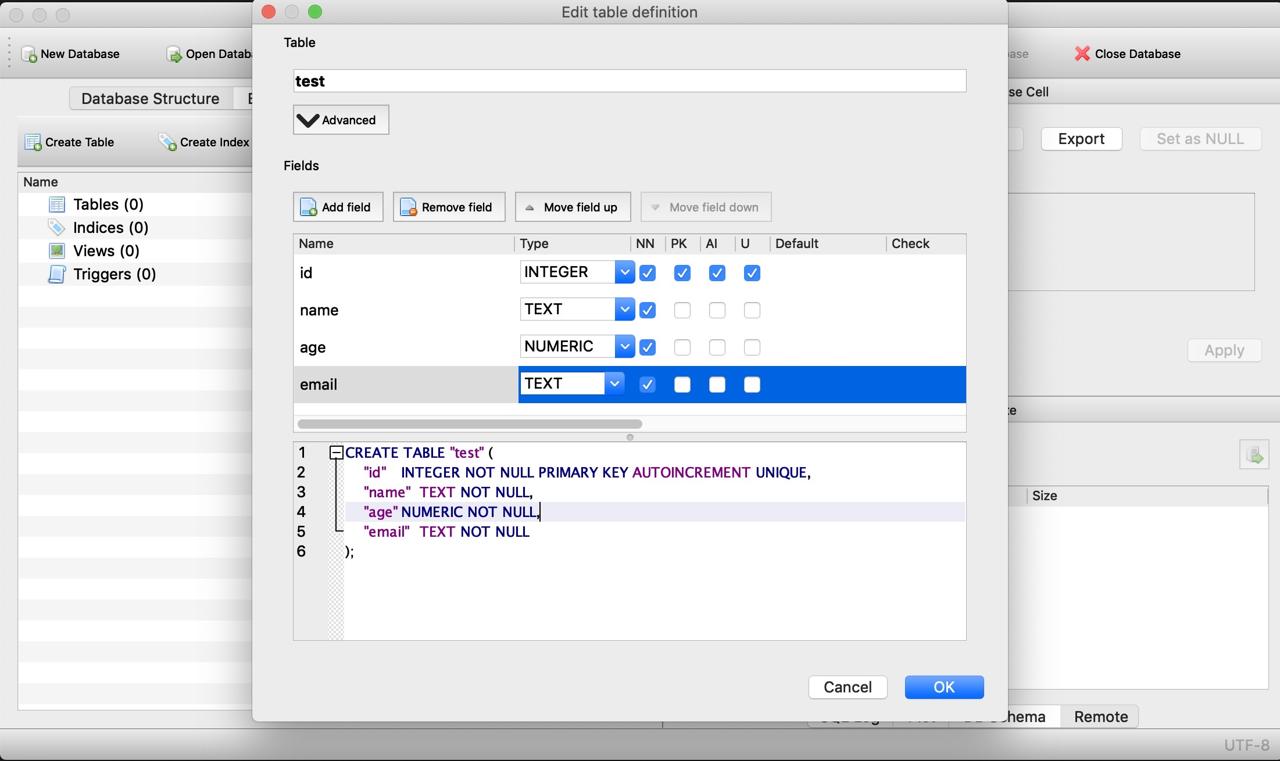
create test table like below, and add id, name, age, email fields.
execute the sql below to add dummy data.
INSERT INTO
	test
	(name, age, email)
VALUES
	("aaa",  20, "[email protected]"),
	("bbb",  25, "[email protected]"),
	("ccc",  30, "[email protected]")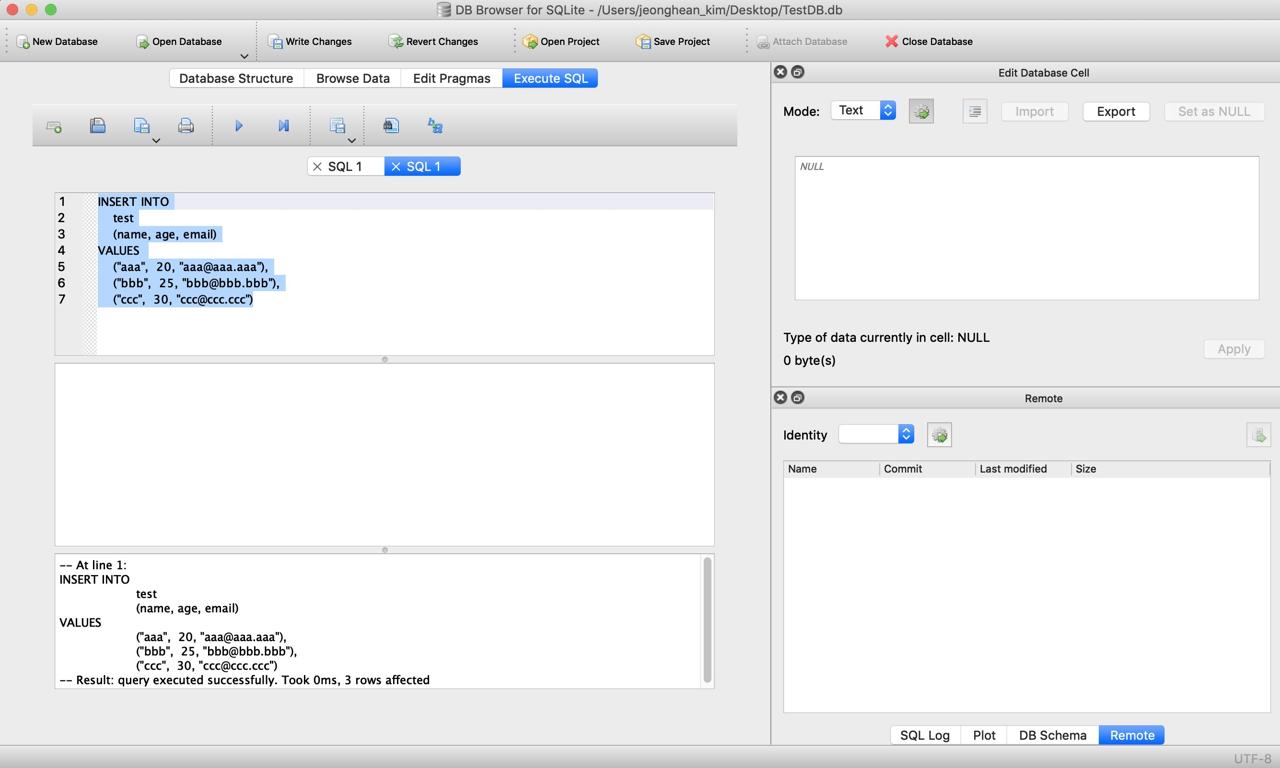
execute the sql below to check data is inserted well.
SELECT * FROM test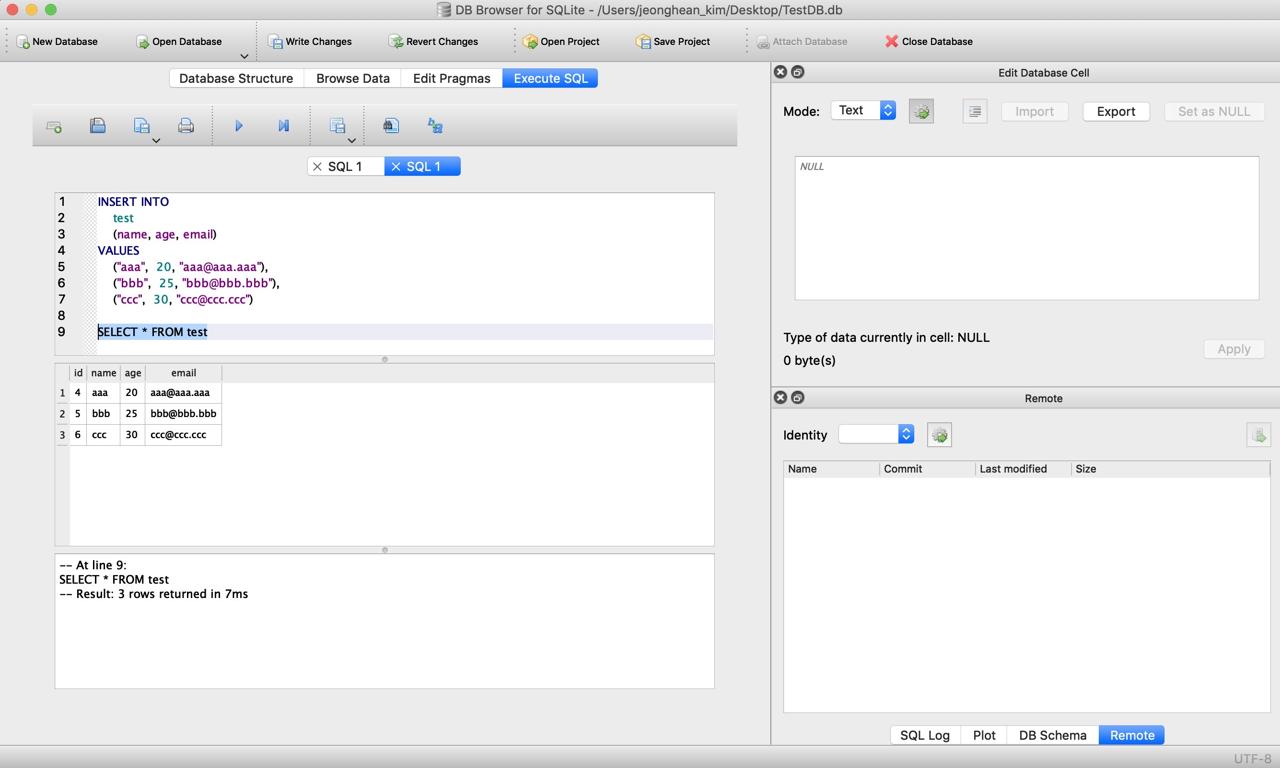
now, we prepared the database. let’s use it on RN(React Native).
Install react-native-sqlite-storage library
execute the command below on the project that you want to use the sqlite.
npm install --save react-native-sqlite-storage
# for typescript
npm install --save-dev @types/react-native-sqlite-storage
and then, execute the command below to bind react-native-sqlite-storage to RN(React Native) project.
react-native link react-native-sqlite-storageif you use pod, I recommend you to bind it manually. you can see the details on the official site.
- react-native-sqlite-storage official site: https://github.com/andpor/react-native-sqlite-storage
as a result, your project settings to use react-native-sqlite-storage should be like below.

Add DB
we need to add DB which we’ve made above to each OS.
iOS
if you want to use sqlite DB that you’ve made, you should follow the process below.
-
create
ios/[project name]/wwwfolder and copy the DB on it.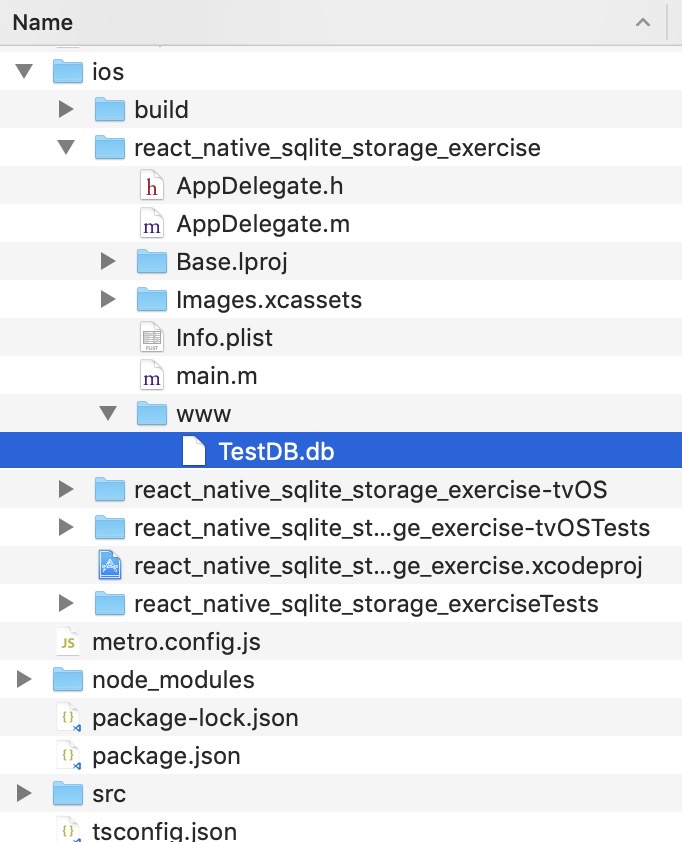
-
execute
[project name].xcodeprojor[project name].xcworkspacefile to start xcode -
right-click
[project name]>[project name]folder on the left top and clickAdd Files to [project name].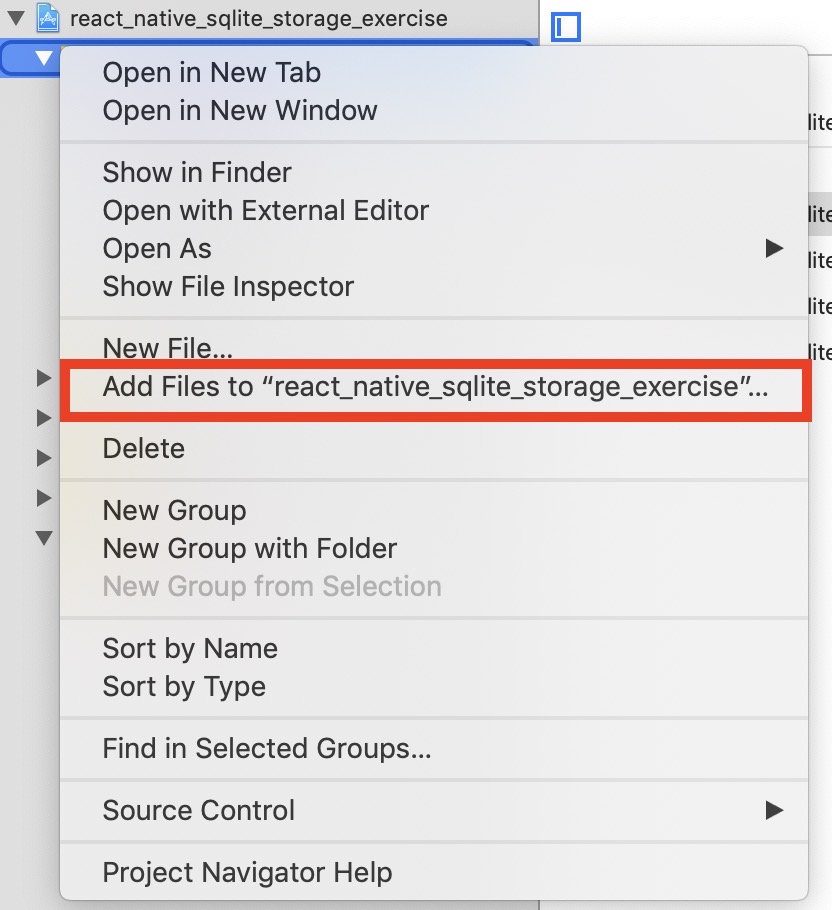
-
when you see the file selection dialog, click
wwwfolder that we’ve made on(1)section. selectCreate folder referencesand clickAddto add it.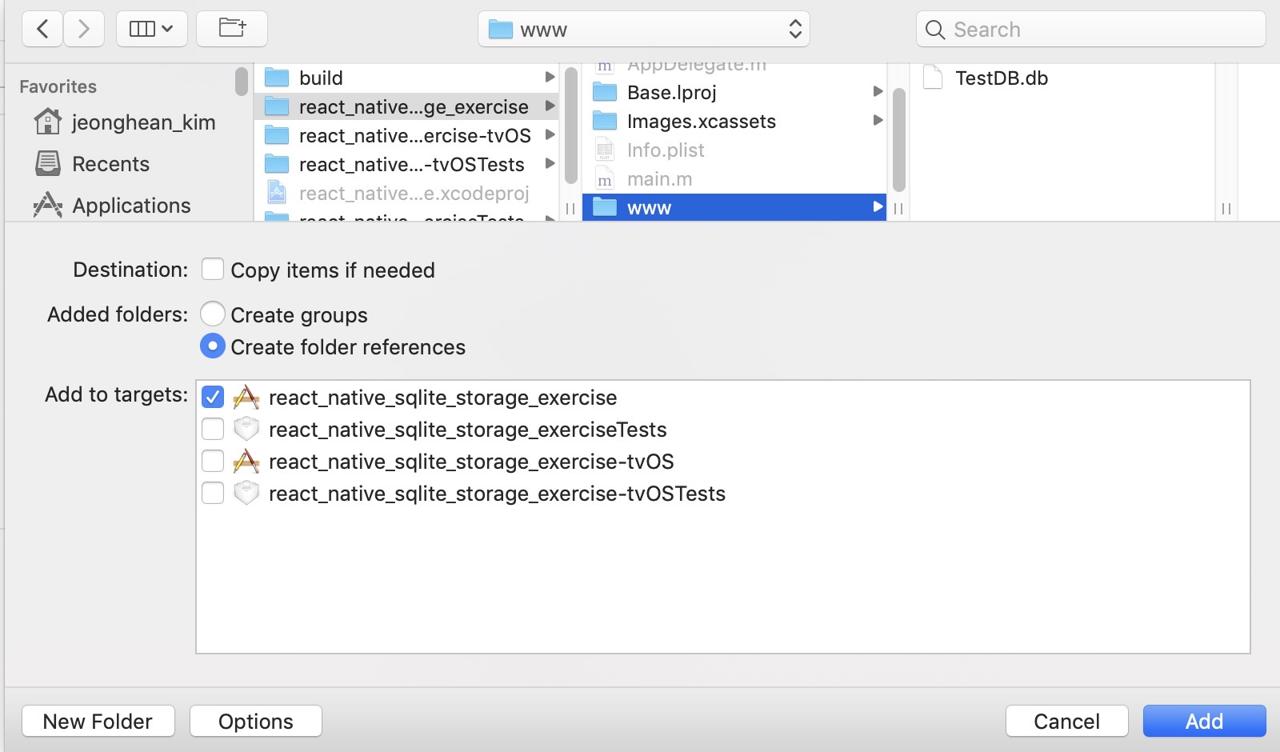
Android
if you want to use sqlite DB that you’ve made, you should follow the process below.
- open and modify
android/settings.gradlefile like below.
rootProject.name = 'react_native_sqlite_storage_exercise'
...
include ':react-native-sqlite-storage'
project(':react-native-sqlite-storage').projectDir = new File(rootProject.projectDir, '../node_modules/react-native-sqlite-storage/src/android')
...
include ':app'- open and modify
android/app/build.gradlefile like below.
...
dependencies {
    implementation fileTree(dir: "libs", include: ["*.jar"])
    implementation "com.android.support:appcompat-v7:${rootProject.ext.supportLibVersion}"
    implementation "com.facebook.react:react-native:+"  // From node_modules
  ...
    implementation project(':react-native-sqlite-storage')
}
...- open and modify
MainApplication.javafile like below.
...
import org.pgsqlite.SQLitePluginPackage;
...
public class MainApplication extends Application implements ReactApplication {
  ...

  ...
  @Override
  protected List<ReactPackage> getPackages() {
    return Arrays.<ReactPackage>asList(
      ...
      new SQLitePluginPackage(),
      ...
      new MainReactPackage()
    );
  }
}- create
android/app/src/main/assets/wwwfolder and copy the sqlite DB which you’ve made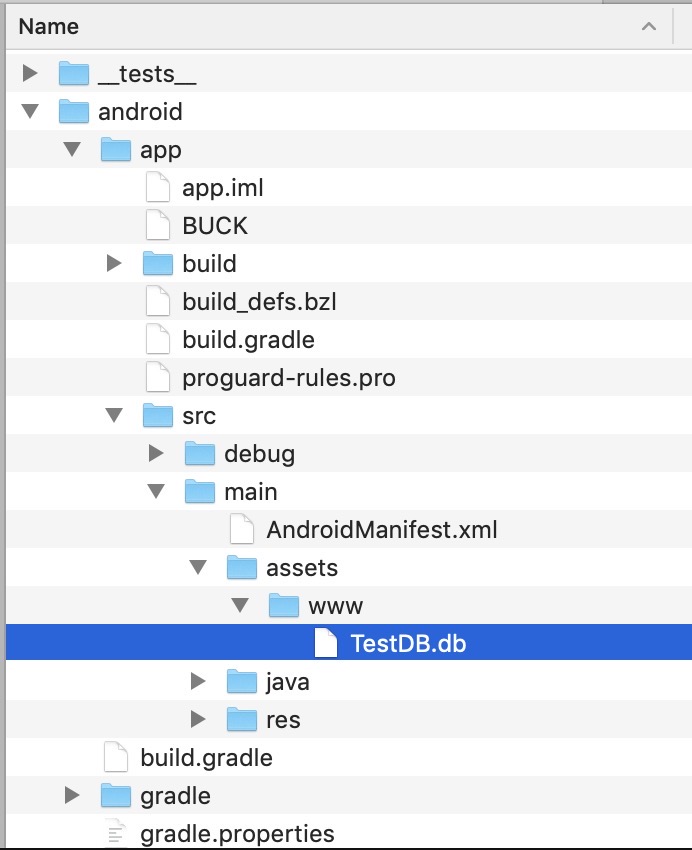
How to use DB
when you finished the configuration each OS, you can use sqlite DB by adding the source like below.
import * as React from 'react';
import Styled from 'styled-components/native';
import SQLite from 'react-native-sqlite-storage';

const Container = Styled.View`
  flex: 1;
  justify-content: center;
  align-items: center;
  background-color: #F5FCFF;
`;
const UserContainer = Styled.View`
  flex-direction: row;
`;
const UserInfo = Styled.Text`
  padding: 8px;
`;

interface Props {}
interface State {
  db: SQLite.SQLiteDatabase;
  users: Array<IUser>;
}

export default class App extends React.Component<Props, State> {
  constructor(props: Props) {
    super(props);

    const db = SQLite.openDatabase(
      {
        name: 'TestDB.db',
        location: 'default',
        createFromLocation: '~www/TestDB.db',
      },
      () => {},
      error => {
        console.log(error);
      }
    );

    this.state = {
      db,
      users: [],
    };
  }

  render() {
    const { users } = this.state;
    return (
      <Container>
        {users.map((user: IUser, index: number) => (
          <UserContainer key={`user-info${index}`}>
            <UserInfo>{user.id}</UserInfo>
            <UserInfo>{user.name}</UserInfo>
            <UserInfo>{user.age}</UserInfo>
            <UserInfo>{user.email}</UserInfo>
          </UserContainer>
        ))}
      </Container>
    );
  }

  componentDidMount() {
    const { db } = this.state;

    db.transaction(tx => {
      tx.executeSql('SELECT * FROM test;', [], (tx, results) => {
        const rows = results.rows;
        let users = [];

        for (let i = 0; i < rows.length; i++) {
          users.push({
            ...rows.item(i),
          });
        }

        this.setState({ users });
      });
    });
  }

  componentWillUnmount() {
    const { db } = this.state;

    db.close();
  }
}
Completed
we saw how to use react-native-sqlite-storage library to use the sqlite DB. now, if you want to deploy the app with DB, you can use the sqlite database. let’s challenge!
if you want to know full example about how to use react-native-sqlite-storage, please check the git repository below that I’ve made when I wrote this blog.
- git repository: react_native_sqlite_storage_exercise
Was my blog helpful? Please leave a comment at the bottom. it will be a great help to me!
App promotion
Deku.Deku created the applications with Flutter.If you have interested, please try to download them for free.


