Contents
Outline
The app developed by React Native is also a normal app, so it can receive a Push message. In this blog post, I will show you how to use FCM(Firebase Cloud Messaging) via react-native-firebase(V5) library to receive a Push message on React Native.
- react-native-firebase v5: https://v5.rnfirebase.io/
- FCM(Firebase Cloud Messaging): https://firebase.google.com/docs/cloud-messaging
Install library
Execute the command below to install react-native-firebase library.
npm install --save react-native-firebaseLink library
We need to link react-native-firebase library to use it.
Over 0.60 version
Execute the command below to link react-native-firebase library to React Native project.
cd ios
pod install
cd ..
Under 0.59 version
Execute the command below to link react-native-firebase library to React Native project.
react-native link react-native-firebaseCreate Firebase project
Next, we need to create a project on Google Firebase. Click the link below to go to Google Firebase.
- Google Firebase: https://firebase.google.com
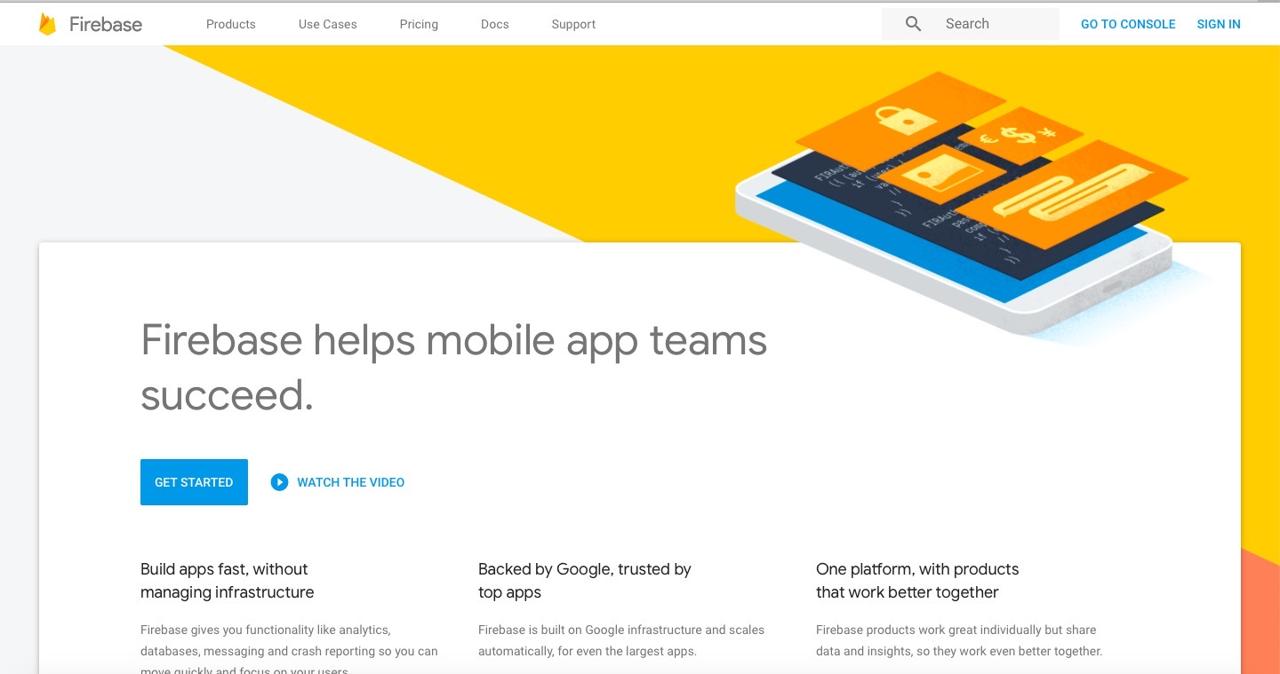
Click the SIGN IN button on the right top to login.
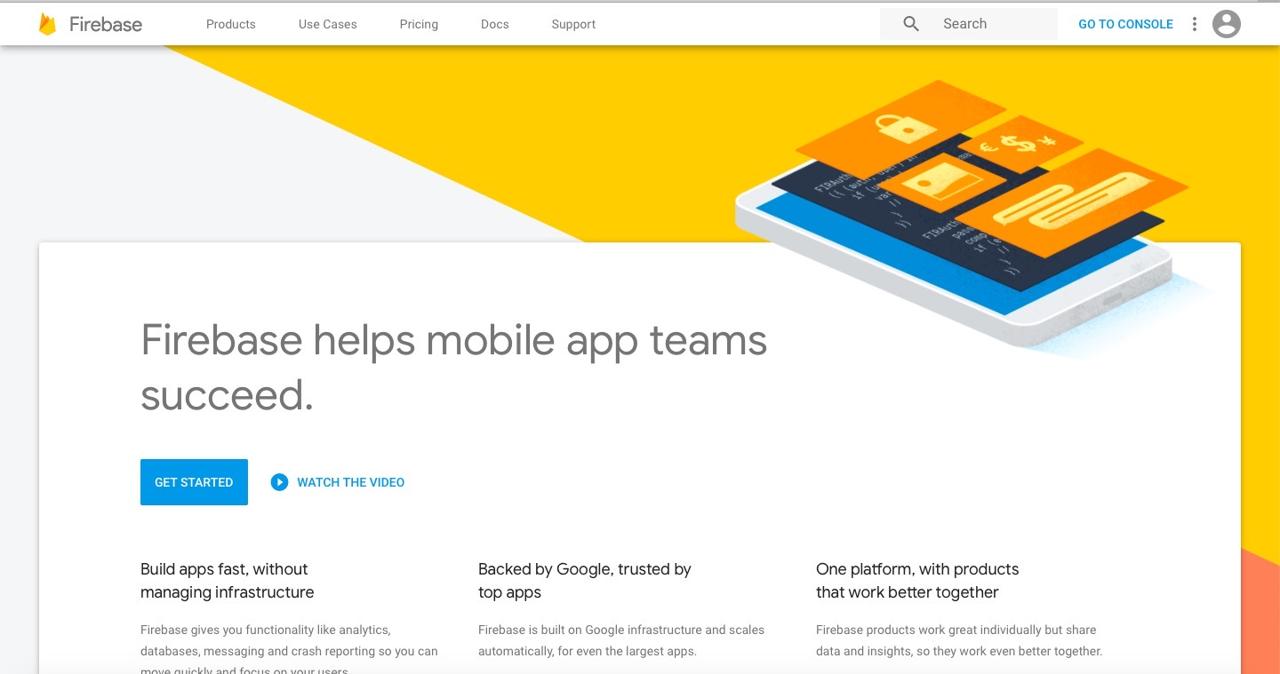
After login, click the GO TO CONSOLE button on the right tope to go to Google Firebase Console.

On Google Firebase Console, click + Add project to add a new project.
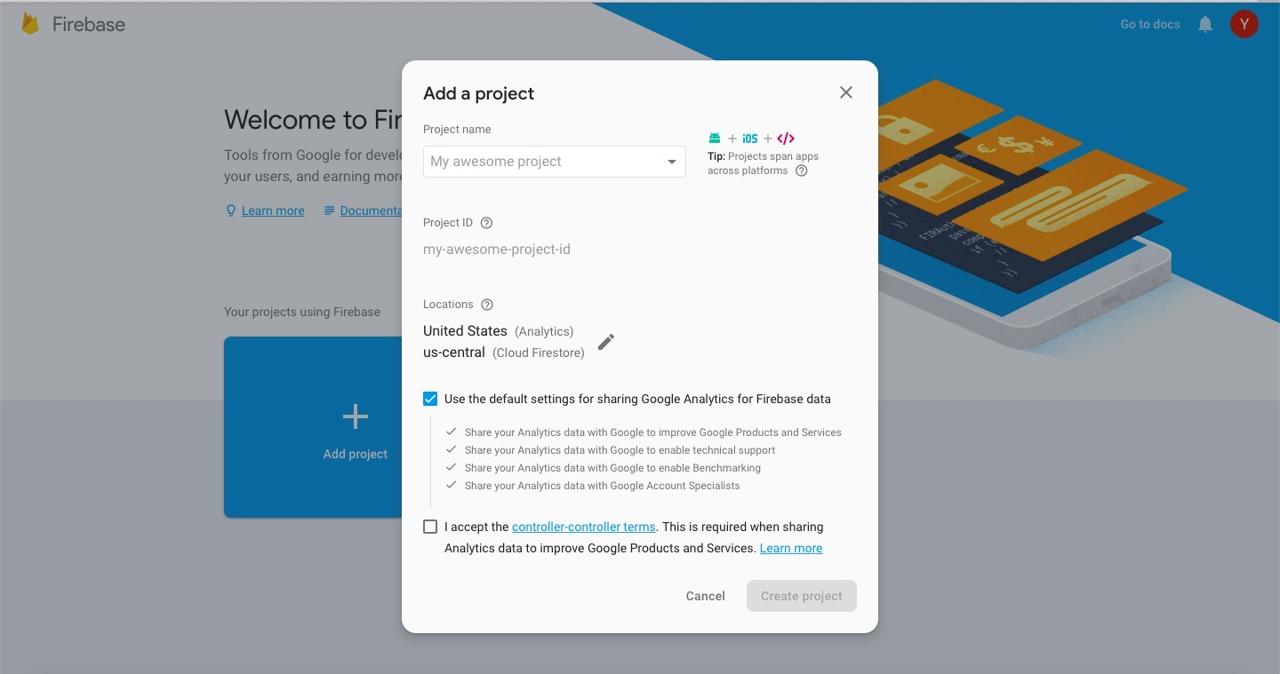
After inserting the project information, click the Create project button to create the project.
iOS settings
Let’s see how to configure react-native-firebase for iOS.
Configure iOS project on Firebase
When you click the project on Google Firebase Console, you can see the screen like below.
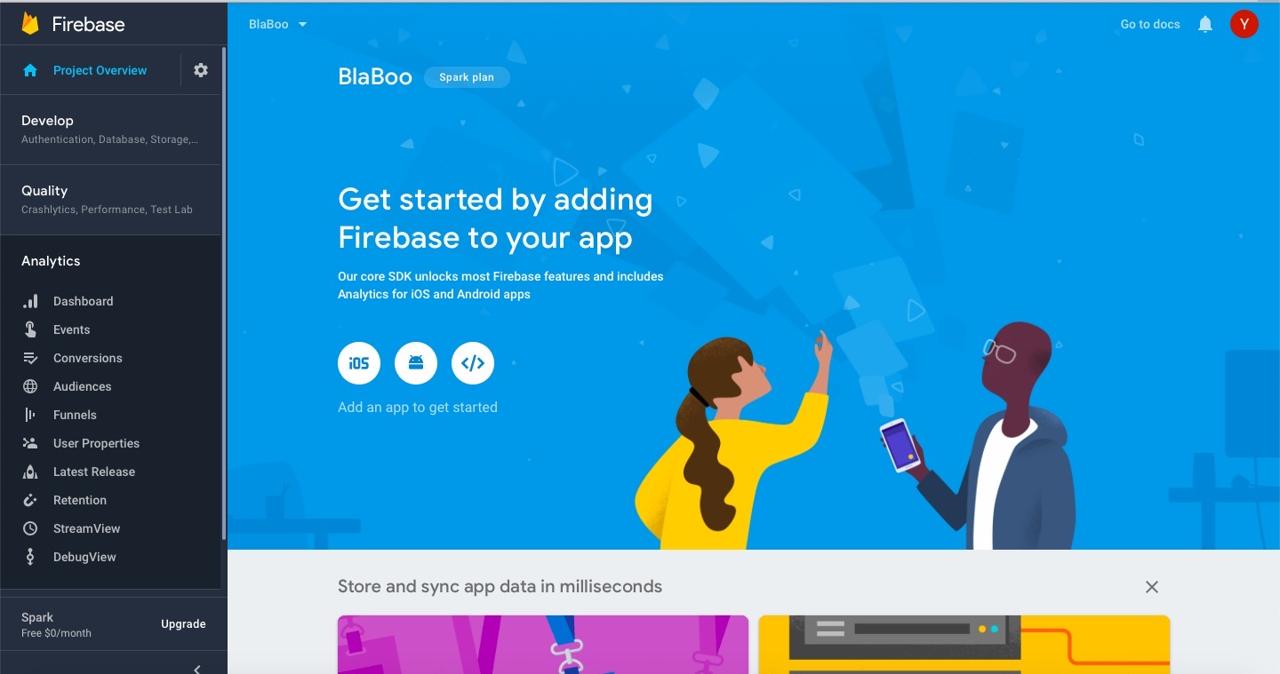
click the iOS button on the center to go to iOS configuration.
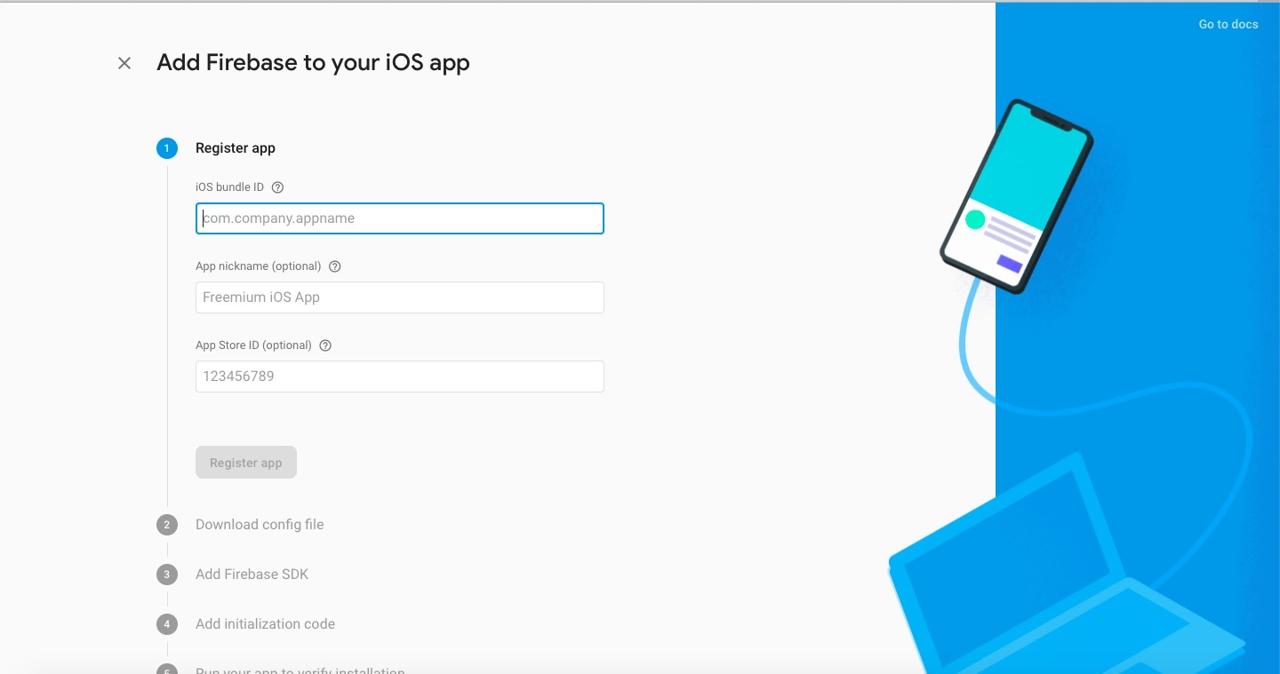
Insert Bundle ID of the app, and click Register app button
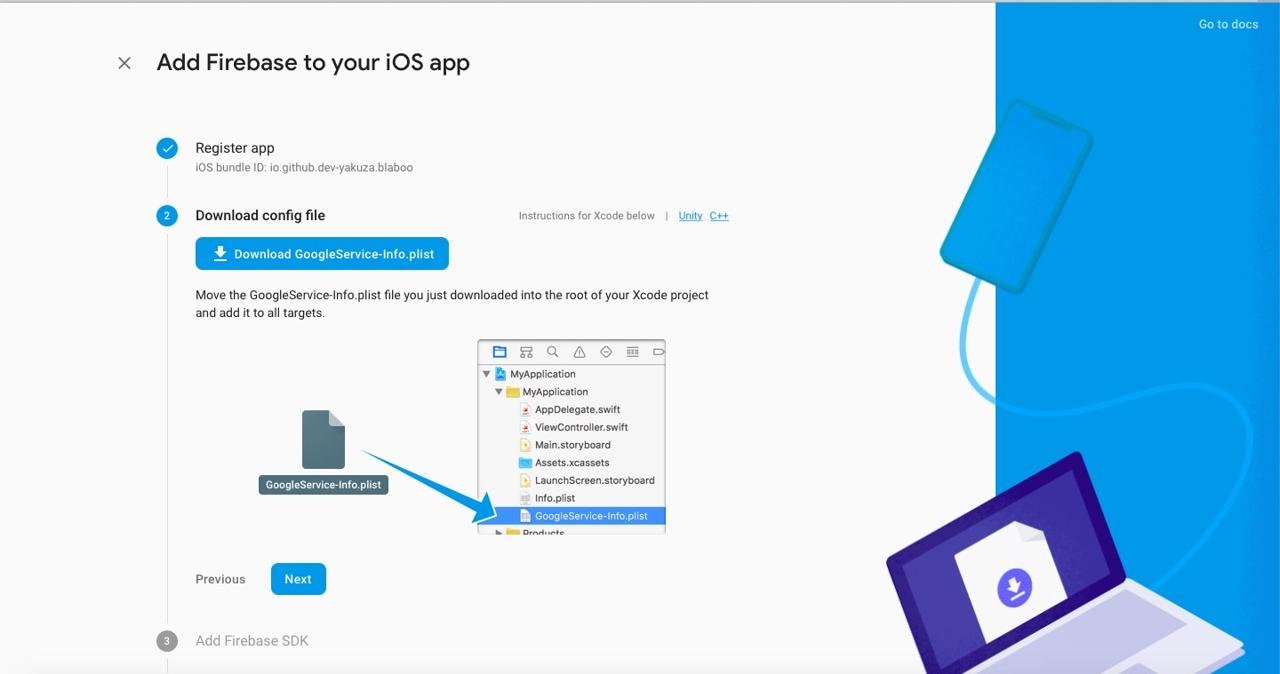
Download GoogleService-Info.plist file which is created by Google Firebase, and move it to the same location of info.plist file. after adding GoogleService-Info.plist file, click Next button.
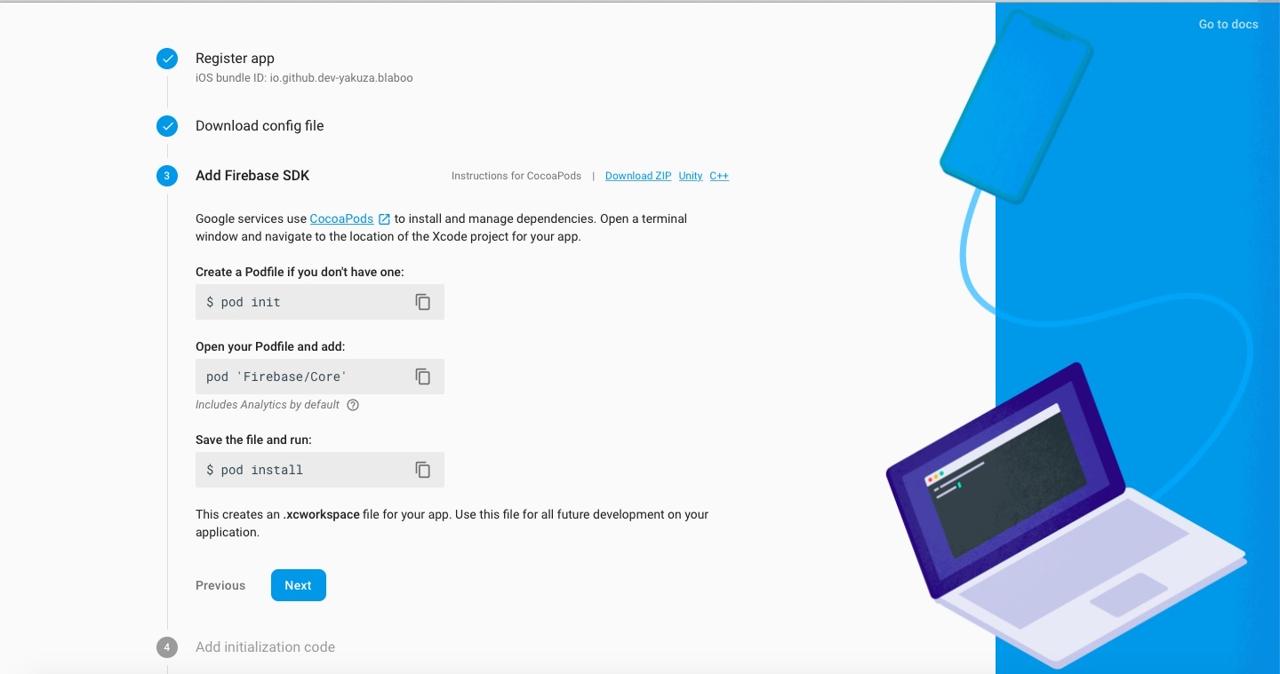
We need to add Google Firebase SDK to React Native project like above.
If you use React Native under 0.59 version, execute the command below.
pod initTo add Google Firebase SDK, modify ./ios/Podfile file like below.
target 'blaboo' do
  ...
  pod 'Firebase/Core'
  pod 'Firebase/Analytics' // if you use Analytics
  pod 'Firebase/Messaging'
  ...
end
Install Google Firebase SDK.
pod install
# pod update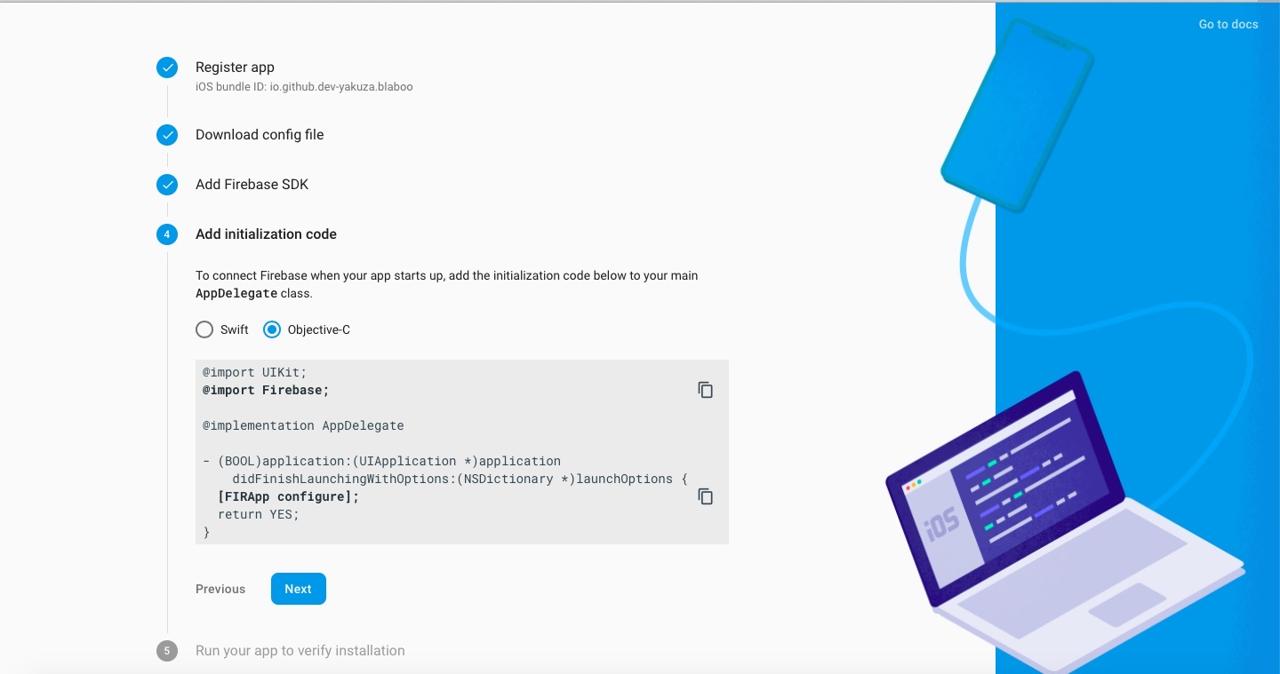
Open AppDelegate.m file on React Native project, and modify it like below,
...
@import Firebase;
#import "RNFirebaseNotifications.h"
...
- (BOOL)application:(UIApplication *)application didFinishLaunchingWithOptions:(NSDictionary *)launchOptions
{
  [FIRApp configure];
  [RNFirebaseNotifications configure];
  ...
  return YES;
}
...
To initialize Google Firebase SDK.
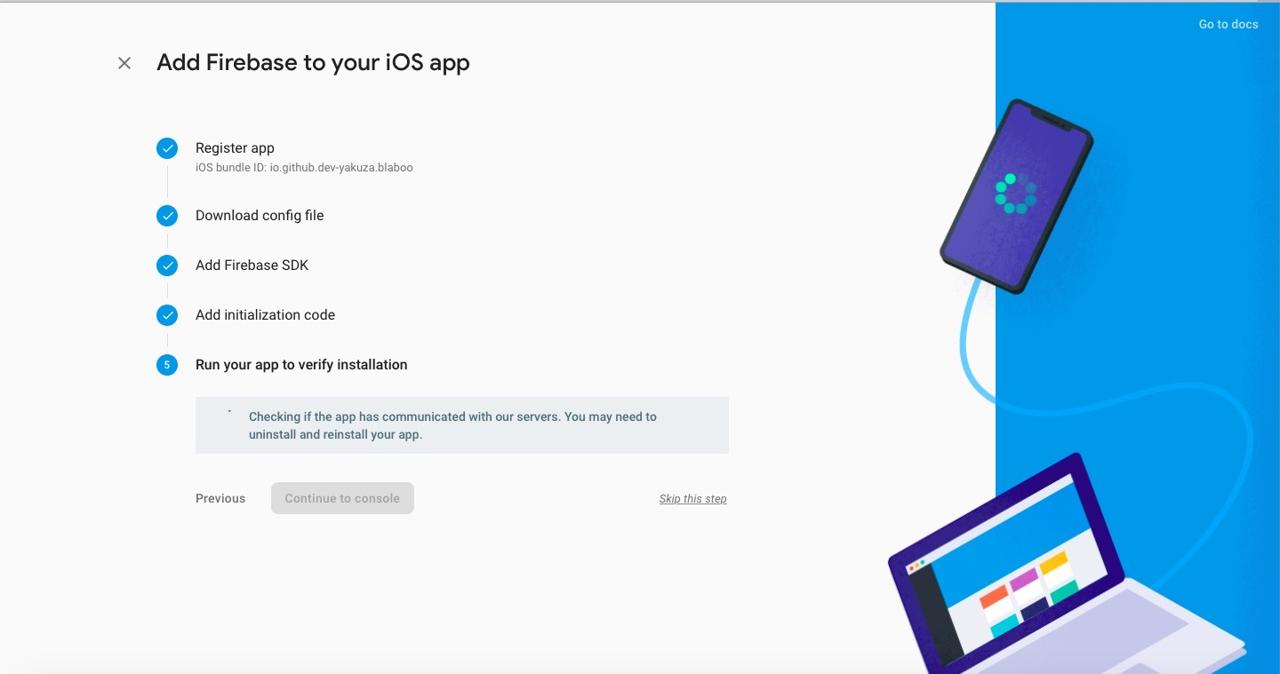
At this part, I clicked Skip this step to skip this section.
Configure Permissions
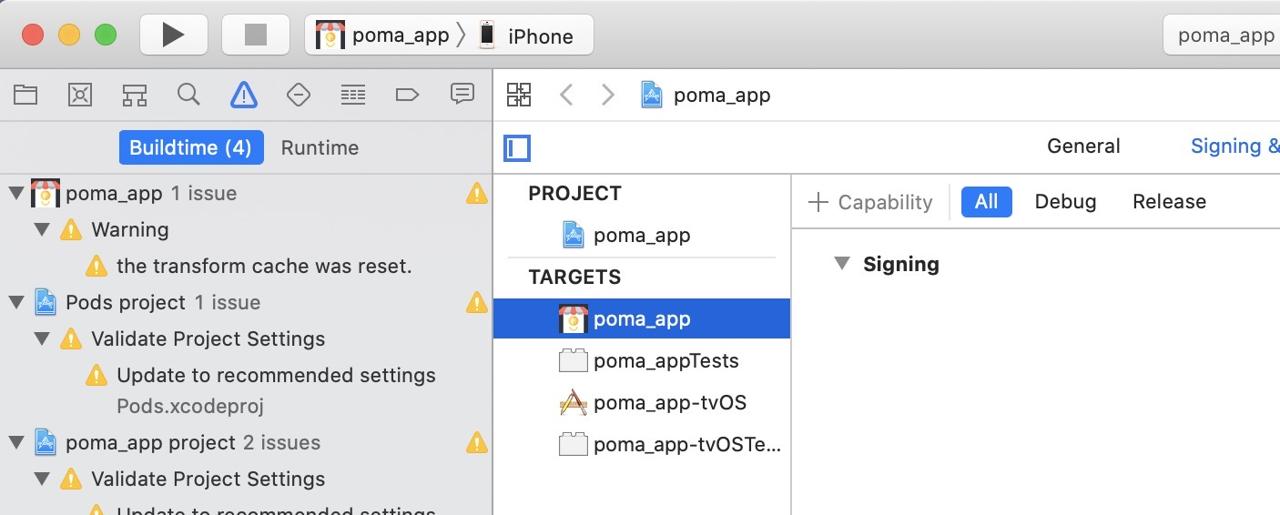
To configure the permissions, open ios/[project name].xcworkspace file to execute Xcode.
After executing the Xcode, click the project on the left menu, and click the Signing & Capabilities tab.
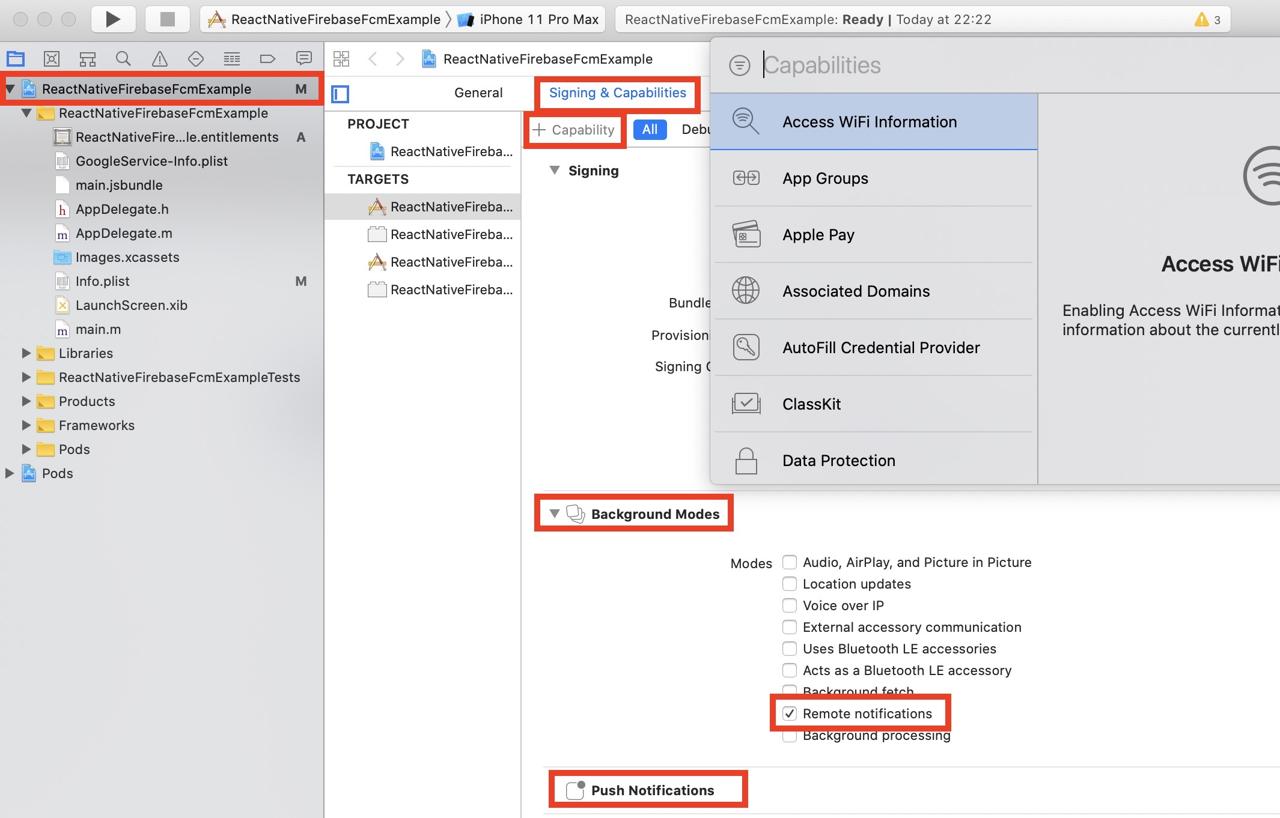
click +Capability on the top. Search and add the permissions below.
- Push Notifications
- Background modes
When you add Background modes, you can see the checkbox list unlike Push Notifications permission. Select Remote notifications in the list.
APNS setting
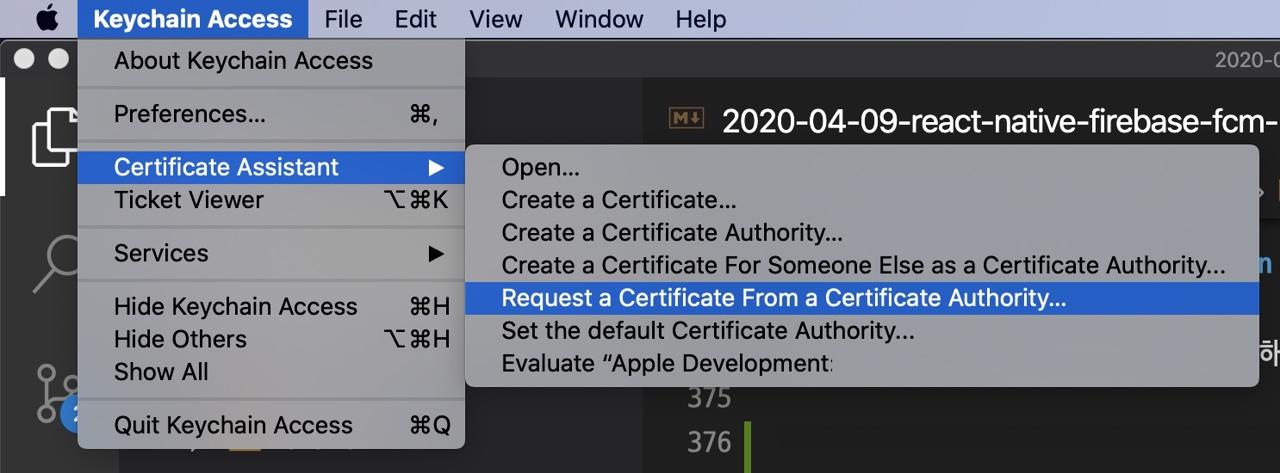
We need to configure APNS(Apple Push Notification Service) to use Push message on iOS.
open Keychain Access on macOS. And the, click Keychain Access > Certificate Assistant > Request a Certificate From a Certificate Authority... menu.
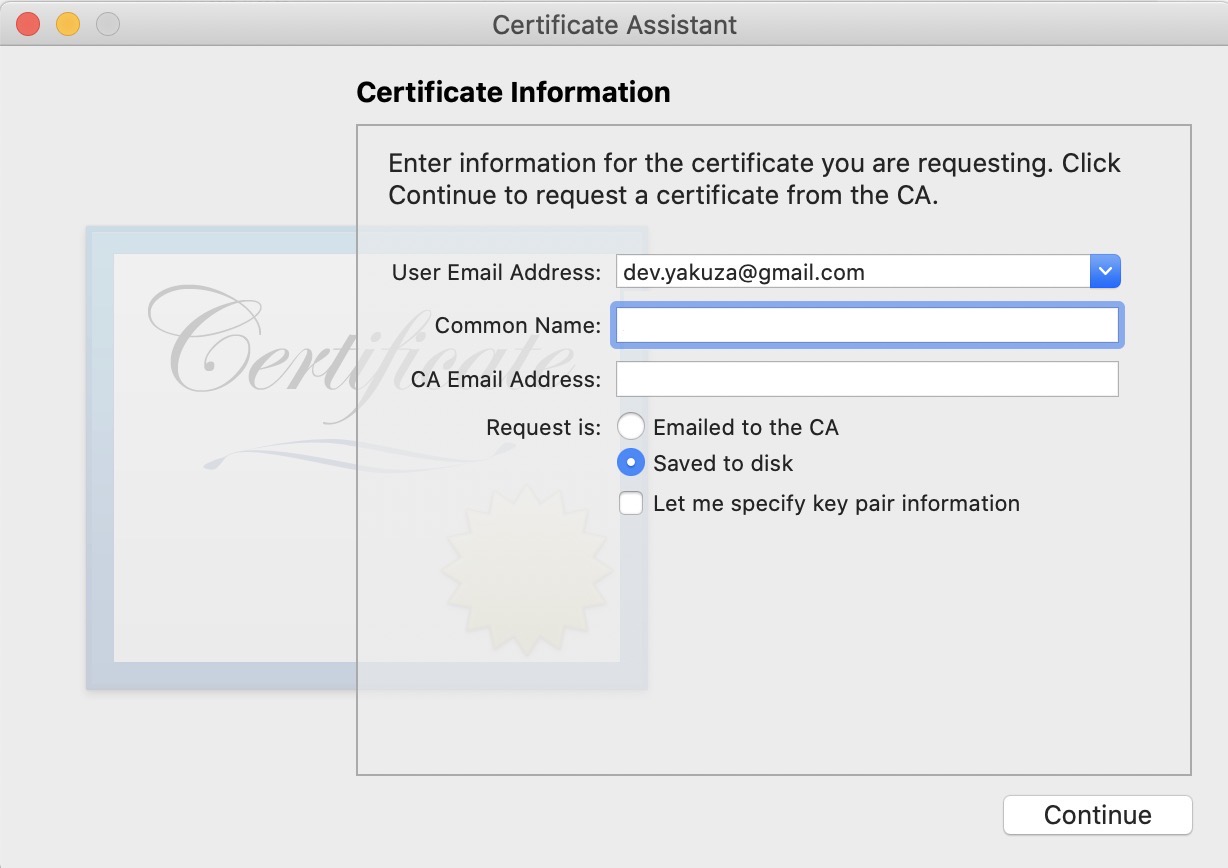
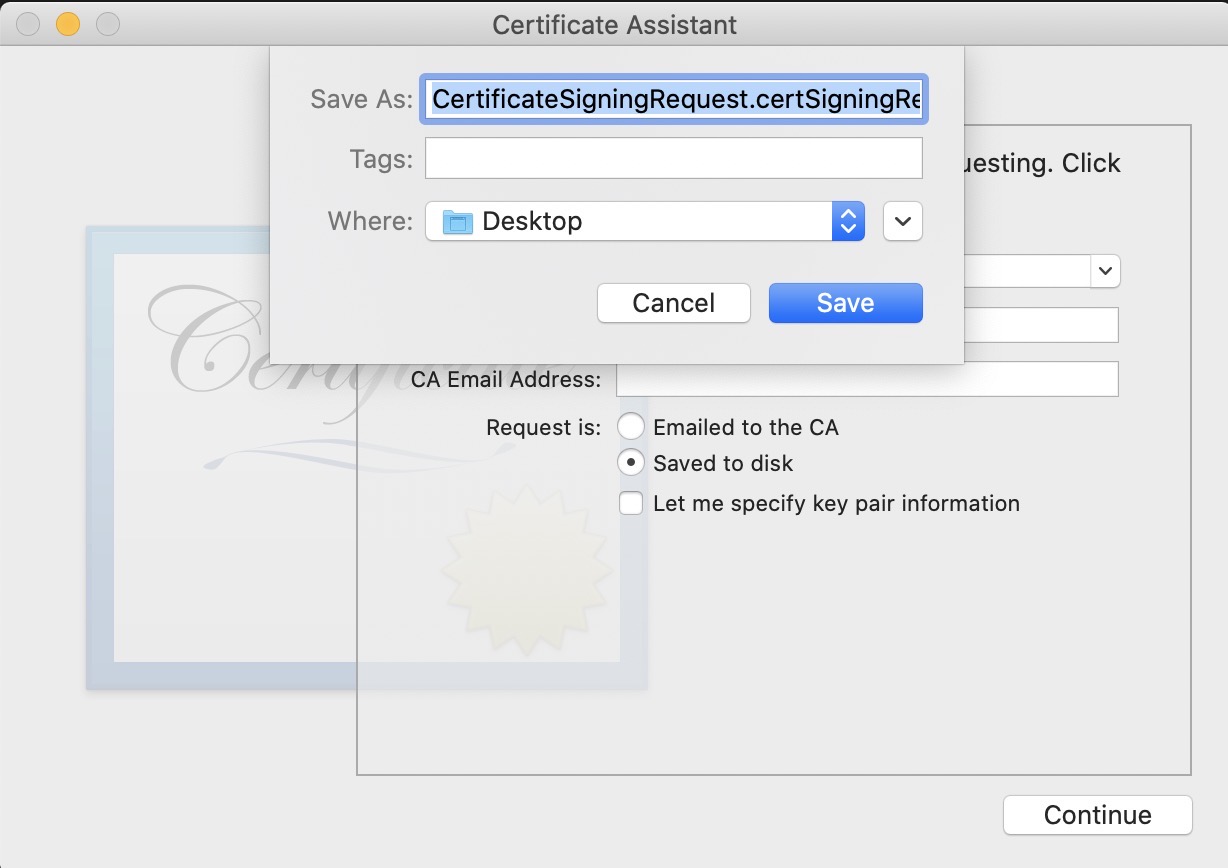
If the screen blow is shown up, insert User Email Address and Common Name, and select Saved to disk. After it, click Continue button to go to the next.
When you see the screen like below, select the folder which you want to save the file, and click Save button to save it.
Next, go to https://developer.apple.com/ site.
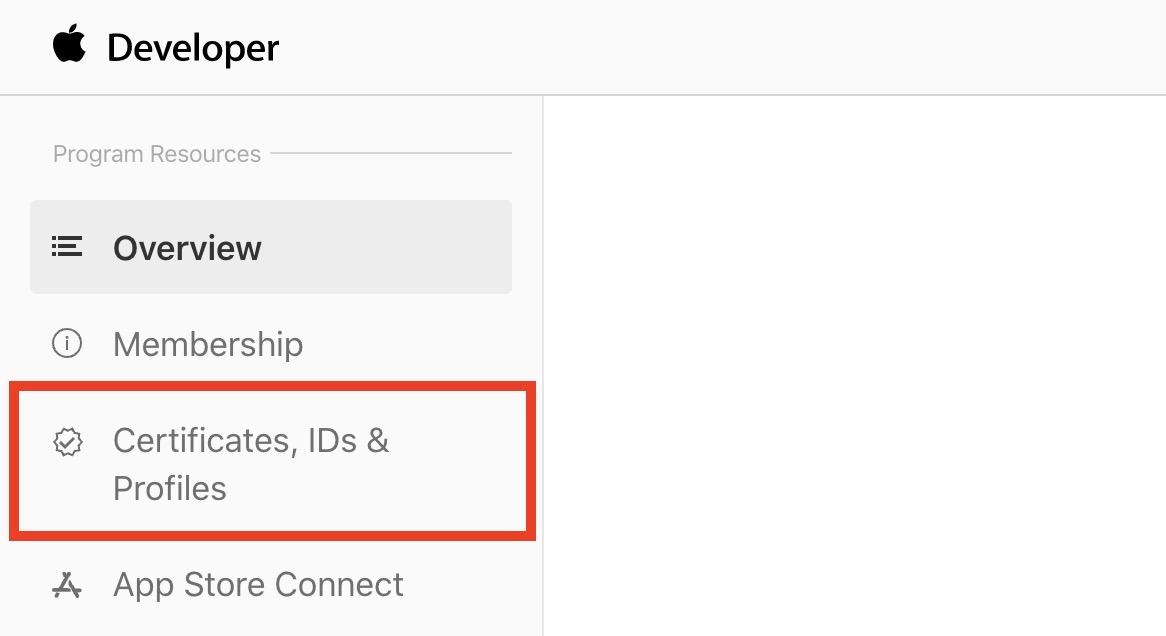
click the Account menu on the right top, and login. If you see the screen like below, click Certificates, Identifiers & Profiles menu.
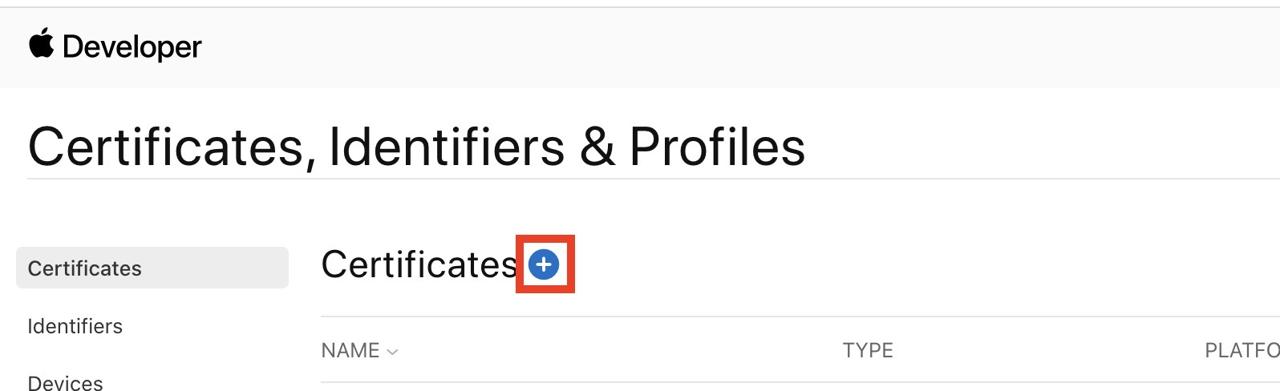
When you see the screen like below, click Certificates menu and click + button on the top.
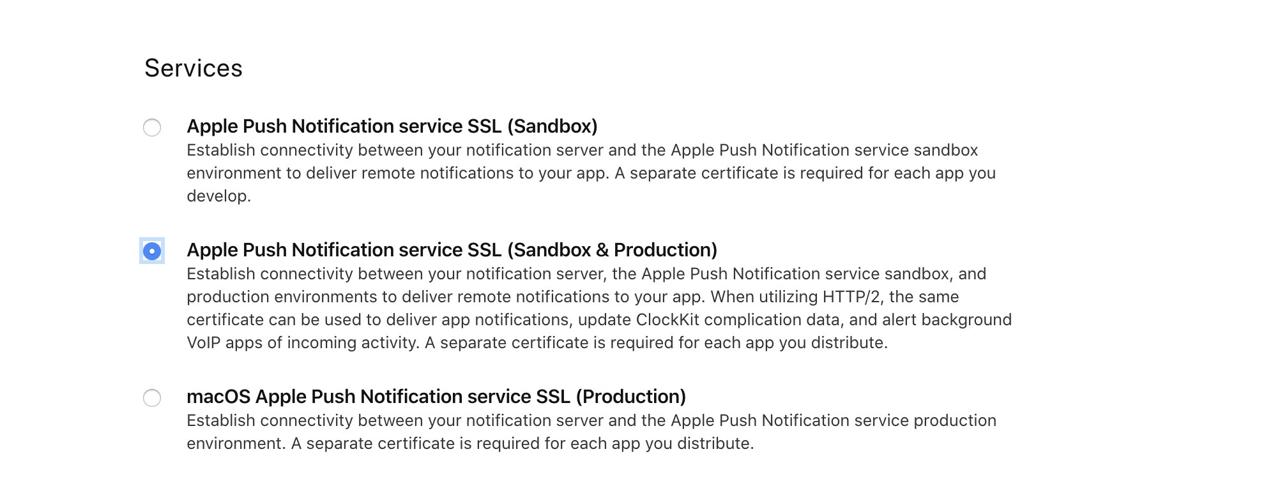
Next, when Create a New Certificate is shown up, scroll it to go down. When you scroll down, you can find Apple Push Notification service SSL (Sandbox & Production) on Service section. Select it, and click Continue button on the right top to go to the next.
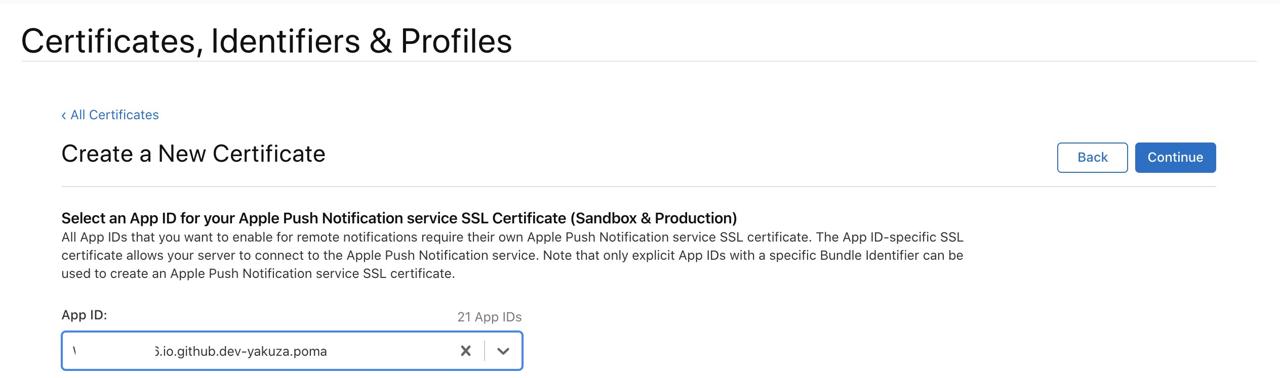
When you see the screen like below, select the app which you want to implement FCM feature, and click Continue button to go to the next.
When you see the screen like below, click Choose File and select the file which you’ve made via Keychain. After selecting, click Continue button.
If you see the screen like below, you made a certification well. Click Download button on the right top to download the certification.
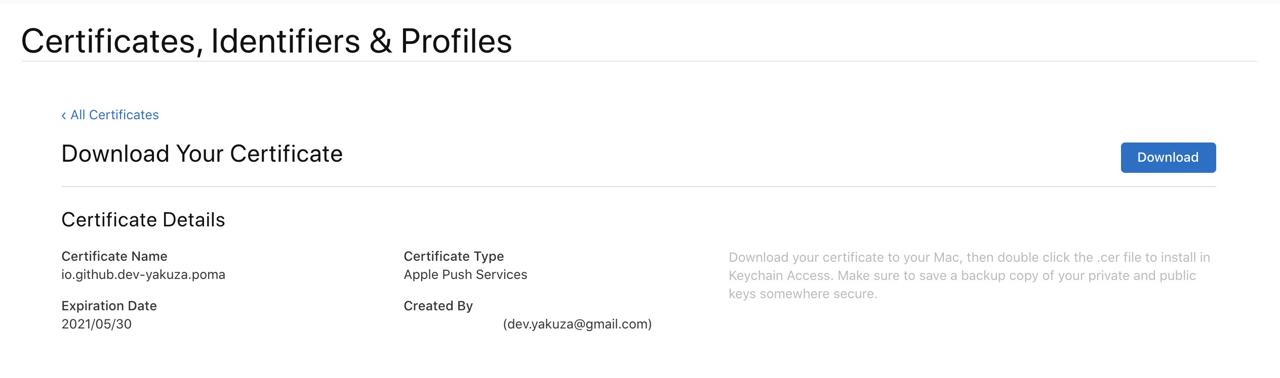
We need to transform this certification to .p12 format. Double-click the certification to register it to Keychain.

Right-click the registered certification, select Export "Apple Push Services: package name"... menu.
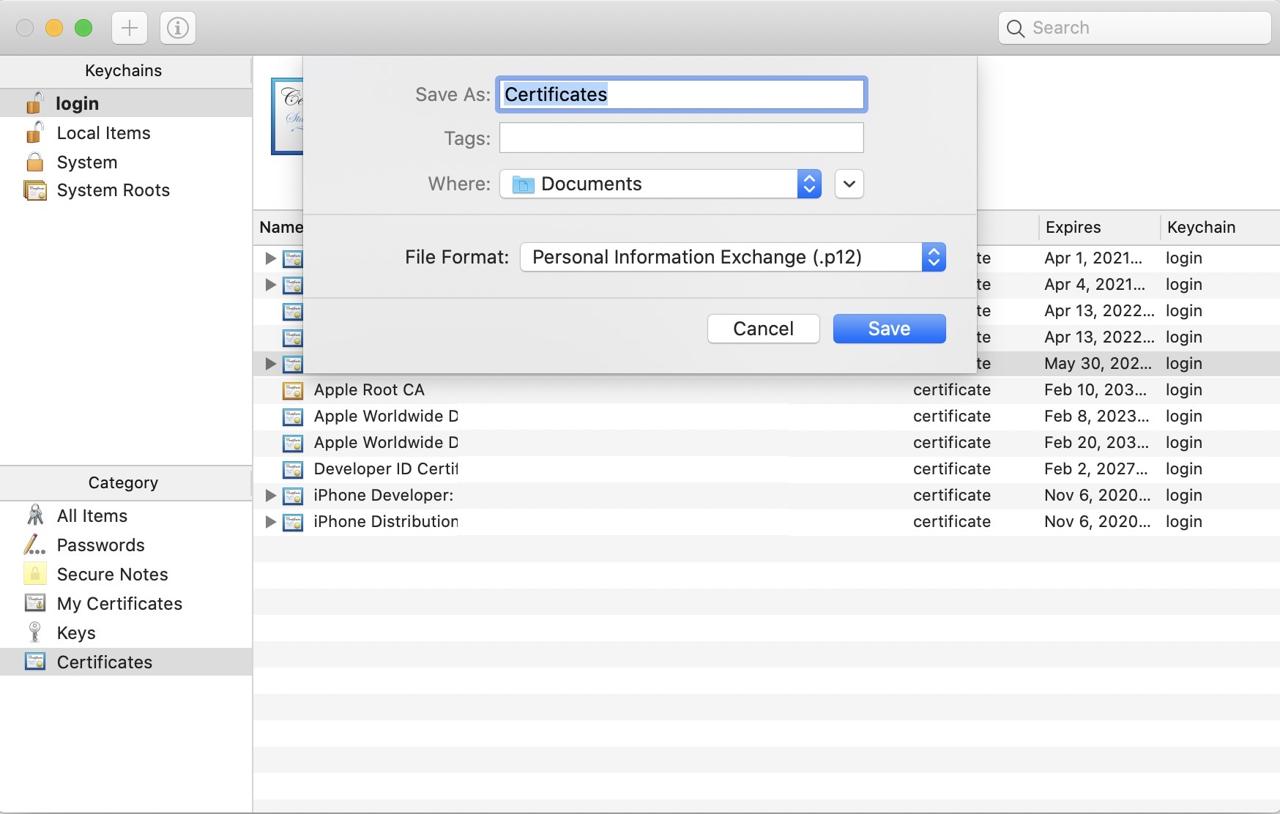
When the screen above is shown up, select Personal Information Exchange (.p12) on File Format and click Save button to save the file.
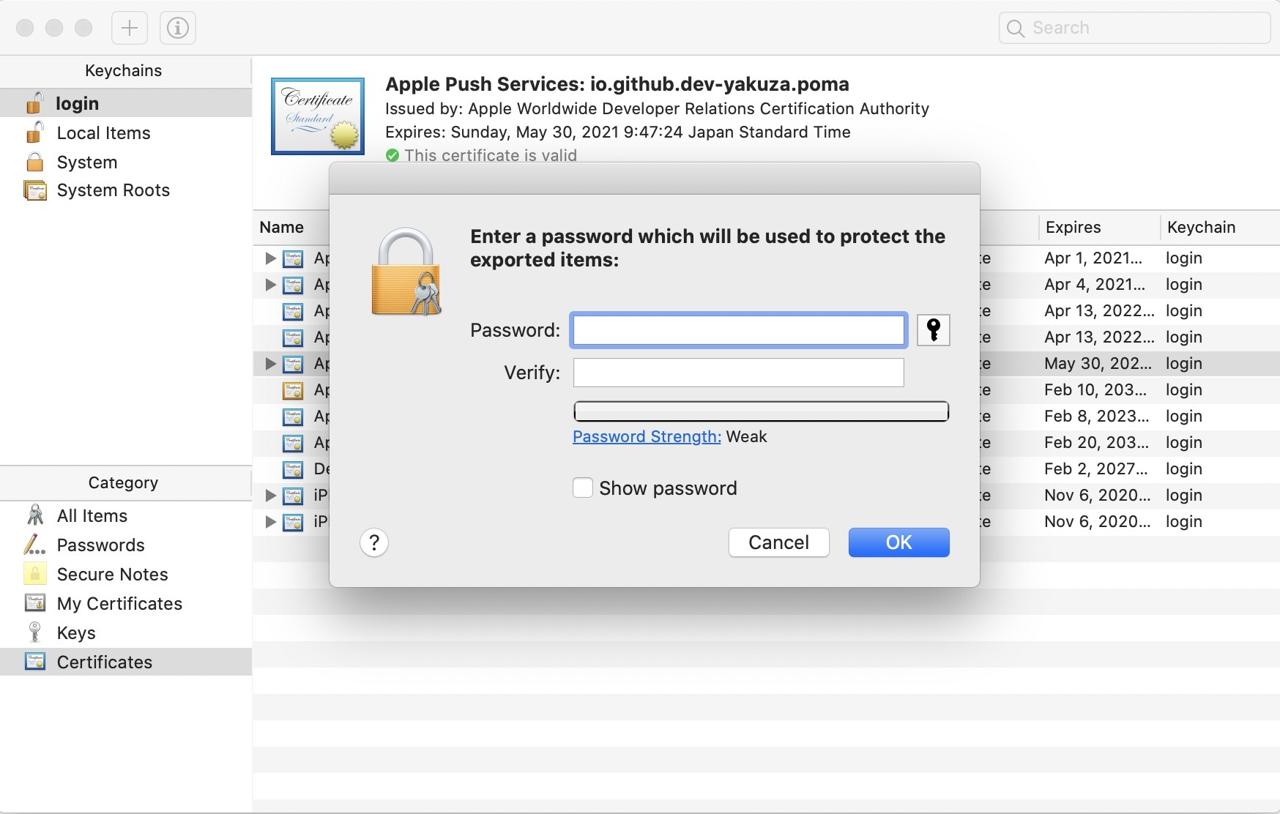
We need to insert a password to save p12 file like above. Insert the password to save .p12 file.
Next, go to Firebase Console, and click the project which we’ve made above. After it, you can see the iOS project on the right side.
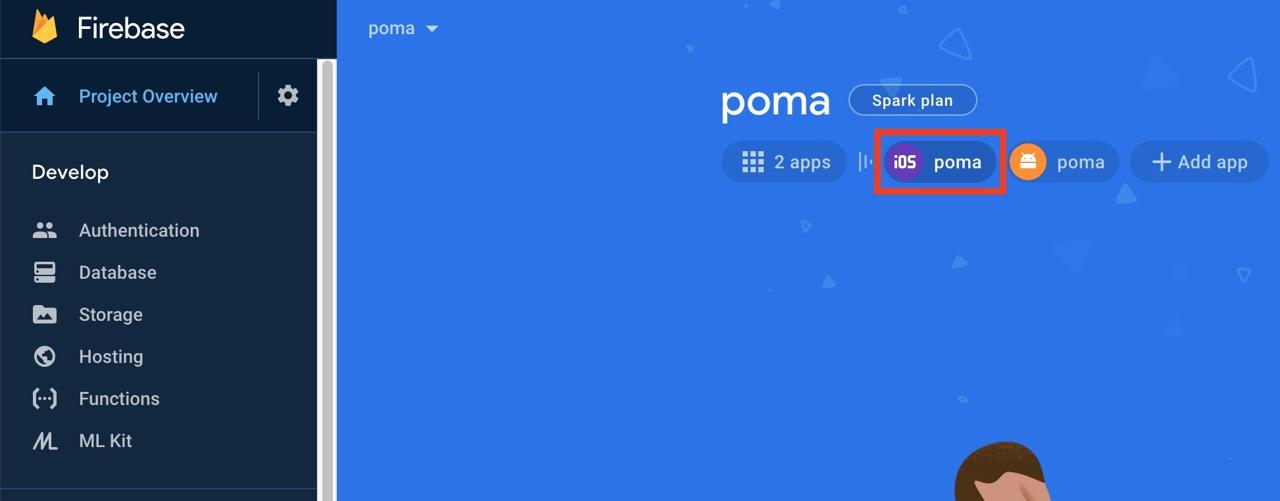
Click the iOS project, and click the configuration icon to go to the iOS project setting screen. Click Cloud Messaging menu on the iOS setting screen.
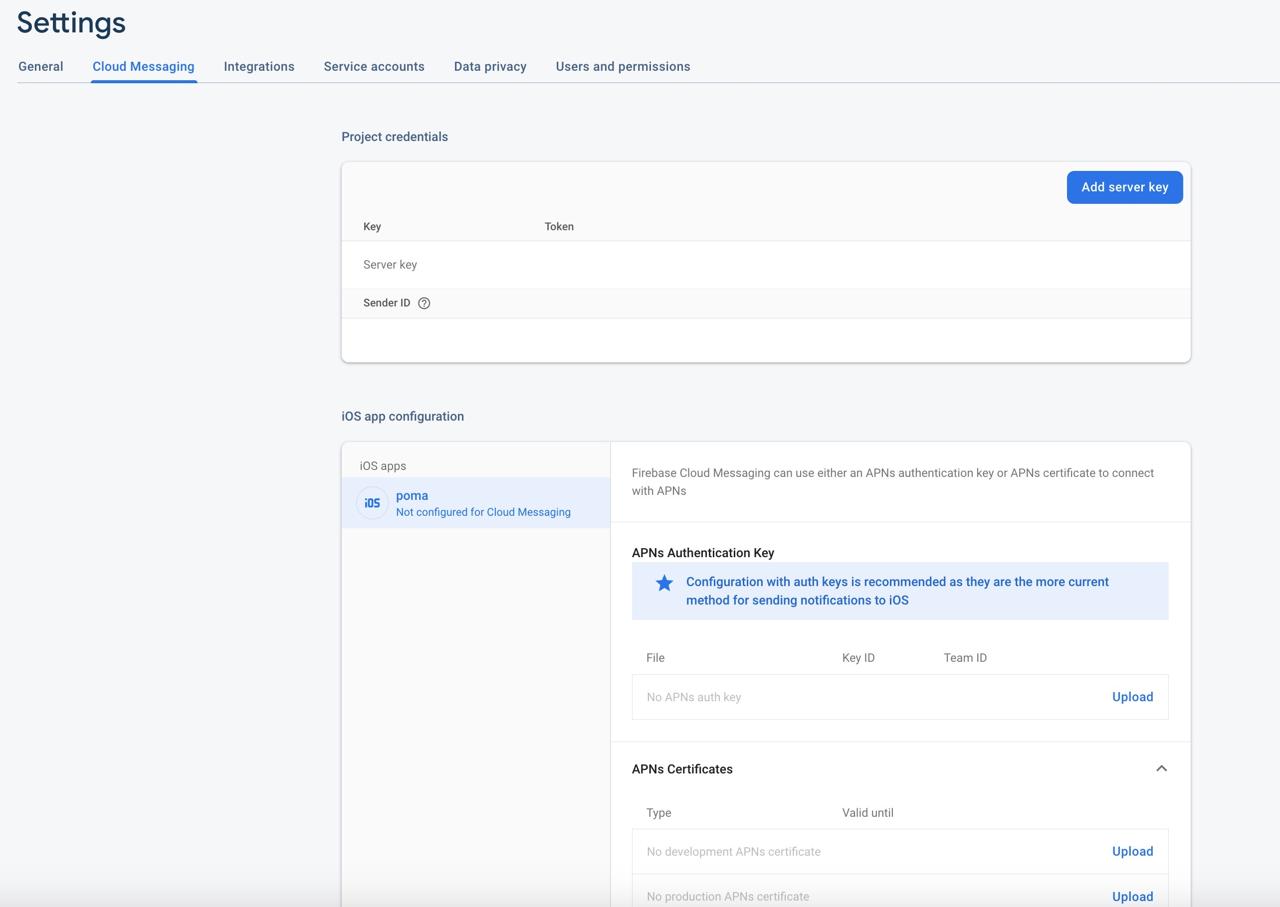
You can see the APNs certificates on iOS app configuration section on the bottom. Click Upload button on No development APNs certificate and No production APNs certificate.
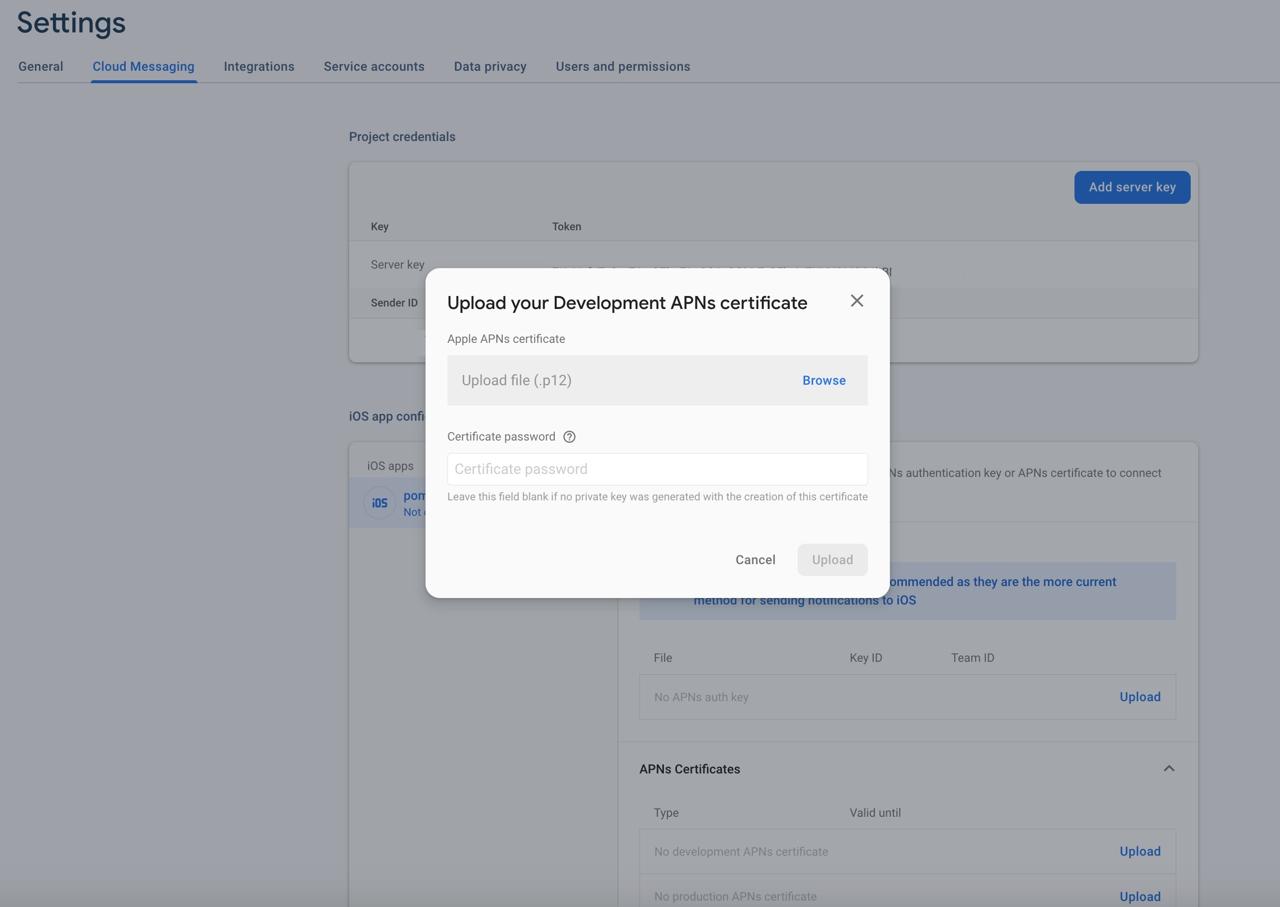
When this screen is shown up, upload .p12 file, and insert the password which you made .p12 file.
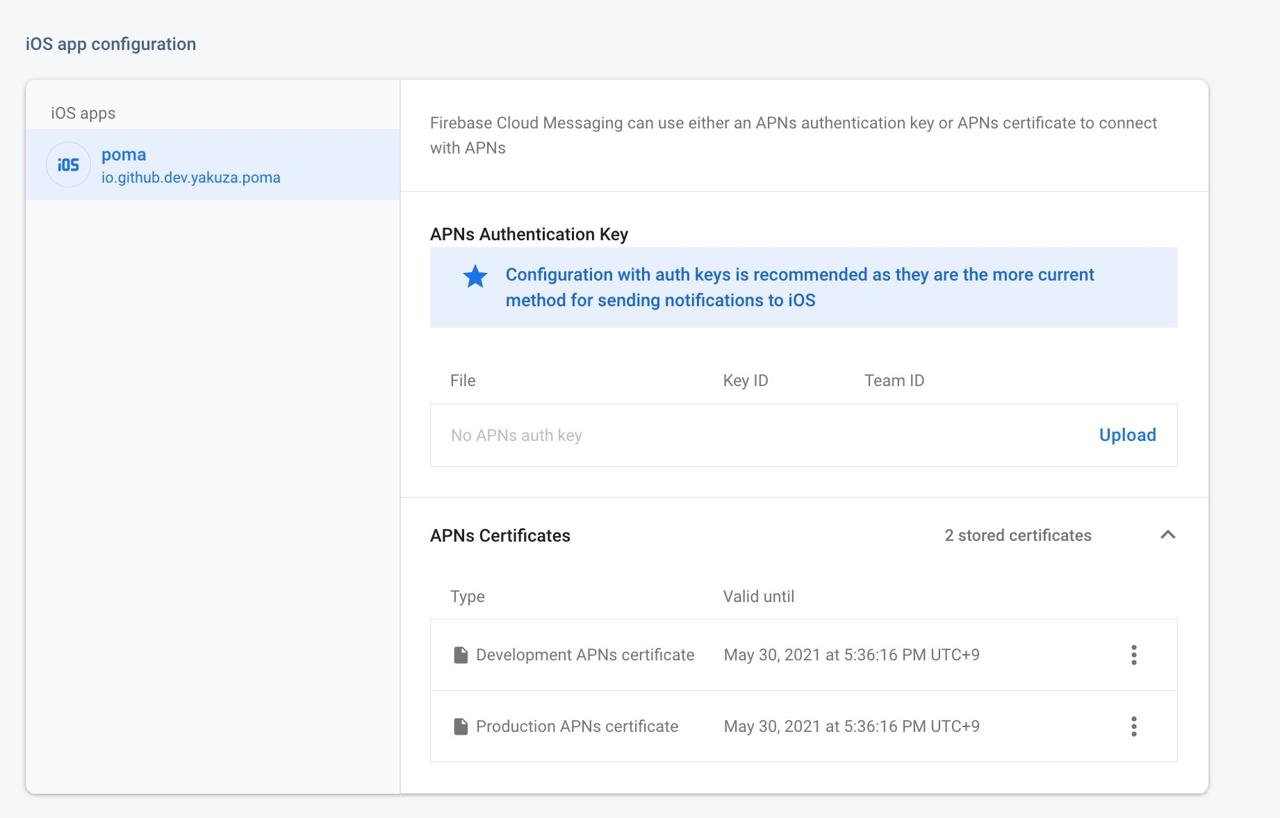
We’ve done all configurations for APNS(Apple Push Notification Service).
Android settings
Next, let’s see how to configure Android to use react-native-firebase.
Modify Android package name
-
Modify
android/app/BUCKfile on React Native project like below.... android_build_config( ... package = "package_name", ) ... android_resource( ... package = "package_name", ... ) ... -
Modify
android/app/src/main/AndroidManifest.xmlfile on React Native project like below.<manifest xmlns:android="http://schemas.android.com/apk/res/android" package="package_name"> ... -
Modify
android/app/src/main/java/com/ProjectName/MainActivity.javafile on React Native project like below.package package_name; ... -
Modify
android/app/src/main/java/com/ProjectName/MainApplication.javafile on React Native project like below.package package_name; ... -
Modify
android/app/build.gradlefile on React Native project like below.... defaultConfig { applicationId package_name ... } ...
Configure Android project on Firebase
Click Project Overview on left top of the Google Firebase Console.

Click + Add app > Android icon to go to the Android project setting.
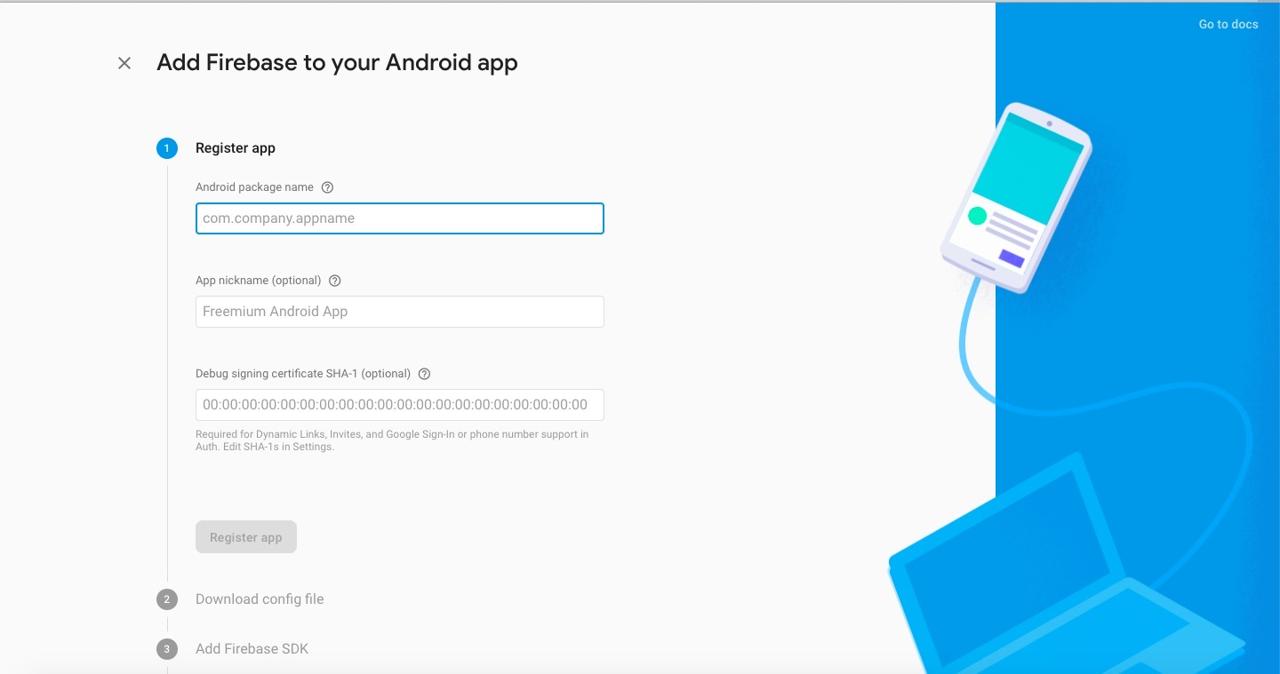
Insert Android Package Name, and click REgister app button.
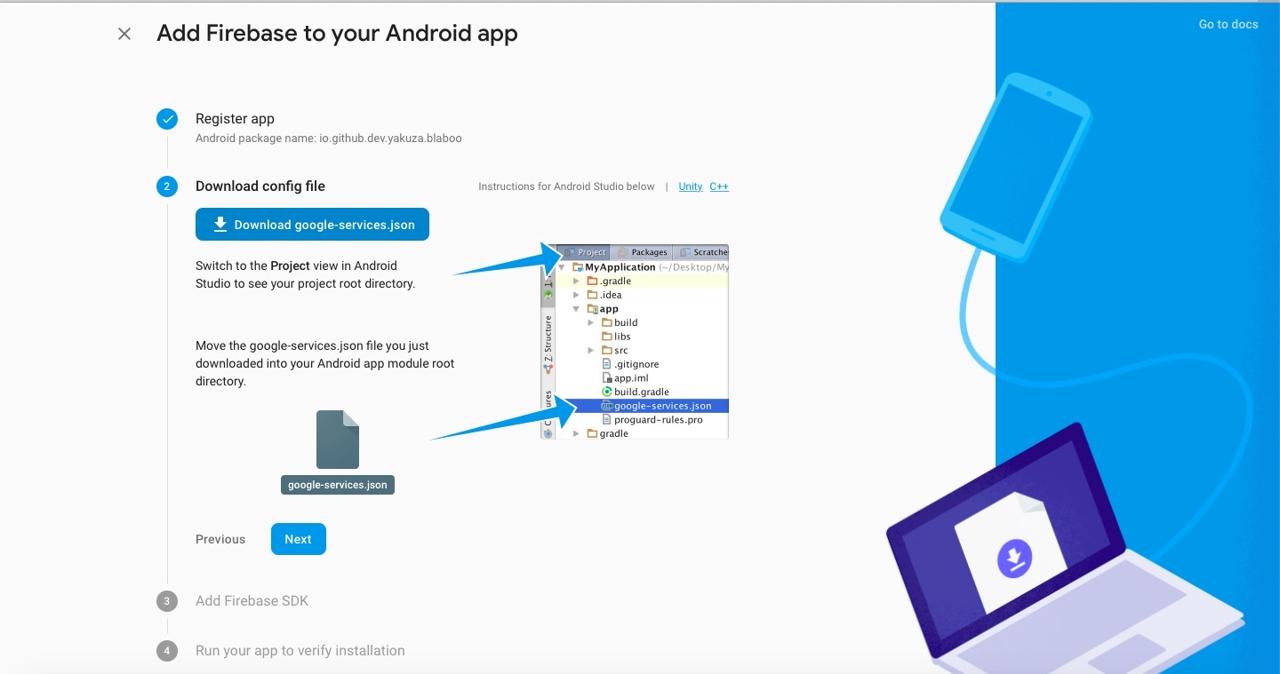
Copy google-services.json file which Google Firebase generates to android/app folder on React Native project. And then, click Next button to go to the next.
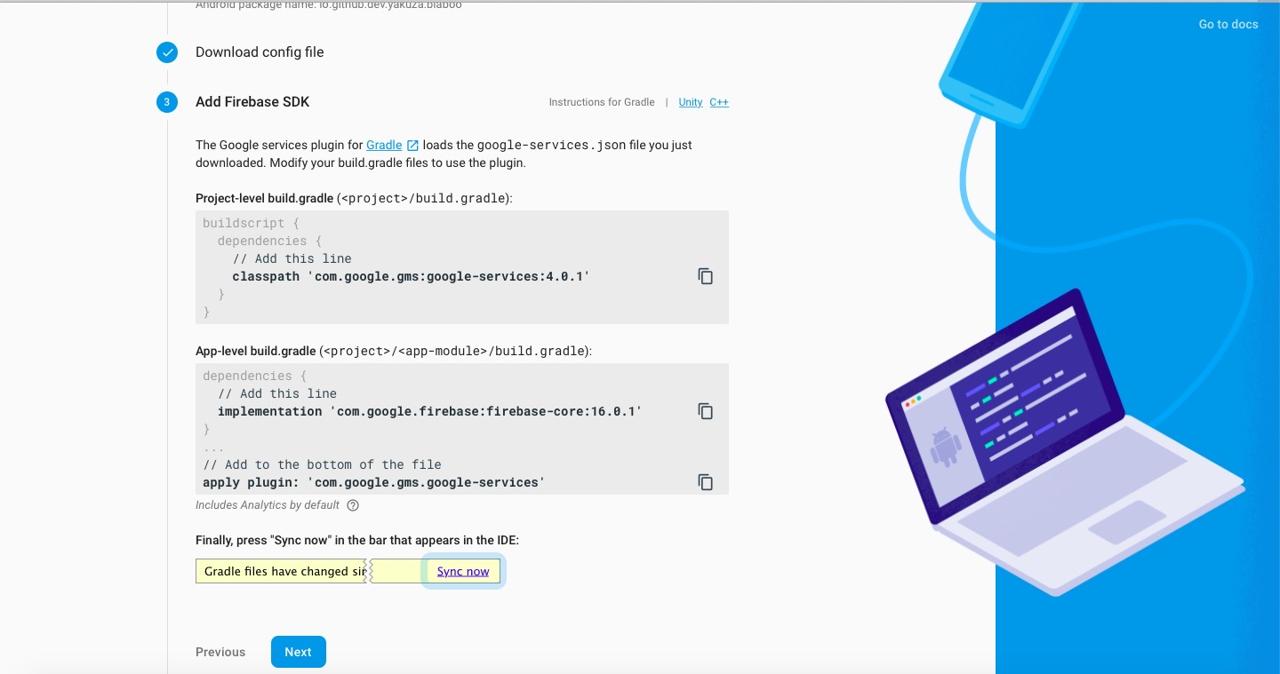
Open android/build.gradle file on React Native project and modify it like below.
buildscript {
  repositories {
    google()
    jcenter()
  }
  dependencies {
    classpath("com.android.tools.build:gradle:3.4.2")
    classpath 'com.google.gms:google-services:4.3.3'
  }
}
...
allprojects {
  repositories {
    mavenLocal()
    google()
    jcenter()
    ...
  }
}
As you see above, google() should be in repositories and be defined above jcenter().
Open android/app/build.gradle file and modify it like below.
dependencies {
    // under 59 version
    // implementation project(':react-native-firebase')
    ...
    implementation 'com.google.android.gms:play-services-base:17.2.1'
    implementation 'com.google.firebase:firebase-core:17.0.0'
    implementation "com.google.firebase:firebase-messaging:20.0.0"
    implementation 'me.leolin:ShortcutBadger:1.1.21@aar'
}
And the, add the code below to the bottom of the same file.
...
apply plugin: 'com.google.gms.google-services'
Next, Open ./android/build.gradle file and modify it like below.
buildscript {
    ext {
        ...
    }
    repositories {
        ...
    }
    dependencies {
        classpath("com.android.tools.build:gradle:3.4.2")
        classpath 'com.google.gms:google-services:4.3.3'
    }
}- Over 0.60 version
To use react-native-firebase, open android/app/src/main/java/com/[app name]/MainApplication.java file and modify it like below.
import io.invertase.firebase.RNFirebasePackage;
import io.invertase.firebase.analytics.RNFirebaseAnalyticsPackage;
import io.invertase.firebase.messaging.RNFirebaseMessagingPackage;
import io.invertase.firebase.notifications.RNFirebaseNotificationsPackage;
...
@Override
protected List<ReactPackage> getPackages() {
  @SuppressWarnings("UnnecessaryLocalVariable")
  List<ReactPackage> packages = new PackageList(this).getPackages();
  // Packages that cannot be autolinked yet can be added manually here, for example:
  // packages.add(new MyReactNativePackage());
  packages.add(new RNFirebaseAnalyticsPackage());
  packages.add(new RNFirebaseMessagingPackage());
  packages.add(new RNFirebaseNotificationsPackage());
  return packages;
}
...- Under 0.59 version
To use react-native-firebase, open android/app/src/main/java/com/[app name]/MainApplication.java file and modify it like below.
import io.invertase.firebase.RNFirebasePackage;
import io.invertase.firebase.analytics.RNFirebaseAnalyticsPackage;
import io.invertase.firebase.messaging.RNFirebaseMessagingPackage;
...

@Override
protected List<ReactPackage> getPackages() {
  return Arrays.<ReactPackage>asList(
    ...
    new RNFirebasePackage(),
    new RNFirebaseAnalyticsPackage(),
    new RNFirebaseMessagingPackage()
    ...
  );
}
To receive the Push message, open android/app/src/main/AndroidManifest.xml file and modify it like below.
<application ...>
...
<service android:name="io.invertase.firebase.messaging.RNFirebaseMessagingService">
  <intent-filter>
    <action android:name="com.google.firebase.MESSAGING_EVENT" />
  </intent-filter>
</service>
<service android:name="io.invertase.firebase.messaging.RNFirebaseBackgroundMessagingService" />
...
</application>
Open the Android project via Android Studio and click Gradle Sync.
Test
Let’s test FCM to check the configuration well.
Add Javascript source code
To test, we need FCM Token. To get this token, we need to use Javascript. You can use this source code to the production projection.
Create ./src/Components/FCMContainer/index.tsx file and modify it like below to use FCM.
import React, { useEffect } from 'react';
import { Platform, Alert } from 'react-native';
import firebase from 'react-native-firebase';
import DeviceInfo from 'react-native-device-info';
import AsyncStorage from '@react-native-async-storage/async-storage';
import Axios from 'axios';

import Config from '~/Config';

interface Props {
  children: JSX.Element;
  onNotificationOpened?: (data: { [key: string]: string }) => any;
}

const FCMContainer = ({ children, onNotificationOpened }: Props): JSX.Element => {
  const CHANNEL_ID = 'io.github.dev.yakuza.poma';
  const APP_NAME = 'POMA';
  const DESCRIPTION = 'POMA channel';

  let _onTokenRefreshListener: any = undefined;
  let _notificationDisplayedListener: any = undefined;
  let _notificationListener: any = undefined;
  let _notificationOpenedListener: any = undefined;

  const _registerMessageListener = (): void => {
    firebase
      .notifications()
      .getInitialNotification()
      .then((notificationOpen) => {
        if (
          onNotificationOpened &&
          typeof onNotificationOpened === 'function' &&
          notificationOpen &&
          notificationOpen.notification &&
          notificationOpen.notification.data &&
          notificationOpen.notification.data.notifications_id
        ) {
          onNotificationOpened(notificationOpen.notification.data);
        }
      });

    const channel = new firebase.notifications.Android.Channel(
      CHANNEL_ID,
      APP_NAME,
      firebase.notifications.Android.Importance.Max,
    ).setDescription(DESCRIPTION);
    firebase.notifications().android.createChannel(channel);

    _notificationListener = firebase.notifications().onNotification((notification) => {
      // Process your notification as required
      notification.android.setPriority(firebase.notifications.Android.Priority.Max);
      notification.android.setChannelId(CHANNEL_ID);

      firebase.notifications().displayNotification(notification);
    });
    _notificationDisplayedListener = firebase.notifications().onNotificationDisplayed(() => {});
    _notificationOpenedListener = firebase
      .notifications()
      .onNotificationOpened((notificationOpen) => {
        if (onNotificationOpened && typeof onNotificationOpened === 'function') {
          onNotificationOpened(notificationOpen.notification.data);
        }
      });
  };

  const _registerToken = async (fcmToken: string): Promise<void> => {
    console.log(fcmToken);
    // try {
    //   const deviceUniqueId = DeviceInfo.getUniqueId();
    //   const token = await AsyncStorage.getItem('token');
    //   await Axios.post(
    //     `URL`,
    //     {
    //       token: fcmToken,
    //       device_unique_id,
    //     },
    //     {
    //       headers: { Authorization: 'Bearer ' + token },
    //     },
    //   );
    // } catch (error) {
    //   console.log('ERROR: _registerToken');
    //   console.log(error.response.data);
    // }
  };

  const _registerTokenRefreshListener = (): void => {
    if (_onTokenRefreshListener) {
      _onTokenRefreshListener();
      _onTokenRefreshListener = undefined;
    }

    _onTokenRefreshListener = firebase.messaging().onTokenRefresh((fcmToken) => {
      // Process your token as required
      _registerToken(fcmToken);
    });
  };
  const _updateTokenToServer = async (): Promise<void> => {
    try {
      const fcmToken = await firebase.messaging().getToken();
      _registerMessageListener();
      _registerToken(fcmToken);
    } catch (error) {
      console.log('ERROR: _updateTokenToServer');
      console.log(error);
    }
  };

  const _requestPermission = async (): Promise<void> => {
    try {
      // User has authorized
      await firebase.messaging().requestPermission();
      await _updateTokenToServer();
    } catch (error) {
      // User has rejected permissions
      Alert.alert("you can't handle push notification");
    }
  };

  const _checkPermission = async (): Promise<void> => {
    try {
      const enabled = await firebase.messaging().hasPermission();
      if (enabled) {
        // user has permissions
        _updateTokenToServer();
        _registerTokenRefreshListener();
      } else {
        // user doesn't have permission
        _requestPermission();
      }
    } catch (error) {
      console.log('ERROR: _checkPermission', error);
      console.log(error);
    }
  };

  useEffect(() => {
    _checkPermission();
    return (): void => {
      if (_onTokenRefreshListener) {
        _onTokenRefreshListener();
        _onTokenRefreshListener = undefined;
      }
      if (_notificationDisplayedListener) {
        _notificationDisplayedListener();
        _notificationDisplayedListener = undefined;
      }
      if (_notificationListener) {
        _notificationListener();
        _notificationListener = undefined;
      }
      if (_notificationOpenedListener) {
        _notificationOpenedListener();
        _notificationOpenedListener = undefined;
      }
    };
  }, []);

  if (Platform.OS === 'ios') {
    firebase.notifications().setBadge(0);
  }

  return children;
};

export default FCMContainer;
You should change Channel ID, App Name and Description to fit yours.
const CHANNEL_ID = 'io.github.dev.yakuza.poma';
const APP_NAME = 'POMA';
const DESCRIPTION = 'POMA channel';
Also, For testing, just display FCM token on the log,
const _registerToken = async (fcmToken: string): Promise<void> => {
  console.log(fcmToken);
  // try {
  //   const deviceUniqueId = DeviceInfo.getUniqueId();
  //   const token = await AsyncStorage.getItem('token');
  //   await Axios.post(
  //     `URL`,
  //     {
  //       token: fcmToken,
  //       device_unique_id,
  //     },
  //     {
  //       headers: { Authorization: 'Bearer ' + token },
  //     },
  //   );
  // } catch (error) {
  //   console.log('ERROR: _registerToken');
  //   console.log(error.response.data);
  // }
};
For production, You should make this part to send FCM Token to the server via API.
To use the source code above, open App.tsx file and modify it like below.
import React from 'react';
import FCMContainer from '~/Component/FCMContainer';

const App = (): JSX.Element => {
  return (
    <FCMContainer>
      ...
    </FCMContainer>
  );
};

export default App;
iOS test
To test FCM on iOS, we need a device. Connect the device to the PC, and open Xcode.
Select the device on the left tope menu, and click > button to execute the project.
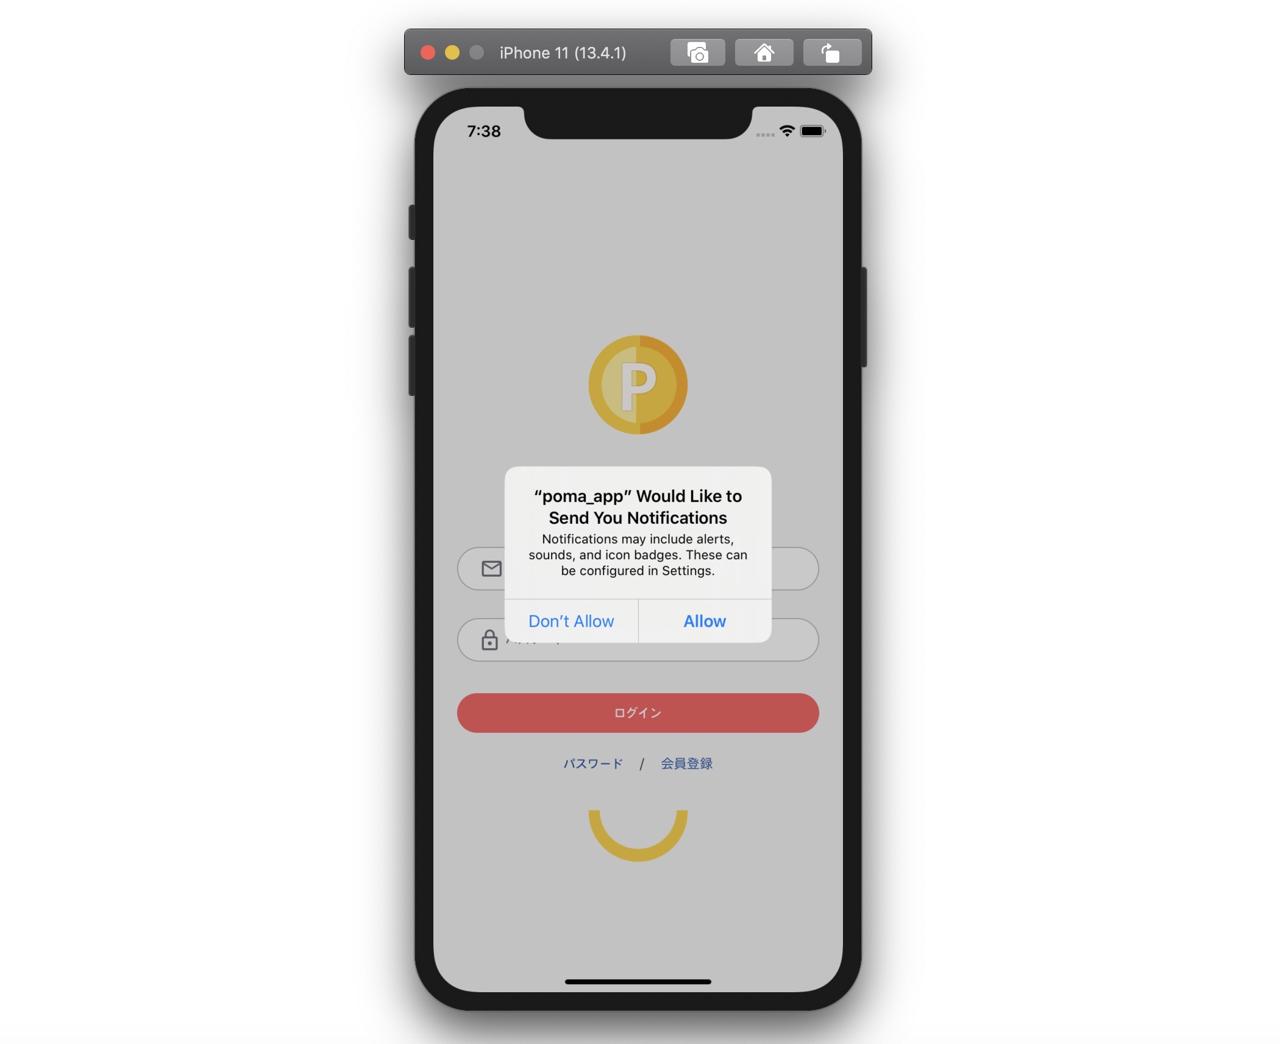
After executing the app on the device, you can see the screen like above. Click Allow button.
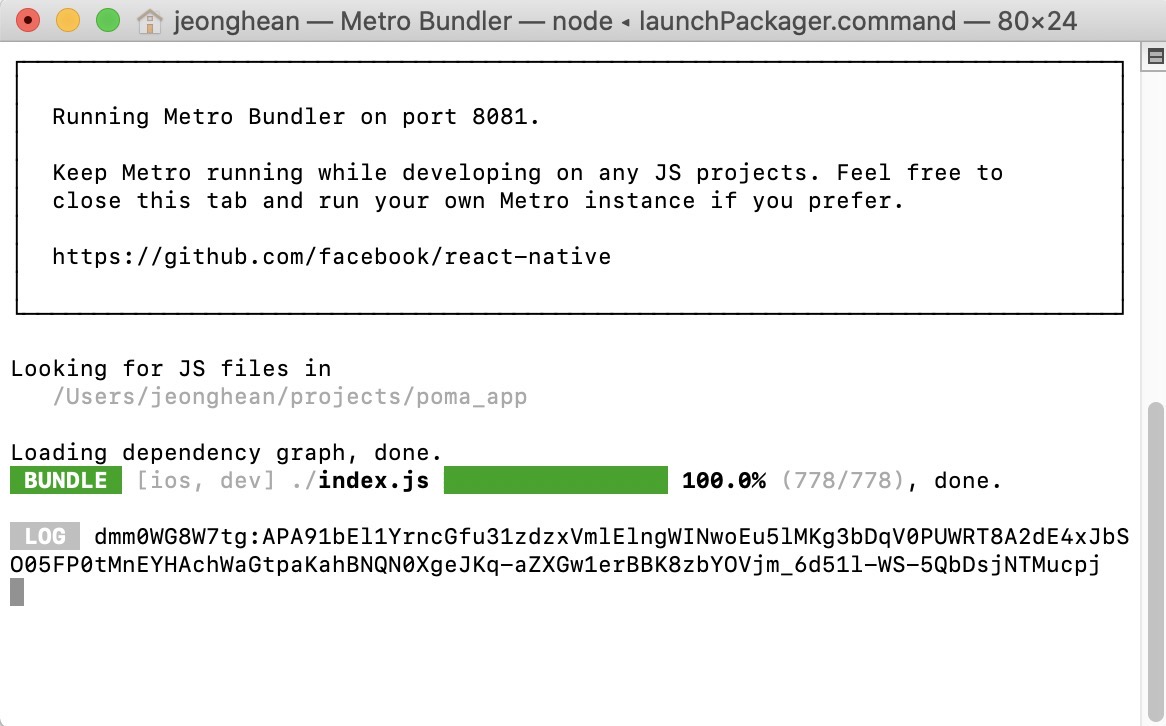
After allowing, you can see the FCM token on the console. copy the Token key.
Next, go to Firebase Console, click Cloud Messaging on the left menu, and Send your first message button.

When the next screen is shown up, insert a test message to Notification title and Notification text. After inserting, click Send test message.

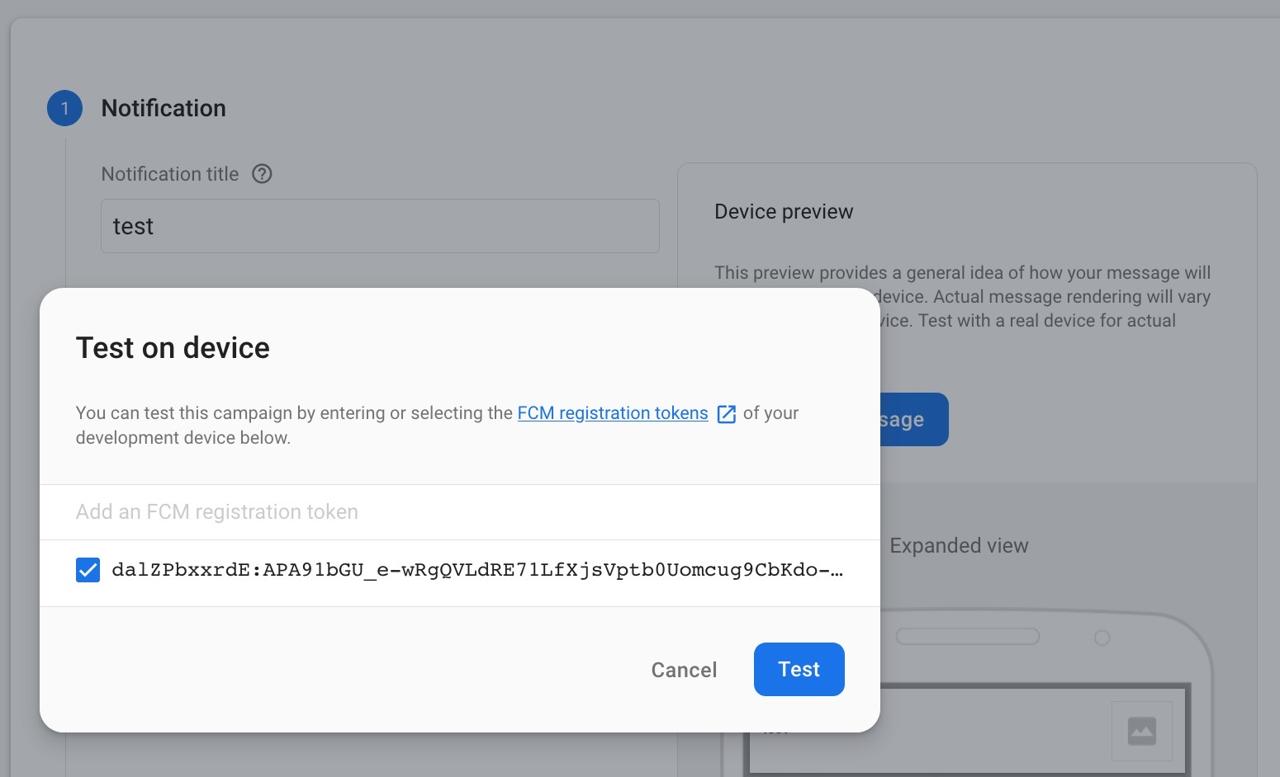
When the screen below is shown up, paste the FCM Token which you copied above on the console to Add an FCM registration token, and click + button.
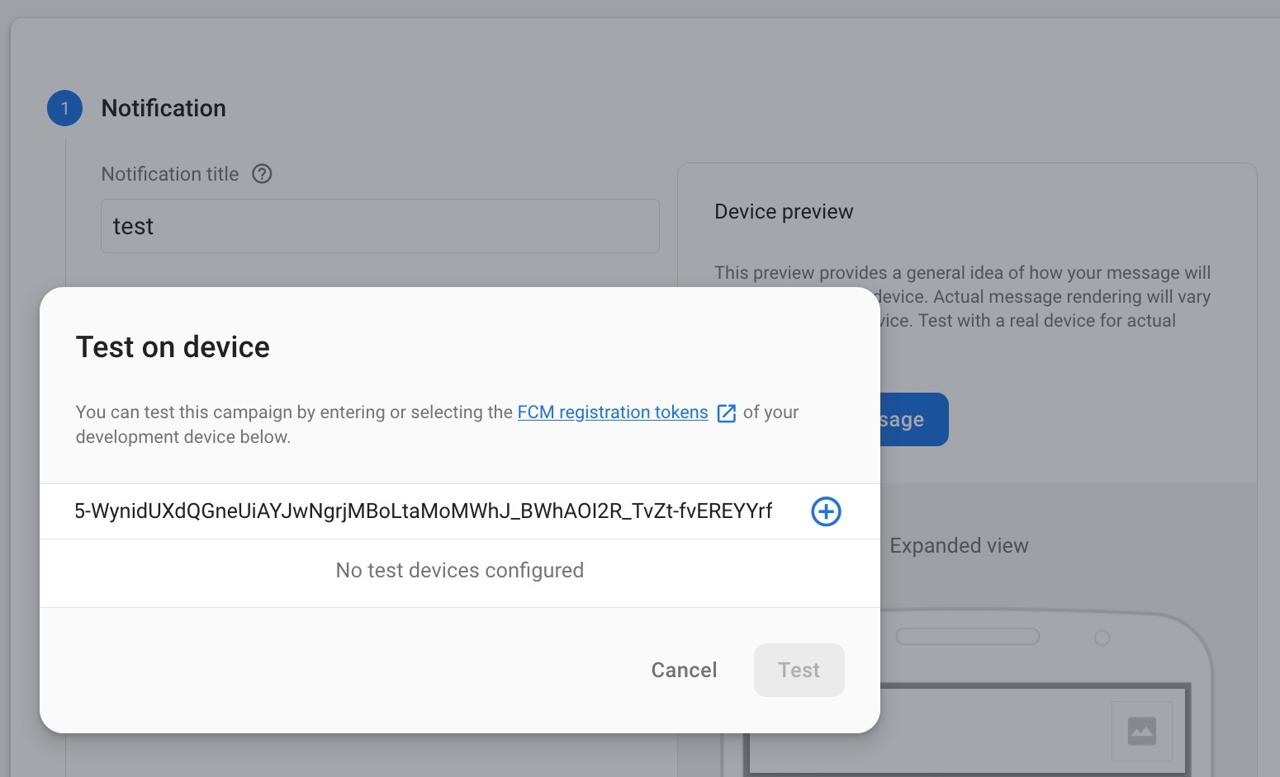
Next, click Test button to send the message.
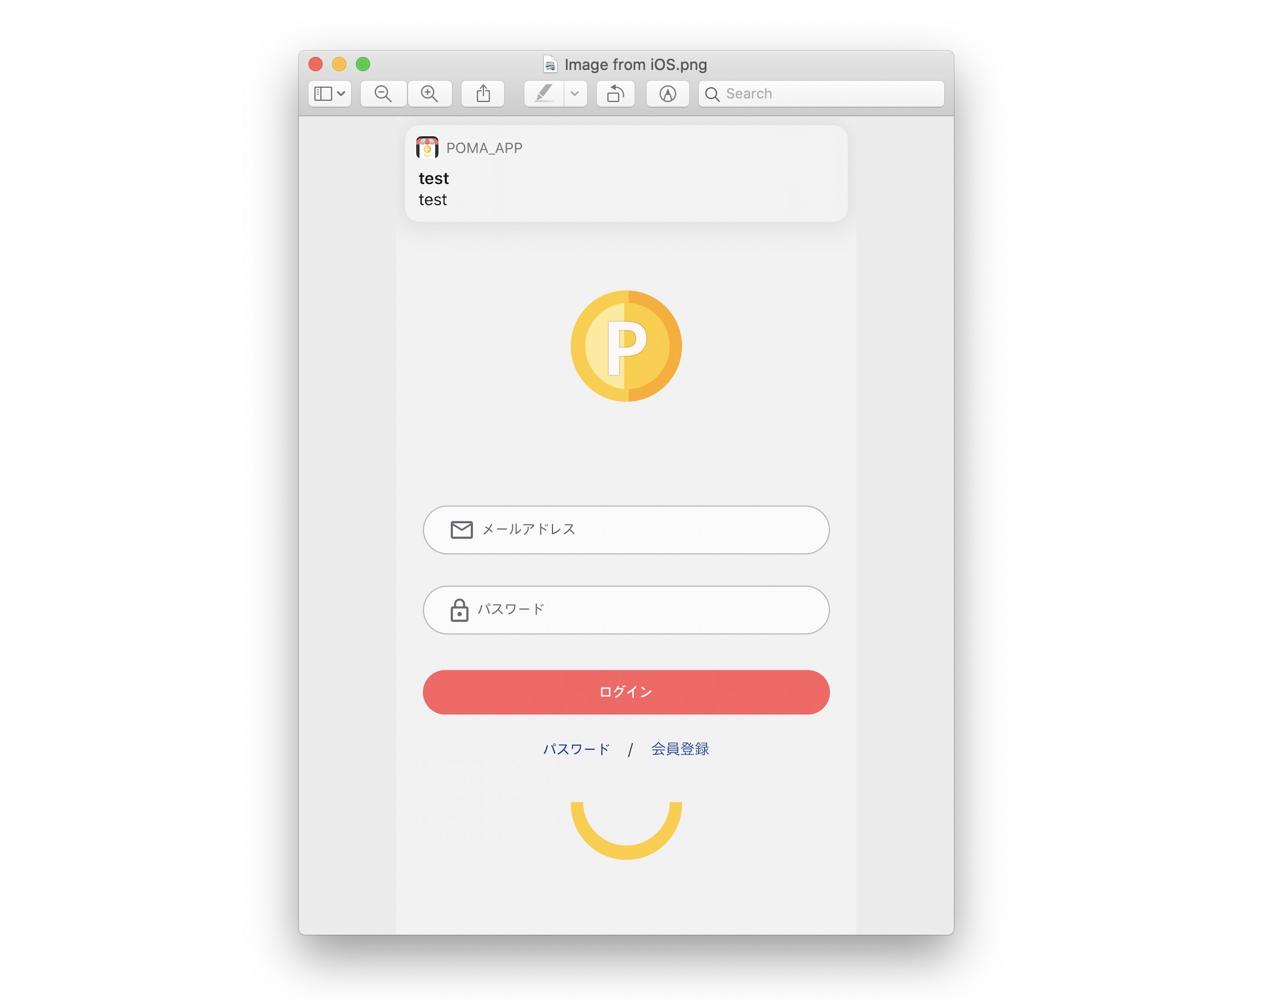
And then, you can see the screen like below that the app received the message well.
Android test
Execute the command below to test FCM on Android.
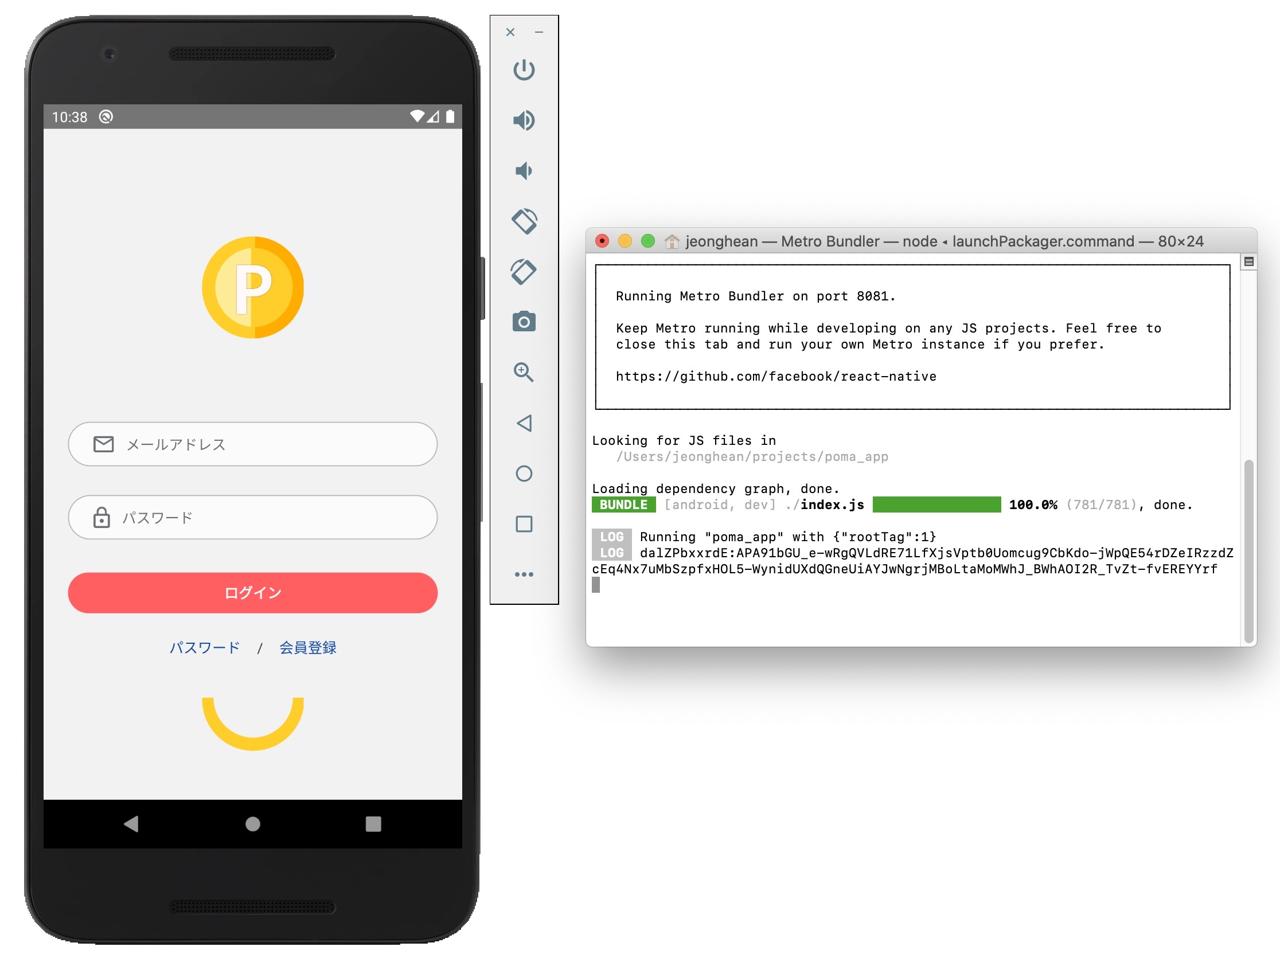
npm run androidAfter executing, you can see the FCM Token on the console. copy the key.
Next, go to Firebase Console, and click Cloud Messaging menu on the left, and click Send your first message button.
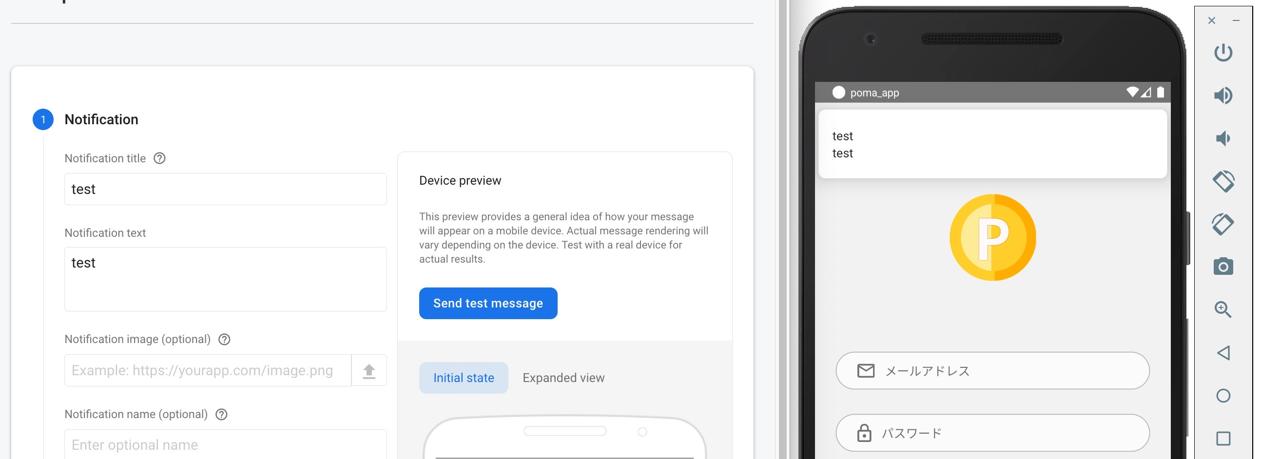
When the next screen is show up, insert a test message to Notification title and Notification text. After it, click Send test message button on the right side.
When the screen blow is shown up, paste FCM token which you copied above to Add an FCM registration token, and click + button.
And then, click Test button to send the test message.
And then, you can see the screen like below that the app received the message well.
Completed
We’ve seen how to receive FCM message on React Native project by react-native-firebase library. You can implement the Push notification by saving the FCM token on the server, and send a message with the Token!
Was my blog helpful? Please leave a comment at the bottom. it will be a great help to me!
App promotion
Deku.Deku created the applications with Flutter.If you have interested, please try to download them for free.