outline
we introduced how to set react-native-firebase at previous blog post - Firebase Admob. we mentioned at previous blog post that Firebase Analytics automatically is started by configuring react-native-firebase. however, when we saw results created Firebase Analytics automatically, we felt that’s not enough, so we write this blog post.
in here we will introduce how to make Firebase Analytics results more detail by using react-native-firebase.
configure library
this blog post is for how to use react-native-firebase for Firebase Analytics. so we need to set react-native-firebase basically. if you don’t know how to set react-native-firebase, see our previous blog post - Firebase Admob. in this blog post, we skip to install and configure react-native-firebase.
DebugView
Firebase Analytics gathers app event logs for about one hour and upload them. so if we want to see analytics result data, we should wait for about one hour. however, we can’t wait for one hour to develop or test. so Firebase Analytics provides DebugView which we can debug analytics events. if we use DebugView, we can see almost real time analytics results.
first, we configure DebugView so that we can immediately see Firebase Analytics results after adding react-native-firebase library features.
iOS
configure below to iOS for using Firebase Analytics DebugView feature.
- click
ios/[project].xcworkspacefile in RN(react native) project folder to execute xcode - select
Product>Scheme>Edit Scheme...menu on the top of the screen.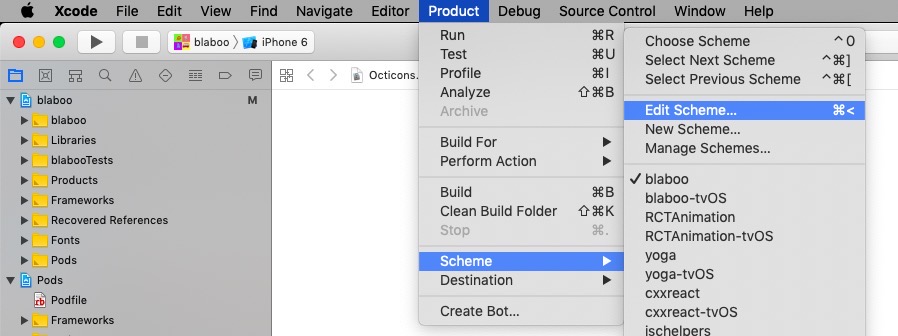
- select
Runmenu on the left ofEdit scheme...dialog and clickArgumentstab on right side.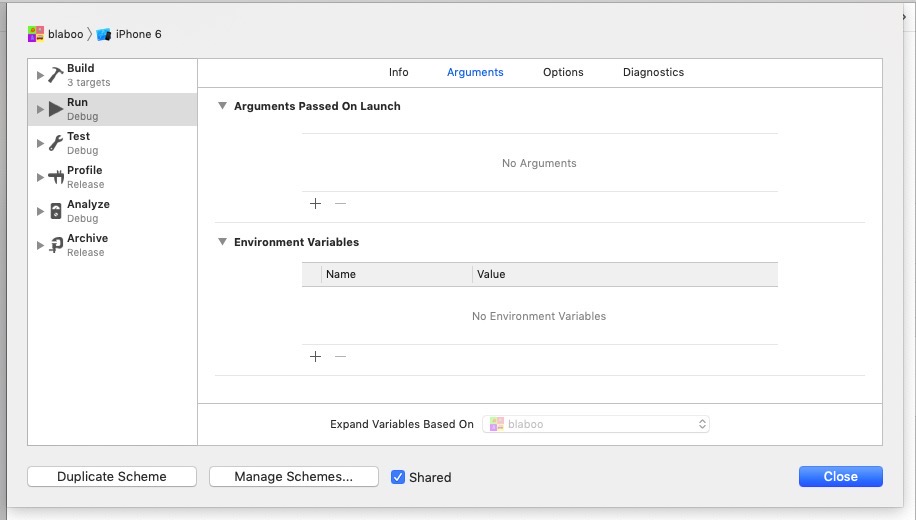
- click
+button inArguments Passed On Launchsession onArgumentstab and insert below code(include-)-FIRDebugEnabled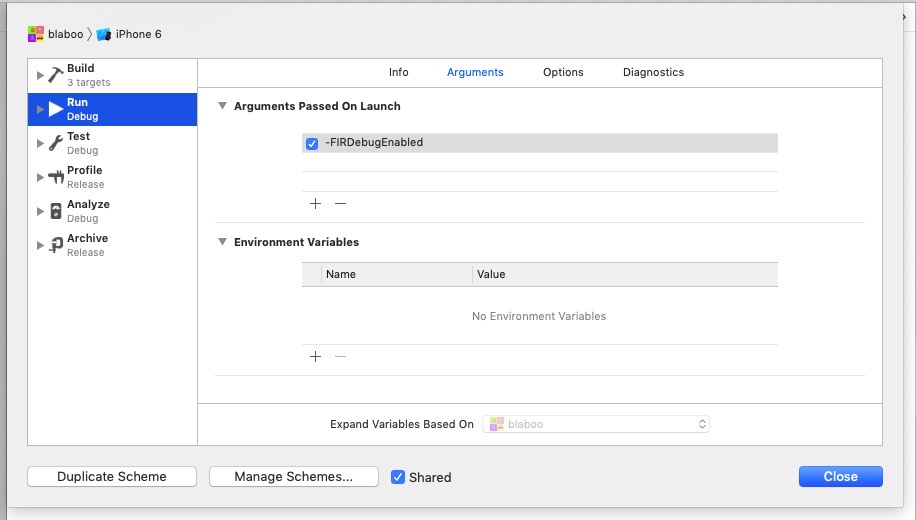
Android
Android is more simple than iOS. execute Android Emulator or Device and execute below code.
adb shell setprop debug.firebase.analytics.app <package_name>if you want to stop DebugView of Firebase Analytics, execute below code.
adb shell setprop debug.firebase.analytics.app .none.test
go to DebugView menu in Firebase Analytics on Firebase Console.
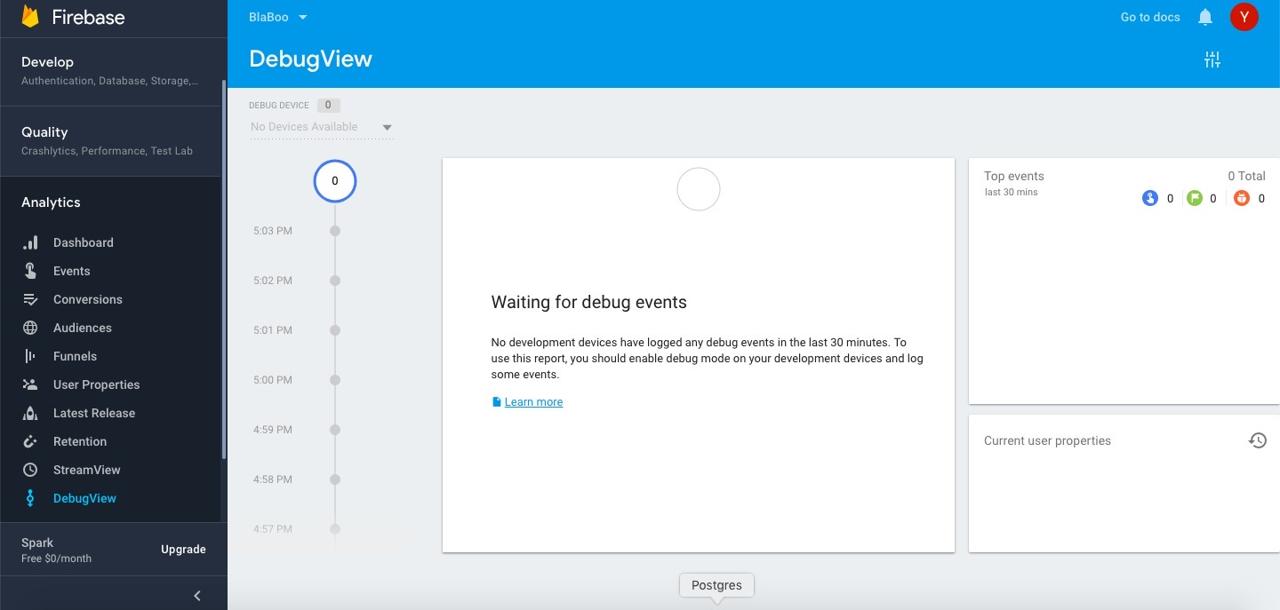
we didn’t execute any iOS, Android so DebugView is wait status. now, execute iOS or Android.
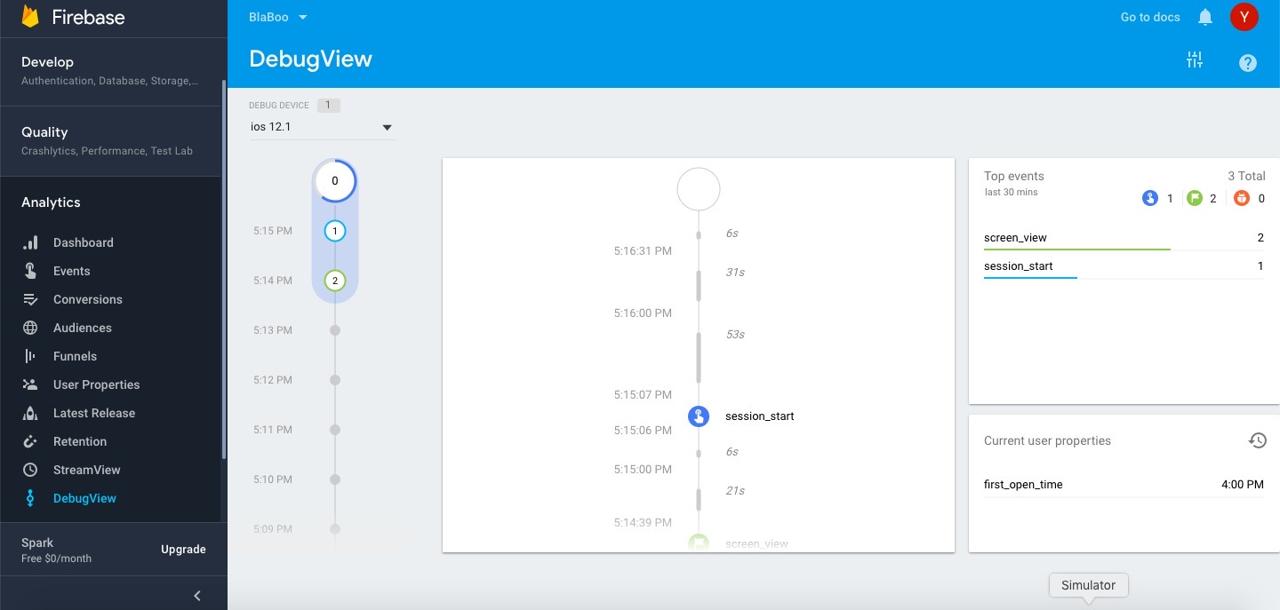
after a while, you can see almost real time analytics results.
analyze screens
Firebase Analytics has screen_view Event to analyze what screens users saw.
click Events menu in Analytics on Firebase Console. you can see below screen.
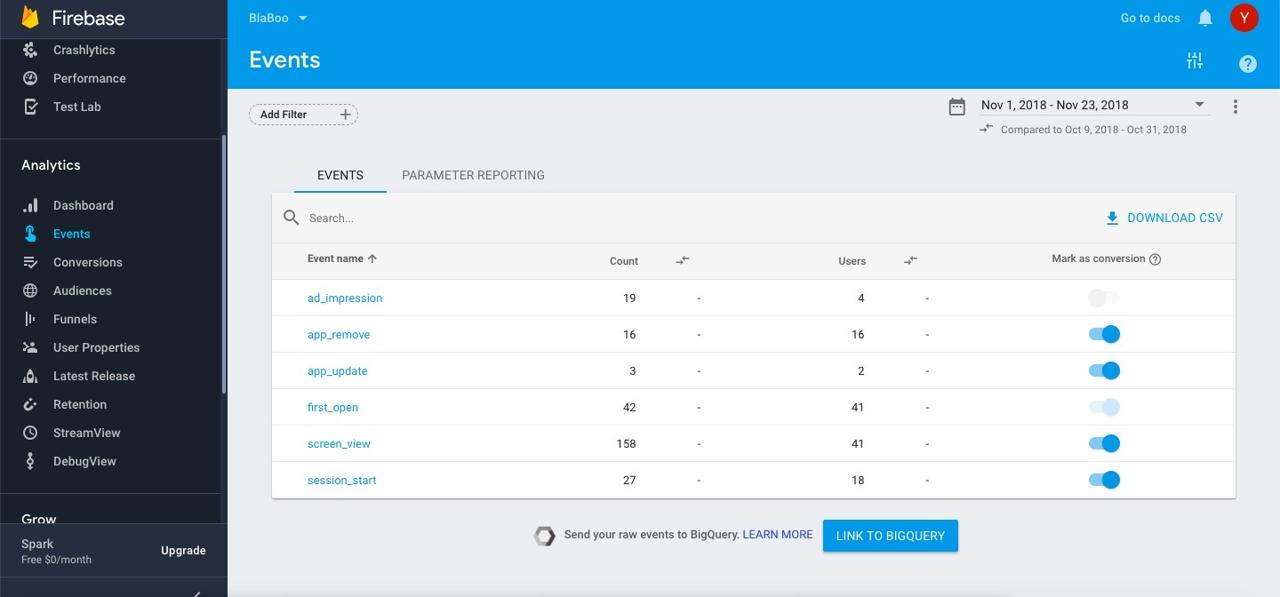
select screen_view in Event list.
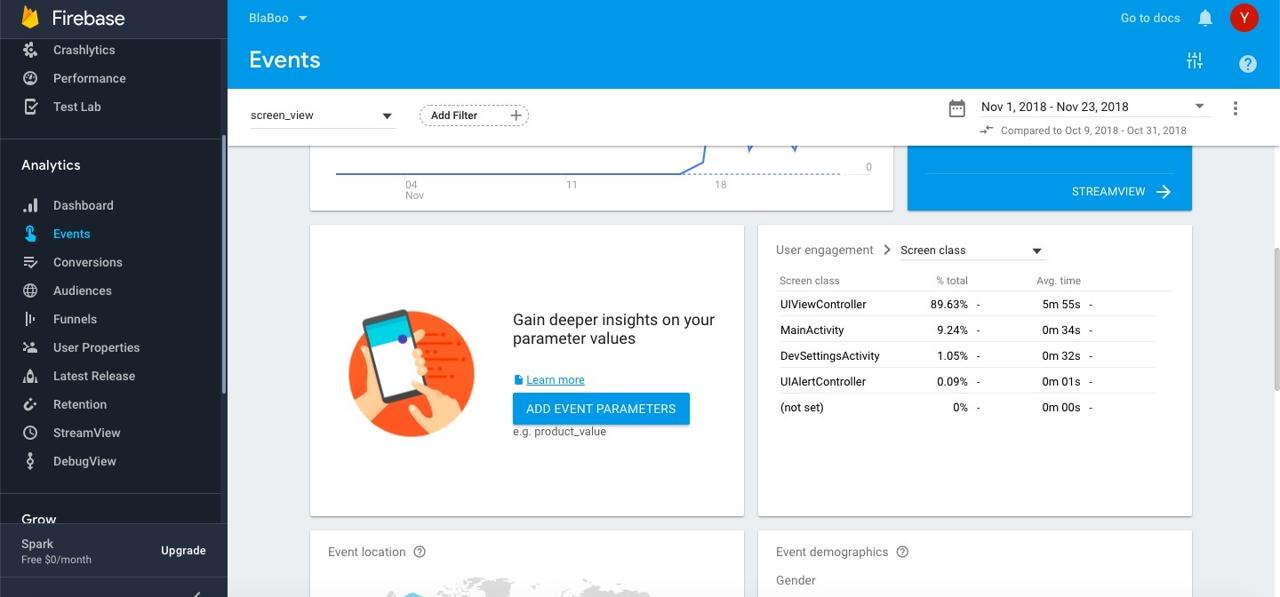
scroll down a little bit, you can see User engagement > Screen class.
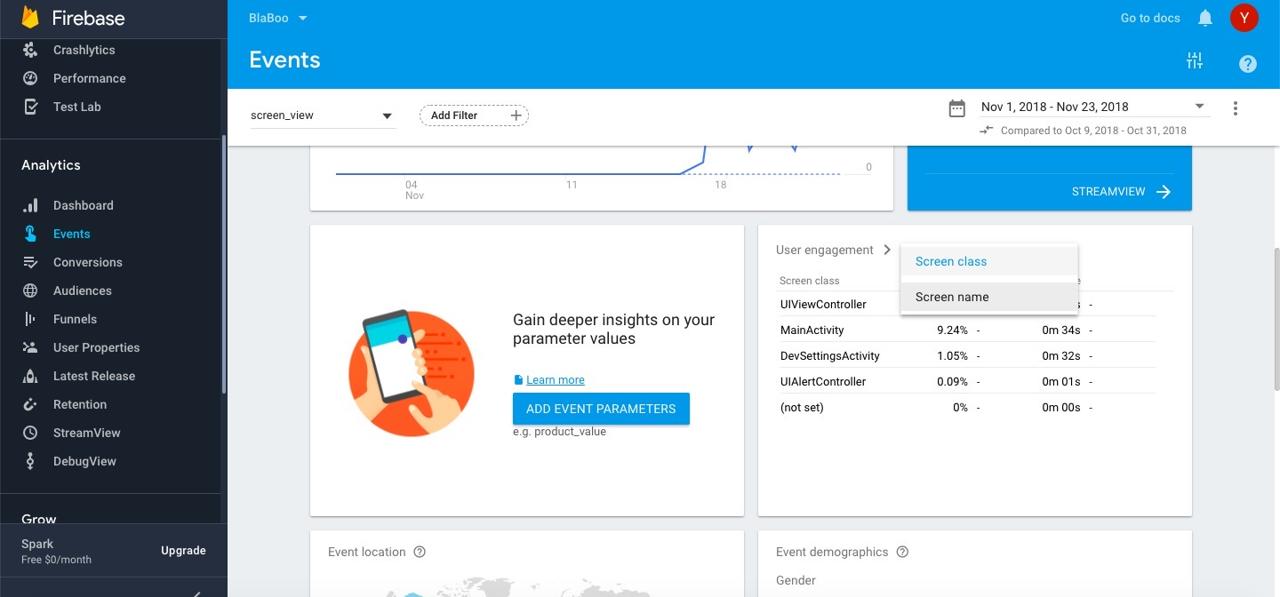
change Screen class to Screen name in User engagement.
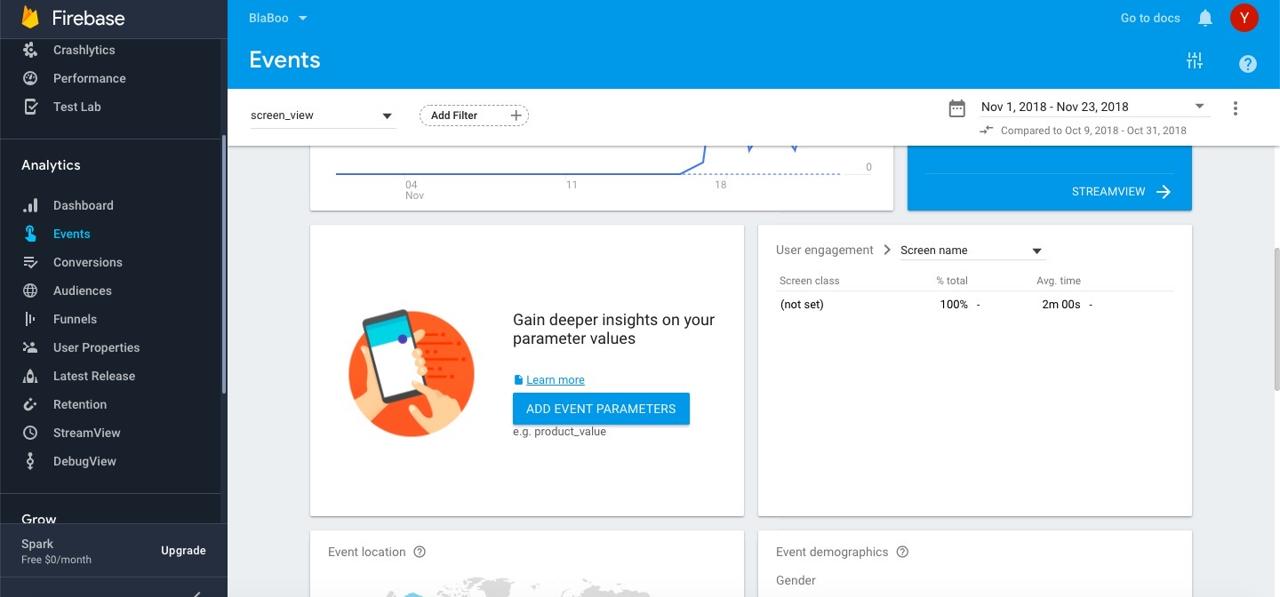
if you check up to here, you might feel it’s not enough. we can see only basic class in Screen class and there are no data in Screen name, so we can’t analyze which screens users have seen more.
so we decided to use setCurrentScreen in react-native-firebase feature to analyze screens users have seen.
add below code to screens you want to analyze.
render() {
    firebase.analytics().setCurrentScreen('HOME');
    ...
    return (
        ...
    );
}
insert App screen name to setCurrentScreen of react-native-firebase feature.
and after testing, we can see App screen name which we inserted to setCurrentScreen.
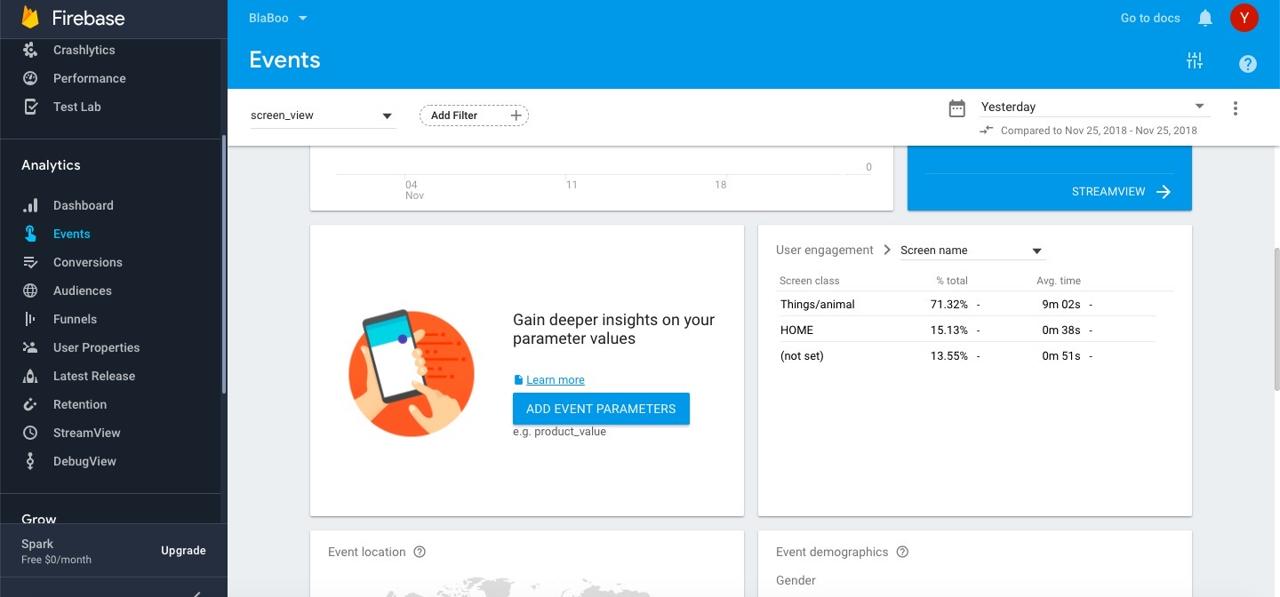
you can see real time analytics results in DebugView on Firebase Analytics.
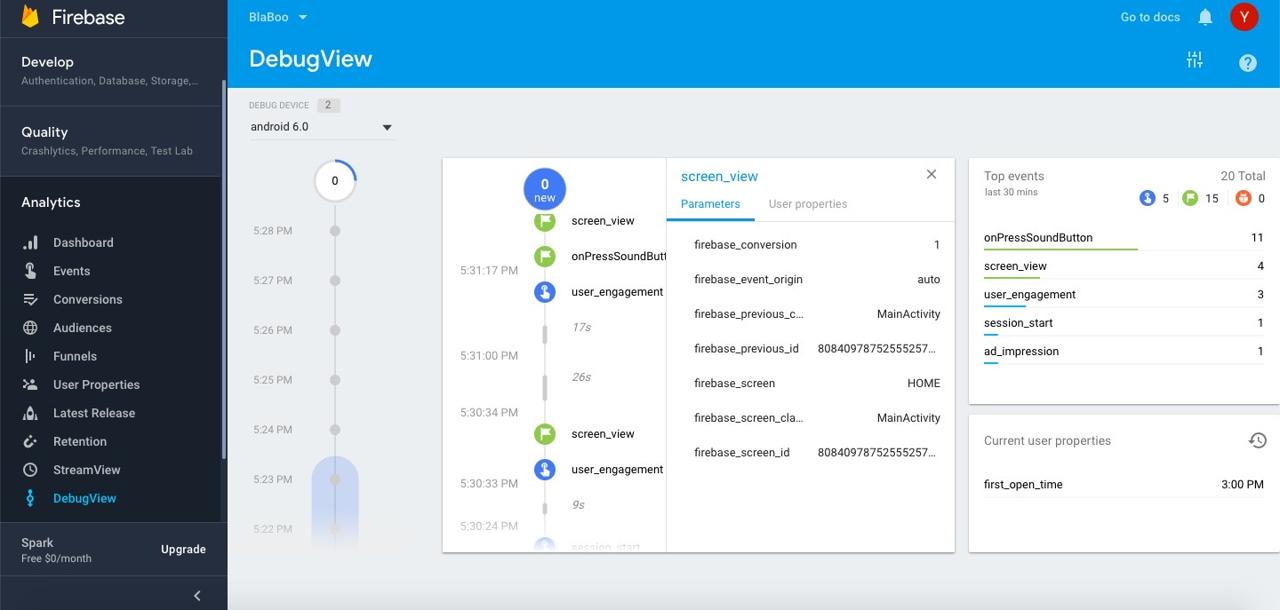
DebugView에서 해당 이벤트(screen_view)를 선택하면 위와 같이 상세 화면을 볼 수 있습니다.
analyze Custom Event
we could analyze which screen users have seen more by using setCurrentScreen but we don’t still know what actions users have done in screens. so let’s see how to use logEvent to add Custom Event in Firebase Analytics.
we added below code to analyze Custom Event in Firebase Analytics.
private _onSpeech = (Tts, text: string) => {
    firebase.analytics().logEvent('onPressSoundButton', { target: text });
    ...
}
logEvent first parameter only supports 100 english character and underbar(_).(up to 100 characters is the maximum character length supported for event parameters.) but our app is multi-language app and we want to know which actions in which languages. so we use second parameter for adding Custom Parameter to Custom Event. second parameter is Object type so we can make any parameters we want.
if you set Custom Parameter to Custom Event like above, you need to add to Firebase Console too.
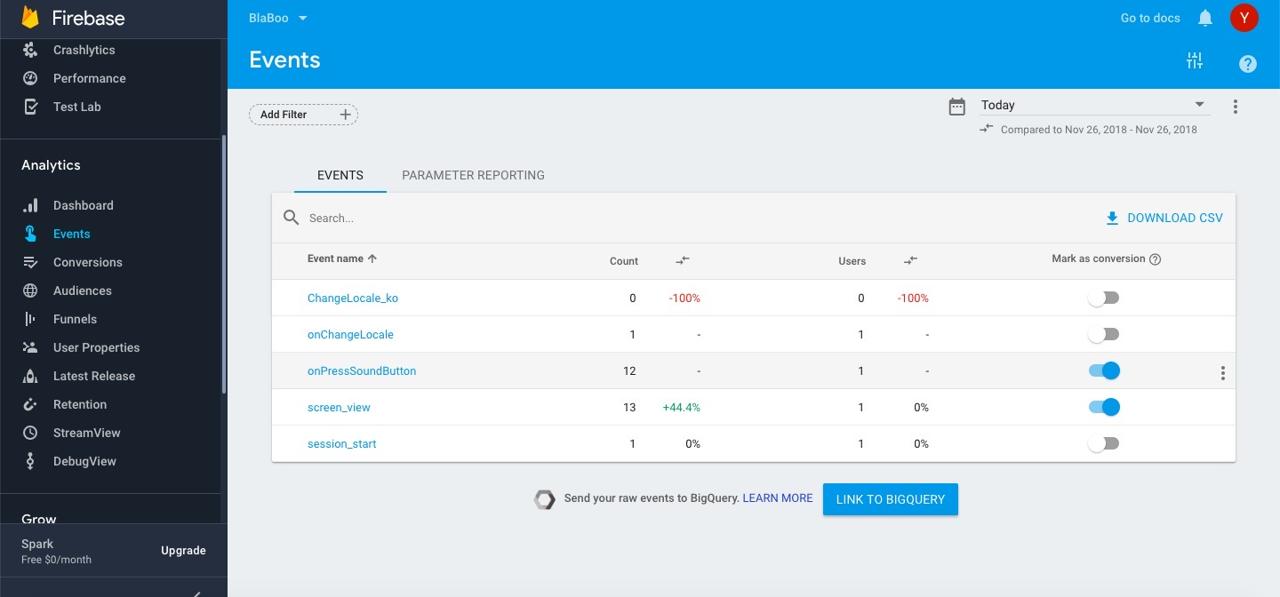
go to Analytics > Events menu, hover to Custom Event you added in Event list.
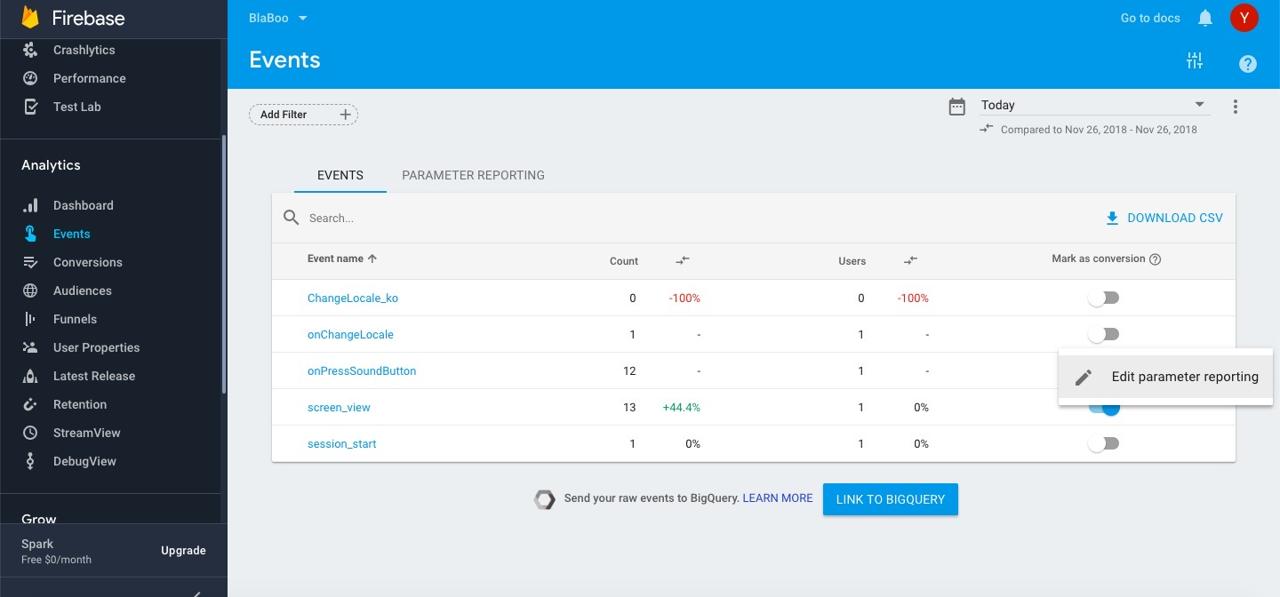
if you hover, you can see ... button. click it and select Edit parameter reporting.
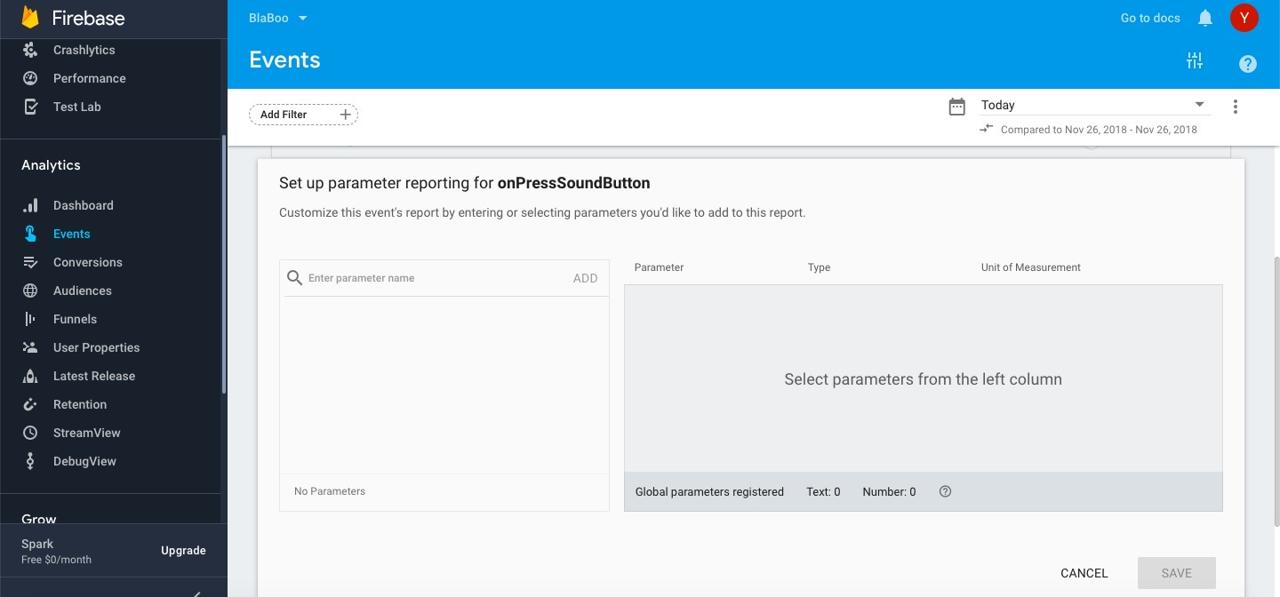
insert Custom Parameter of Custom Event to SearchBar on the left side and click ADD button to add Custom parameter.
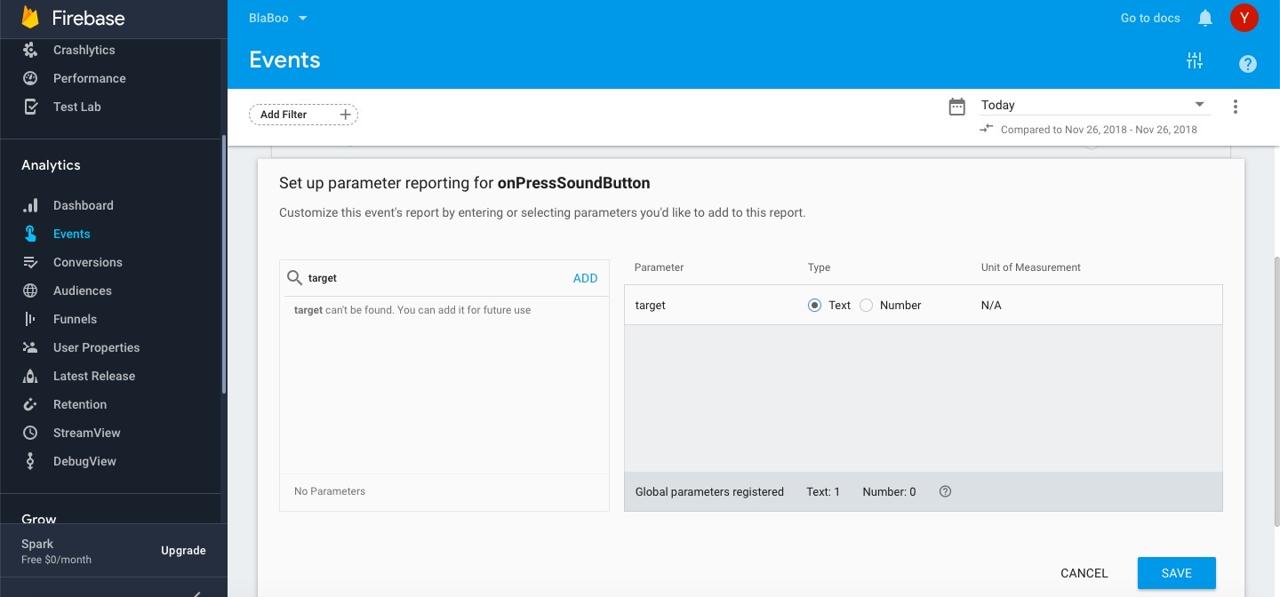
do test after adding. after some data are accumulating(almost one day), select Custom Event you added in Events menu.
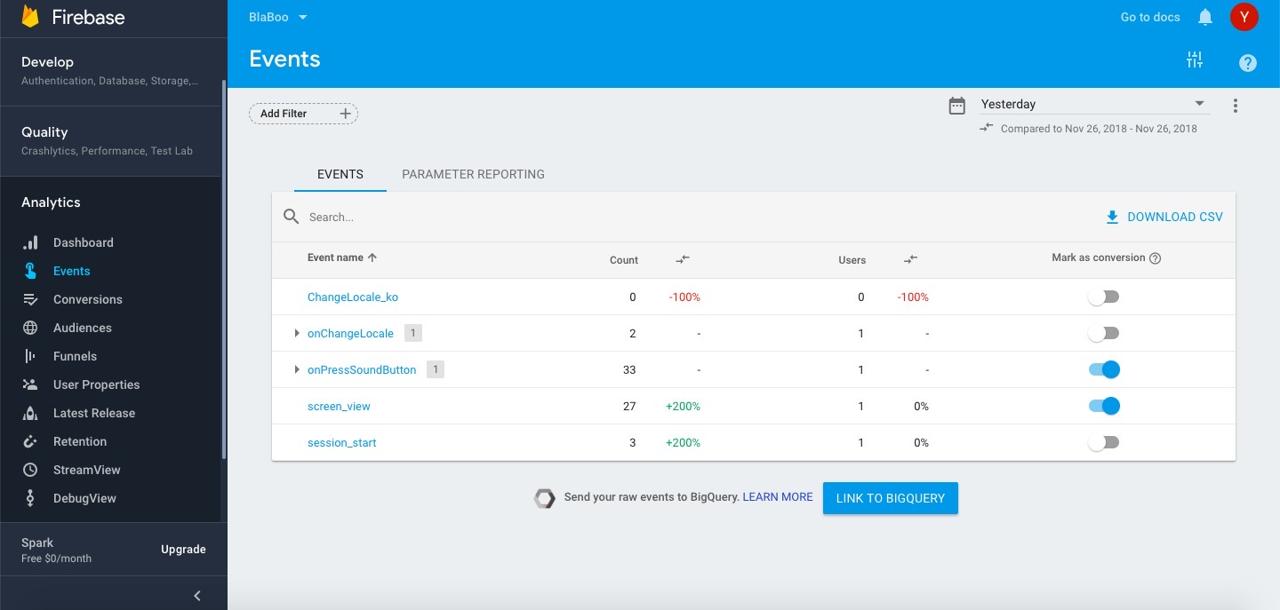
scroll down a little bit, you can see Custom Parameter analytics data you added.
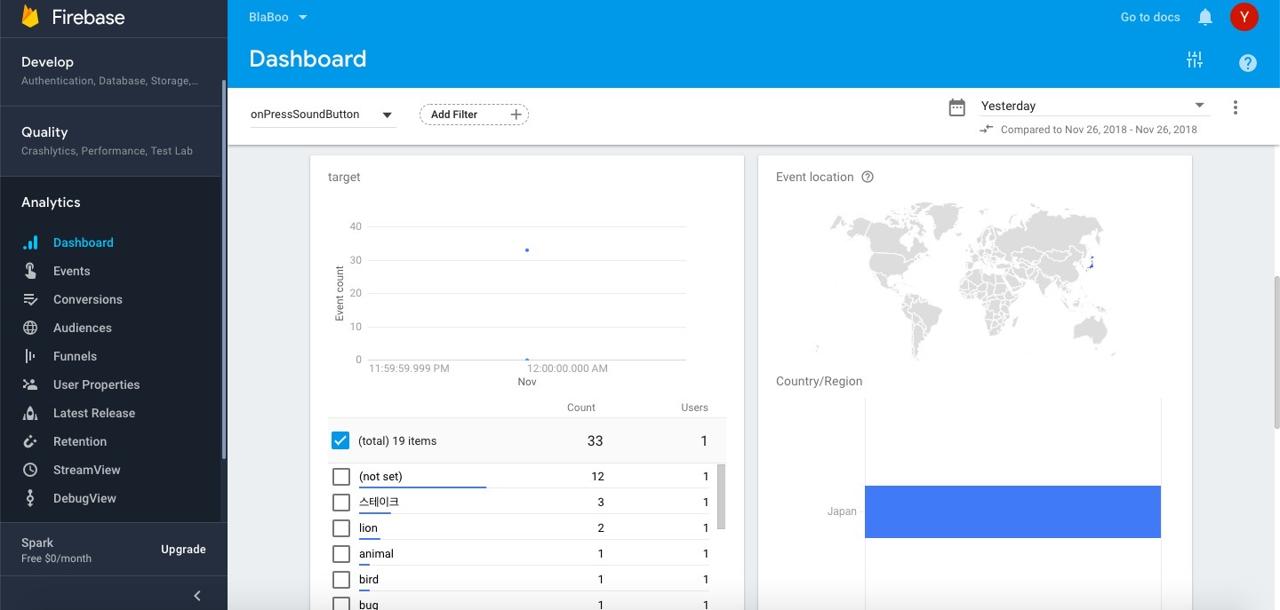
of course, you can see almost real time analytics results in Firebase Analytics DebugView.
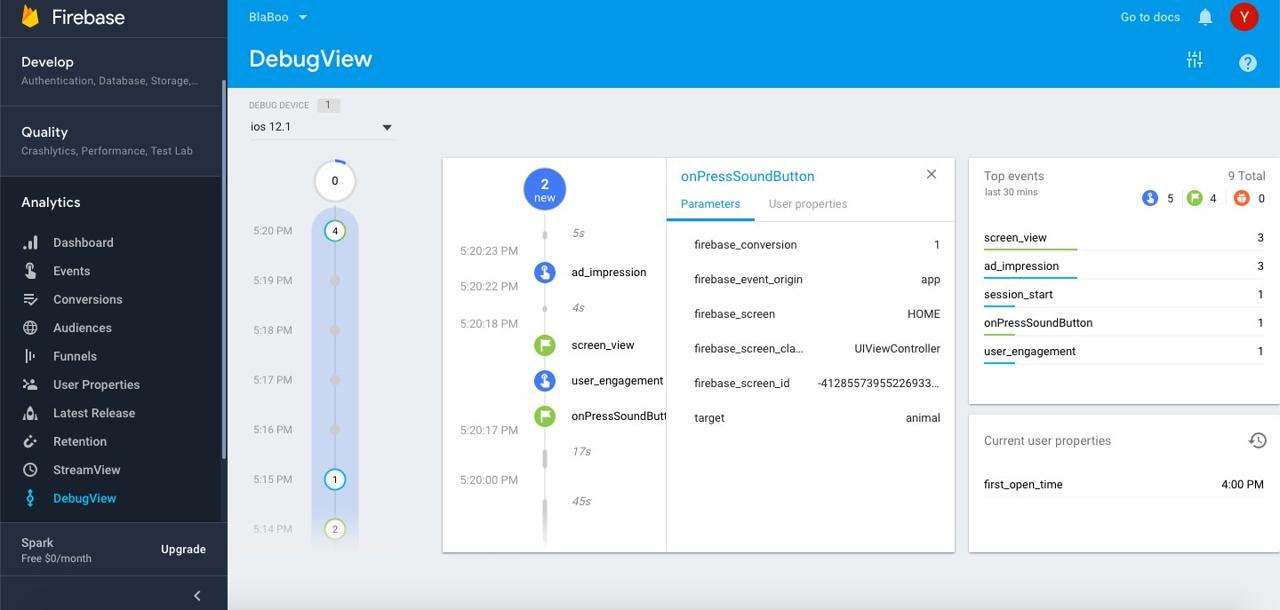
if you select Custom Event in DebugView, you can see details with Custom Parameter.
reference
- firebase debugging event: https://firebase.google.com/docs/analytics/debugview
- react-native-firebase: https://rnfirebase.io/docs/v5.x.x/analytics/reference/analytics
Was my blog helpful? Please leave a comment at the bottom. it will be a great help to me!
App promotion
Deku.Deku created the applications with Flutter.If you have interested, please try to download them for free.


