Contents
Outline
let’s see how to install and configure react-native development environment on Windows. If you want to know how to install react-native on Mac, see the blog post below.
you can use Expo CLI and React Native CLI to develop react-native app on Windows.
Expo CLI is the package includes many native features(geolocation, camera, etc) when you develop the app with react-native. At the first time, when you develop the react native with Expo CLI, you can feel easy and comfortable. However, this package includes many native features those you don’t use, and that makes the app build size bigger. Also, if you want to integrate the native feature which Expo CLI doesn’t include, it’s hard to make it. Therefore, this blog post doesn’t recommend to use Expo CLI.
This blog post is about how to install and configure React Native CLI environment. Also, we’ll create react-native project by React Native CLI and check it works well.
We need to install Nodejs, Watchman, Xcode, etc to develop the app by react-native. let’s see how to install them one by one.
Chocolatey
Chocolatey is a package manager on Windows to install and manage packages. We can install packages simply on Windows via Chocolatey.
- Chocolatey: https://chocolatey.org/
For installing Chocolatey, open Command Prompt(cmd) as Administrator, and execute the command below.
@"%SystemRoot%\System32\WindowsPowerShell\v1.0\powershell.exe" -NoProfile -InputFormat None -ExecutionPolicy Bypass -Command "iex ((New-Object System.Net.WebClient).DownloadString('https://chocolatey.org/install.ps1'))" && SET "PATH=%PATH%;%ALLUSERSPROFILE%\chocolatey\bin"After installing, reopen Command Prompt(cmd), and execute the command below to check Chocolatey is installed well.
choco –versionIf Chocolatey is installed well, you can see Chocolatey version on the screen.
0.10.15Nodejs
react-native is Javascript, so we need to install Nodejs that is Javascript runtime.
- Nodejs: https://nodejs.org/
Open Command Prompt(cmd) as Administrator, and execute Chocolatey command below to install Nodejs.
choco install -y nodejs.installAfter installing, reopen Command Prompt(cmd), and execute the command below to check Nodejs is installed well.
node -–versionIf Nodejs is installed well, you can see Nodejs version like below.
v12.6.0When Nodejs is installed, basically, npm (Node Package Manager) is also installed. Execute the command below to check npm is installed well.
npm --versionIf npm is installed well, you can see npm version like below.
6.9.0Python
React Native build system uses Python. Python is basically installed on Mac, so this procedure is not required, but on Windows, this is required.
Open Command Prompt(cmd) as Administrator, and execute Chocolatey command below to install Python
choco install -y python2After installing, we need to reboot the computer to use Python. After rebooting, open Command Prompt(cmd), and execute the command below to check Python is installed well.
python --versionIf Python is installed well, you can see Python version like below.
2.7.16React Native CLI
Let’s install React Native CLI to develop the app by react-native. Execute npm command below to install React Native CLI globally.
npm install -g react-native-cliAfter installing, execute the command below to check React Native CLI is installed well.
npx react-native --versionIf React Native CLI is installed well, you can see React Native CLI version like below.
react-native-cli: 2.0.1
react-native: n/a - not inside a React Native project
JDK
We need to install JDK(Java Development Kit) to develop Android app with react-native. open Command Prompt(cmd) as Administrator, and Execute Chocolatey command below to install JDK.
choco install -y jdk8After installing, reopen Command Prompt(cmd), and execute the command below to check Java is installed well.
java -versionIf Java is installed well via installing JDK, you can see Java version like below.
openjdk version "1.8.0_222"
OpenJDK Runtime Environment (AdoptOpenJDK)(build 1.8.0_222-b10)
OpenJDK 64-Bit Server VM (AdoptOpenJDK)(build 25.222-b10, mixed mode)
When JDK is installed, Java compiler is alo installed. Execute the command below to check Java compiler is also installed well.
javac -versionIf Java compiler is installed well via installing JDK, Java compiler version is shown up like below.
javac 1.8.0_222Android Studio
We need to install Android Studio to develop Android app with react-native. Click the link below to go to Android Studio site and download the installation file.
- Android Studio: https://developer.android.com/studio
After downloading, execute the installation file to install Android Studio.
Android Studio Configuration
you can see the screen like below after executing Android Studio installation file.
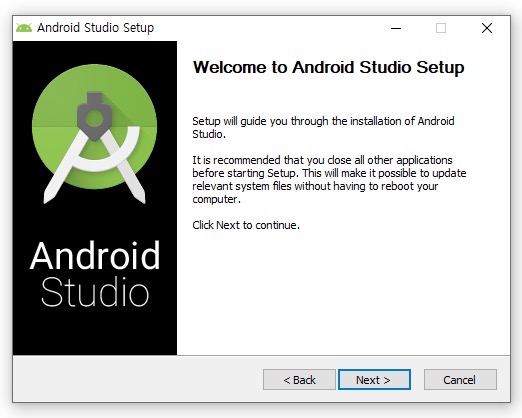
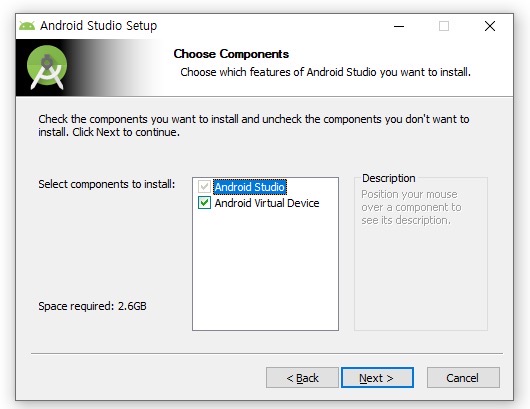
Click Next button to go to next screen. When you go to next screen, you can see Choose Components screen like below. Select Android Virtual Device and click Next button to go to next screen.
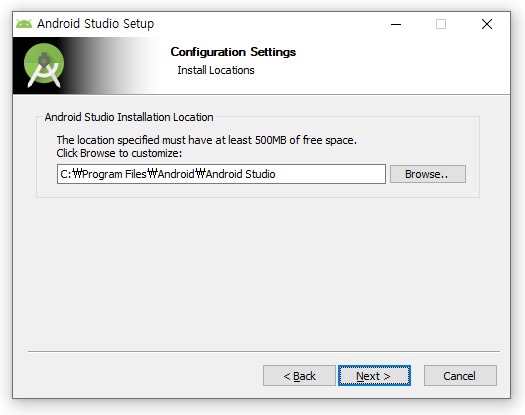
When you go to next screen, you can see Android Studio Install Path screen like below. set Install Path or keep default, click Next button to go to next screen.
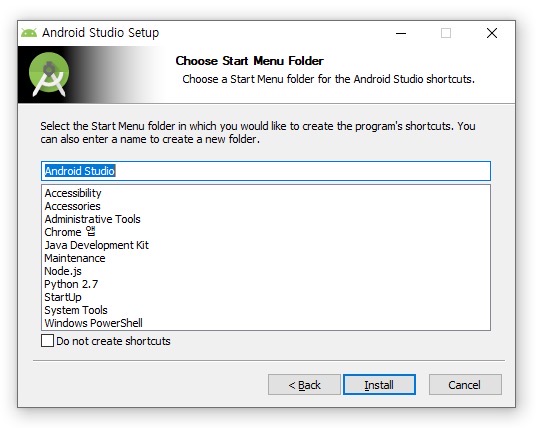
When you go to next screen, you can see Start Menu setting screen like below. Just click Install button to install.
After installing, you can see the screen like below. Click Next button to complete Android Studio installation.
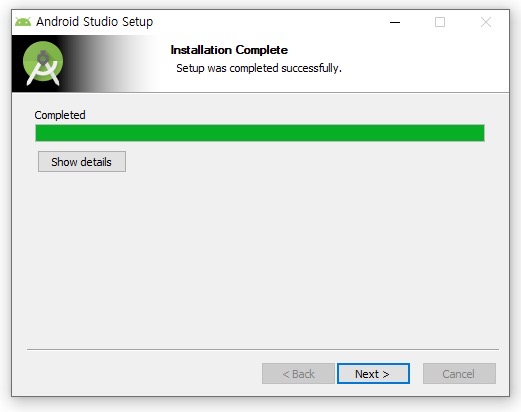
When you click Next button to complete the installation, you can see the screen like below. Check Start Android Studio and click Finish button to finish Android Studio installation.
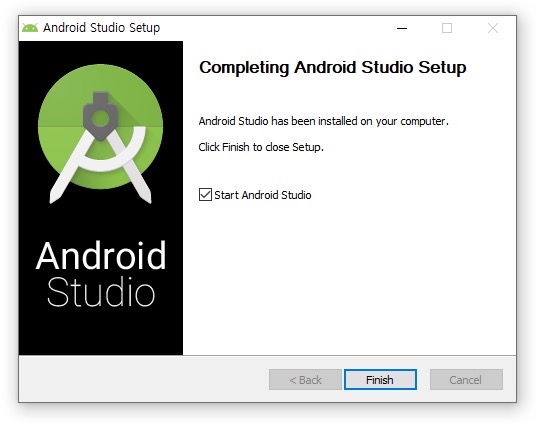
When you click Finish button, you can see Android Studio is executed like below. Select Do not import settings, and click OK button to execute Android Studio.
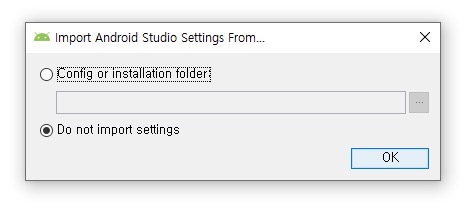
When you click OK button to execute Android Studio, you can see Android Studio Setup Wizard like below. Click Next button to go to next screen.
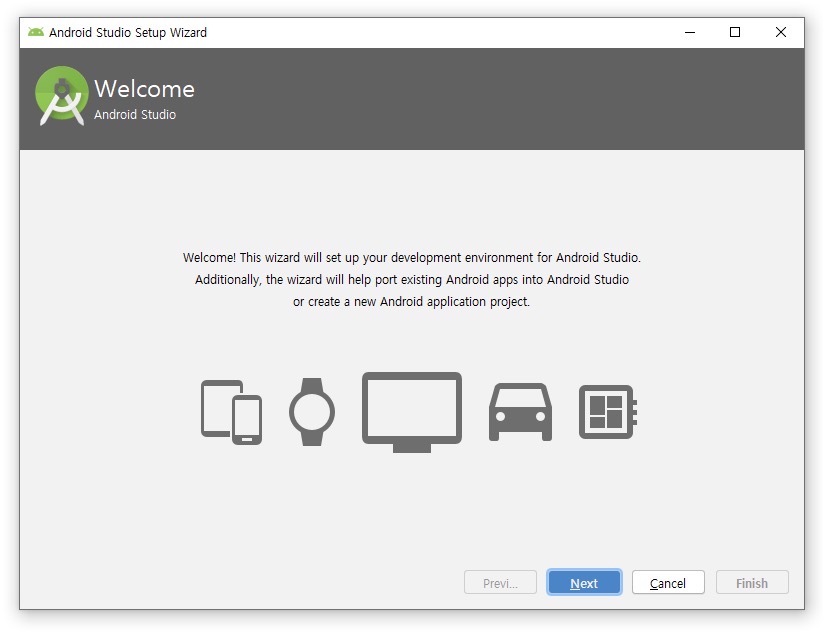
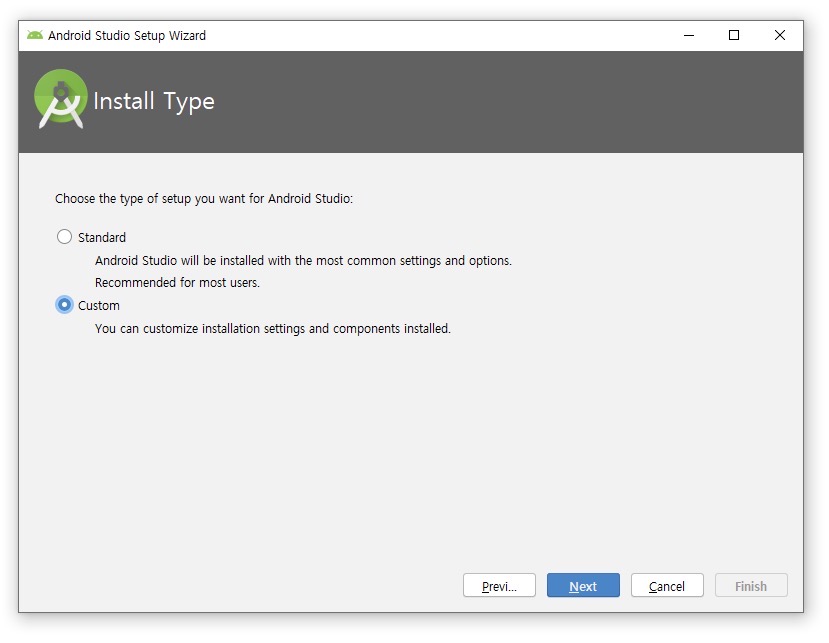
When you go to next screen, you can see Install Type screen like below. Select Custom and click Next button to go to next screen.
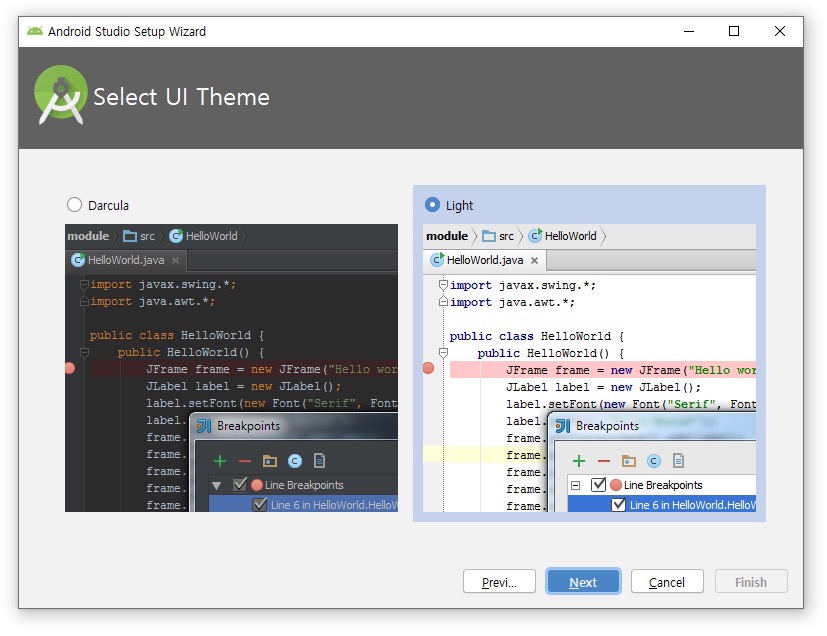
When you go to next screen, you can see Select UI Theme screen like below. Select the theme which you like, and click Next button to go to the next screen.
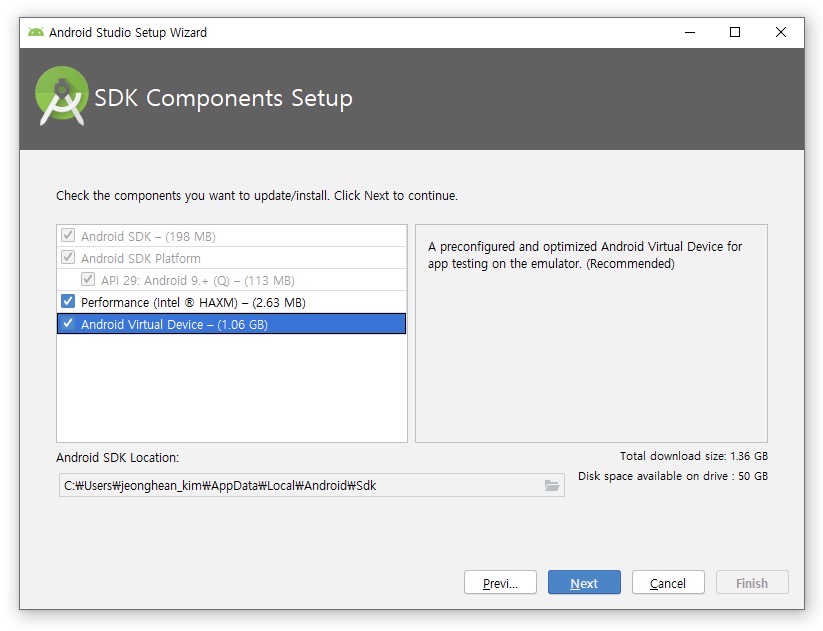
When you go to the next screen, you can see SDK Components Setup screen like below. Select Performance (Intel ® HAXM) option and Android Virtual Device option, and click Next button.
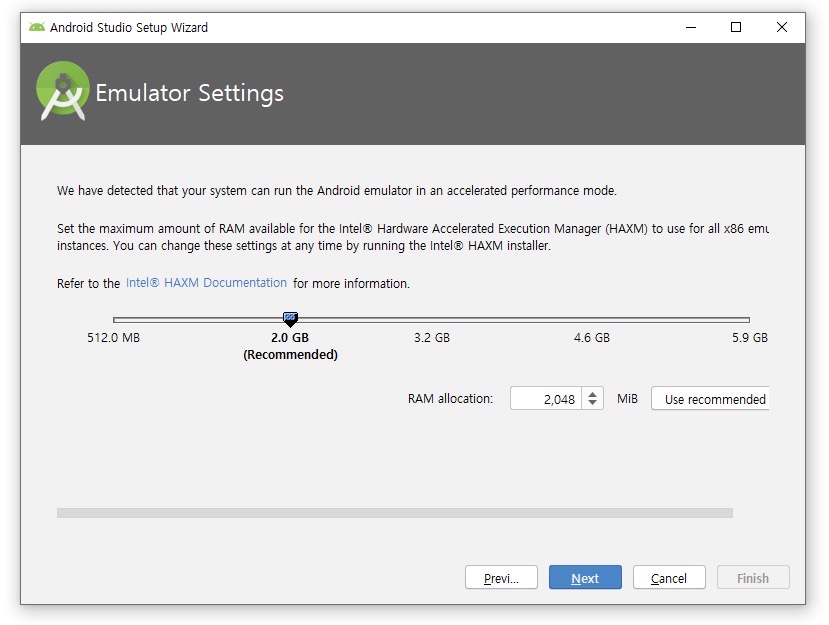
on the next screen, you can see Emulator Settings screen like below. Click Next button without any changing especially.
the next process is just normal program installation, so I don’t explain the detail. Just click Finish button to continue Android studio installation to complete it.
After Android studio installation, you can see Android studio is executed like below.
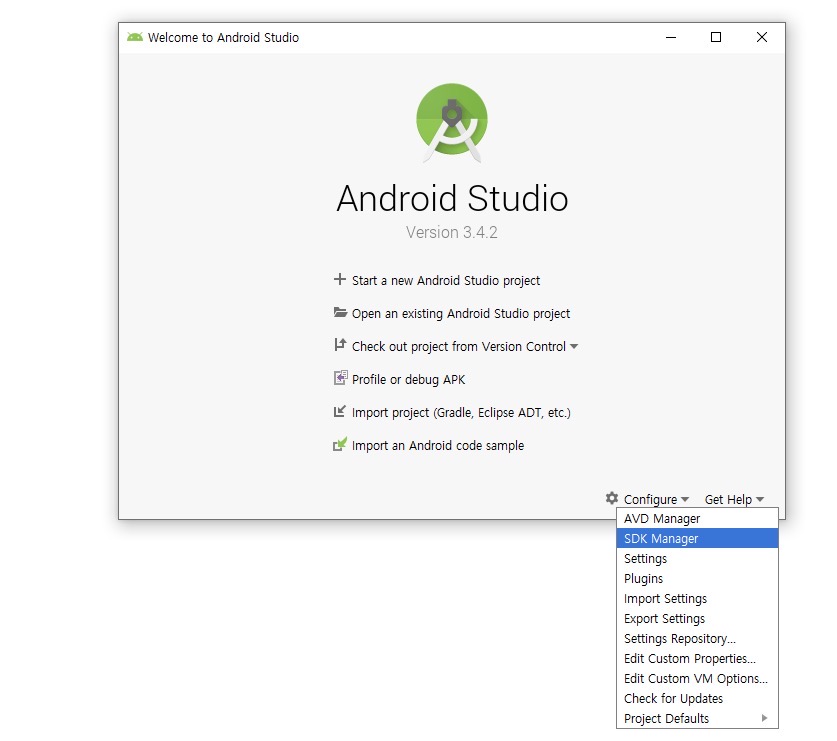
Android Studio SDK Configuration
Click Configure > SDK Manger menu on the right bottom to go to Android SDK configuration.
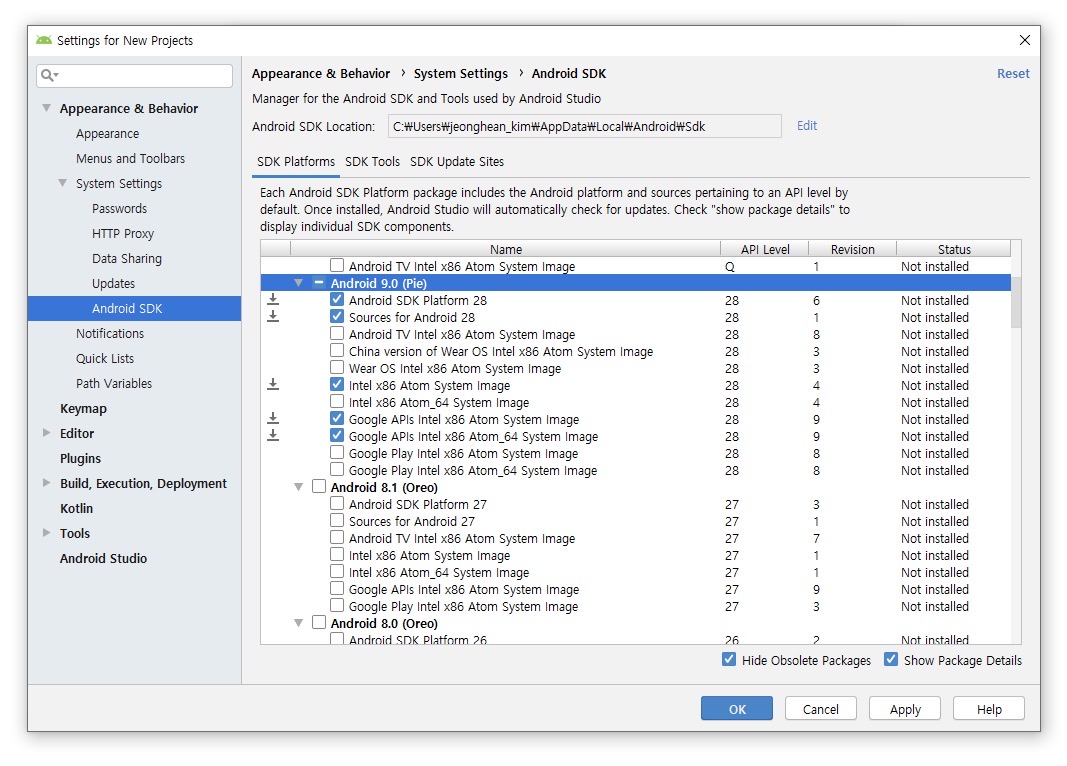
When the screen is shown up like below, select Show Package Details option on the right bottom. find and select the options below on the list.
- Android SDK Platform 29
- Intel x86 Atom System Image
- Google APIs Intel x86 Atom System Image
- Google APIs Intel x86 Atom_64 System Image
If you select all options above, click OK button on the right bottom to install them.
Configure Android Studio Environment Variable
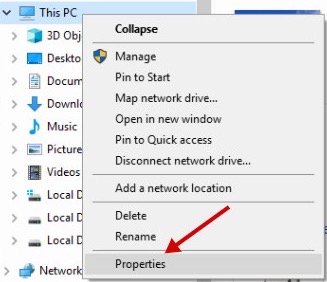
Android studio installation and configuration are done. Now, we need to set the environment variables. Right-click This PC and click Properties menu like below.
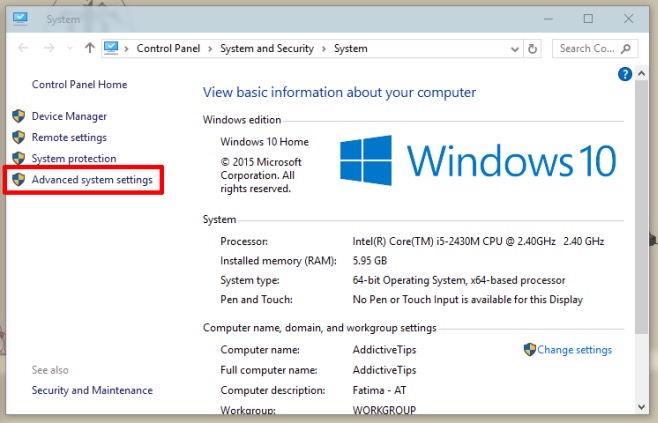
When you click Properties menu, you can see System and Security screen. Click Advanced System settings on the left menu list.
When you click Advanced System settings menu, you can see System properties screen like below. Click Advanced tab, and select Environment Variables button on the bottom of Advanced tab.
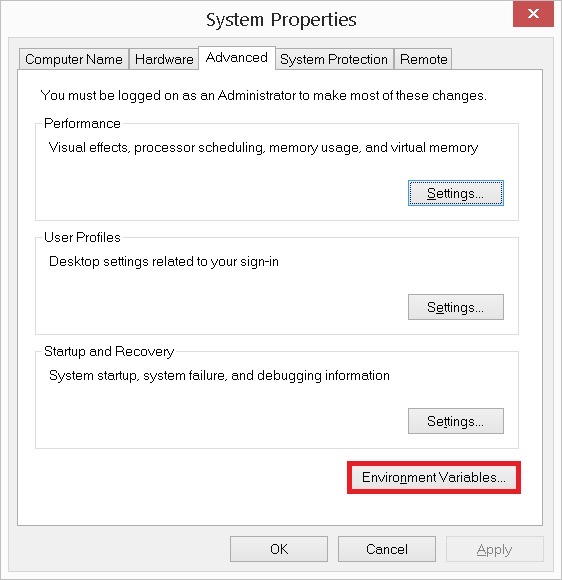
When you click Environment Variables button, you can see the dialog like below. Click New button on User variables for your name section.
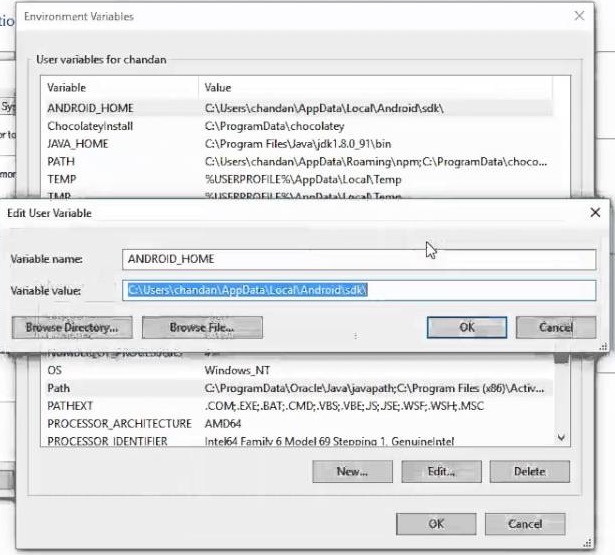
When you see the dialog like above, insert ANDROID_HOME to Variable name, and your Android Studio SDK path to Variable value. If you don’t know your Android Studio SDK path, execute ANdroid Studio SDK configuration screen like below. you can see Android Studio SDK location on the top of the Android Studio SDK configuration screen.

When you’ve added ANDROID_HOME environment variable, you need to set Android Studio platform-tools path. Click Path variable on User variables for your name list to go to the edit dialog.
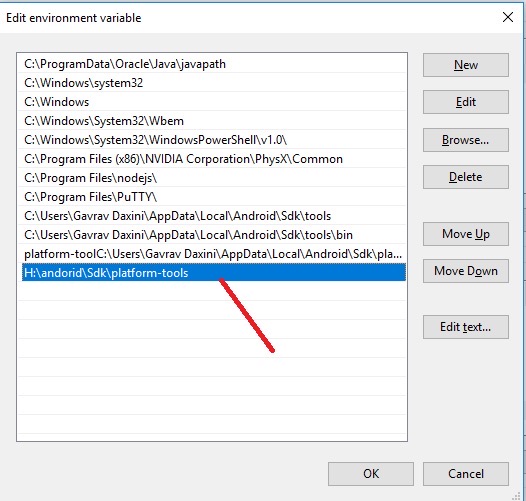
When you can see the screen like above, insert platform-tools folder path in Android SDK path like C:\Users\[user name]\AppData\Local\Android\Sdk\platform-tools to the bottom of the list and click OK button.
After that, open Command Prompt(cmd) and execute the command below.
adbIf the environment variables are configured well, you can see the result like below.
Android Debug Bridge version 1.0.41
Version 29.0.1-5644136
Installed as /Users/dev-yakuza/Library/Android/sdk/platform-tools/adb
Create & Check react-native Project
Execute React Native CLI command below to create react-native project.
npx react-native init SampleAppCheck on Android
In Android, execute the command below after connecting the device that the developer mode is activated via USB or executing Android studio emulator.
cd SampleApp
# react-native run-android
npm run android
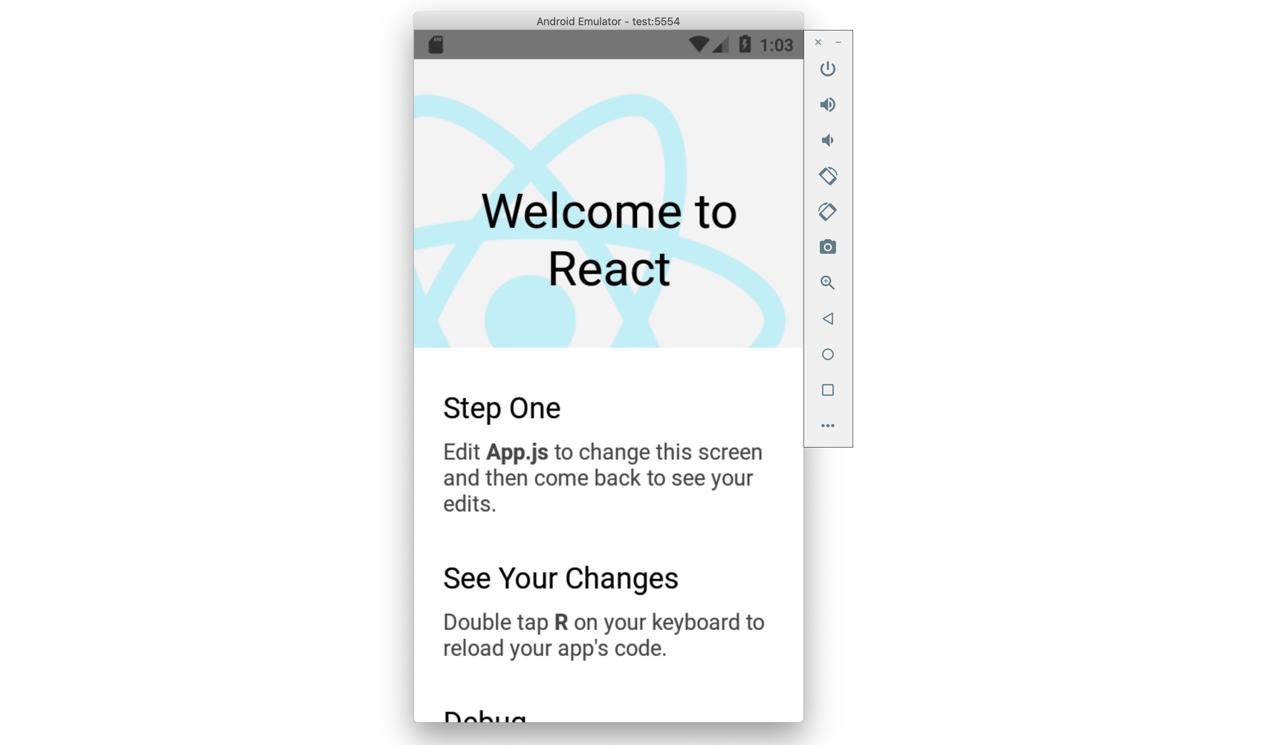
If you don’t have any problem, you can see the screen like below.
Completed
We’ve seen how to install and configure react-native to develop the app on Windows. Also, We’ve created the app by React Native CLI and executed it to check the environment is configured well.
Now, we are ready to develop the app with react-native. Let’s dive to the react-native development world!
Was my blog helpful? Please leave a comment at the bottom. it will be a great help to me!
App promotion
Deku.Deku created the applications with Flutter.If you have interested, please try to download them for free.


