Content
Outline
we want to register RN(React Native) Android App to Android App store(Google Play). we need to enroll Android Developer(Google Play Developer) to register Android App to Android App store(Google Play). if you didn’t enroll Android Developer(Google Play Developer), see our previous blog to enroll Android Developer(Google Play Developer).(enroll Android developer)
this blog post is a series. it’s better to see below together.
- Android device test
- Android build and test
- enroll Android developer
- Deploy automatically applications via Fastlane
Prepare
we need RN(React Native) Android App build to register Android App store(Google Play). if you don’t know how to register Android Signing Key and how to build, see our previous blog.
Reduce Build File size
in previous blog(Android build and test), Android build we generated is not minimum file size. we need to reduce RN(React Native) Android build file size to upload Android App store(Google Play).
open android/app/build.gradle in RN(React Native) project folder and modify like below.
...
defaultConfig {
    ...
    // ndk {
    //     abiFilters "armeabi-v7a", "x86"
    // }
}
...
def enableSeparateBuildPerCPUArchitecture = true

def enableProguardInReleaseBuilds = true
...
buildTypes {
    release {
        shrinkResources true
        ...
    }
}
..
- enableSeparateBuildPerCPUArchitecture: When React Native is built to apk file, apk files will be separated for each CPU. The apk file will not include other CPU apk file contents, so the file size will be smaller. However, the multiple apk files are generated, so you need to upload all files to deploy the app.
- enableProguardInReleaseBuilds: Make Proguard activate for the code obfuscation. Proguard does the code obfuscation and also makes the code size smaller, so the file size will be smaller.
- shrinkResources: Remove unused resources, so the file size will be smaller.(If you can’t see the local images on the App after setting true, change it to false.)
and then, execute below command to build RN(React Native) Android App.
# react-native bundle --platform android --dev false --entry-file index.js --bundle-output android/app/src/main/assets/index.android.bundle
# cd android
# ./gradlew assembleRelease
./gradlew app:assembleRelease --stacktrace
in here, I added --stacktrace option, because sometimes build errors occurs when enableProguardInReleaseBuilds = true is set.
...
Note: the configuration keeps the entry point 'okhttp3.internal.ws.WebSocketWriter { void writePong(okio.ByteString); }', but not the descriptor class 'okio.ByteString'
Note: the configuration keeps the entry point 'okhttp3.internal.ws.WebSocketWriter { void writeClose(int,okio.ByteString); }', but not the descriptor class 'okio.ByteString'
Note: the configuration keeps the entry point 'okhttp3.internal.ws.WebSocketWriter { void writeControlFrame(int,okio.ByteString); }', but not the descriptor class 'okio.ByteString'
Note: the configuration keeps the entry point 'okhttp3.internal.ws.WebSocketWriter$FrameSink { void write(okio.Buffer,long); }', but not the descriptor class 'okio.Buffer'
Note: the configuration keeps the entry point 'okio.AsyncTimeout { void scheduleTimeout(okio.AsyncTimeout,long,boolean); }', but not the descriptor class 'okio.AsyncTimeout'
Note: the configuration keeps the entry point 'okio.AsyncTimeout { boolean cancelScheduledTimeout(okio.AsyncTimeout); }', but not the descriptor class 'okio.AsyncTimeout'
Note: the configuration keeps the entry point 'okio.AsyncTimeout { okio.Sink sink(okio.Sink); }', but not the descriptor class 'okio.Sink'
Note: the configuration keeps the entry point 'okio.AsyncTimeout { okio.Source source(okio.Source); }', but not the descriptor class 'okio.Source'
Note: the configuration keeps the entry point 'okio.ForwardingSink { ForwardingSink(okio.Sink); }', but not the descriptor class 'okio.Sink'
Note: the configuration keeps the entry point 'okio.ForwardingSink { void write(okio.Buffer,long); }', but not the descriptor class 'okio.Buffer'
Note: the configuration keeps the entry point 'okio.ForwardingSource { ForwardingSource(okio.Source); }', but not the descriptor class 'okio.Source'
Note: the configuration keeps the entry point 'okio.ForwardingSource { long read(okio.Buffer,long); }', but not the descriptor class 'okio.Buffer'
...
* What went wrong:
Execution failed for task ':app:transformClassesAndResourcesWithProguardForRelease'.
> Job failed, see logs for details
...
if you see the build error like above, modify android/app/proguard-rules.pro file like below.
# Note: the configuration keeps the entry point 'okio.AsyncTimeout { void scheduleTimeout(okio.AsyncTimeout,long,boolean); }', but not the descriptor class 'okio.AsyncTimeout
-dontwarn okio.**
# Note: the configuration keeps the entry point 'okhttp3.internal.ws.WebSocketWriter$FrameSink { void write(okio.Buffer,long); }', but not the descriptor class 'okio.Buffer'
-dontwarn okhttp3.**
you could get more build errors depends on what libraries you use. if you get more errors, check the error message and modify android/app/proguard-rules.pro.
you can find build files on below path.
android/app/build/outputs/apk/release/app-arm64-v8a-release.apk.apk
android/app/build/outputs/apk/release/app-armeabi-v7a-release.apk.apk
android/app/build/outputs/apk/release/app-x86_64-release.apk.apk
android/app/build/outputs/apk/release/app-x86-release.apk.apk
we need to upload all these files.
Register App
click below link to go to Google Play Console..
- Google Play Console: https://play.google.com/apps/publish/
when you go to Google Play Console, you can see below screen.
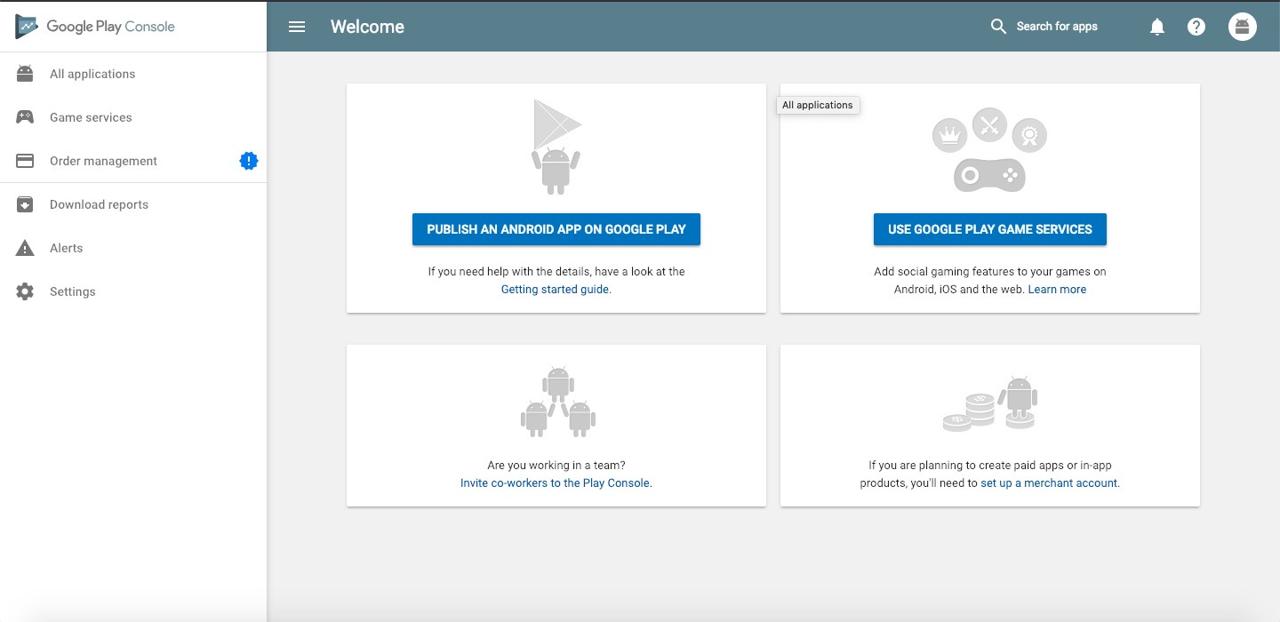
click PUBLISH AN ANDROID APP ON GOOGLE PLAY button on top of the screen.
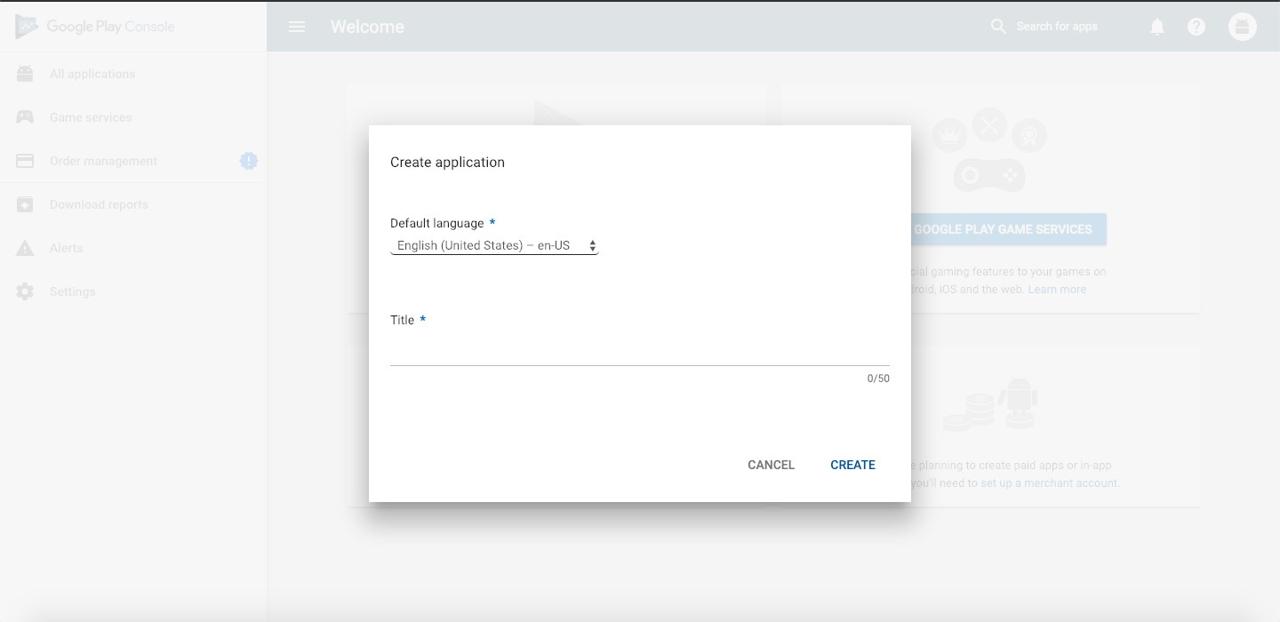
insert App name and default language to display on Android App store(Google Play).
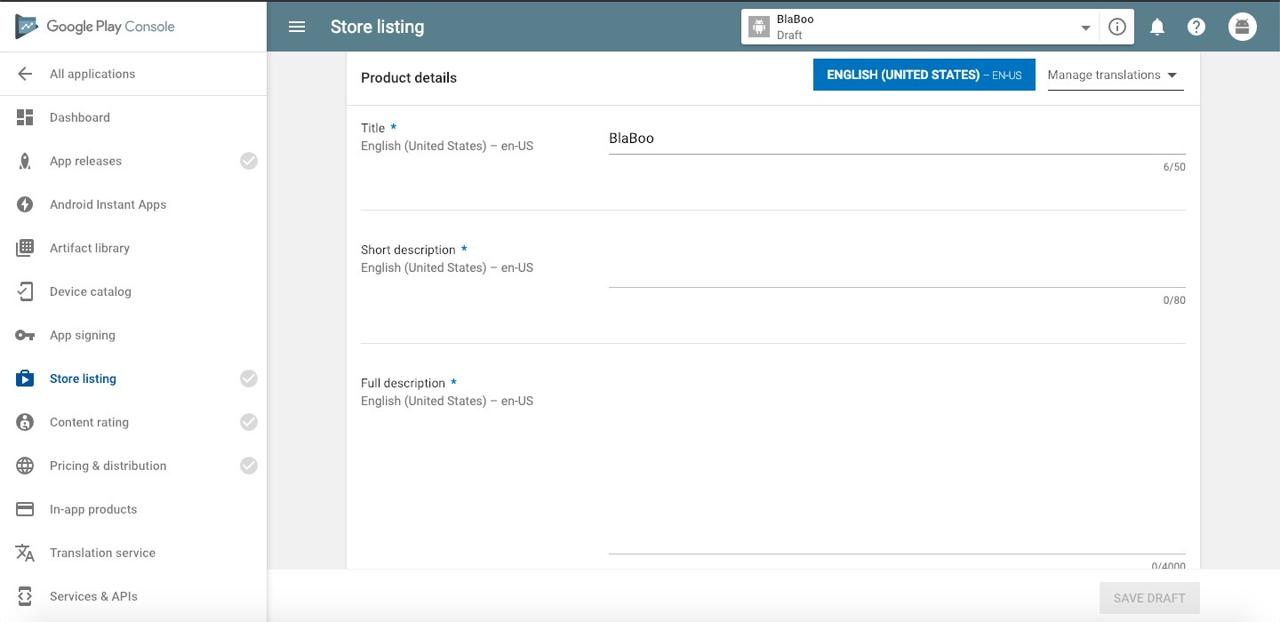
insert App information to display on Android App store(Google Play).
- Title: 50 characters
- Short description): 80 characters
- Full description): 4000 characters
- App Screenshots
- App icon: 512x512(32-bit PNG, alpha), 1024x500(JPG or 24-bit PNG), 180x120(JPG or 24-bit PNG), 1280x720(JPG or 24-bit PNG), 4096x4096(JPG or 24-bit PNG)
- Promo Video
- App Category
- Developer’s Contact details
- Privacy Policy
if you finished to insert above information, let’s see how to register apk file.
when you click App release menu on the left of the screen, you can see below screen.
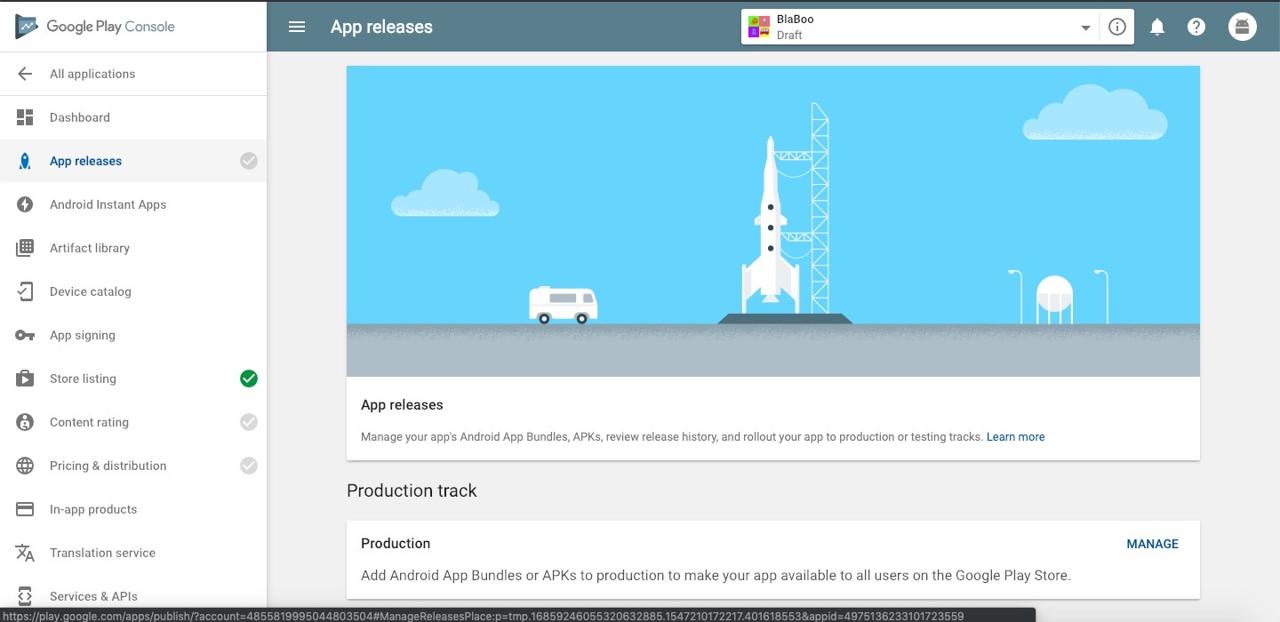
click MANAGE button on the Production in Production track section.
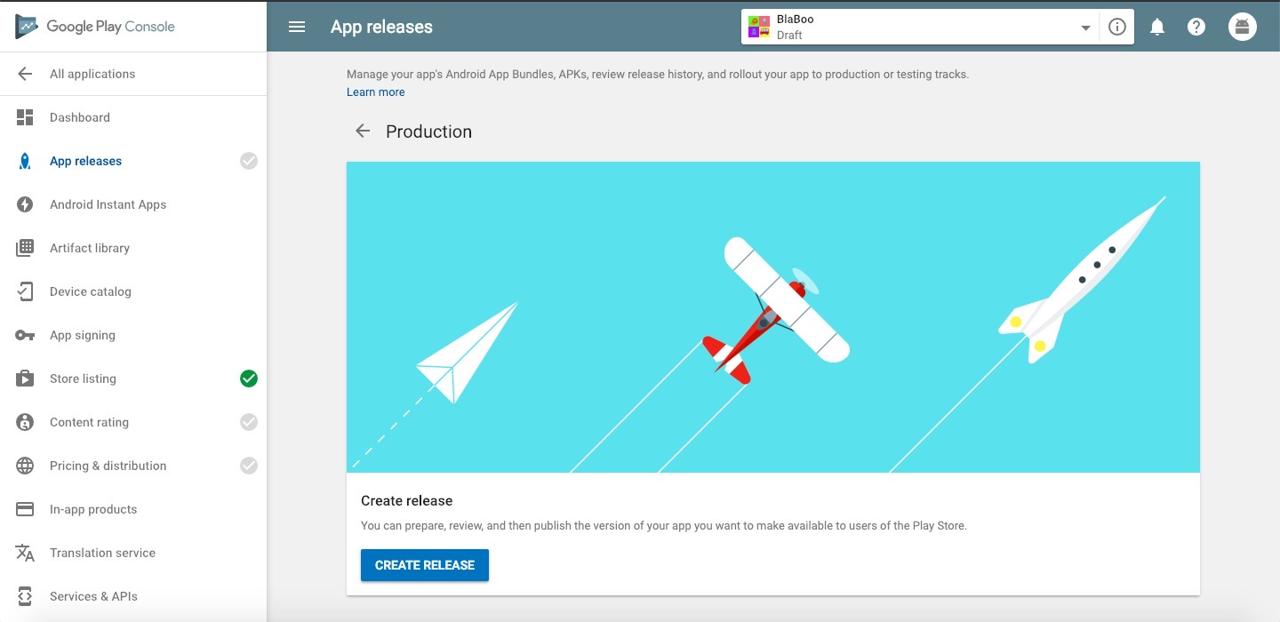
when you see above screen, click CREATE RELEASE on the bottom of the screen.
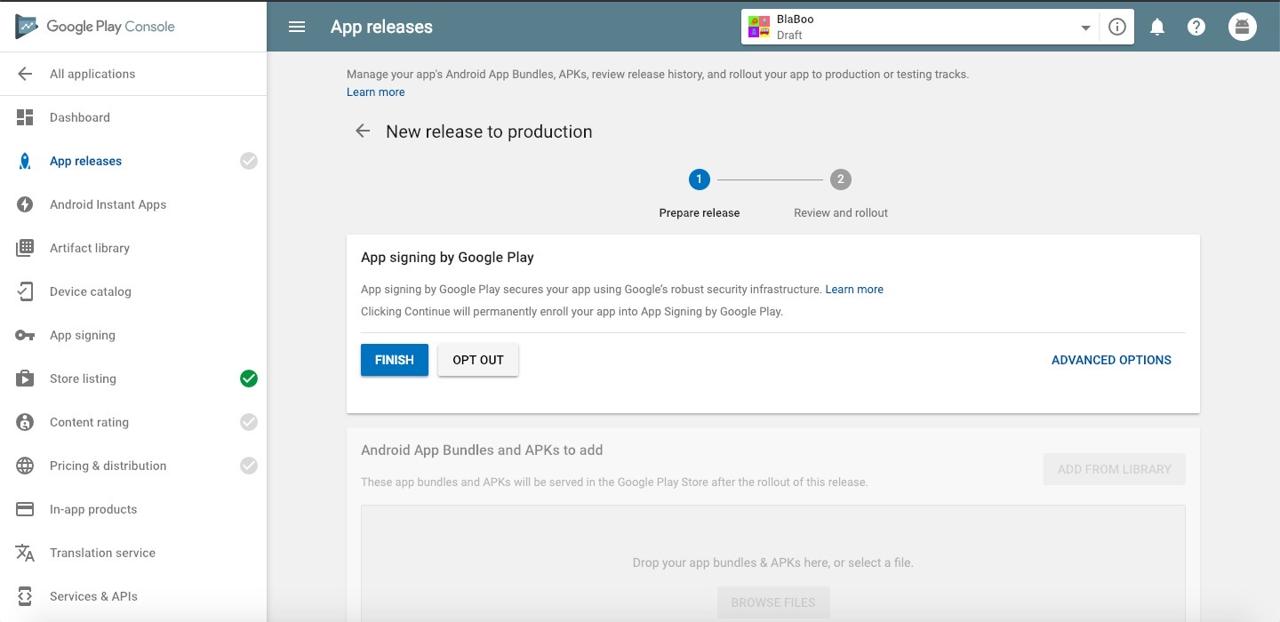
if you want to do App Signing by Google Play, click FINISH button.
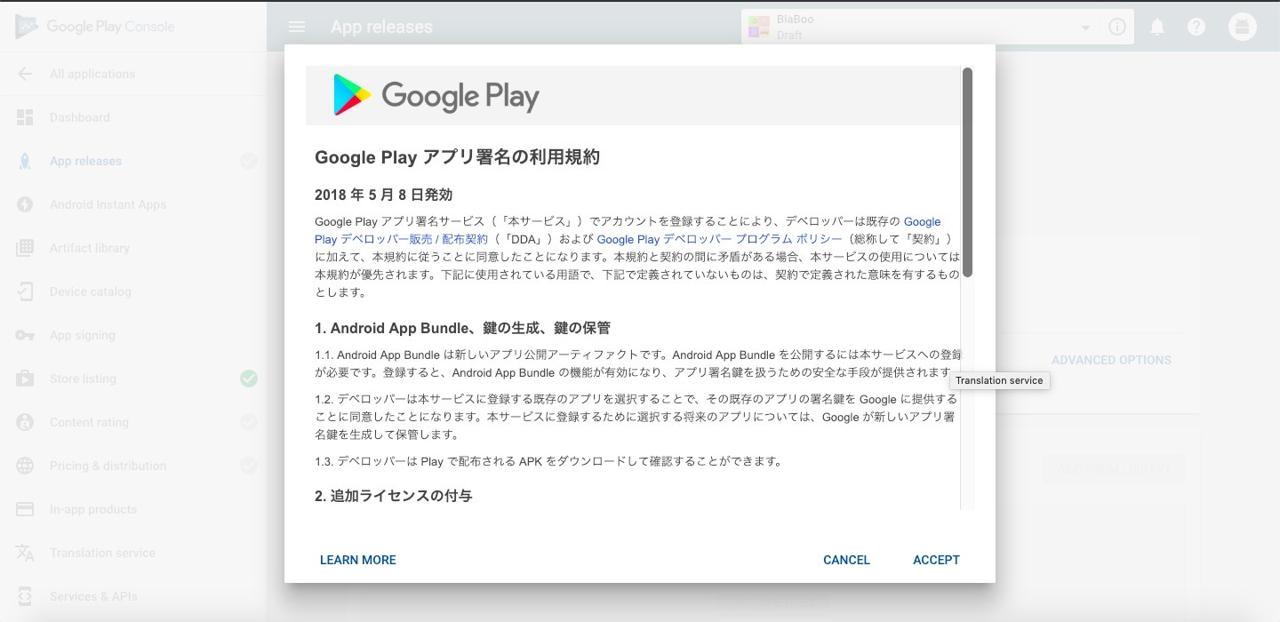
when you see above screen, click ACCEPT button to accept the agreement.
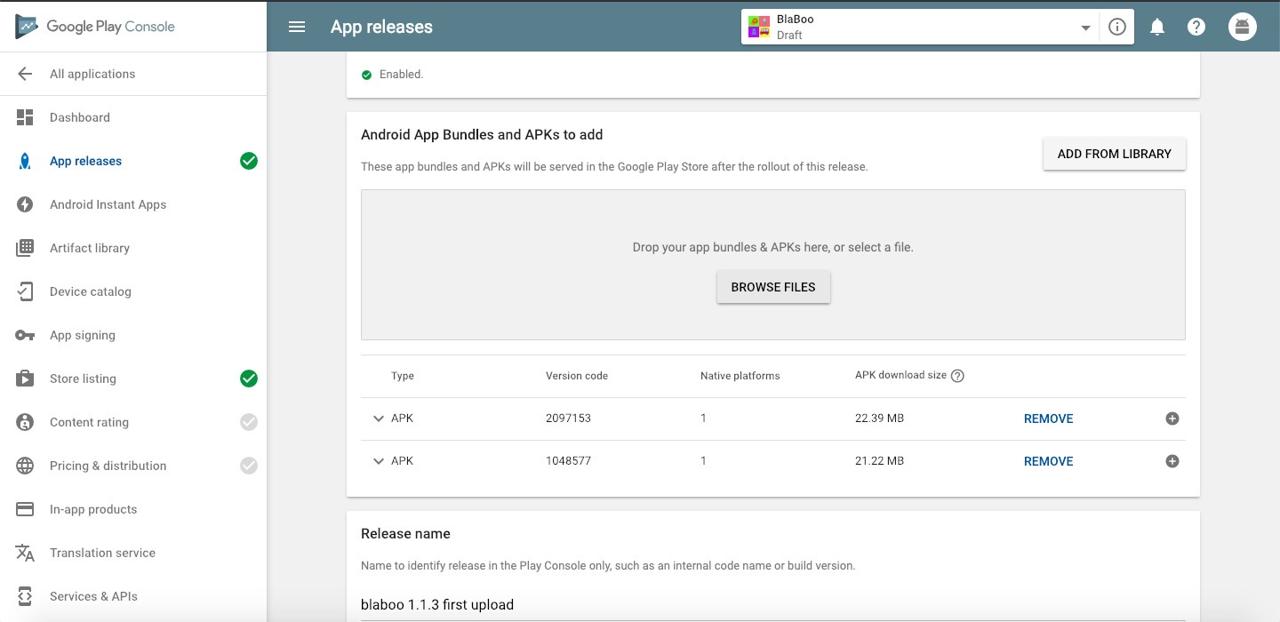
upload apk file we built.
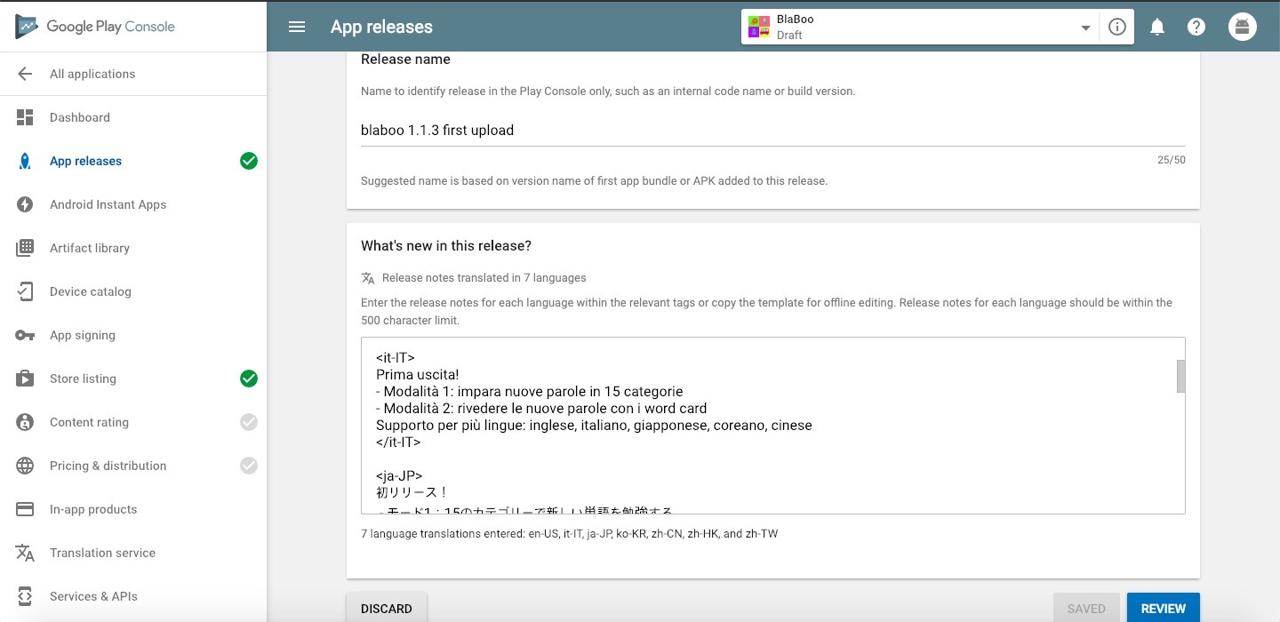
insert App release name and note. click SAVE button on the right bottom of the screen. and then, you can see REVIEW button activate. click REVIEW button.
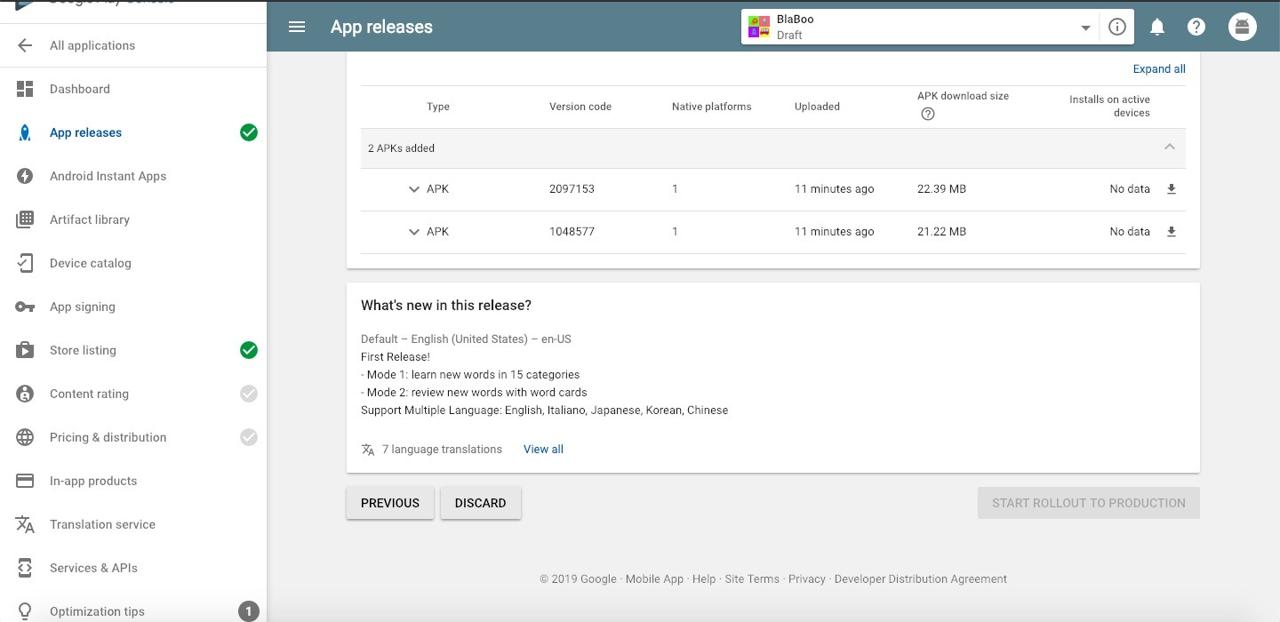
we didn’t finish all procedures to register app, so START ROLLOUT TO PRODUCTION button on right bottom of the screen is not activated. click Content rating on left menu.
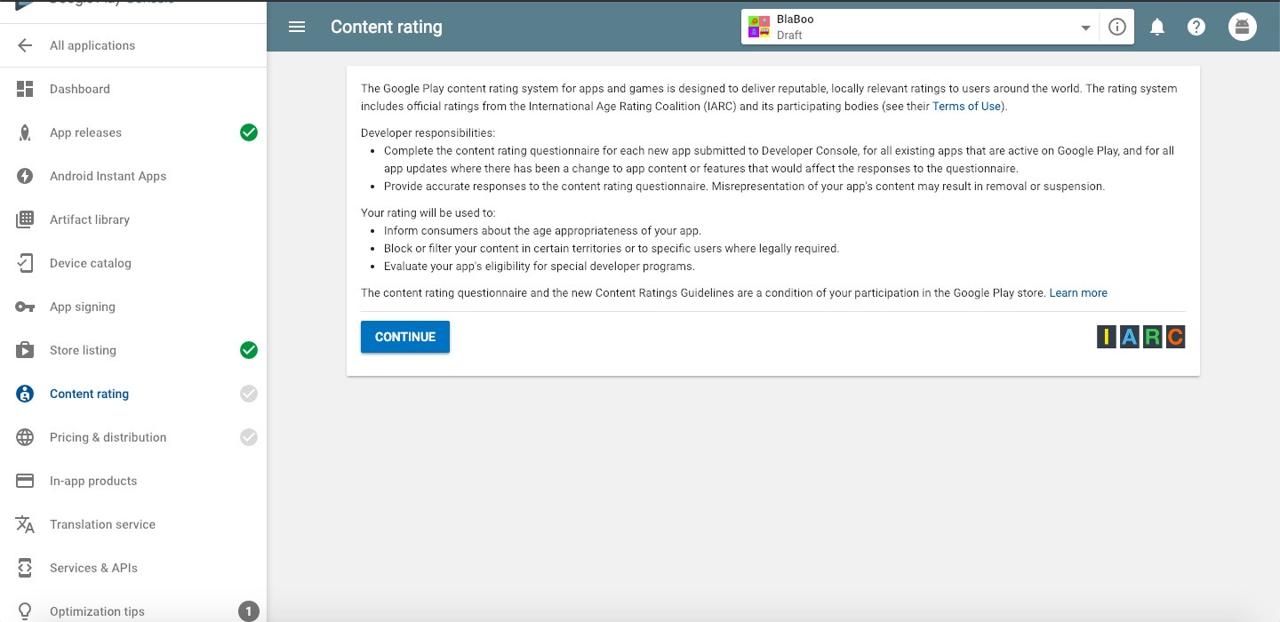
this screen is the screen to set Content Rating. click CONTINUE button.
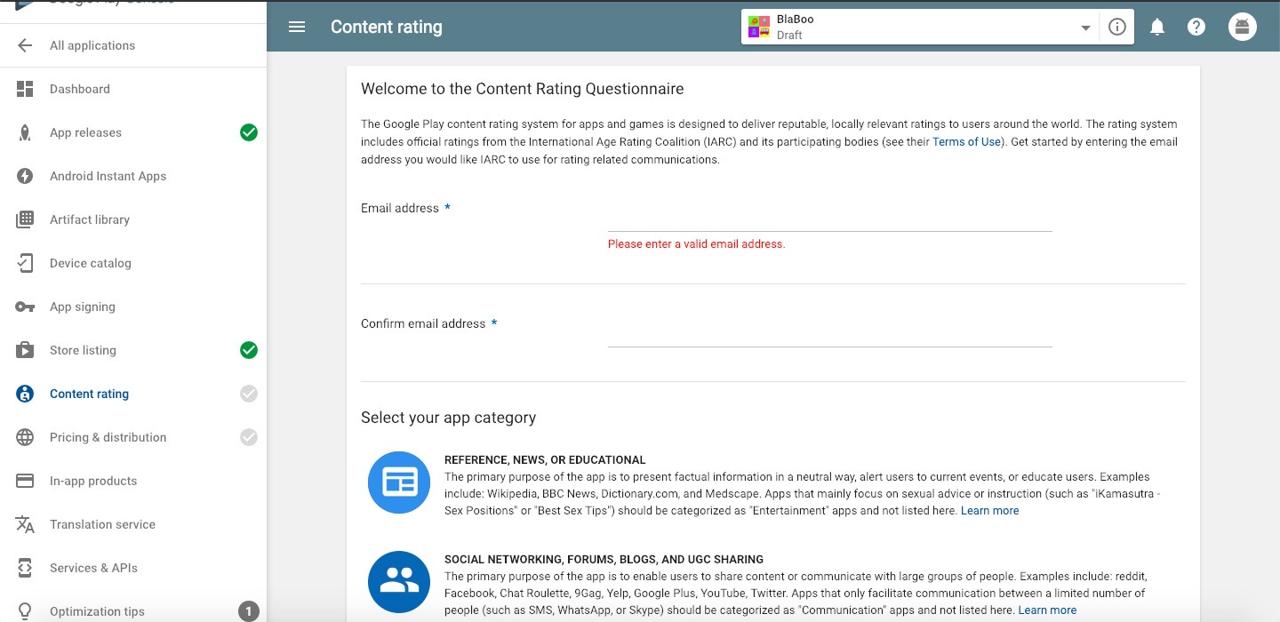
insert your email information and select App category.
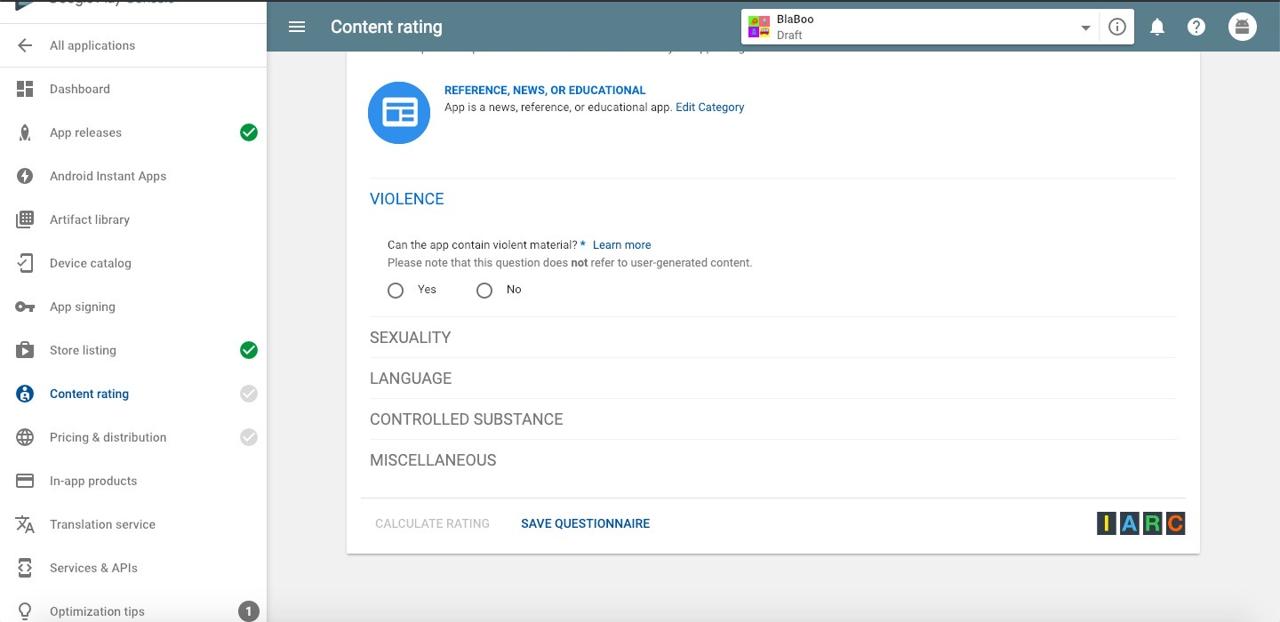
select App information for Google to decide Content rating. after selecting all, click SAVE QUESTIONNAIRE button and click CALCULATE RATING if it’s activate.
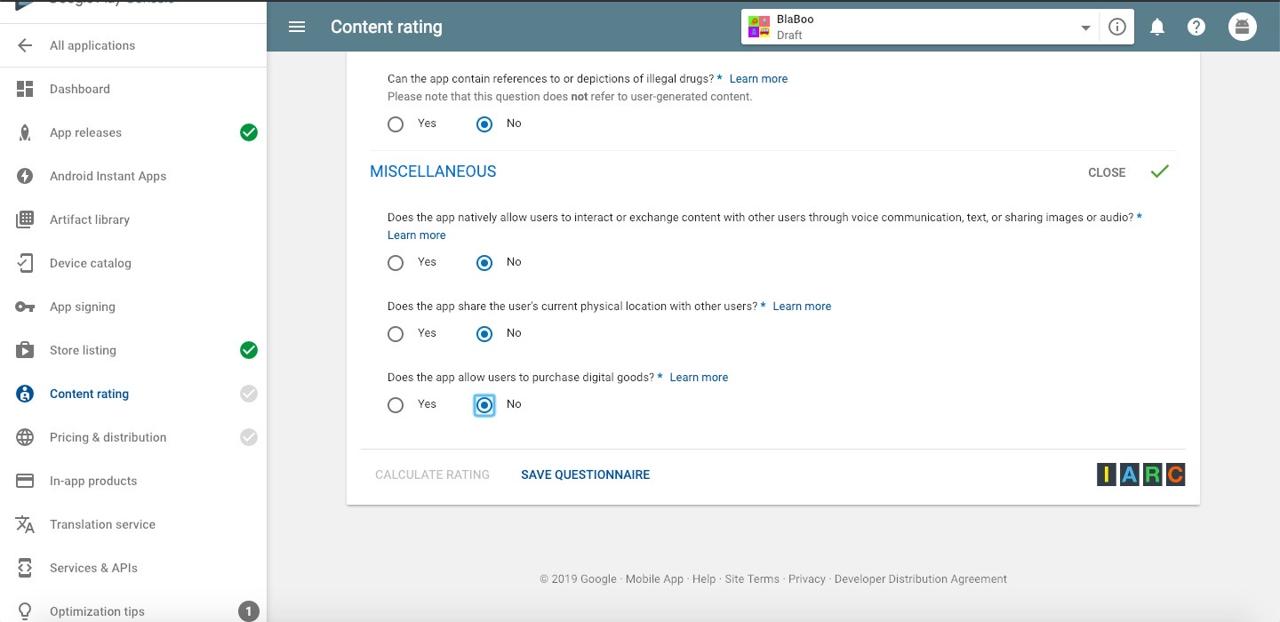
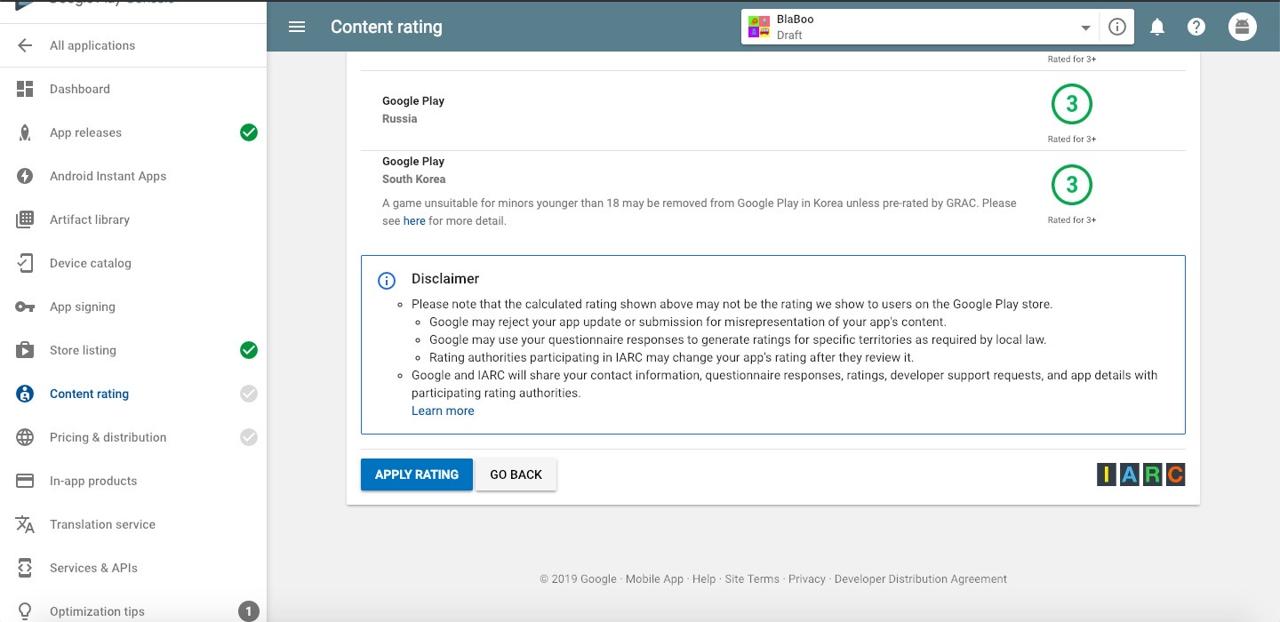
you can see the result based on the information you selected. after checking the result, click APPLYING RATING button.
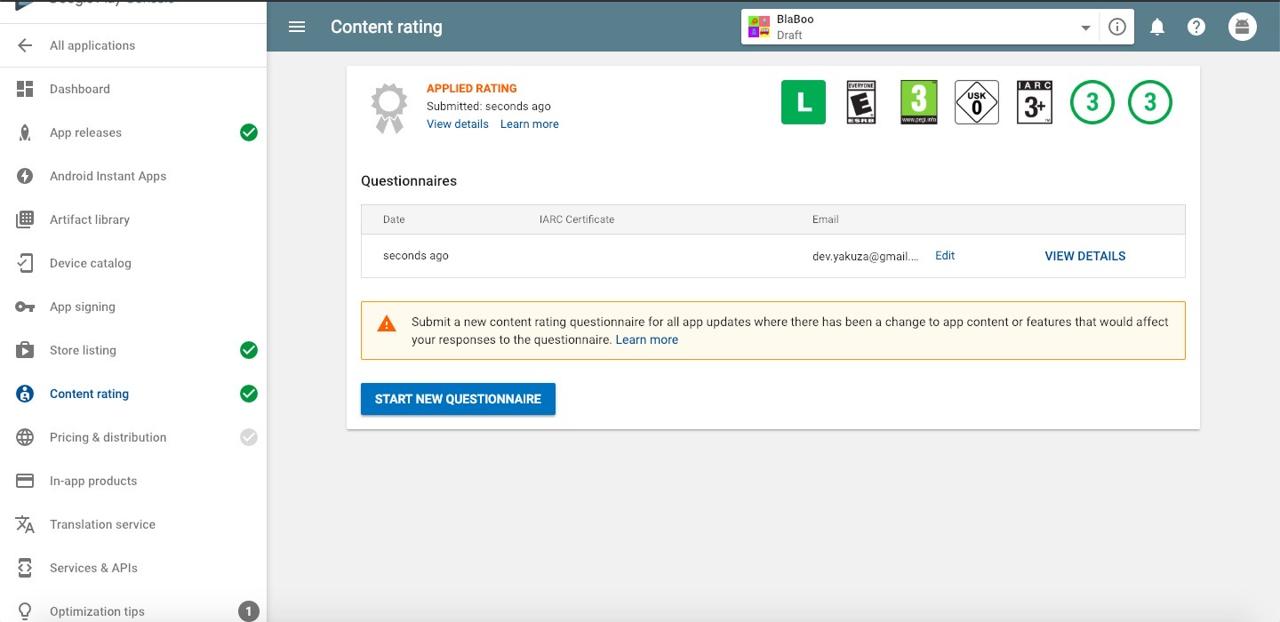
completed to set Content rating. iif you have any update to affect Content rating, you should recalculate it by above procedure.
let’s go to the end of the procedure. click Pricing & distribution on left menu.
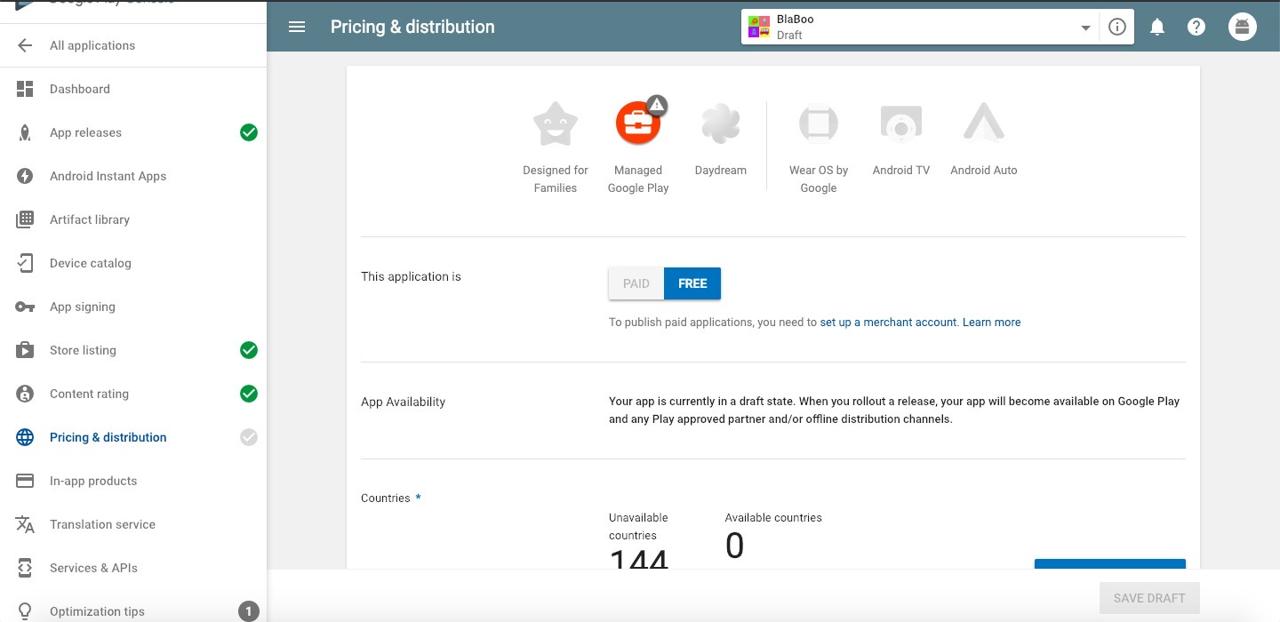
this screen is the screen to set App price. we’ll provide our app for free so we configured FREE. and there are questions about your app is to target the children, or your app includes advertisements, etc. after selecting all requirements, click SAVE DRAFT on the bottom of the screen.
Apply App Review
finally, we’re ready to apply App review. click App release menu.
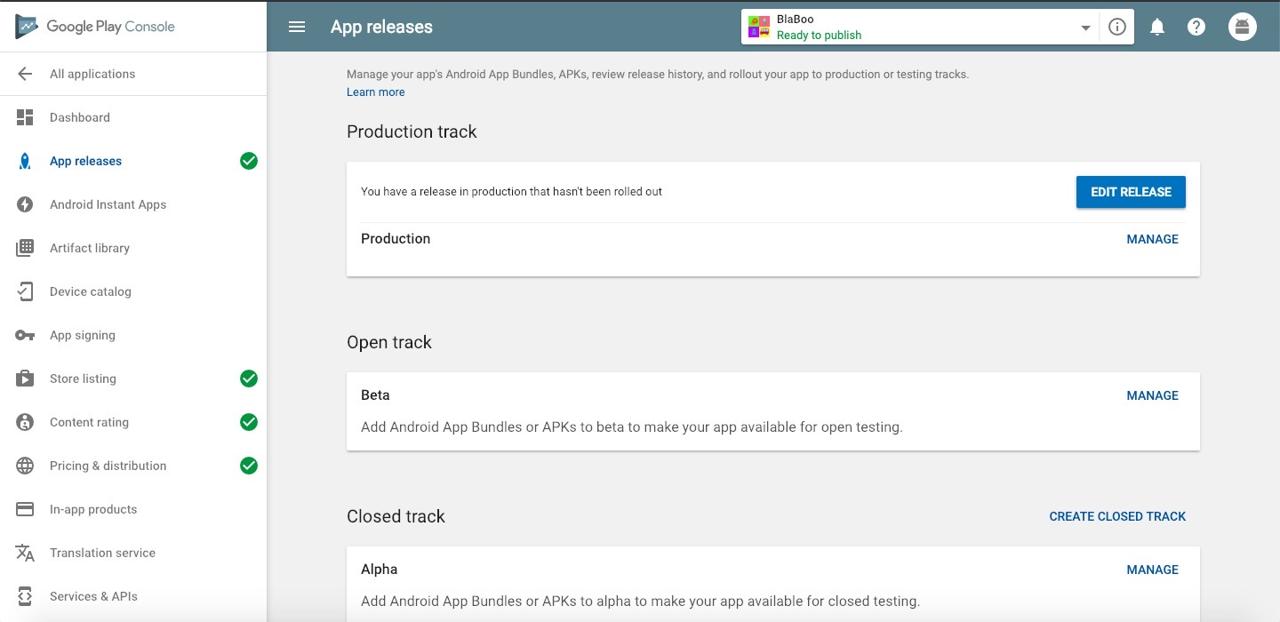
click EDIT RELEASE in Production section.
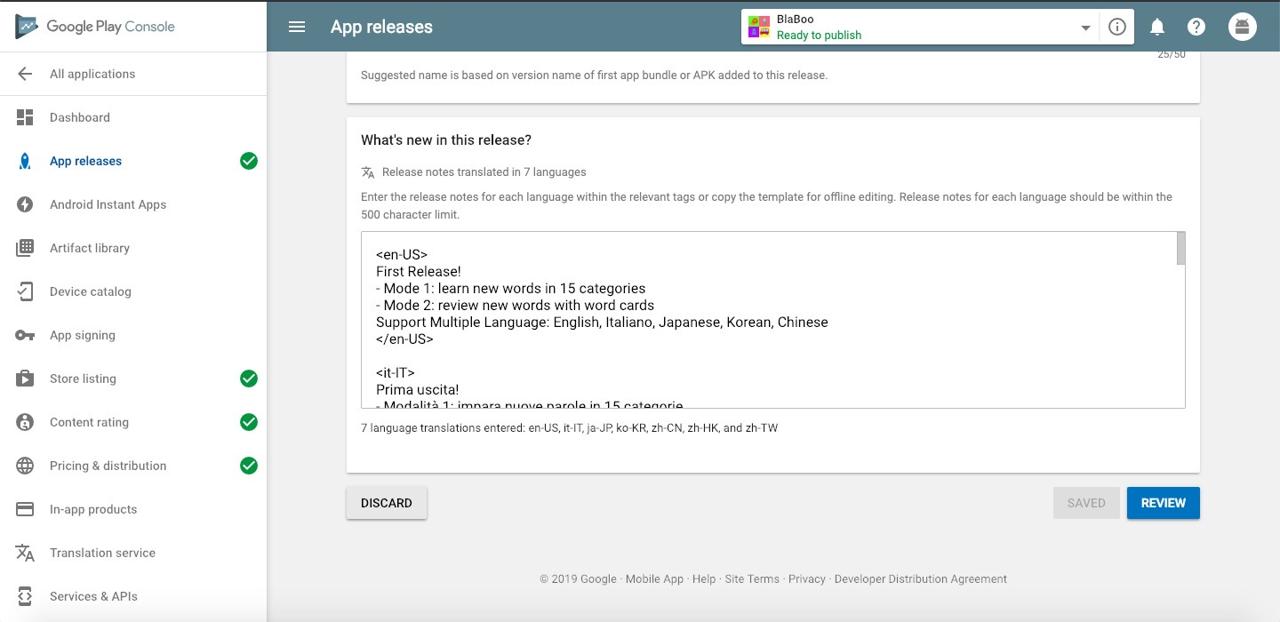
we can see contents we wrote. scroll to the bottom and click REVIEW button.
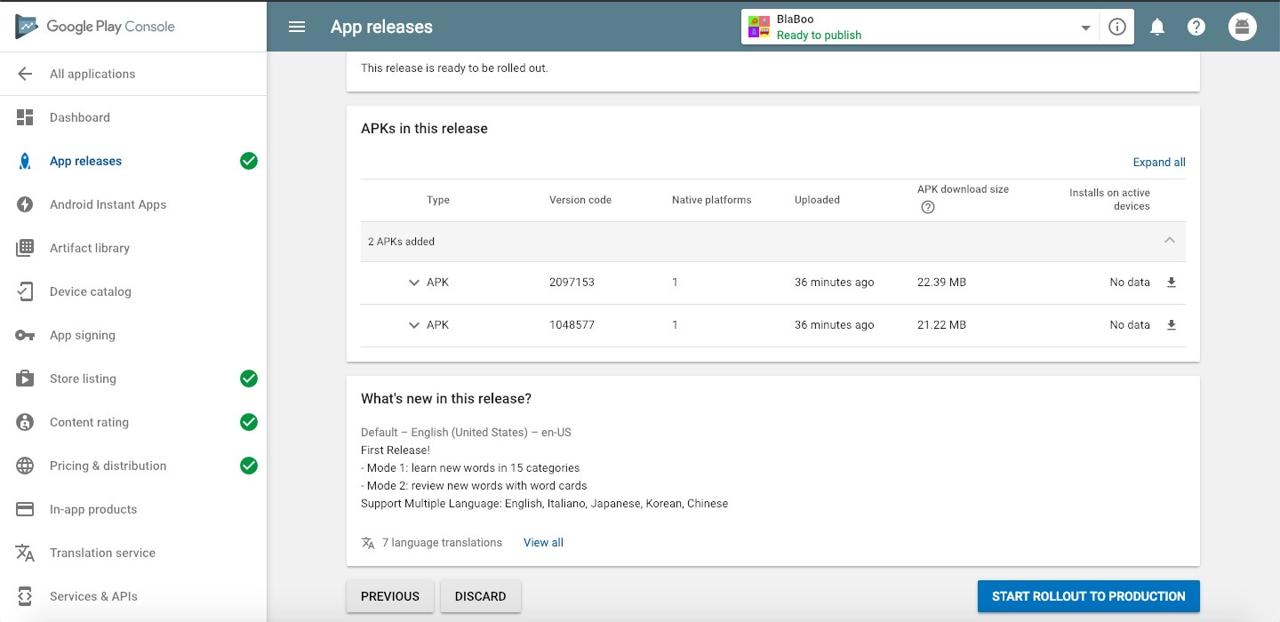
when you see above screen, scroll down and click START ROLLOUT TO PRODUCTION.
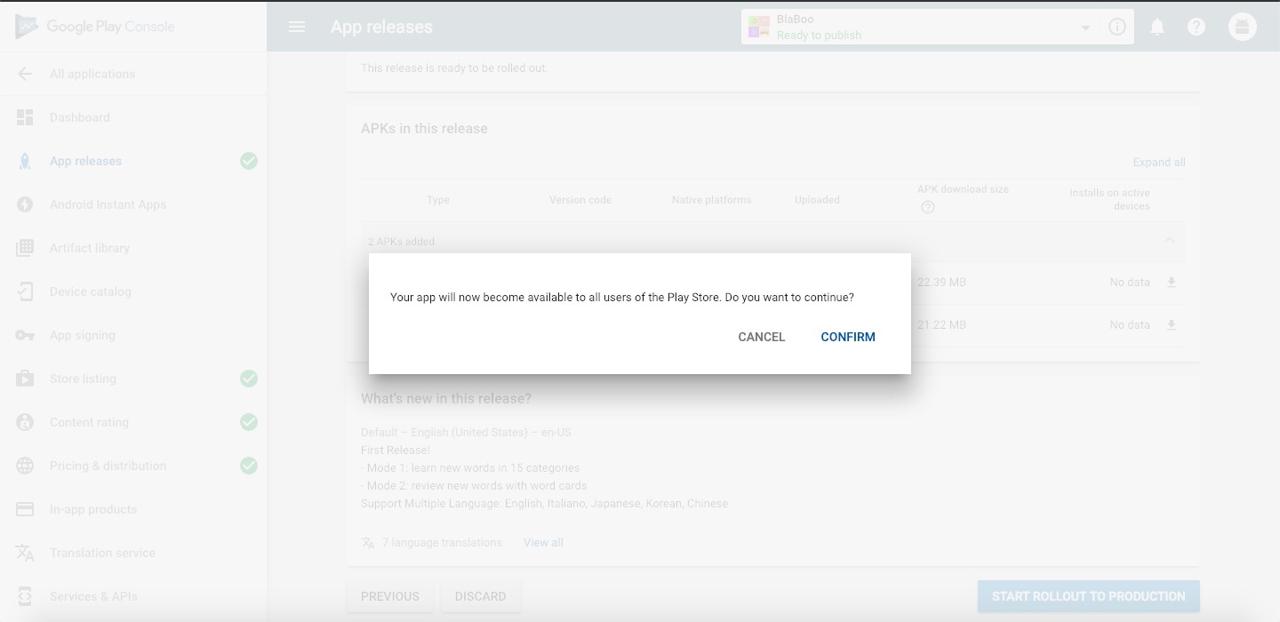
if you’re ready to apply App review, click CONFIRM button.
Fix Error
when you execute the command below,
./gradlew assembleRelease
sometime, you get the error message like below and build is failed.
Execution failed for task ':app:transformDexArchiveWithExternalLibsDexMergerForRelease'.
add the code below to android/app/build.gradle and try to build again.
defaultConfig {
    ...
    multiDexEnabled true
}
Fix Build Error
when I built RN(React Native) version 0.58 with the command below,
./gradlew assembleRelease
I got the error like below.
  --auto-add-overlay\
          --non-final-ids\
          -0\
          apk\
          --no-version-vectors
  Daemon:  AAPT2 aapt2-3.2.1-4818971-osx Daemon #0
execute the command below to build.
./gradlew app:assembleRelease
Permission Error
after building RN(React Native) 0.58, when I uploaded the file to Google Play, I got the error message like my file include android.permission.READ_PHONE_STATE permission.
the solution is on the official site.
https://facebook.github.io/react-native/docs/removing-default-permissions
let’s do it!
open and edit android/app/src/main/AndroidManifest.xml file like below.
<manifest xmlns:android="http://schemas.android.com/apk/res/android"
    package="XXXXXXXX"
+   xmlns:tools="http://schemas.android.com/tools"
    >

    <uses-permission android:name="android.permission.INTERNET" />
    <uses-permission android:name="android.permission.SYSTEM_ALERT_WINDOW" />
+   <uses-permission tools:node="remove" android:name="android.permission.READ_PHONE_STATE" />
+   <uses-permission tools:node="remove" android:name="android.permission.WRITE_EXTERNAL_STORAGE" />
+   <uses-permission tools:node="remove" android:name="android.permission.READ_EXTERNAL_STORAGE" />
...
and create android/app/src/release/AndroidManifest.xml file and copy-paste the content below to it.(you must change the package name with yours)
<manifest xmlns:android="http://schemas.android.com/apk/res/android"
    package="XXXXXXX"
    xmlns:tools="http://schemas.android.com/tools">

    <uses-permission tools:node="remove" android:name="android.permission.SYSTEM_ALERT_WINDOW" />

</manifest>
completed! you can upload with no problems!
Android 4.4.2 Kitkat
when I tested the build file of RN(React Native) 0.58 on Android 4.4.2(Kitkat) device, the app was not executed with the crash. the problem was multiDexEnabled and I added some code like below to resolve it.
open android/app/build.gradle file in RN(React Native) and modify it like below.
dependencies {
    implementation project(':react-native-firebase')
    ...
    implementation 'com.android.support:multidex:1.0.1'
}
also, modify MainApplication.java file like below.
import android.app.Application;
import android.content.Context;
import android.support.multidex.MultiDex;
...
public class MainApplication extends Application implements ReactApplication {
  @Override
  protected void attachBaseContext(Context base) {
      super.attachBaseContext(base);
      MultiDex.install(this);
  }
  ...
}
after editing, you can see your app work on Android 4.4.2(KitKat).
Unoptimized APK
recently, when I uploaded APK files for update, I got warning message like below.
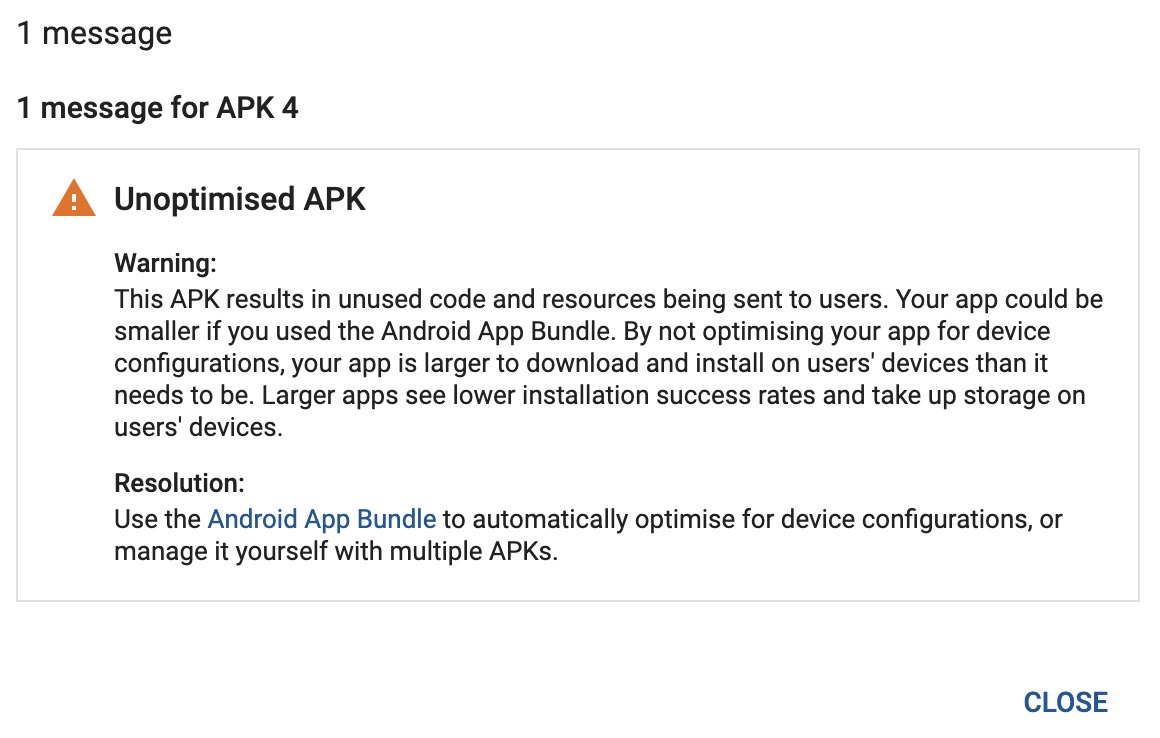
execute the command below to make app bundle file instead of apk file
./gradlew app:bundleRelease
you can find android/app/build/outputs/bundle/release/app.aab created.
just upload this one file!
in my case, I use script in package.json like below.
...
"scripts": {
    ...
    "prebuild-android": "react-native bundle --platform android --dev false --entry-file index.js --bundle-output android/app/src/main/assets/index.android.bundle",
    "build-android": "cd ./android && ./gradlew app:bundleRelease --stacktrace "
}
...
and execute the command below to build.
npm run build-android
Completed
we’ve done to register App to Android App store(Google Play). App review takes 2 ~ 3 hours. if App review is finished, you can search and download your App in Android App store(Google Play).
Was my blog helpful? Please leave a comment at the bottom. it will be a great help to me!
App promotion
Deku.Deku created the applications with Flutter.If you have interested, please try to download them for free.


