Outline
we try to make signup feature by using jwt(Json Web Token) which is a token based authentication system. in this blog, we will apply tymon/jwt-auth middleware to Laravel project to make jwt token system. if you want to know how to install and configure tymon/jwt-auth, see our previous blog.
Repository
we’ve made the repository of jwt authentication system. click below link to see our repository.
- laravel-jwt-exercise: https://github.com/dev-yakuza/laravel-jwt-exercise
Development Environment
in here, we’ll use Laravel development environment created by Laradock and Ansible. if you want to know our environment, see our previous blog.
Connect Database
signup feature which we will develop from now need the database to store the user information. if you don’t know how to connect the database to Laravel, see below blog.
Create Table
Laravel basically provides the migration(the file to create DB table). so if you execute below command, you could use basic user table.
# vagrant up
# vagrant ssh
# sudo docker exec -it laradock_workspace_1 bash
php artisan migrate
Create Controller
execute below command to create the controller which implements jwt authentication system.
# vagrant up
# vagrant ssh
# sudo docker exec -it laradock_workspace_1 bash
php artisan make:controller JWTAuthController
modify app/http/Controllers/JWTAuthController.php like below.
...
use Illuminate\Support\Facades\Validator;
use App\User;

class JWTAuthController extends Controller
{
    public function register(Request $request) {
        $validator = Validator::make($request->all(), [
            'name' => 'required|string|max:100',
            'email' => 'required|email|max:255|unique:users',
            'password' => 'required|string|min:8|max:255|confirmed',
            'password_confirmation' => 'required|string|min:8|max:255',
        ]);

        if($validator->fails()) {
            return response()->json([
                'status' => 'error',
                'messages' => $validator->messages()
            ], 200);
        }

        $user = new User;
        $user->fill($request->all());
        $user->password = bcrypt($request->password);
        $user->save();

        return response()->json([
            'status' => 'success',
            'data' => $user
        ], 200);
    }
}
let’s see the controller one by one.
$validator = Validator::make($request->all(), [
    'name' => 'required|string|max:100',
    'email' => 'required|email|max:255|unique:users',
    'password' => 'required|string|min:8|max:255|confirmed',
    'password_confirmation' => 'required|string|min:8|max:255',
]);
use Validator to validate request ($request) values from the client(browser).
if($validator->fails()) {
    return response()->json([
        'status' => 'error',
        'messages' => $validator->messages()
    ], 200);
}
if the validation is failed above, send the response with fail manage to the client(browser).
$user = new User;
$user->fill($request->all());
$user->password = bcrypt($request->password);
$user->save();
if the validation is success, create new user and store it.
$user->fill($request->all())at this time, use fillable feature defined in the model to fill the data from the request which client has sent.
return response()->json([
    'status' => 'success',
    'data' => $user
], 200);
when the data is created successfully, send the response to the client(browser) with the data.
Connect Route
configure the route to connect URL and the controller which we’ve made until now. open routes/api.php file and modify it like below.
Route::post('register', 'JWTAuthController@register')->name('api.jwt.register');when Laravel receives the request at register URL, it calls register function in JWTAuthController.
Test
we use Postman to test API. if you don’t have Postman, click below link to download it. you can also use curl instead of Postman.
- Postman: https://www.getpostman.com/
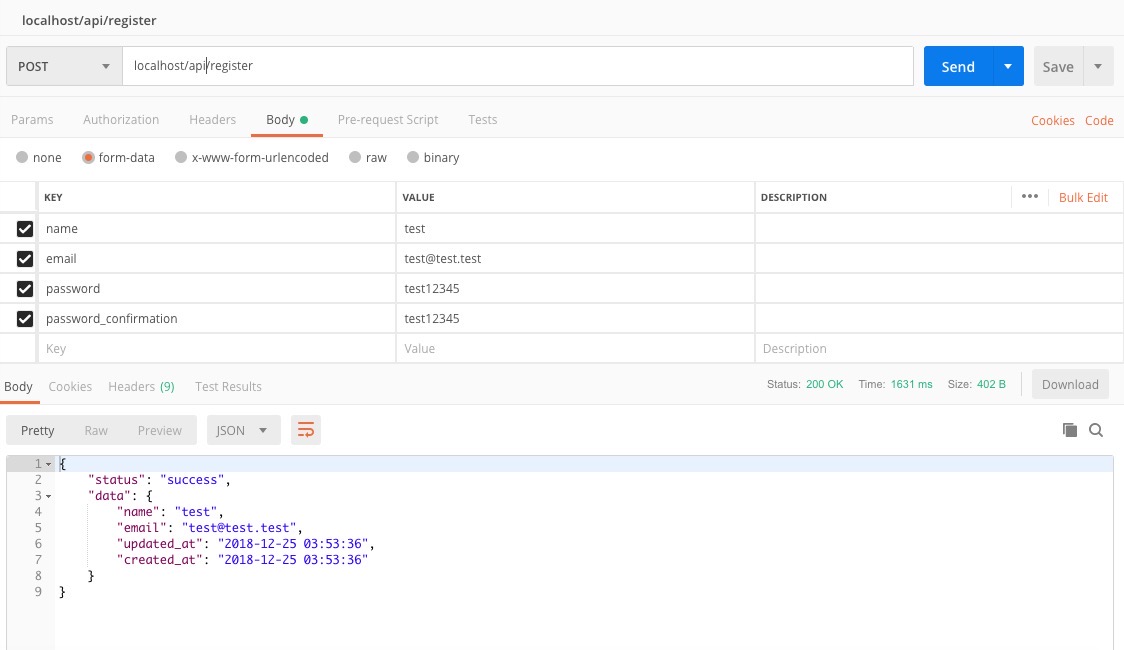
now you can open Postman and send the post request to localhost/api/register url.

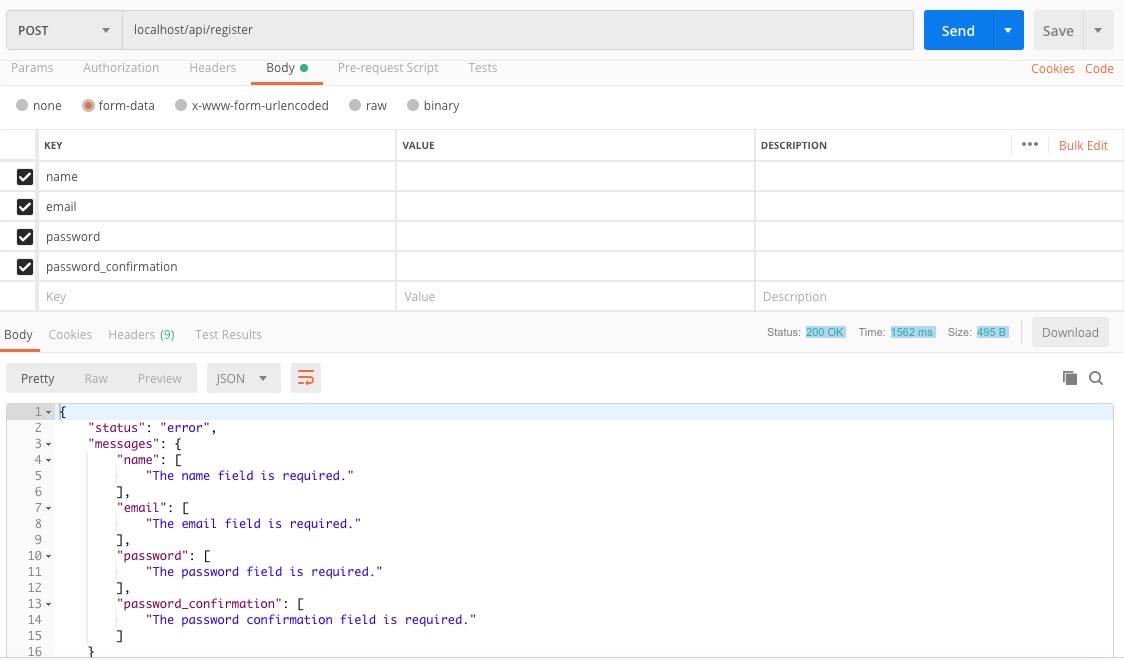
if the data is successfully created, you can see the response which we configured above. if it’s failed, you can see the screen like below.

Completed
until now, we’ve developed jwt authentication system which is one of token based authentication systems. next blog post, we will introduce how to make login procedure in jwt authentication system.
Reference
- tymon/jwt-auth: https://github.com/tymondesigns/jwt-auth
- Postman: https://www.getpostman.com/
Was my blog helpful? Please leave a comment at the bottom. it will be a great help to me!
App promotion
Deku.Deku created the applications with Flutter.If you have interested, please try to download them for free.


