Contents
Outline
Dependabot is an open source for checking the new version of the libraries in the project and creating the Pull request(Merge request) automatically in GitHub or GitLab.
- Dependabot: https://github.com/dependabot
Dependabot is made for GitHub at the first time, but now it becomes open source be able to use everywhere. So, GitLab also supports Dependabot for you to use it.
- Dependabot for GitLab: https://gitlab.com/dependabot-gitlab/dependabot
However, the Ultimate plan is required to use Dependabot provided by GitLab in GitLab.
- Dependency Scanning https://docs.gitlab.com/ee/user/application_security/dependency_scanning/
In this blog post, I will introduce how to add Dependabot in self-managed GitLab for not the Ultimate plan.
Add dependabot-script to GitLab
To execute Dependabot on GitLab, you need to make an environment for it. Dependabot provides the dependabot-script repository for the environment to execute Dependabot.
So, you need to import the dependabot-script to GitLab by following the steps.
- Access
GitLab - Click
New Project - Click
Import project - Insert and add
Repository by URL
And then, insert the dependabot-script repository URL below to Repository URL.
- Repository URL: https://github.com/dependabot/dependabot-script
Create GitLab token
The dependabot-script repository will access the other repositories and check the version. And then, when the new version exist, The dependabot-script repository creates Merge request automatically. So, Personal Access Token is required to access the other repositories and make Merge request.
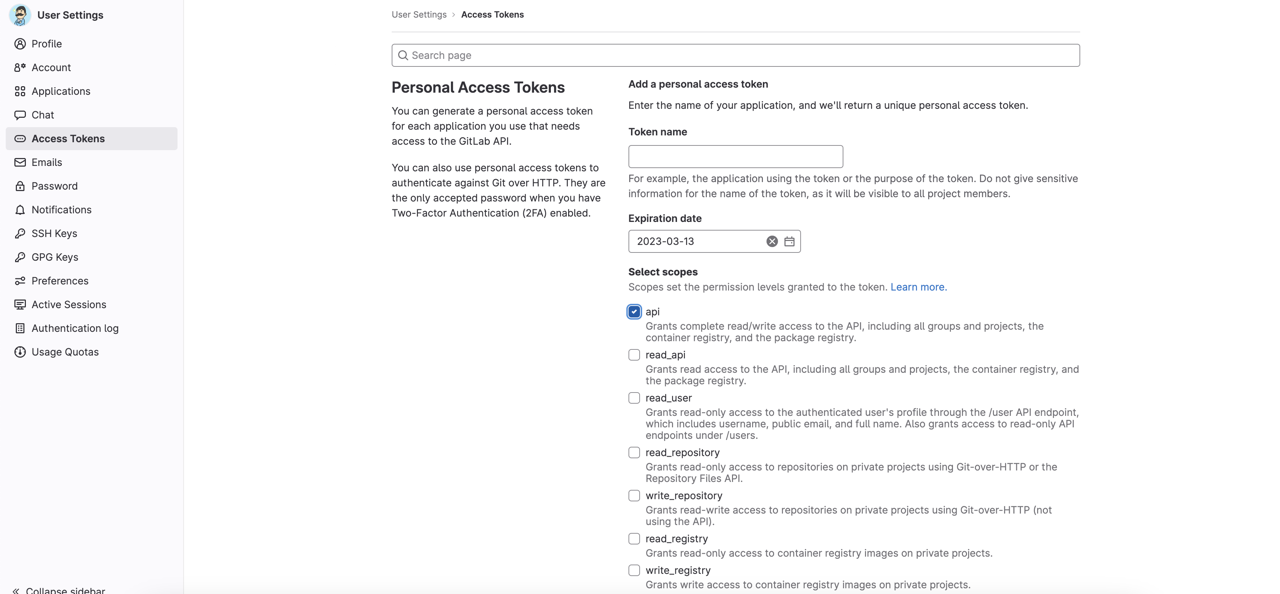
Create Personal Access Token with the api permission.
Create GitHub token
The dependabot-script repository uses GitHub API to check the library versions.. So To use GitHub API, you need to create Personal access token of GitHub.
After login on GitHub, click the profile image on the right top. And then, click Settings to go to the settings page.
Click Developer settings on the bottom of the left menu on the settings page. And then, click Personal access tokens > Token (classic) to go to creating Token page.
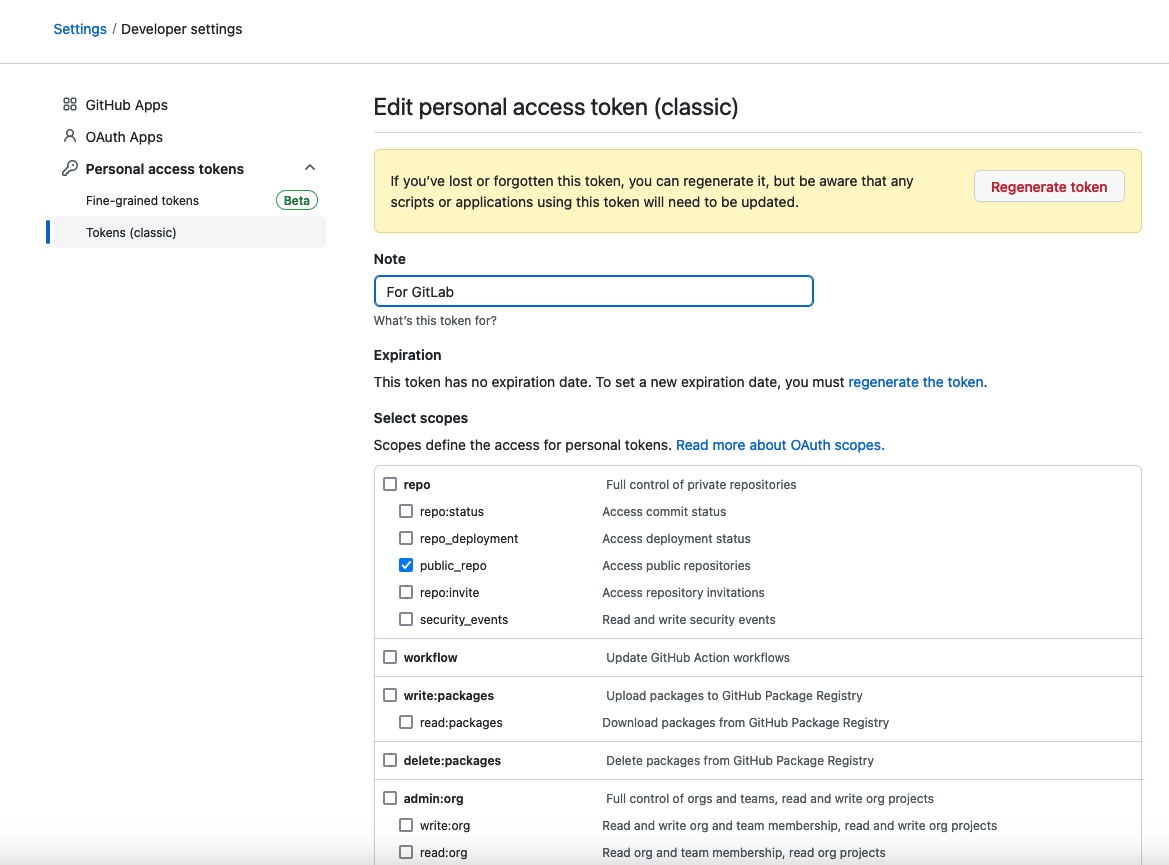
Create Token with the public_repo permission of repo.
Create CI/CD variables
Next, you need to configure Personal Access Token to the CI/CD variables in dependabot-script.
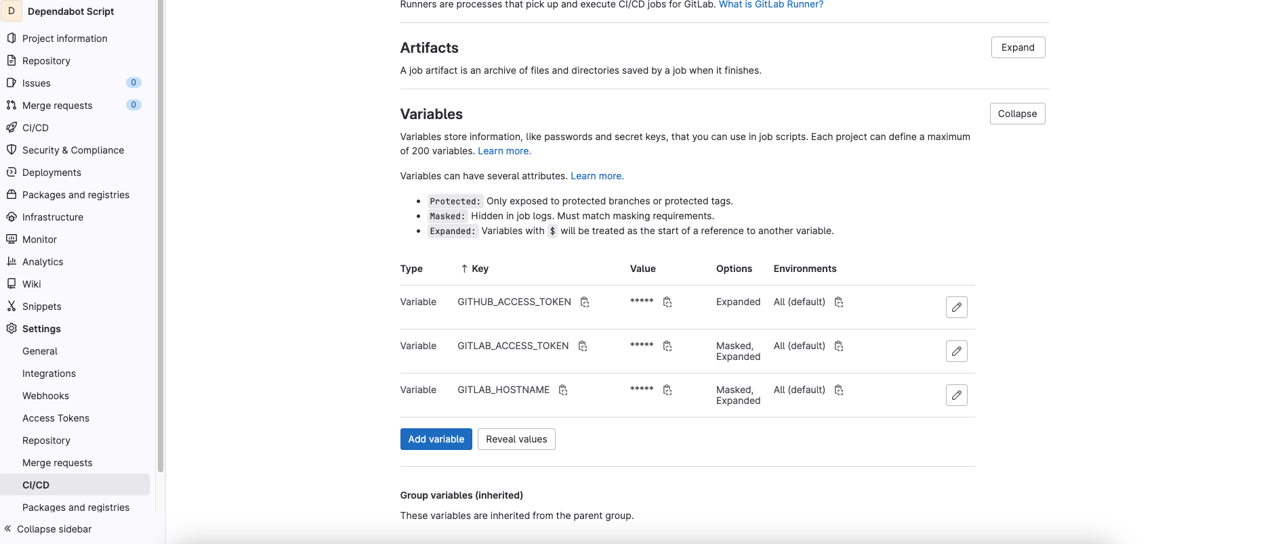
In the dependabot-script repository, click Settings > CI/CD > Variables, and Expand.
And then add Personal Access Token of GitLab with GITLAB_ACCESS_TOKEN by key.
- Key: GITLAB_ACCESS_TOKEN
- Value: token
Also, add Personal Access Token of GitHub with GITHUB_ACCESS_TOKEN by key.
- Key: GITHUB_ACCESS_TOKEN
- Value: token
If you use self-managed GitLab, you may need to configure GITLAB_HOSTNAME like the following.
- Key: GITLAB_HOSTNAME
- Value: gitlab.dev-yakuza.com
Create .gitlab-ci.yml file
You can find the .gitlab-ci.example.yml file in the dependabot-script repository. Modify this file name to .gitlab-ci.yml.
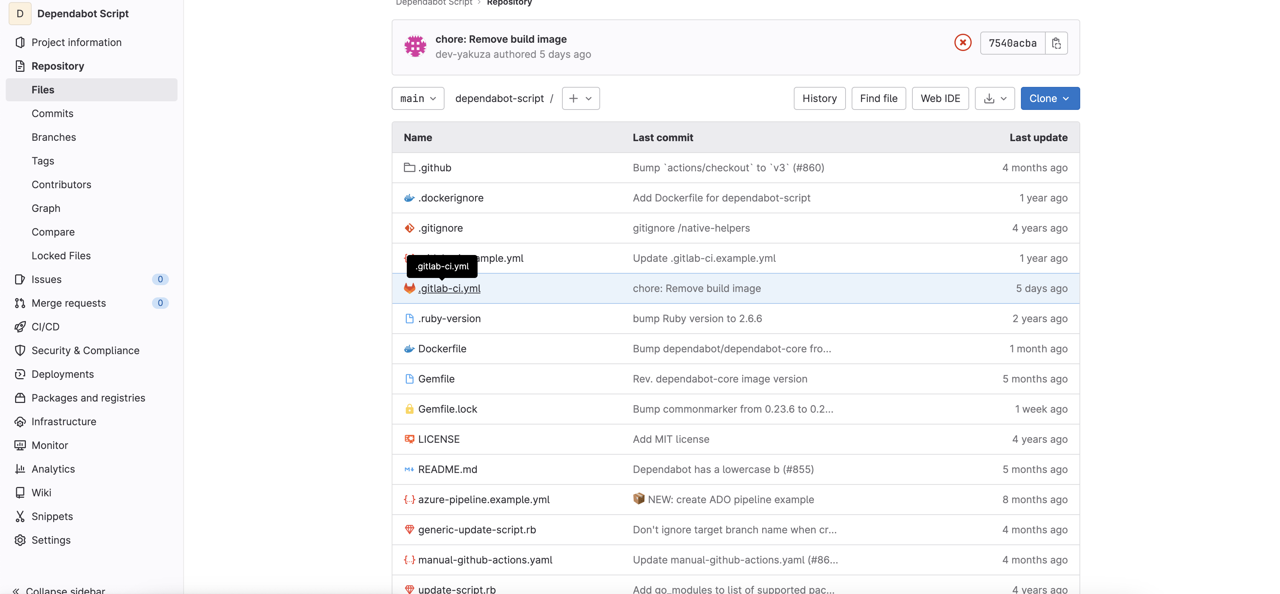
Create Schedule
Now, let’s create Schedule to execute Dependabot at regular interval to check that there are new versions of the libraries in the specific project and if there are, create Merge request.
Create new Schedule on the dependabot-script repository.
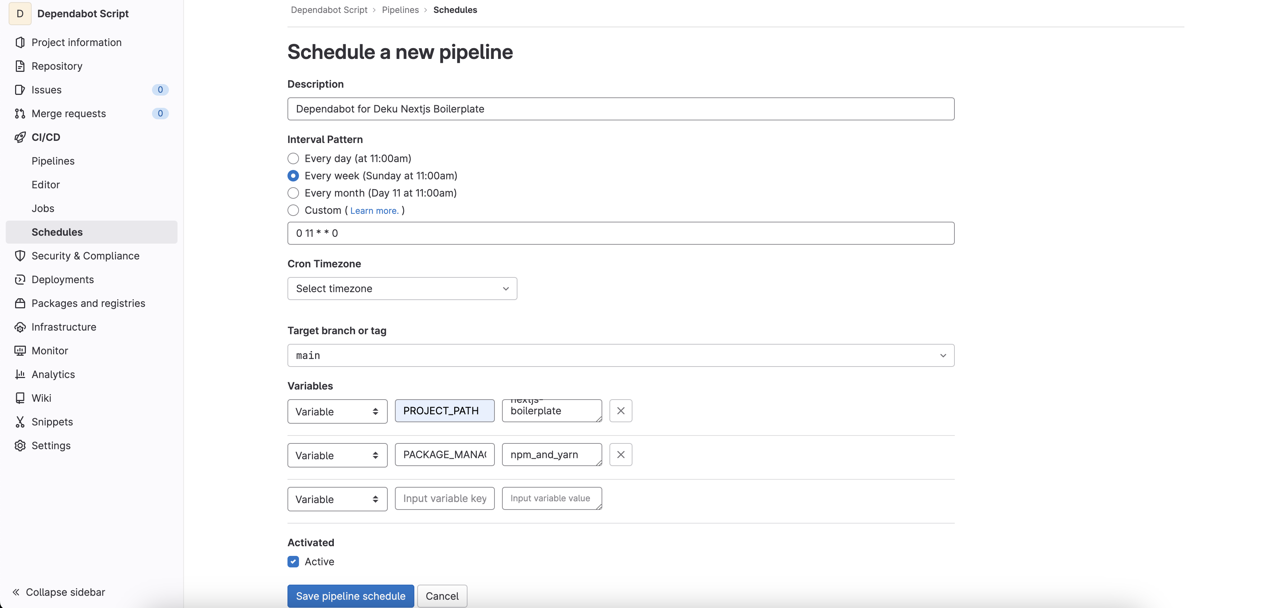
At this time, you need to configure the specific project Path and Package manger to Variables.
- PROJECT_PATH:
/ (ex> dev-yakuza/deku-nextjs-boilerplate) - PACKAGE_MANAGER_SET: project manager (ex> npm_and_yarn)
You can see Package manager that you can configure to the dependabot-script on the following link.
The list of Package manager is like following.
- bundler
- cargo
- composer
- dep
- docker
- elm
- go_modules
- gradle
- hex
- maven
- npm_and_yarn
- nuget
- pip (includes pipenv)
- submodules
- terraform
Execute Schedule
And then, let’s execute Schedule to check Dependabot works well.
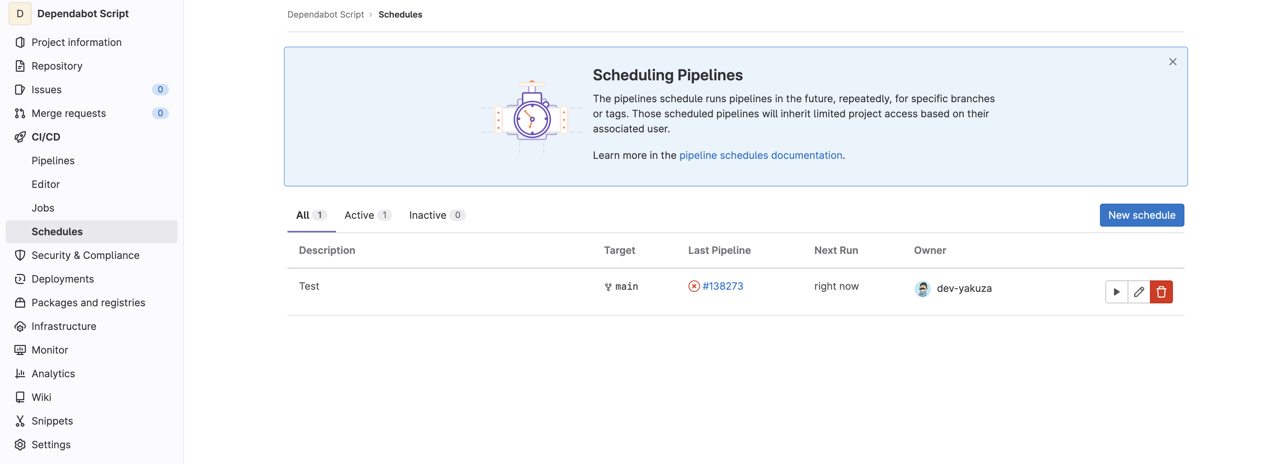
If there is no problem, you can see Merge request is created on the repository that you set to PROJECT_PATH like following.

ERROR: Job failed: failed to pull image dependabot/dependabot-script
Basically, you don’t need to modify the .gitlab-ci.yml file. But due to the GitLab configuration, the following error may occur.
ERROR: Job failed: failed to pull image "dependabot/dependabot-script" with specified policies [always]: Error response from daemon: pull access denied for dependabot/dependabot-script, repository does not exist or may require 'docker login': denied: requested access to the resource is denied (manager.go: 237:2s)In this case, you need to modify the .gitlab-ci.yml file like following.
# build-image:
#   tags:
#     - shell
#   stage: build
#   script:
#     - docker build -t "dependabot/dependabot-script" -f Dockerfile .

.dependabot:
  tags:
    - docker
  image: dependabot/dependabot-core
  before_script:
    - bundle install -j $(nproc) --path vendor
  variables:
    PACKAGE_MANAGER: $CI_JOB_NAME
  script:
    - bundle exec ruby ./generic-update-script.rb
  only:
    - schedules
After modifying it, when you execute Schedule, you can see Merge request create well.
Completed
Done! we’ve seen how to configure and execute Dependabot by using dependabot-script in self-manged GitLab not the Ultimate plan. If you use the newest version of the library, you can fix some security issues, and you don’t need to do a massive version update, so you don’t have to spend a lot of time on version updates.
Was my blog helpful? Please leave a comment at the bottom. it will be a great help to me!
App promotion
Deku.Deku created the applications with Flutter.If you have interested, please try to download them for free.


