Contents
Outline
When using GitHub Actions, sometimes you need to run GitHub Actions manually. In this blog post, I’ll introduce how to run GitHub Actions manually.
workflow_dispatch
To run GitHub Actions manually, you need to use workflow_dispatch.
- Official document: https://docs.github.com/ko/actions/writing-workflows/workflow-syntax-for-github-actions#onworkflow_dispatch
At this time, you can pass parameters through inputs of workflow_dispatch.
You can set workflow_dispatch as follows.
name: GITHUB ACTIONS NAME

on:
  workflow_dispatch:
inputs type
You can use the following types in inputs of workflow_dispatch.
boolean: true or falsechoice: SelectBox that can select one of the predefined optionsnumber: numberstring: stringenvironment: Use environment variables set in GitHub
You can check the inputs type that can be used in the official document.
- Official document: https://docs.github.com/ko/actions/writing-workflows/workflow-syntax-for-github-actions#onworkflow_dispatchinputsinput_idtype
Yon can set inputs of workflow_dispatch as follows.
name: GITHUB ACTIONS NAME

on:
  workflow_dispatch:
    inputs:
      input_boolean:
        description: 'This is a boolean input'
        required: true
        default: false
        type: boolean
You can set the description, required, default in addition to the type in inputs of workflow_dispatch. Except for type, all are optional.
Example
Then, let’s see an example about how to run GitHub Actions manually using workflow_dispatch.
boolean
To create GitHub Actions that run manually, create a .github/workflows/manual_test.yml file and modify it as follows.
name: GITHUB ACTIONS NAME

on:
  workflow_dispatch:
    inputs:
      input_boolean:
        description: 'This is a boolean input'
        required: true
        default: false
        type: boolean

jobs:
  deploy-to-staging:
    runs-on: ubuntu-latest
    steps:
      - name: Print the input
        run: echo ${{ inputs.input_boolean }}
After committing and pushing the file you wrote like this, you can see the following screen when you go to the Actions tab of GitHub.
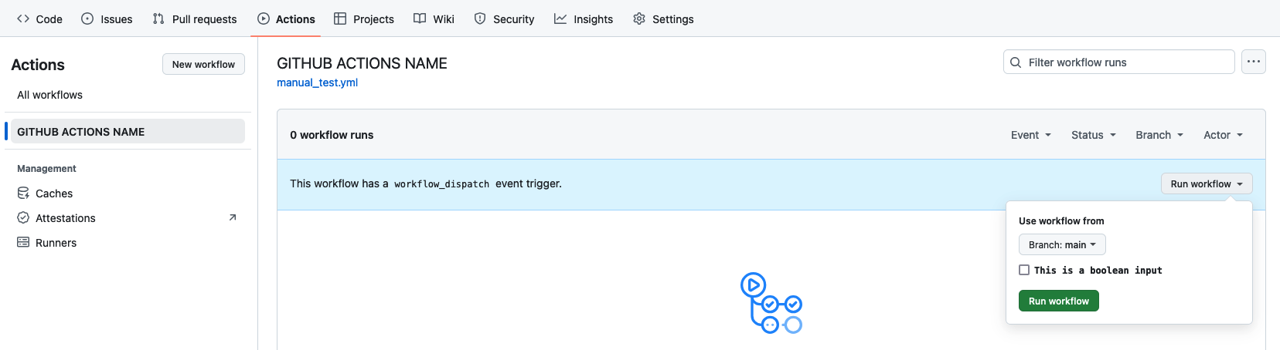
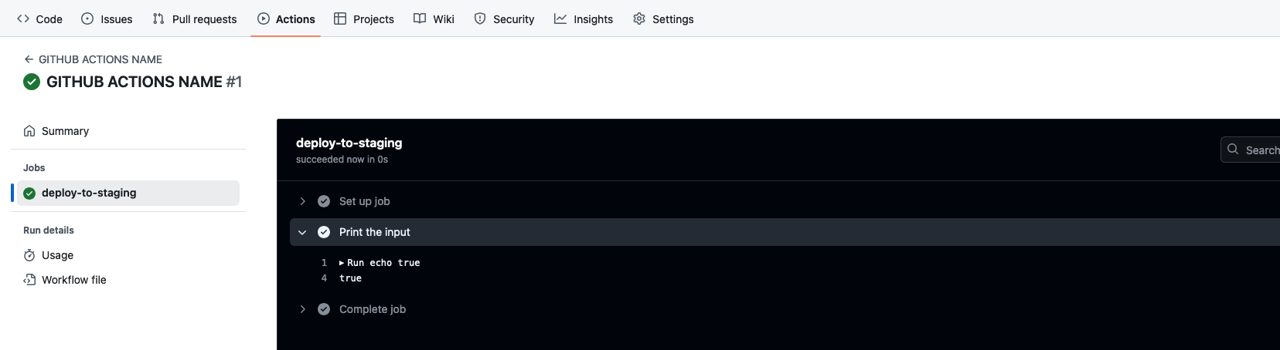
When you click the Run workflow displayed on the right side, you can see the inputs of the boolean type we’ve set. If you run this, you can get the following result.
choice
To create GitHub Actions that run manually, create a .github/workflows/manual_test.yml file and modify it as follows.
name: GITHUB ACTIONS NAME

on:
  workflow_dispatch:
    inputs:
      input_choice:
        description: 'This is a choice input'
        required: true
        default: 'warning'
        type: choice
        options:
          - info
          - warning
          - debug

jobs:
  deploy-to-staging:
    runs-on: ubuntu-latest
    steps:
      - name: Print the input
        run: echo ${{ inputs.input_choice }}
After committing and pushing the file you wrote like this, you can see the following screen when you go to the Actions tab of GitHub.
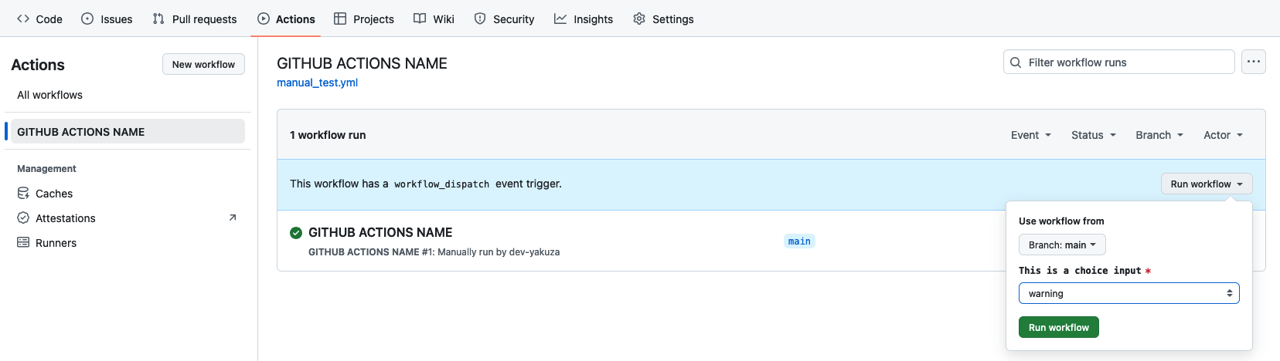
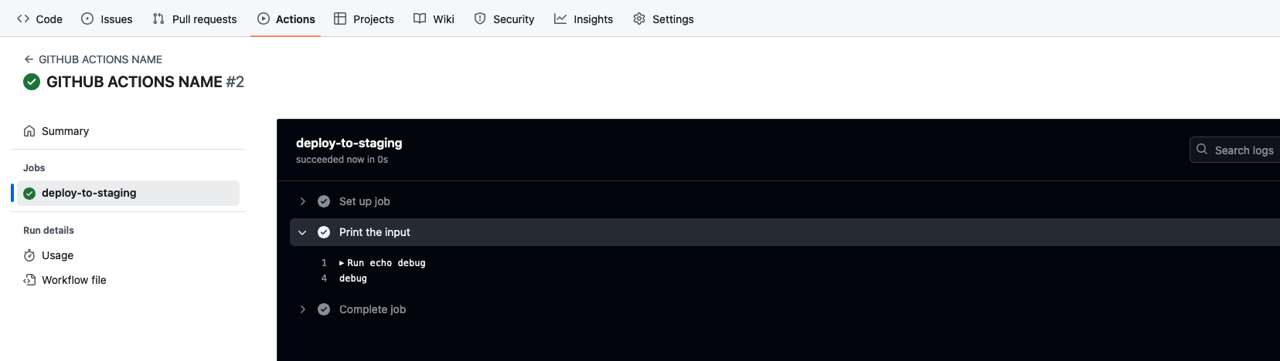
When you click the Run workflow displayed on the right side, you can see the inputs of the choice type we’ve set. If you run this, you can get the following result.
number
To create GitHub Actions that run manually, create a .github/workflows/manual_test.yml file and modify it as follows.
name: GITHUB ACTIONS NAME
on:
workflow_dispatch:
inputs:
input_number:
description: 'This is a number input'
required: true
default: 20
type: number
jobs:
deploy-to-staging:
runs-on: ubuntu-latest
steps:
- name: Print the input
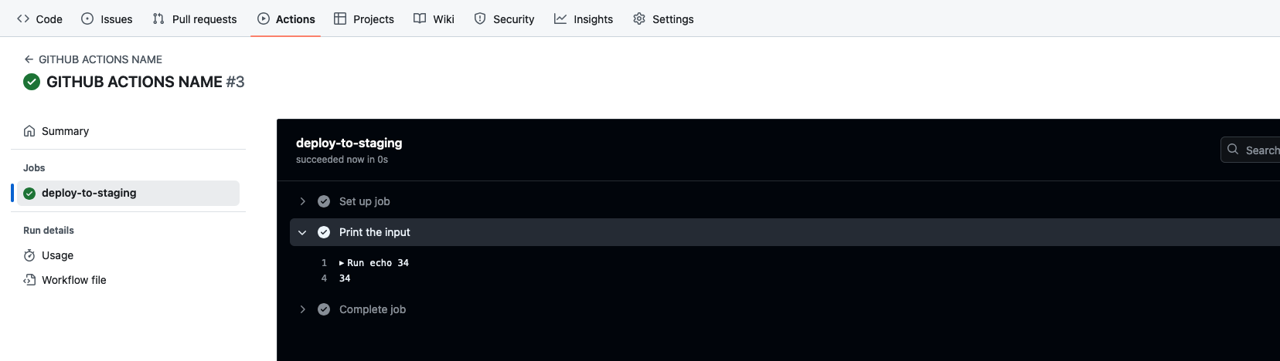
run: echo ${{ inputs.input_number }}After committing and pushing the file you wrote like this, you can see the following screen when you go to the Actions tab of GitHub.
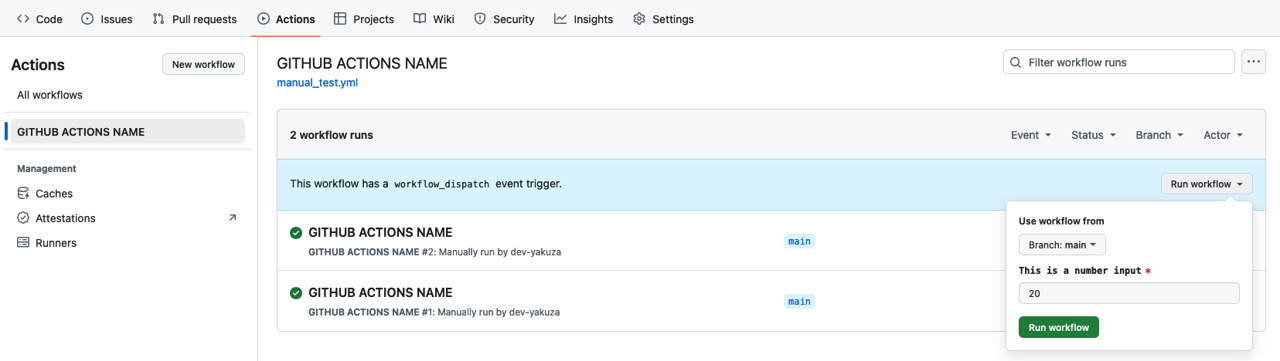
When you click the Run workflow displayed on the right side, you can see the inputs of the number type we’ve set. If you run this, you can get the following result.
string
To create GitHub Actions that run manually, create a .github/workflows/manual_test.yml file and modify it as follows.
name: GITHUB ACTIONS NAME
on:
workflow_dispatch:
inputs:
input_string:
description: 'This is a string input'
required: true
default: 'Hello, World!'
type: string
jobs:
deploy-to-staging:
runs-on: ubuntu-latest
steps:
- name: Print the input
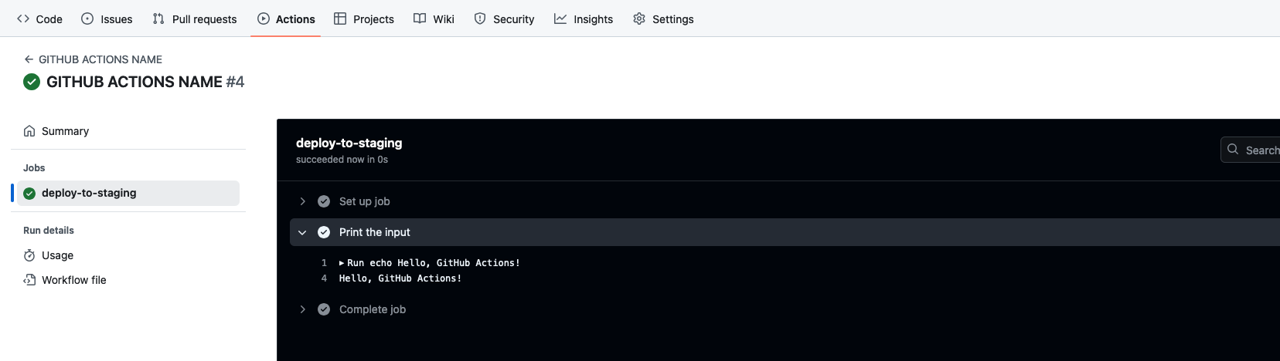
run: echo ${{ inputs.input_string }}After committing and pushing the file you wrote like this, you can see the following screen when you go to the Actions tab of GitHub.
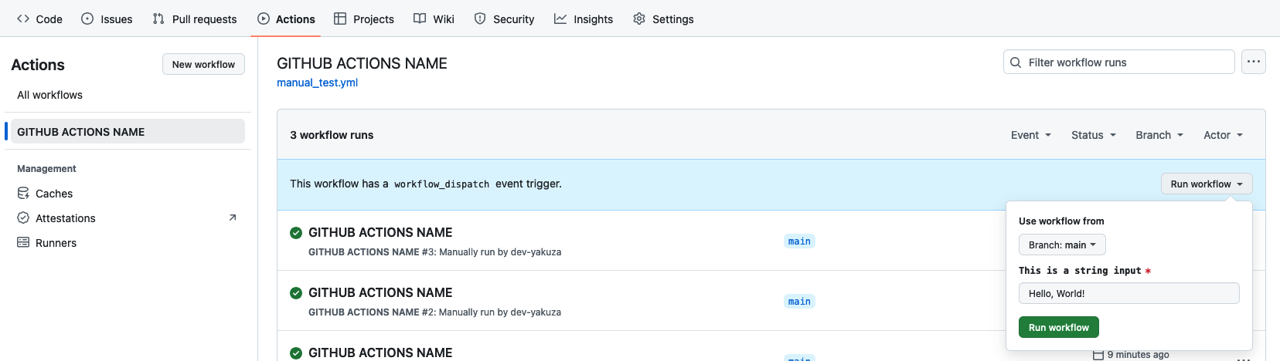
When you click the Run workflow displayed on the right side, you can see the inputs of the string type we’ve set. If you run this, you can get the following result.
environment
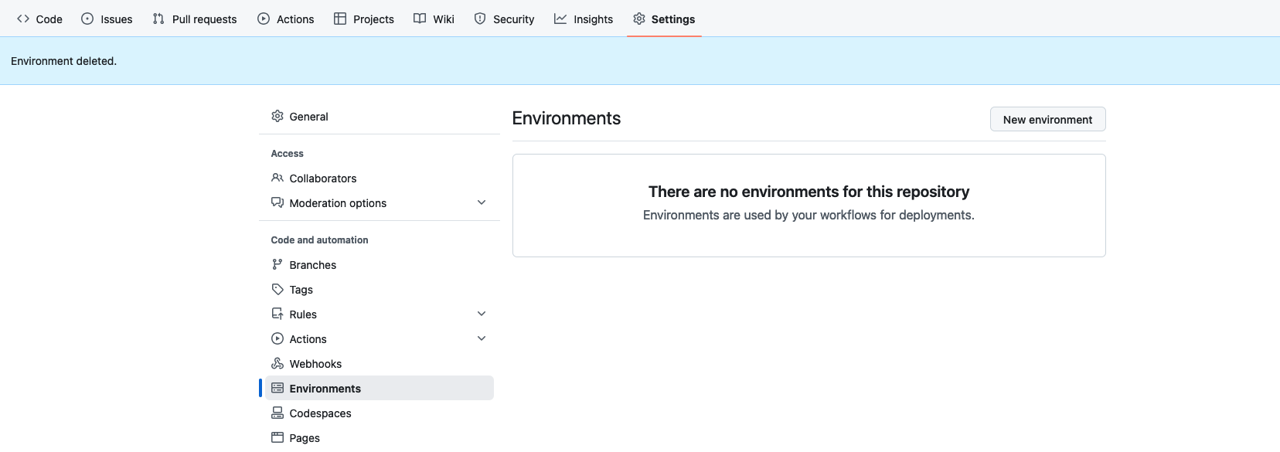
To use the environment type in workflow_dispatch, you need to set Environment in GitHub’s Settings.
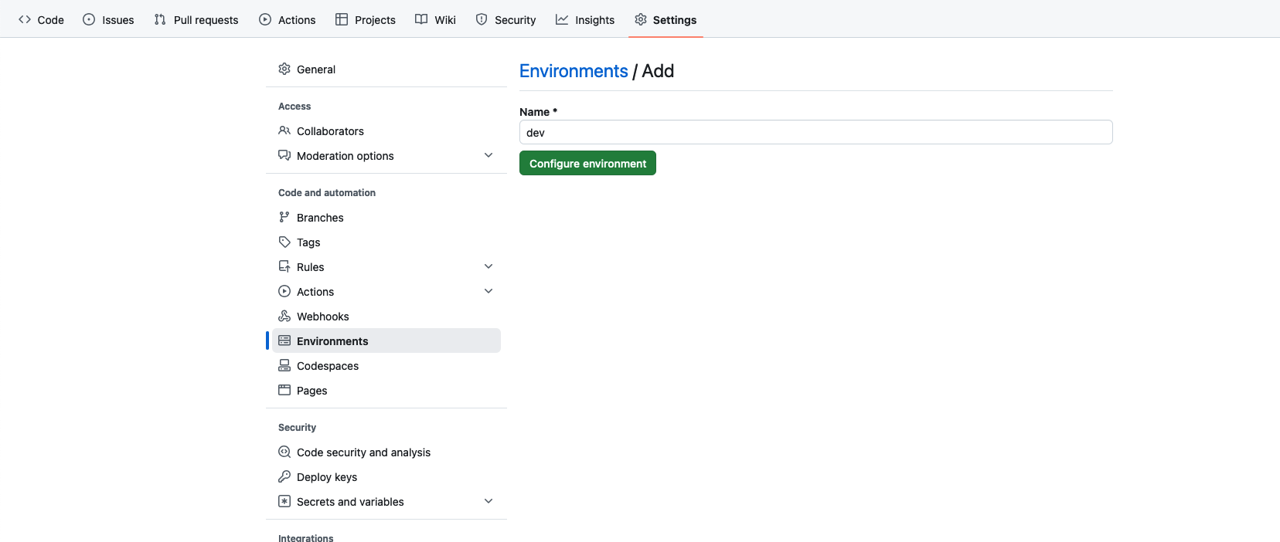
Click New environment and enter dev in the Name as follows, and click Configure environment.
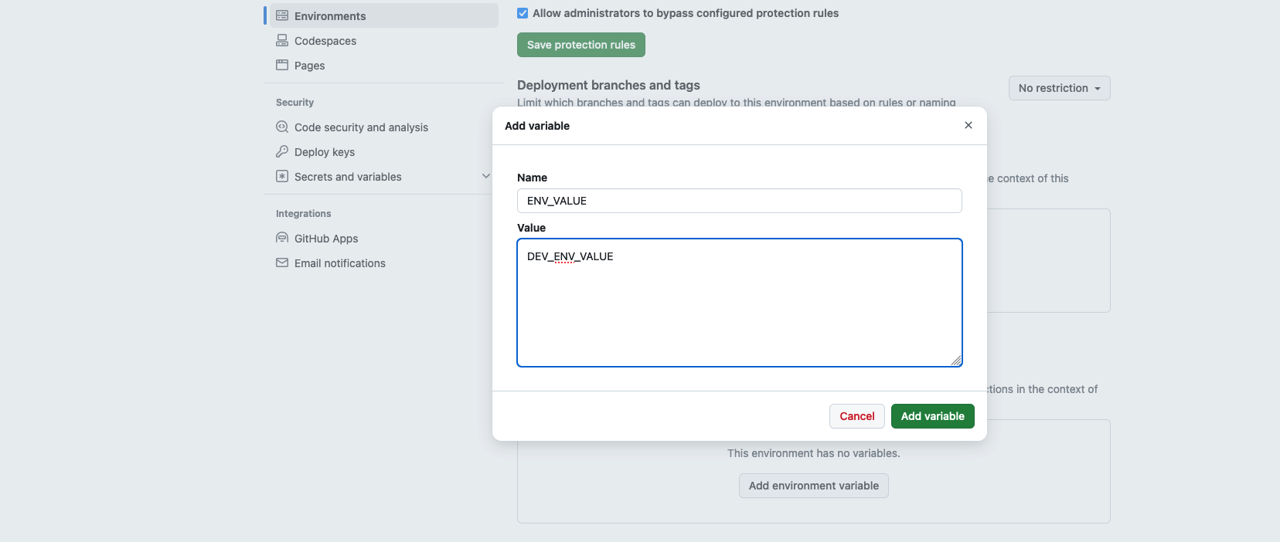
Then click the Add environment variable button in Environment variables and add the Variable as follows.
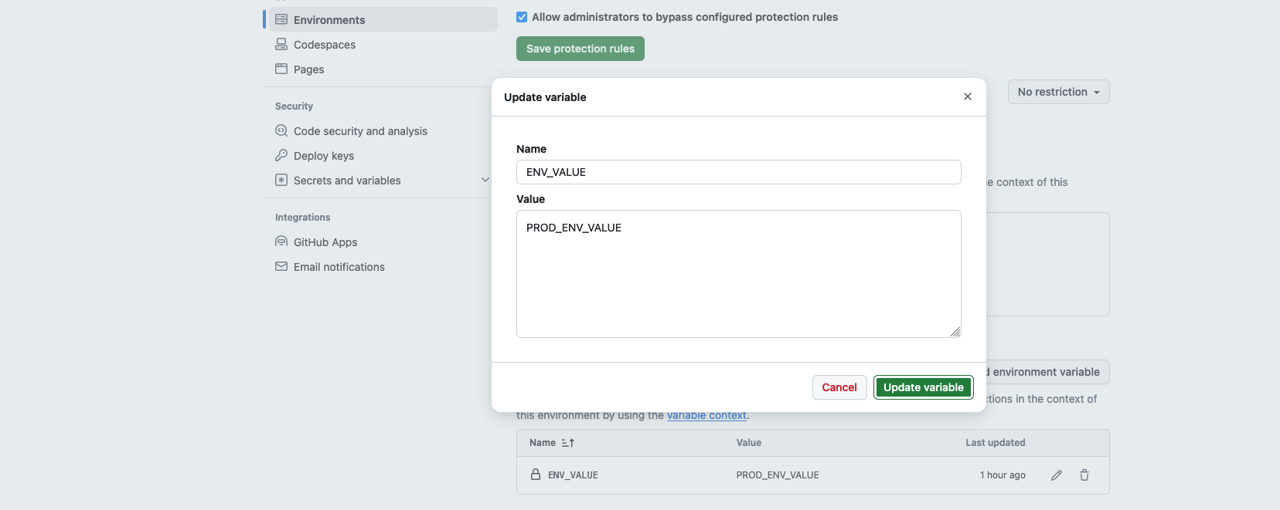
In the same way, add the same variable to the prod environment.
Now, create a .github/workflows/manual_test.yml file to run GitHub Actions manually and modify it as follows.
name: GITHUB ACTIONS NAME
on:
workflow_dispatch:
inputs:
input_environment:
description: 'This is a environment input'
required: true
type: environment
jobs:
deploy-to-staging:
runs-on: ubuntu-latest
environment: ${{ inputs.input_environment }}
steps:
- name: Print the input
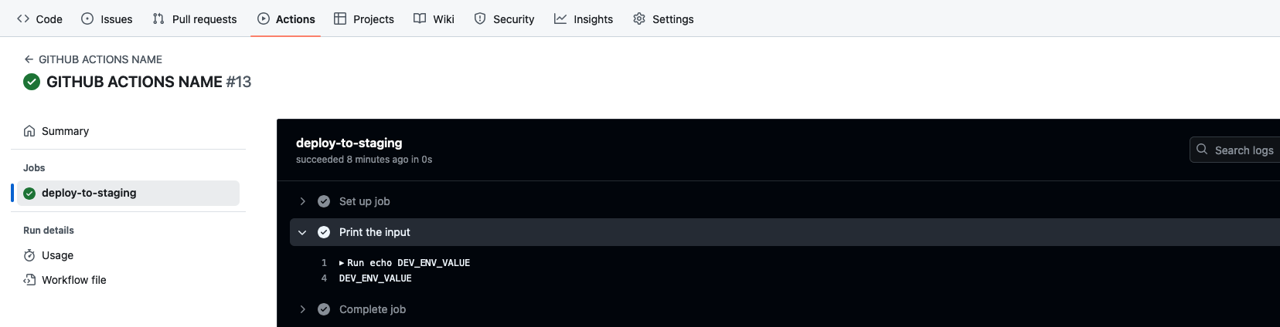
run: echo ${{ vars.ENV_VALUE }}After committing and pushing the file you wrote like this, you can see the following screen when you go to the Actions tab of GitHub.

When you click the Run workflow displayed on the right side, you can see the Environment that we’ve set in GitHub’s Settings. If you run this, you can get the following result.
- dev environment
- prod environment

Completed
Done! We’ve seen how to run GitHub Actions manually. We also learned about the inputs type that can be set.
If you need to run GitHub Actions manually, try using workflow_dispatch and various types of inputs to run GitHub Actions manually.
Was my blog helpful? Please leave a comment at the bottom. it will be a great help to me!
App promotion
Deku.Deku created the applications with Flutter.If you have interested, please try to download them for free.