Contents
Outline
In apps, we usually see the UI that shows the calendar(DatePicker) for users to select the date.
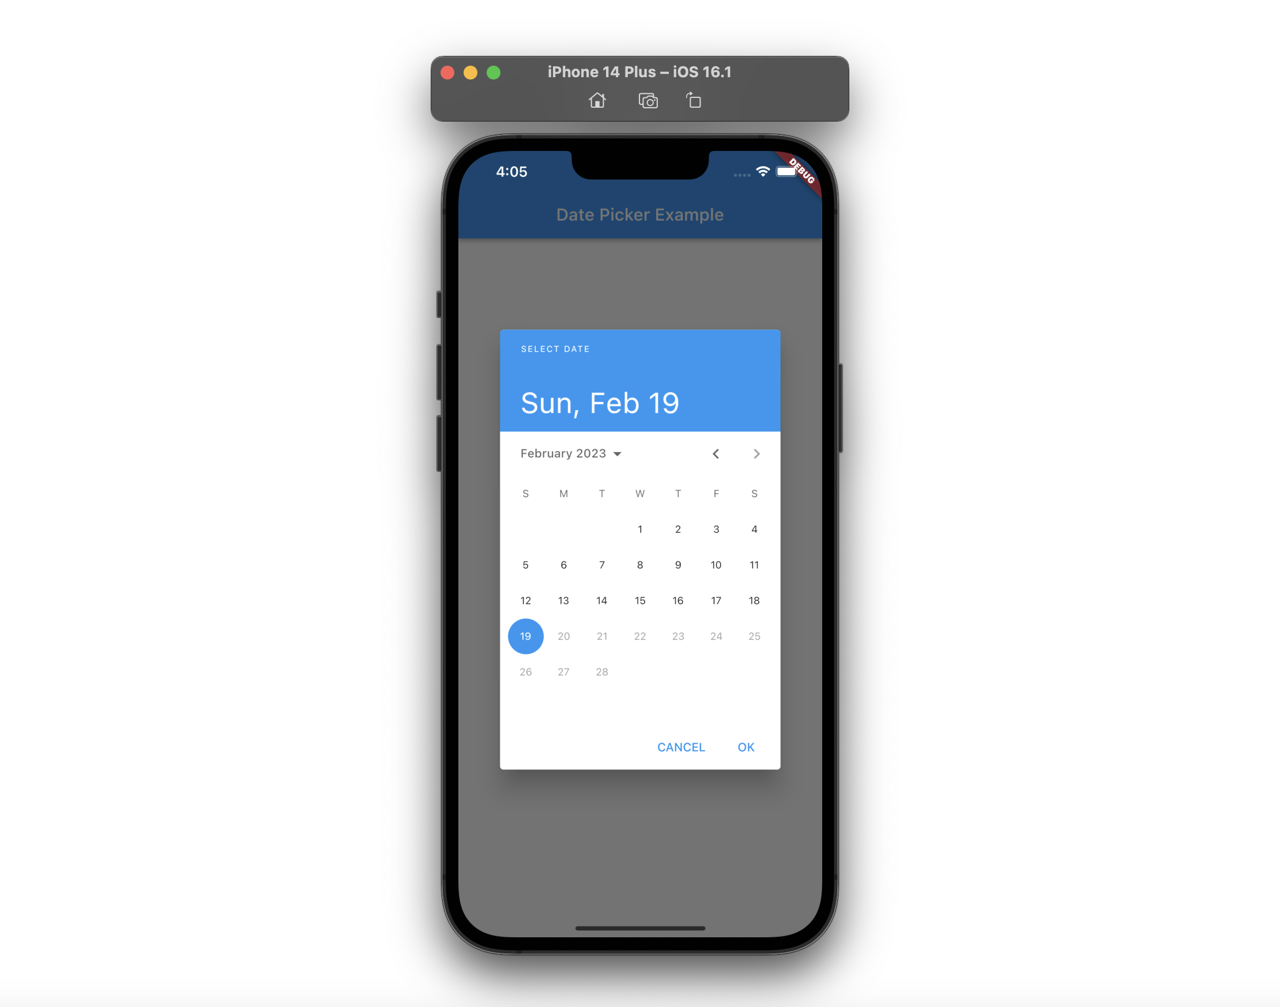
In this blog post, I will introduce how to use showDatePicker to show the DatePicker on Flutter.
- showDatePicker: https://api.flutter.dev/flutter/material/showDatePicker.html
You can see the full source code of the blog post in GitHub.
Prepare project
To check how to use showDatePicker, we’ll make a simple app to show the button like the following.
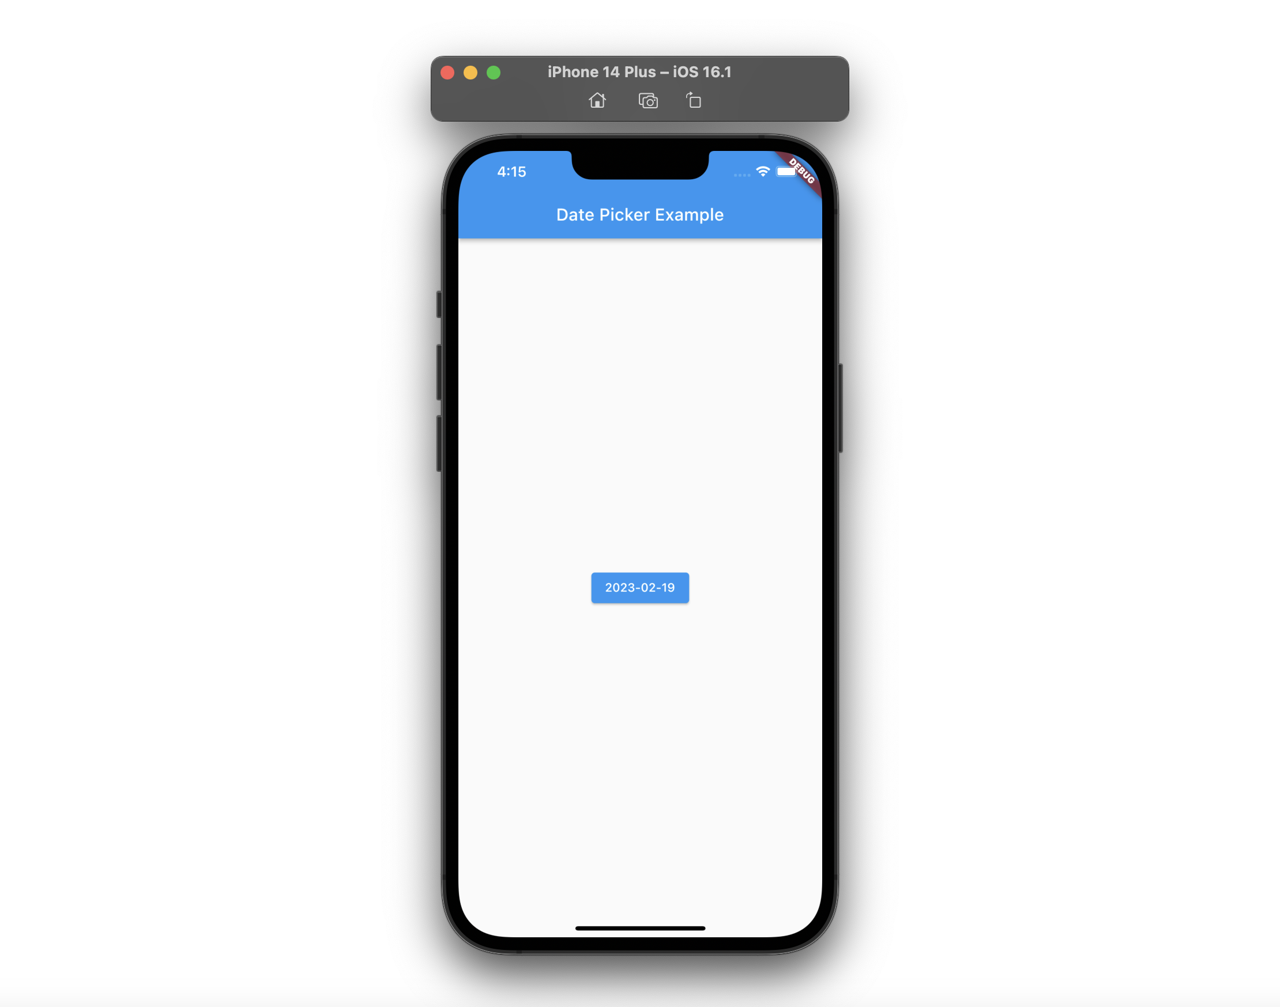
So, execute the following command to create a new Flutter project.
flutter create show_date_pickerAfter creating the new Flutter project, open the main.dart file and modify it like the following.
class _MyHomePageState extends State<MyHomePage> {
  DateTime date = DateTime.now();

  @override
  Widget build(BuildContext context) {
    return Scaffold(
      appBar: AppBar(
        title: const Text('Date Picker Example'),
      ),
      body: Center(
        child: ElevatedButton(
          onPressed: () {},
          child: Text(
            "${date.year.toString()}-${date.month.toString().padLeft(2, '0')}-${date.day.toString().padLeft(2, '0')}",
          ),
        ),
      ),
    );
  }
}
The app will update the date of the button by DatePicker, so I use the Stateful widget. After modifying and saving the main.dart file, you can see the button is shown well like the following.

We didn’t add any code to the button event, so you can see nothing happens when you press the button.
showDatePicker
Next, let’s see how to use showDatePicker to show DatePicker. Modify the onPressed function of the ElevatedButton widget like the following to show DatePicker when the button is pressed.
...
ElevatedButton(
  onPressed: () async {
    final selectedDate = await showDatePicker(
      context: context,
      initialDate: date,
      firstDate: DateTime(2000),
      lastDate: DateTime.now(),
    );
    if (selectedDate != null) {
      setState(() {
        date = selectedDate;
      });
    }
  },
  ...,
),
...
The showDatePicker function will return the Future<DateTime?> type data, so you need to use async-await. Also, if the user doesn’t select the date, null will be returned, so I use the if statement here to store the user-selected date. Lastly, I use setState to update State with the user-selected date for updating the screen.
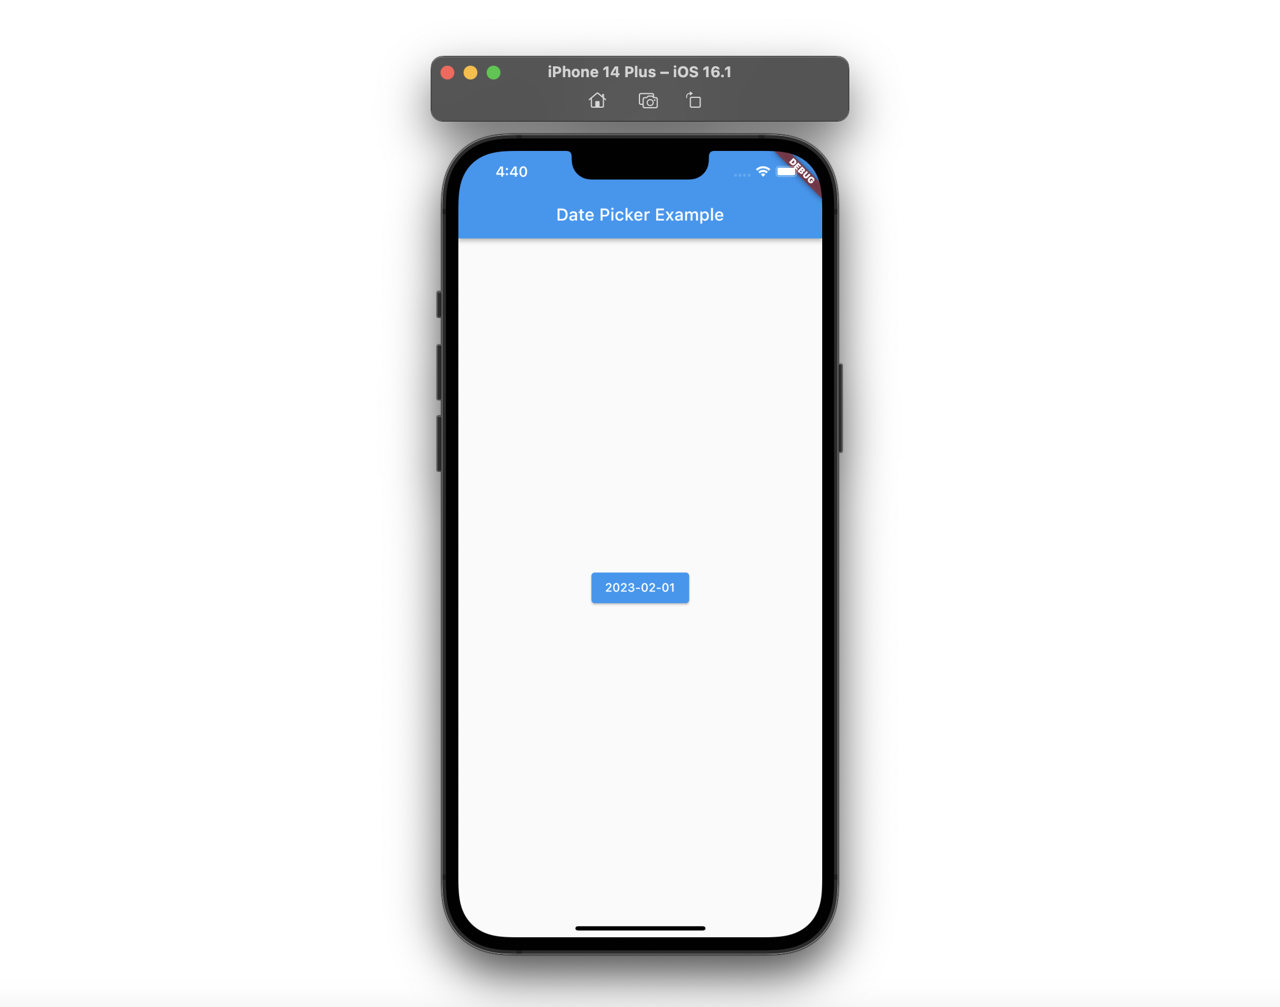
After modifying and saving the code, you can see the button is still shown well like the following.

And, let’s press the button. When you press the button, you can see the calendar like the following.

And then, when you select the date, you can see the date of the button is changed well like the following.
initialEntryMode
On the current DatePicker, you can see the edit icon on the top right, and when you press the icon, you can see the input like the following.
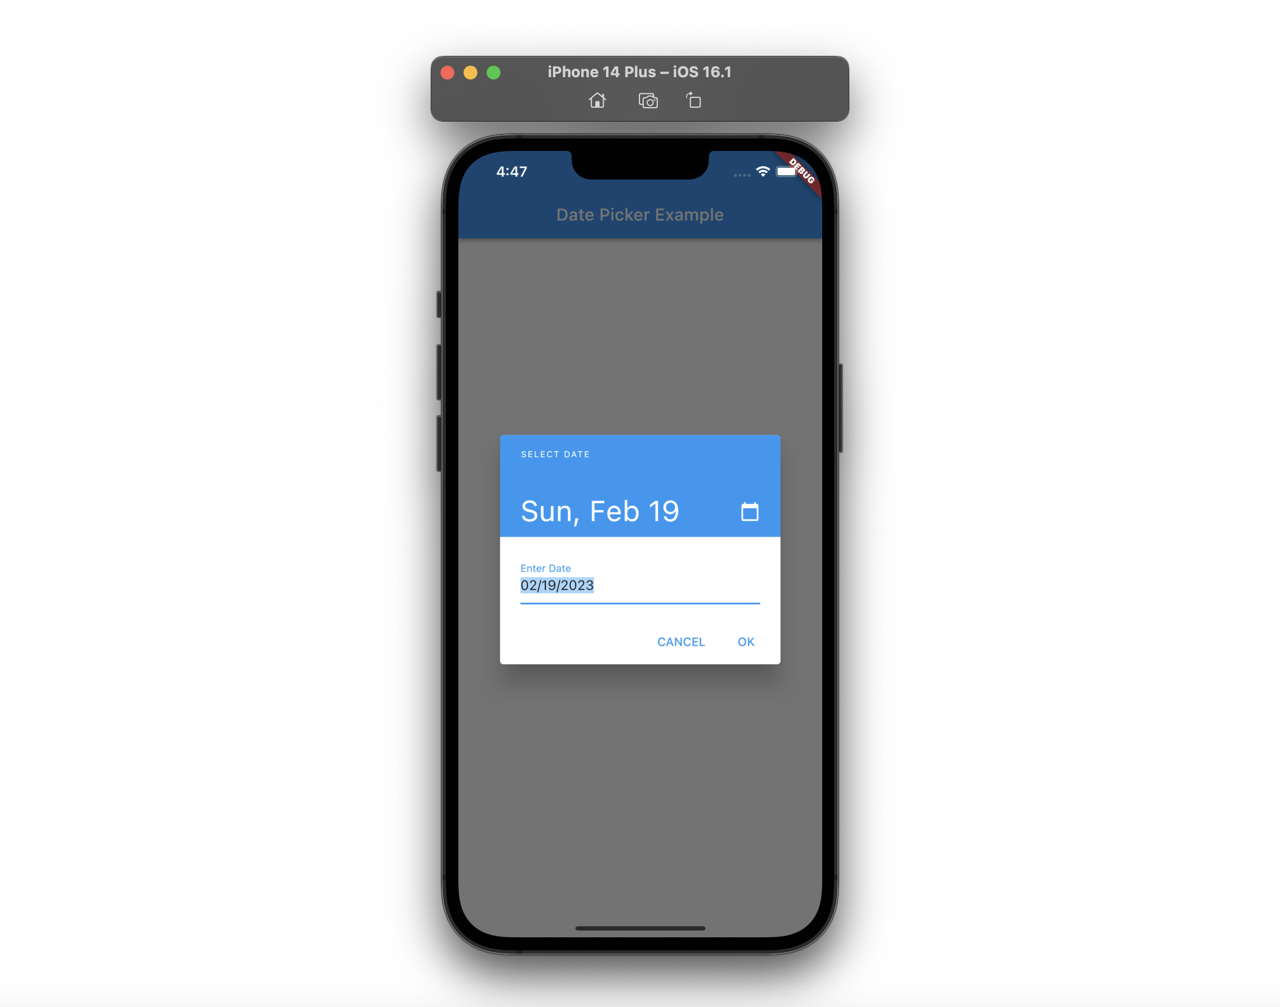
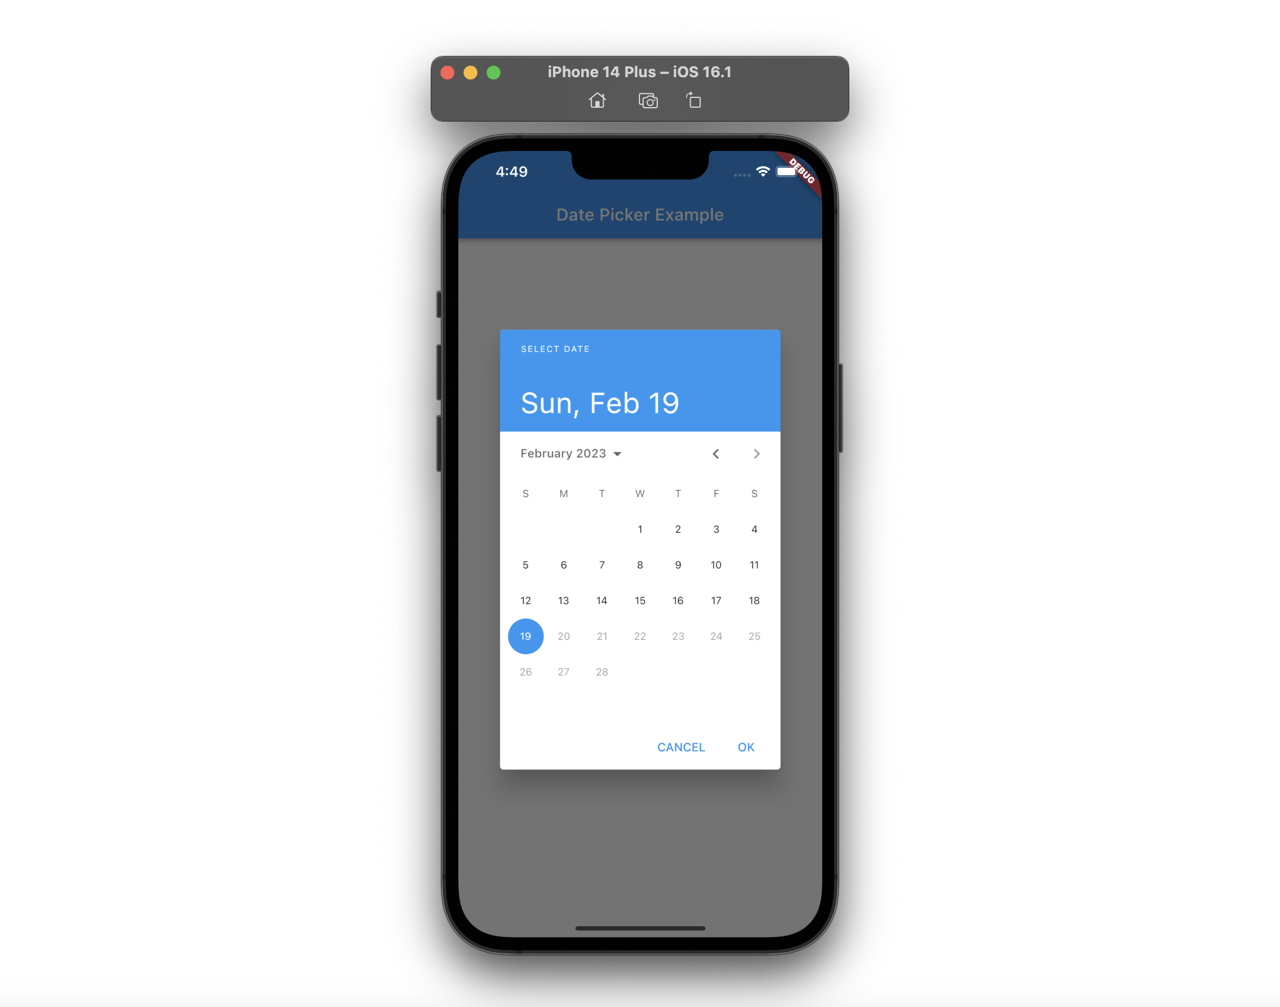
If you want to disable this feature, you need to set DatePickerEntryMode.calendarOnly to the initialEntryMode option in the showDatePicker function like the following.
...
ElevatedButton(
  onPressed: () async {
    final selectedDate = await showDatePicker(
      context: context,
      initialDate: date,
      firstDate: DateTime(2000),
      lastDate: DateTime.now(),
      initialEntryMode: DatePickerEntryMode.calendarOnly,
    );
    if (selectedDate != null) {
      setState(() {
        date = selectedDate;
      });
    }
  },
  ...,
),
...
And then, you can see the edit icon on the top right is disappeared.
DatePicker Localization
If you want to change the language of the calendar, you need to install the flutter_localizations package. Execute the following command to install the flutter_localizations package.
flutter pub add flutter_localizations --sdk=flutterOr, modify the pubspec.yaml file like the following to install the flutter_localizations package.
...
dependencies:
  flutter:
    sdk: flutter
  flutter_localizations:
    sdk: flutter
...
And then, Add the localizationsDelegates option to MaterialApp like the following.
import 'package:flutter_localizations/flutter_localizations.dart';
...
class MyApp extends StatelessWidget {
  const MyApp({super.key});

  @override
  Widget build(BuildContext context) {
    return MaterialApp(
      title: 'Flutter Demo',
      localizationsDelegates: const [
        GlobalMaterialLocalizations.delegate,
        GlobalWidgetsLocalizations.delegate,
        GlobalCupertinoLocalizations.delegate,
      ],
      ...,
    );
  }
}
...
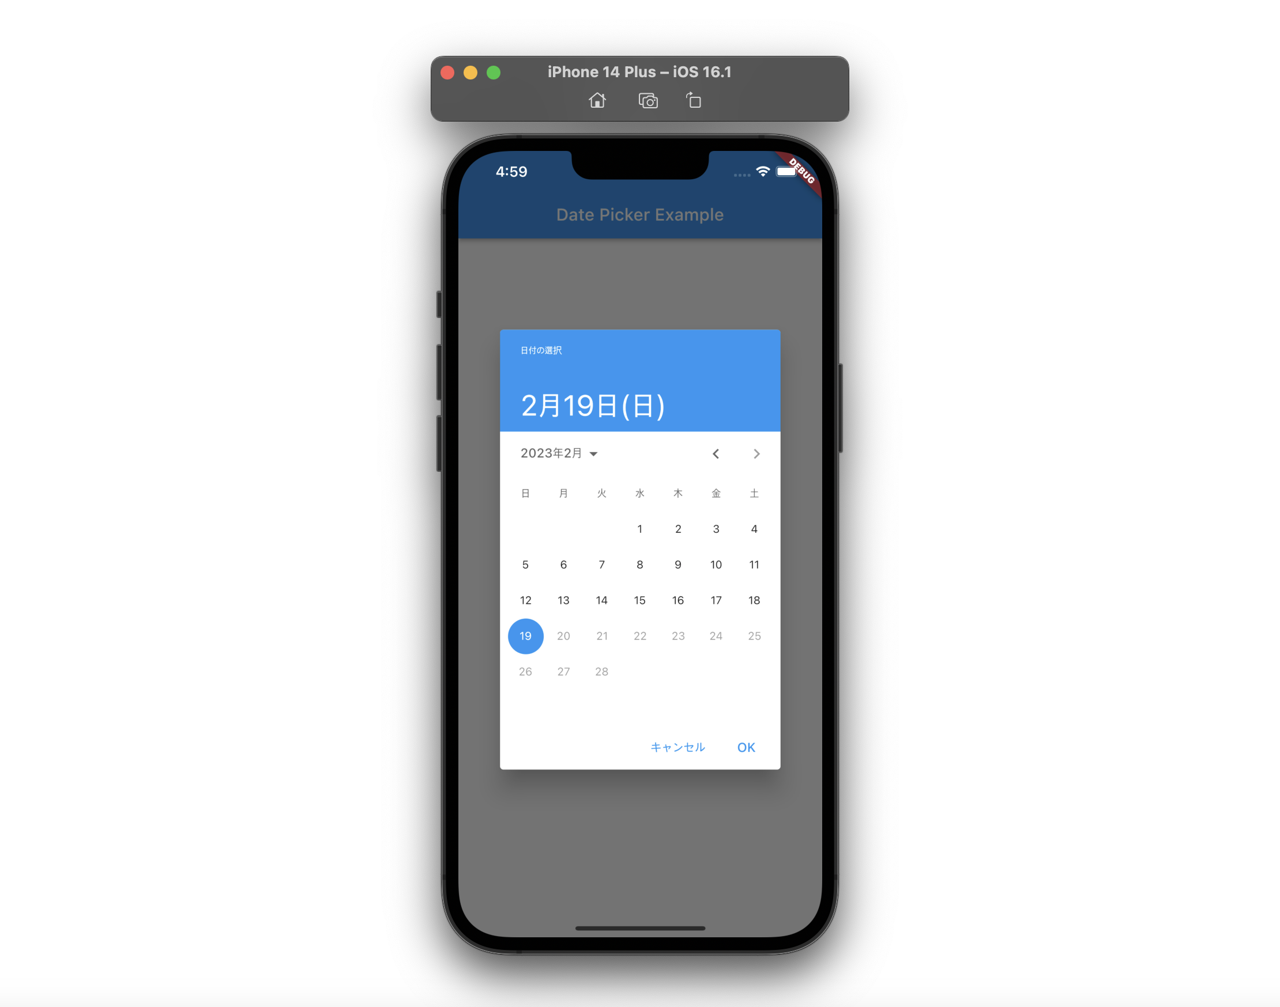
And, configure the language that you want to show to the locale option in the showDatePicker function. In here, I configure Japanese.
...
final selectedDate = await showDatePicker(
  context: context,
  initialDate: date,
  firstDate: DateTime(2000),
  lastDate: DateTime.now(),
  initialEntryMode: DatePickerEntryMode.calendarOnly,
  locale: const Locale('ja', 'JP'),
);
...
After modifying and saving the code, you can see Japanese is shown well on the calendar instead of English.
Test code
You can write the test code like the following to check showDatePicker works well.
...
testWidgets('Change date by DatePicker', (WidgetTester tester) async {
  DateTime date = DateTime.now();

  await tester.pumpWidget(const MyApp());

  final year = date.year.toString();
  final month = date.month.toString().padLeft(2, '0');
  final day = date.day.toString().padLeft(2, '0');

  expect(find.text('$year-$month-$day'), findsOneWidget);

  // Press cancel test
  await tester.tap(find.text('$year-$month-$day'));
  await tester.pump();
  await tester.tap(find.text('キャンセル')); // Cancel
  await tester.pump();
  expect(find.text('$year-$month-$day'), findsOneWidget);
  expect(find.text('キャンセル'), findsNothing);

  // Change date
  await tester.tap(find.text('$year-$month-$day'));
  await tester.pump();
  await tester.tap(find.text('15'));
  await tester.tap(find.text('OK'));
  await tester.pump();
  expect(find.text("$year-$month-15"), findsOneWidget);

  await tester.tap(find.text('$year-$month-15'));
  await tester.pump();
  await tester.tap(find.text('1'));
  await tester.tap(find.text('OK'));
  await tester.pump();
  expect(find.text("$year-$month-01"), findsOneWidget);
});
...
In this test code, press the button to show DatePicker, and then press the cancel button in Japanese(キャンセル) to close DatePicker without any changes. And then, open it again and select the date on the calendar to update the date.
Completed
Done! we’ve seen how to use showDatePicker to implement to show the calendar and change the date on Flutter. If you need the input of the date, it’s better to use DatePicker for users’ convenience instead of the input that users need to modify the data directly.
Was my blog helpful? Please leave a comment at the bottom. it will be a great help to me!
App promotion
Deku.Deku created the applications with Flutter.If you have interested, please try to download them for free.


