Outline
Let’s see how to use the AnimatedContainer widget and the AnimatedOpacity widget to make a simple animation in Flutter.
You can see the source code of the blog post on the link below.
- GitHub: AnimatedContainer
- GitHub: AnimatedOpacity
Create Flutter project
To check how to use the animation in Flutter, execute the command below to create a new Flutter project.
flutter create my_app
cd my_app
AnimatedContainer
After creating the project, open the main.dart file and modify it like below to show the AnimatedContainer widget.
import 'dart:math';
import 'package:flutter/material.dart';
void main() {
runApp(MyApp());
}
class MyApp extends StatelessWidget {
@override
Widget build(BuildContext context) {
return MaterialApp(
title: 'Flutter Demo',
theme: ThemeData(
primarySwatch: Colors.blue,
),
home: MyHomePage(),
);
}
}
class MyHomePage extends StatefulWidget {
@override
_MyHomePageState createState() => _MyHomePageState();
}
class _MyHomePageState extends State<MyHomePage> {
double _width = 0;
double _height = 0;
Color _color = Colors.green;
double _borderRadius = 0;
@override
Widget build(BuildContext context) {
return Scaffold(
appBar: AppBar(
title: Text('AnimatedContainer'),
),
body: Center(
child: AnimatedContainer(
duration: Duration(seconds: 1),
curve: Curves.fastOutSlowIn,
width: _width,
height: _height,
decoration: BoxDecoration(
color: _color,
borderRadius: BorderRadius.circular(_borderRadius)),
),
),
floatingActionButton: FloatingActionButton(
onPressed: () {
setState(() {
final random = Random();
_width = random.nextInt(300).toDouble();
_height = random.nextInt(300).toDouble();
_color = Color.fromRGBO(random.nextInt(256), random.nextInt(256),
random.nextInt(256), 1);
_borderRadius = random.nextInt(150).toDouble();
});
},
child: Icon(Icons.play_arrow),
),
);
}
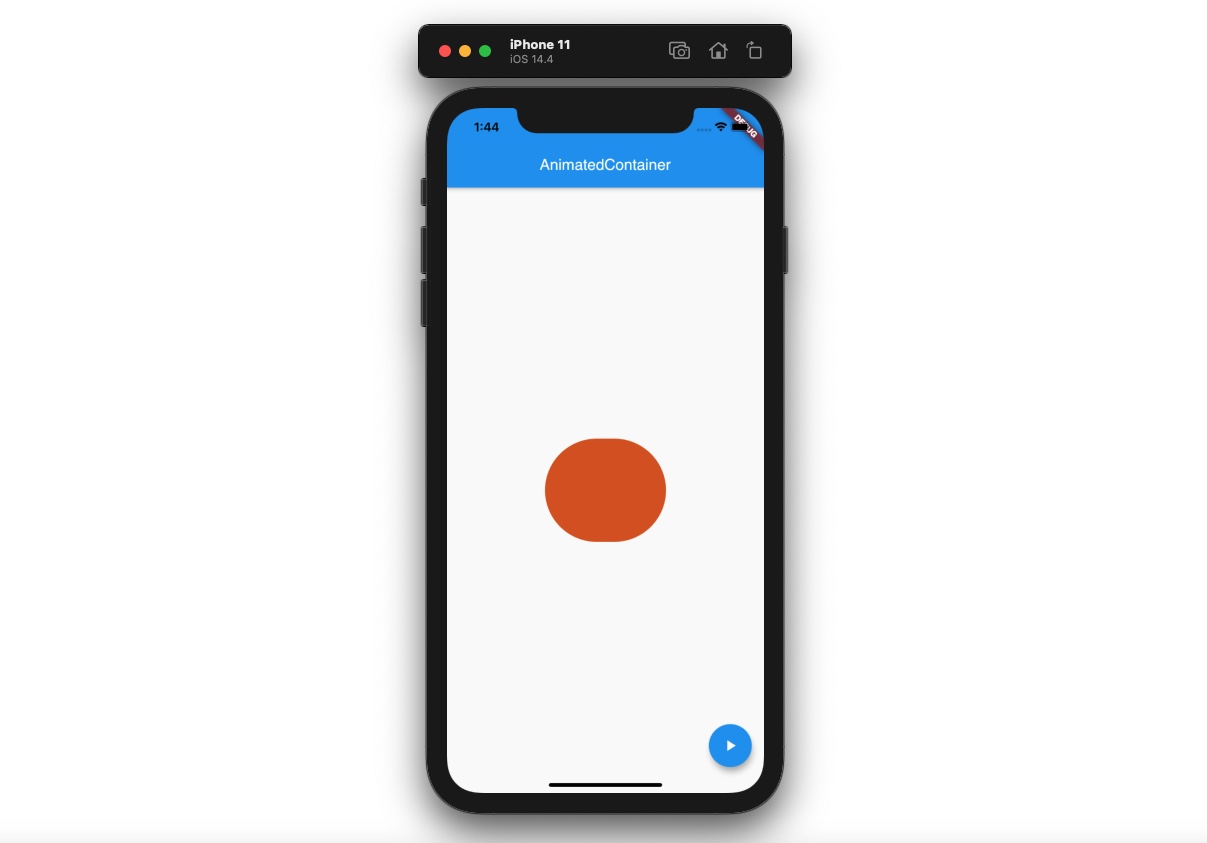
}If you write the code above, you can see the screen like below.
Let’s see the details about how to use the AnimatedContainer widget.
class _MyHomePageState extends State<MyHomePage> {
  double _width = 0;
  double _height = 0;
  Color _color = Colors.green;
  double _borderRadius = 0;
  ...
}
I used Stateful widget and defined the animation values.
class _MyHomePageState extends State<MyHomePage> {
  ...
  @override
  Widget build(BuildContext context) {
    return Scaffold(
      ...
      body: Center(
        child: AnimatedContainer(
          duration: Duration(seconds: 1),
          curve: Curves.fastOutSlowIn,
          width: _width,
          height: _height,
          decoration: BoxDecoration(
              color: _color,
              borderRadius: BorderRadius.circular(_borderRadius)),
        ),
      ),
      ...
    );
  }
}
And then, pass the values to the AnimatedContainer widget.
class _MyHomePageState extends State<MyHomePage> {
  ...
  @override
  Widget build(BuildContext context) {
    return Scaffold(
      ...
      floatingActionButton: FloatingActionButton(
        onPressed: () {
          setState(() {
            final random = Random();
            _width = random.nextInt(300).toDouble();
            _height = random.nextInt(300).toDouble();
            _color = Color.fromRGBO(random.nextInt(256), random.nextInt(256),
                random.nextInt(256), 1);
            _borderRadius = random.nextInt(150).toDouble();
          });
        },
        child: Icon(Icons.play_arrow),
      ),
    );
  }
}
Lastly, when the FloatingActionButton is pressed, the animation values are changed via setState. Now, when you press the FloatingActionButton button, you can see the various shape of the squares on the screen.
AnimatedOpacity
Unlike the AnimatedContainer widget, the AnimatedOpacity widget is simply to change the opacity with the animation. Open the main.dart file and modify it like below.
import 'package:flutter/material.dart';
void main() {
runApp(MyApp());
}
class MyApp extends StatelessWidget {
@override
Widget build(BuildContext context) {
return MaterialApp(
title: 'Flutter Demo',
theme: ThemeData(
primarySwatch: Colors.blue,
),
home: MyHomePage(),
);
}
}
class MyHomePage extends StatefulWidget {
@override
_MyHomePageState createState() => _MyHomePageState();
}
class _MyHomePageState extends State<MyHomePage> {
bool _isVisible = true;
@override
Widget build(BuildContext context) {
return Scaffold(
appBar: AppBar(
title: Text('AnimatedOpacity'),
),
body: Center(
child: AnimatedOpacity(
opacity: _isVisible ? 1.0 : 0,
duration: Duration(seconds: 1),
child: Container(
width: 200,
height: 200,
color: Colors.green,
),
),
),
floatingActionButton: FloatingActionButton(
onPressed: () {
setState(() {
_isVisible = !_isVisible;
});
},
child: Icon(Icons.play_arrow),
),
);
}
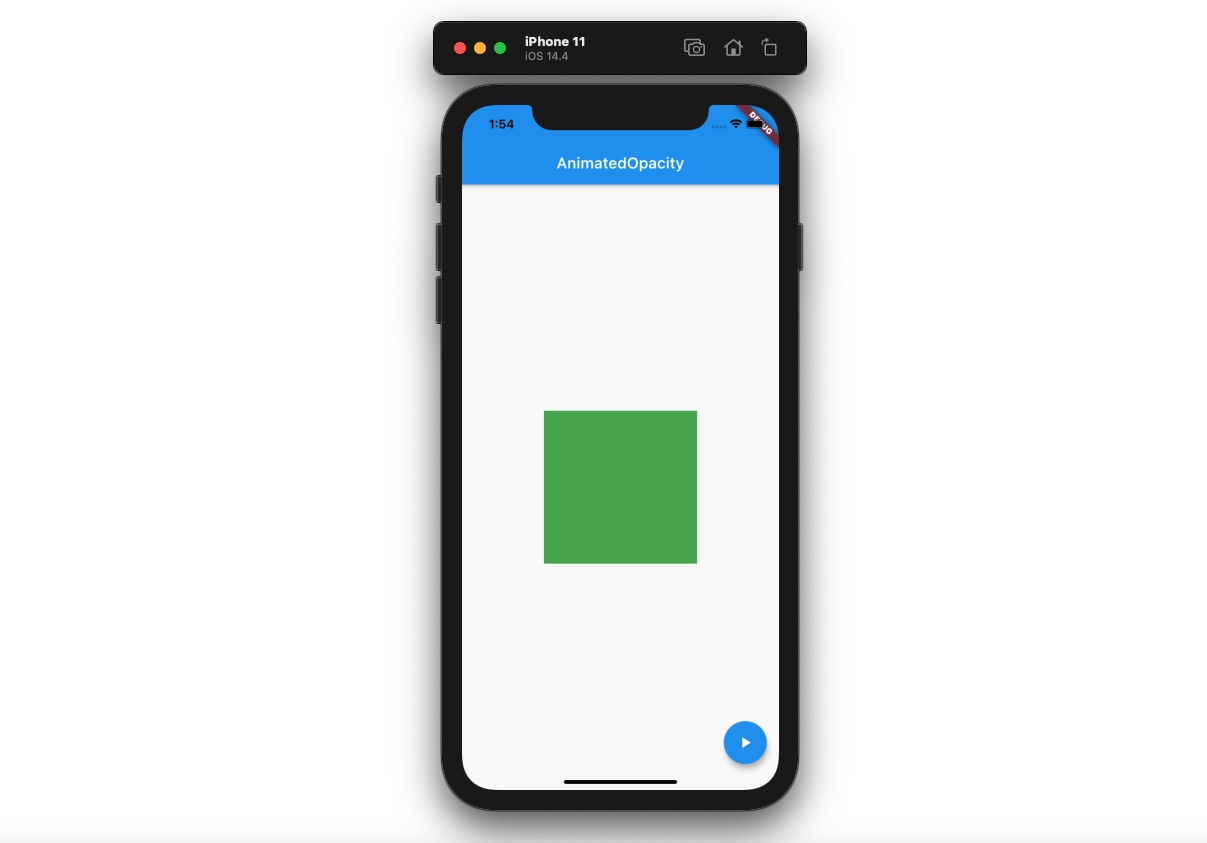
}If you modify the code like above, you can see the screen like below.
Let’s see the details about how to use the AnimatedOpacity widget.
class _MyHomePageState extends State<MyHomePage> {
  bool _isVisible = true;
  ...
}
In this example, I used the _isVisible value, and if the value is true, the AnimatedOpacity widget will be shown, and if the value is false, the AnimatedOpacity widget will be hidden.
class _MyHomePageState extends State<MyHomePage> {
  ...
  @override
  Widget build(BuildContext context) {
    return Scaffold(
      ...
      body: Center(
        child: AnimatedOpacity(
          opacity: _isVisible ? 1.0 : 0,
          duration: Duration(seconds: 1),
          child: Container(
            width: 200,
            height: 200,
            color: Colors.green,
          ),
        ),
      ),
      ...
    );
  }
}
The AnimatedOpacity widget requires the child widget, and we can control the opacity animation by passing the opacity parameter.
class _MyHomePageState extends State<MyHomePage> {
  ...
  @override
  Widget build(BuildContext context) {
    return Scaffold(
      ...
      floatingActionButton: FloatingActionButton(
        onPressed: () {
          setState(() {
            _isVisible = !_isVisible;
          });
        },
        child: Icon(Icons.play_arrow),
      ),
    );
  }
}
Now, we can use the FloatingActionButton widget to change the _isVisible value and it will change the AnimatedOpacity widget’s opacity.
Completed
Done! We’ve seen how to use the AnimatedContainer widget and the AnimatedOpacity widget to make a simple animation in Flutter!
Was my blog helpful? Please leave a comment at the bottom. it will be a great help to me!
App promotion
Deku.Deku created the applications with Flutter.If you have interested, please try to download them for free.