Outline
I try to develop an app with Flutter. When we develop the app, we use the navigation system to navigate the screens. In this blog post, I will show you how to use the Drawer navigation in Flutter.
You can see the full source code of this blog post on the link below.
Drawer
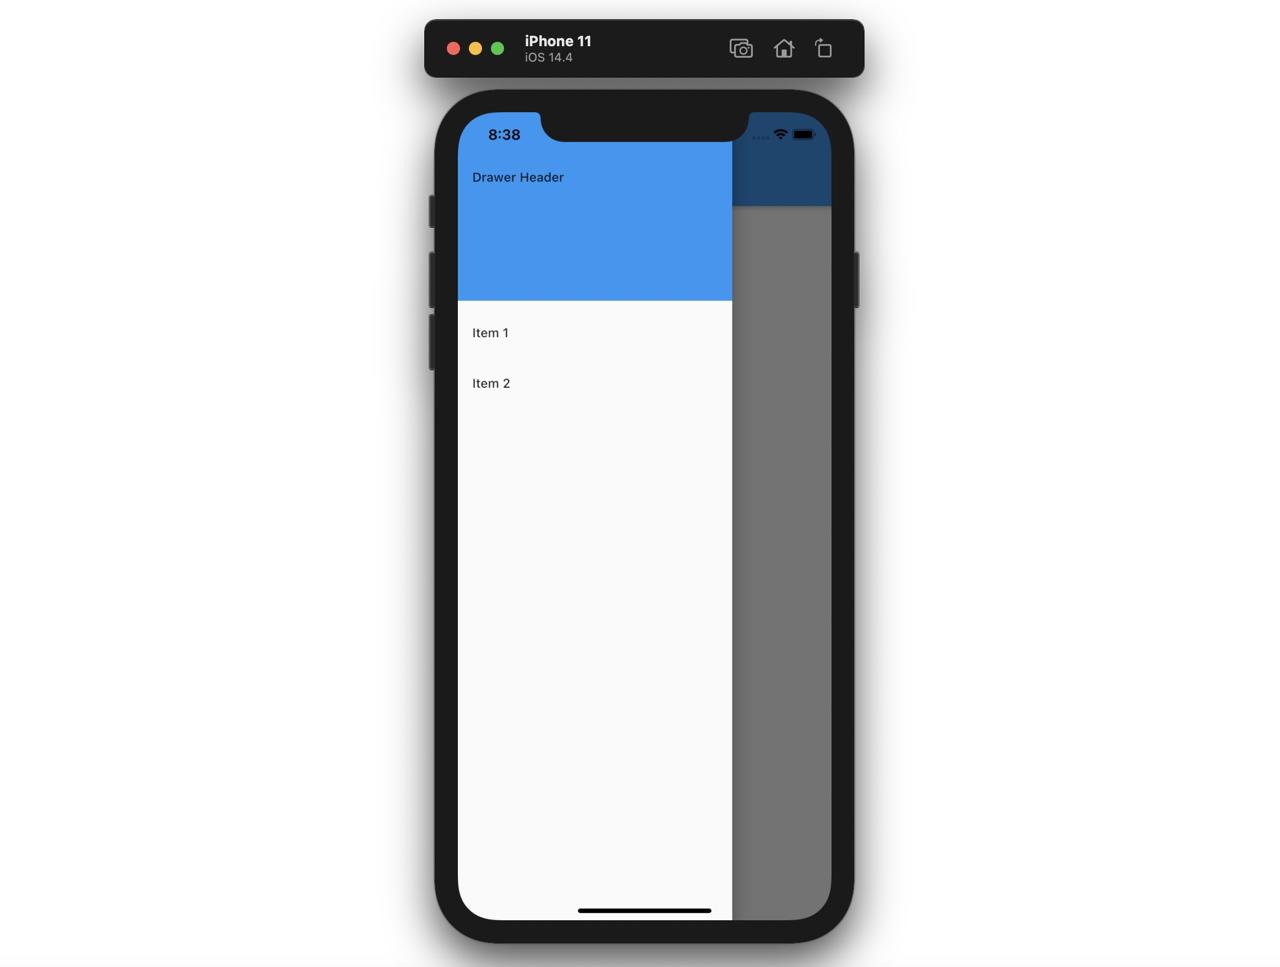
The Drawer navigation is mainly used for the app menu, and it slides over the screen like below.

Let’s see the example to understand the Drawer navigation. First, execute the command below to create a new project for the Drawer navigation.
flutter create my_app
cd stack
To implement the Drawer navigation, open the main.dart file and modify it like below.
import 'package:flutter/material.dart';

void main() => runApp(MyApp());

class MyApp extends StatelessWidget {
  @override
  Widget build(BuildContext context) {
    return MaterialApp(
      title: 'Flutter Demo',
      debugShowCheckedModeBanner: false,
      home: Home(),
    );
  }
}

class Home extends StatelessWidget {
  @override
  Widget build(BuildContext context) {
    return Scaffold(
      appBar: AppBar(title: Text('Drawer')),
      body: Center(child: Text('My Page!')),
      drawer: Drawer(
        child: ListView(
          padding: EdgeInsets.zero,
          children: [
            DrawerHeader(
              child: Text('Drawer Header'),
              decoration: BoxDecoration(
                color: Colors.blue,
              ),
            ),
            ListTile(
              title: Text('Item 1'),
              onTap: () {
                Navigator.pop(context);
              },
            ),
            ListTile(
              title: Text('Item 2'),
              onTap: () {
                Navigator.pop(context);
              },
            ),
          ],
        ),
      ),
    );
  }
}
And let’s see the details.
The code below is a basic code to show the app on the screen.
import 'package:flutter/material.dart';

void main() => runApp(MyApp());

class MyApp extends StatelessWidget {
  @override
  Widget build(BuildContext context) {
    return MaterialApp(
      title: 'Flutter Demo',
      debugShowCheckedModeBanner: false,
      home: Home(),
    );
  }
}
I just skip to explain the code above, because you already use it many times. After executing the app, the Home widget is shown up.
class Home extends StatelessWidget {
  @override
  Widget build(BuildContext context) {
    return Scaffold(
      appBar: AppBar(title: Text('Drawer')),
      body: Center(child: Text('My Page!')),
      drawer: Drawer(
        child: ListView(...),
      ),
    );
  }
}
The Home widget inherits StatelessWidget, and use the Scaffold for the structure of the screen. At this time, we can use the drawer parameter to implement the Drawer navigation simply.
drawer: Drawer(
  child: ListView(...),
),
We need to pass the Drawer widget on the drawer parameter. The Drawer widget can have one child widget. In this example, I use the ListView widget.
In this blog post, I’m introducing the Drawer navigation, so I skip to explain the ListView widget in here.
DrawerHeader
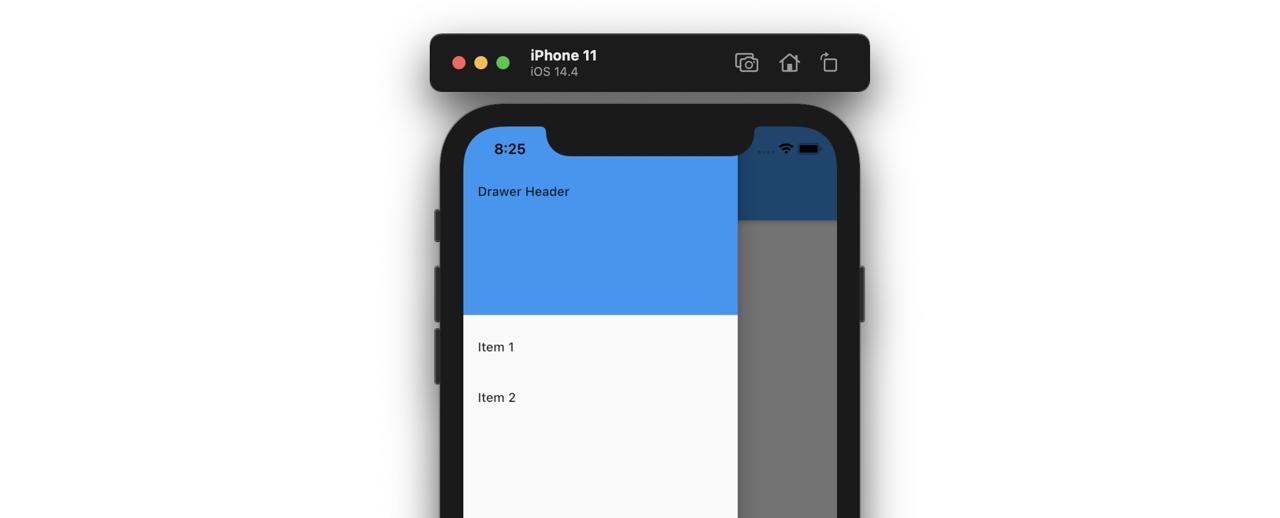
The DrawerHeader widget is a widget to be shown up on the header of the Drawer navigation in Material design. The DrawerHeader widget includes basic Material design.

We can use the DrawerHeader widget like below, and pass the custom widget to the child parameter to customize it.
DrawerHeader(
  child: Text('Drawer Header'),
  decoration: BoxDecoration(
    color: Colors.blue,
  ),
)
UserAccountsDrawerHeader
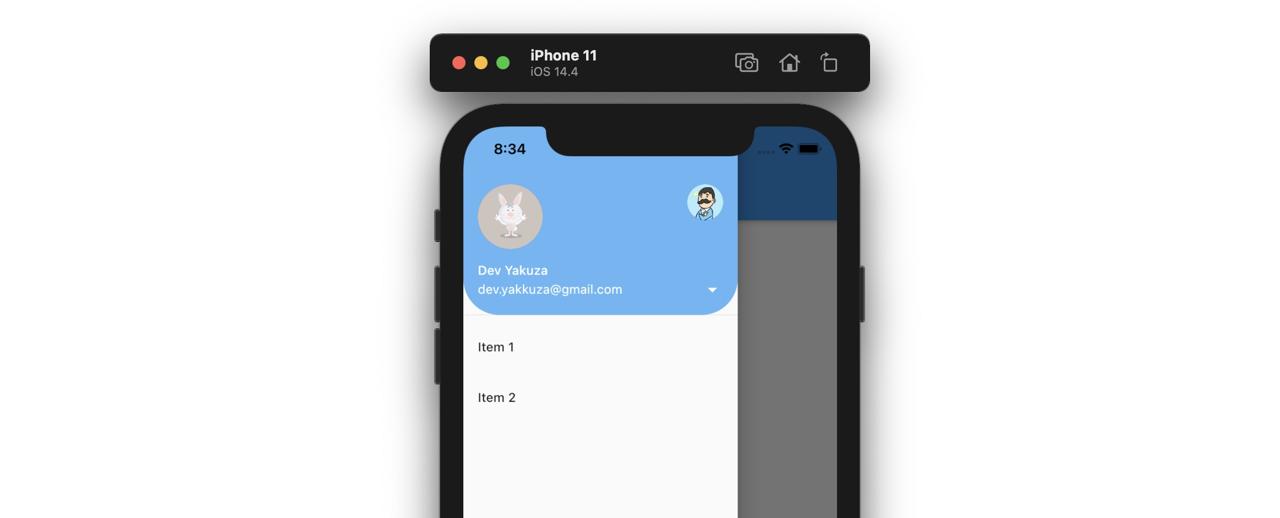
The UserAccountsDrawerHeader is used for showing the user account information on the header of the Drawer navigation in the Material design.

You can use the UserAccountsDrawerHeader widget like below.
UserAccountsDrawerHeader(
  currentAccountPicture: CircleAvatar(
    backgroundImage: AssetImage('assets/bunny.gif'),
  ),
  otherAccountsPictures: [
    CircleAvatar(
      backgroundImage: AssetImage('assets/profile.png'),
    )
  ],
  accountEmail: Text('[email protected]'),
  accountName: Text('Dev Yakuza'),
  onDetailsPressed: () {
    print('press details');
  },
  decoration: BoxDecoration(
      color: Colors.blue[300],
      borderRadius: BorderRadius.only(
        bottomLeft: Radius.circular(40),
        bottomRight: Radius.circular(40),
      )),
),
Completed
Done! we’ve seen how to use the Drawer navigation and the widgets for the header of the Drawer navigation.
Was my blog helpful? Please leave a comment at the bottom. it will be a great help to me!
App promotion
Deku.Deku created the applications with Flutter.If you have interested, please try to download them for free.


