Outline
In Flutter, normally you create a Flutter project by executing the command below.
flutter create project_nameWhen you create the Flutter project, the Application ID will be generated as com.example.project_name temporarily. However, when you deploy the app, you need to configure the unique ID to the Application ID. In this blog post, I will show you how to change the Application ID in Flutter app.
iOS
To change the Application ID in iOS, execute the ios/Runner.xcworkspace file.
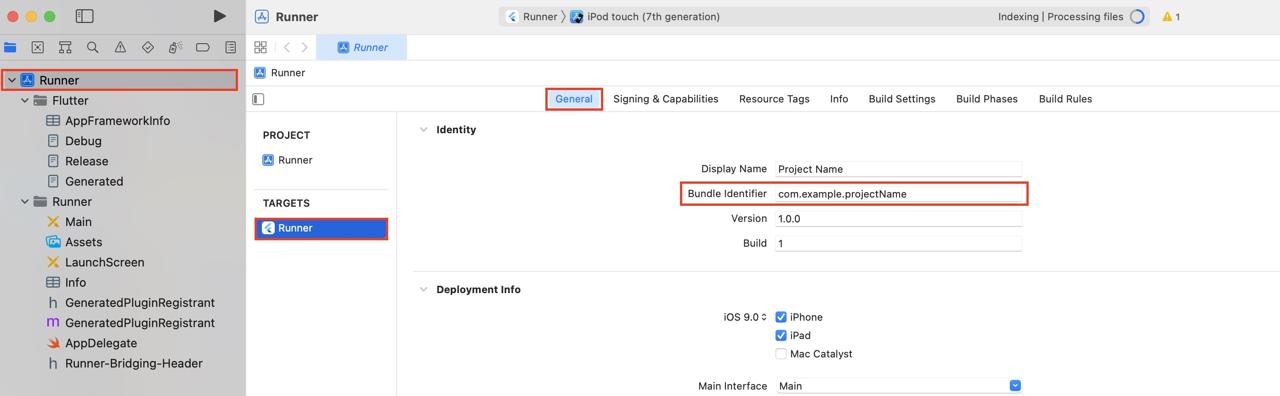
After Xcode is executed, click the Runner on the left tab, and select Runner in Targets. And, you can change the Application ID you want in Bundle Identifier.
Normally, the APplication ID is entered in the reverse order of the URL.
com.posstree.dev.yakuza.appAndroid
To change the Application ID in Android, open the the android/app/build.gradle file and configure the Application ID to applicationId in defaultConfig section.
defaultConfig {
    // TODO: Specify your own unique Application ID (https://developer.android.com/studio/build/application-id.html).
    applicationId "com.example.project_name"
    ...
}
Normally, the APplication ID is entered in the reverse order of the URL.
com.posstree.dev.yakuza.appCompleted
Done! we’ve seen how to change the Application ID in Flutter app. To deploy the app to App Store and Play Console, the unique Application is required. So, remember well to change the Application ID to help you deploy the app.
Was my blog helpful? Please leave a comment at the bottom. it will be a great help to me!
App promotion
Deku.Deku created the applications with Flutter.If you have interested, please try to download them for free.