Outline
I try to write how to configure the development environment from very first time on Mac. this blog is a series. if you want to know other development environment, see other blog posts.
- Development Environment on Mac(1) - iTerm & zsh
- Development Environment on Mac(2) - for tools
- Development Environment on Mac(3) - for development
- Configure automatically development environment on Mac via Homebrew and Shell Script
in here, I’ll introduce how to configure iTerm and zsh on Mac.
iTerm Installation
click the link below to go to iTerm download page.
- iTerm download: Download
you can see the screen like below, click Stable Releases to download.
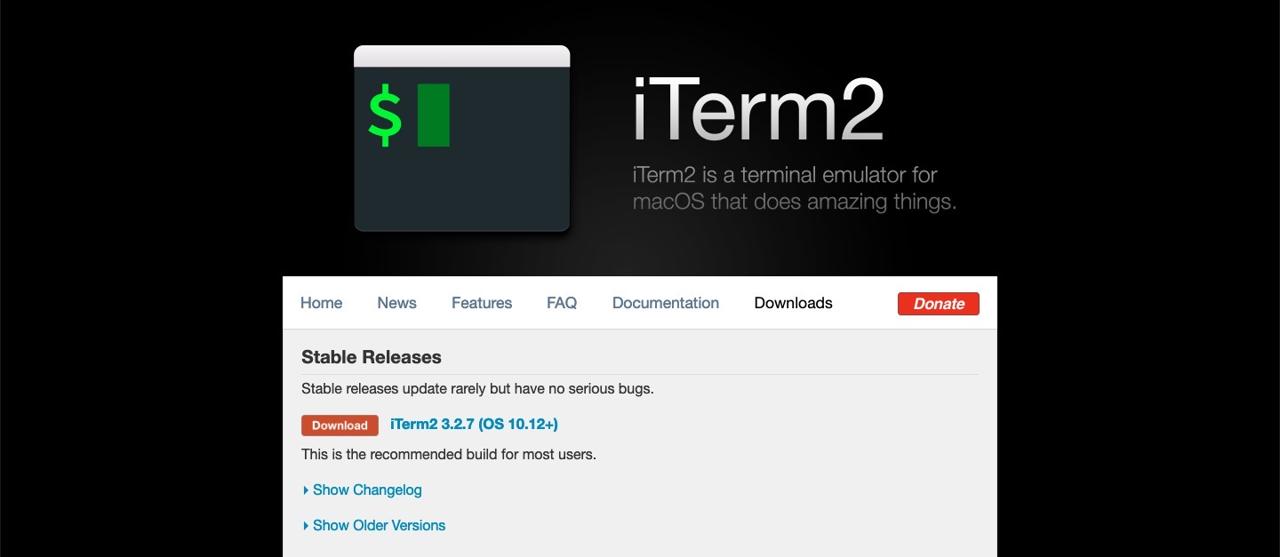
unzip zip file you downloaded and install it.
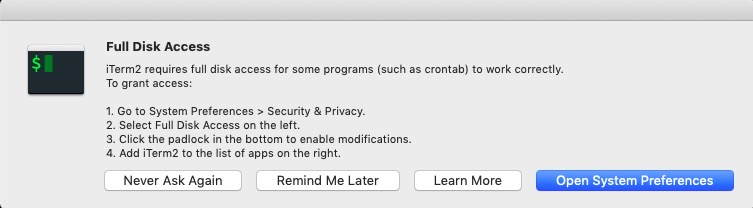
if iTerm asks you Full Disk Access permission, click Open System Preferences on the right bottom.
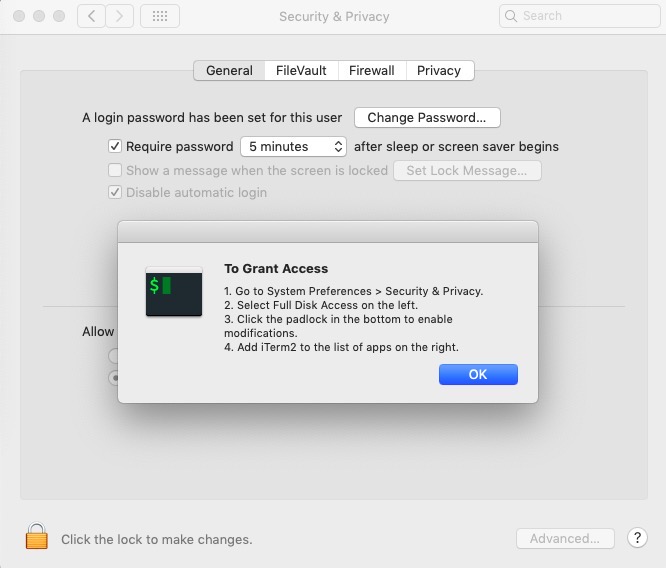
you can see the nice explanation and Security & Privacy is activated. click the lock shape on the left bottom, and insert your password to make editable.
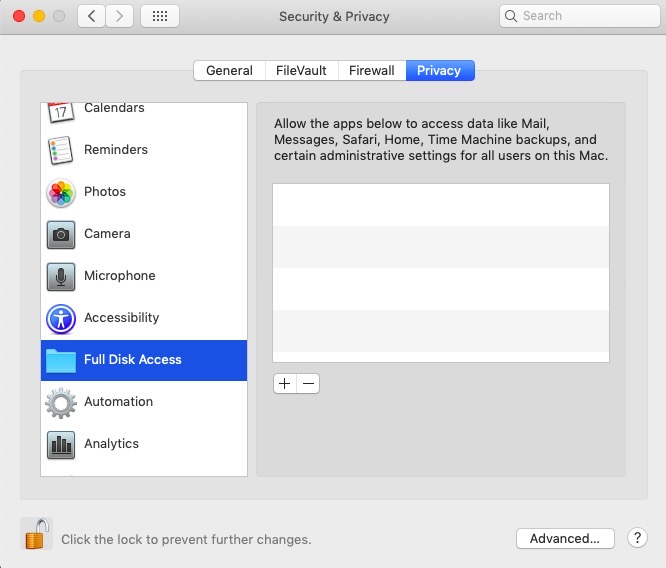
select Privacy on the top tab, and click Full Disk Access on the left list.
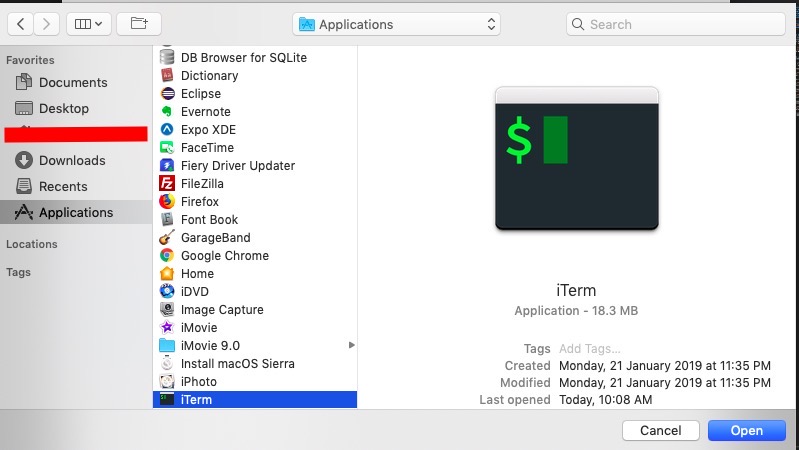
click + button on the right side. go to Applications, and select iTerm and click Open.
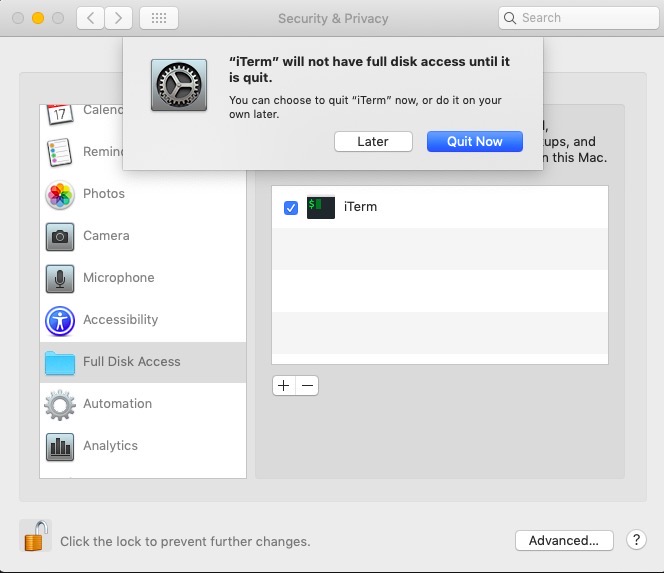
if Mac asks you that you want to quit iTerm, click Quit Now to quit iTerm.
after it, check iTerm is executed.
zsh
zsh makes Terminal easier to use. if you want to know more details, click the link below.
- zsh official site: zsh
you can find the installation on zsh official site like below.
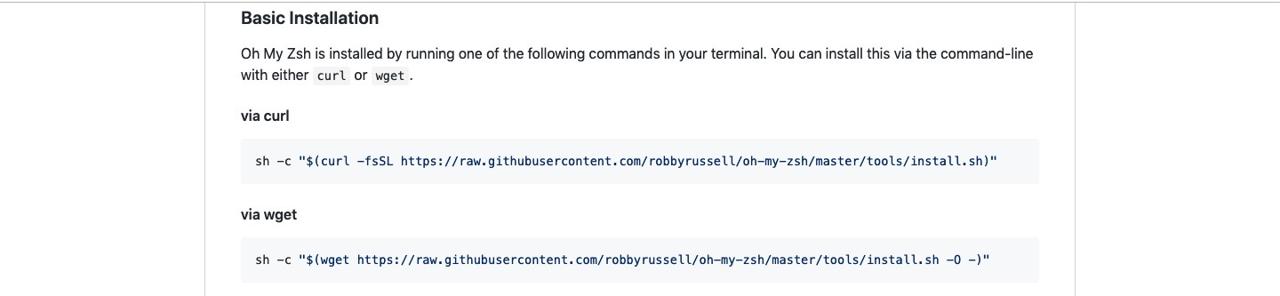
open iTerm or Terminal and execute the command below.
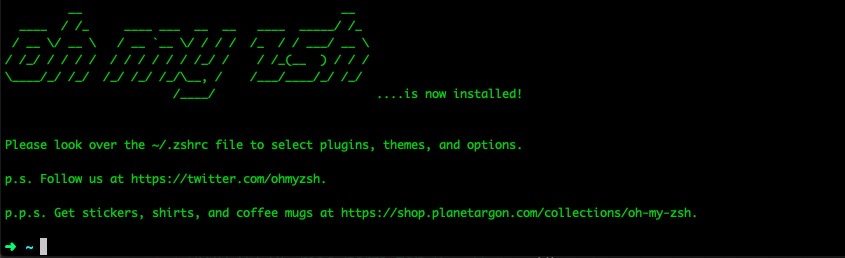
sh -c "$(curl -fsSL https://raw.githubusercontent.com/robbyrussell/oh-my-zsh/master/tools/install.sh)"after installing, you can see the screen like below.
Configure zsh to iTerm Default Terminal
iTerm’s default is to use the basic shell. let’s set iTerm uses basically zsh.
execute iTerm and click iTerms2 > Preferences... on the left top.

you can see the screen like above. click Profiles tab on the top. insert /bin/zsh in Command on Command section on the right middle.
after it, restart iTerm. you can see zsh is executed by default.
Configure iTerm Theme.
there are many themes for iTerm. you can configure the theme what you want. in here, I’ll introduce how to set iterm2-solarized theme.
click the link below to download the theme.
when you click the link above, you can see the theme file contents. push command + s to save it.
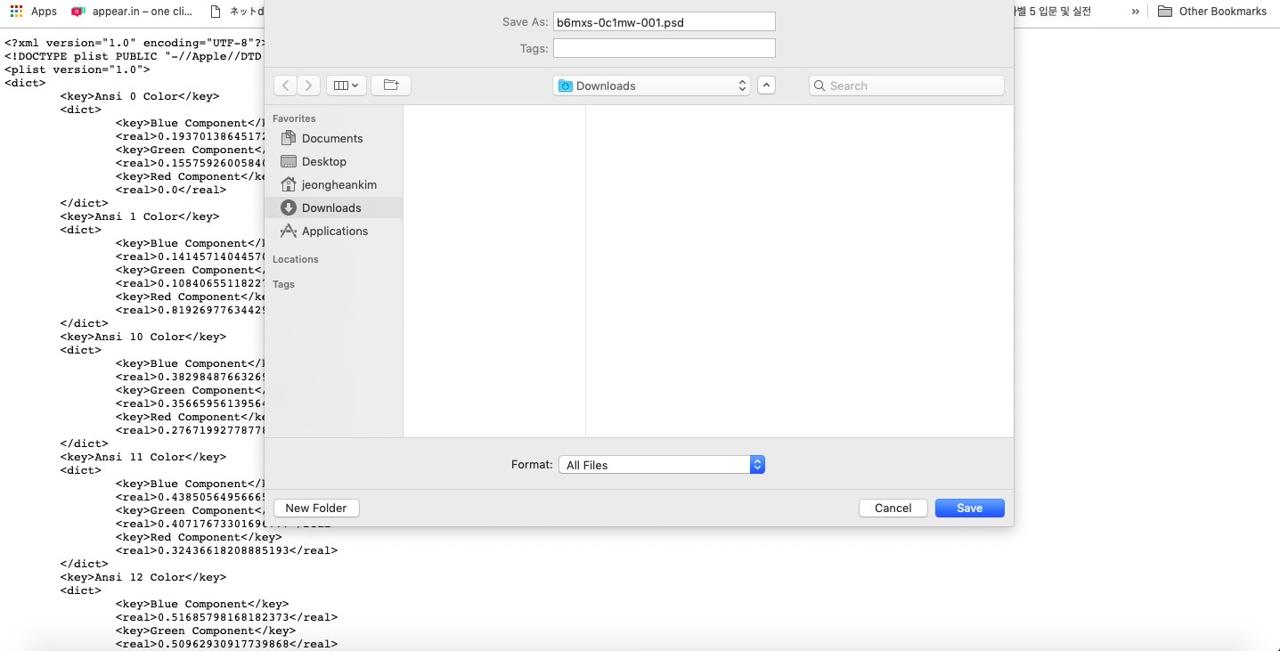
before you download it, change to All Files on Format on the bottom. and check the end of the file is .itermcolors.
open Preferences of iTerm again.
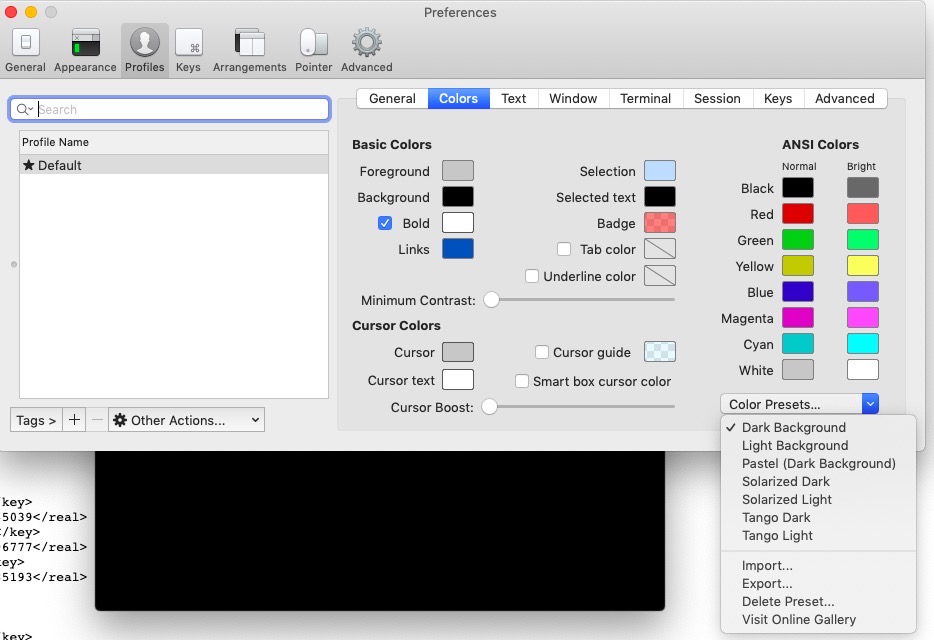
click Profiles > Colors like above, and click Color Preset... > import... on the right bottom.
select Solarized Dark - Patched.itermcolors file you downloaded above.
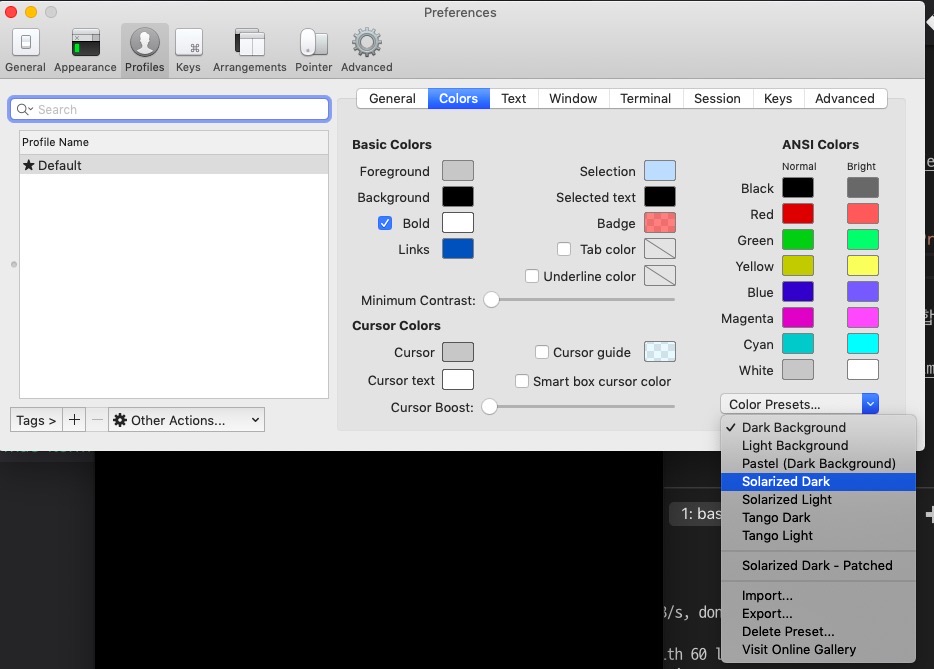
select Color Preset... again, you can see Solarized Dark. click it to change the theme.
Configure Powerlevel9k
to show more information on zsh, let’s configure Powerlevel9k. you can see the screen like below, when you execute current iTerm.
execute the command below to download Powerlevel9k.
git clone https://github.com/bhilburn/powerlevel9k.git ~/.oh-my-zsh/custom/themes/powerlevel9kzsh’s configuration file is ~/.zshrc. open it and set Powerlevel9k.
vi ~/.zshrcfind the theme configuration.
# Set name of the theme to load --- if set to "random", it will
# load a random theme each time oh-my-zsh is loaded, in which case,
# to know which specific one was loaded, run: echo $RANDOM_THEME
# See https://github.com/robbyrussell/oh-my-zsh/wiki/Themes
ZSH_THEME="robbyrussell"
change the theme from ZSH_THEME="robbyrussell" to ZSH_THEME="powerlevel9k/powerlevel9k" and save it.
to restart iTerm, you can see the screen like below.

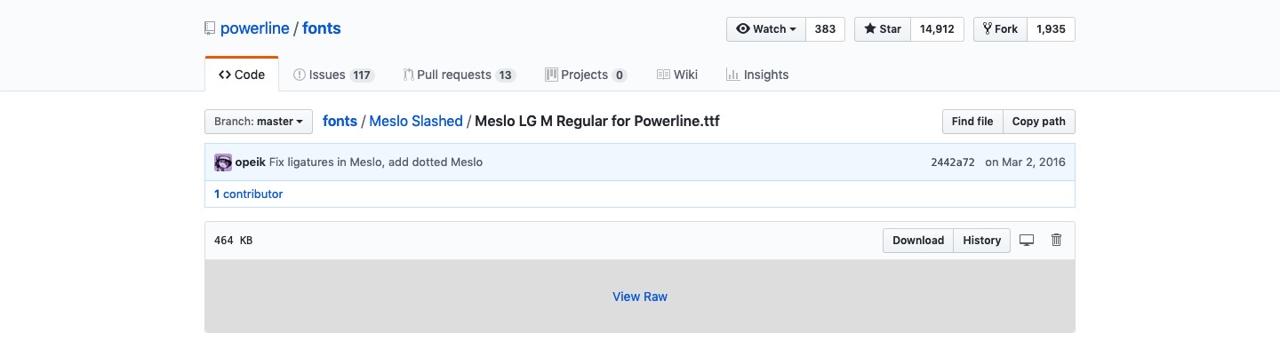
you can see user information and ?. the question mark is shown up when the font is not set. click the link below to go to the font download site.
when you click the link above, you can see the screen lik below. click View Raw to download the font.
after downloading it, click the font file to execute it.
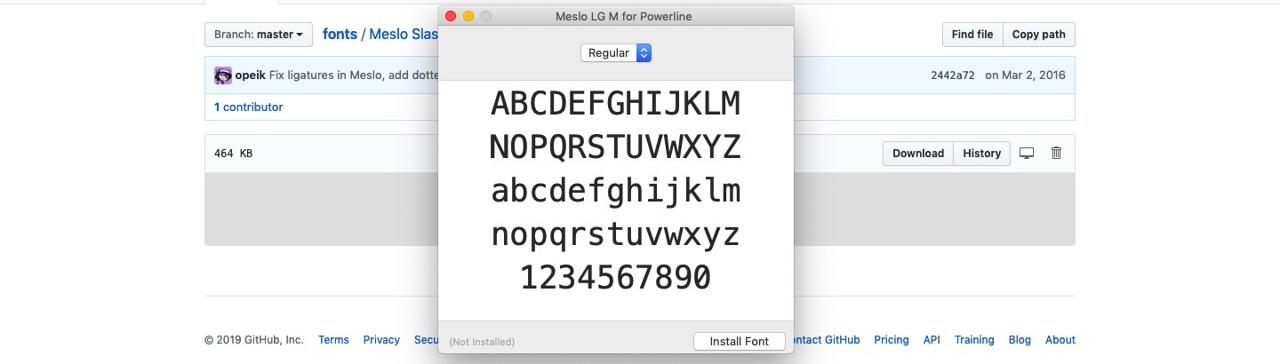
click Install Font on the right bottom to install it. after installing, open Preference on iTerm again and click Profiles > Text > Change Font.
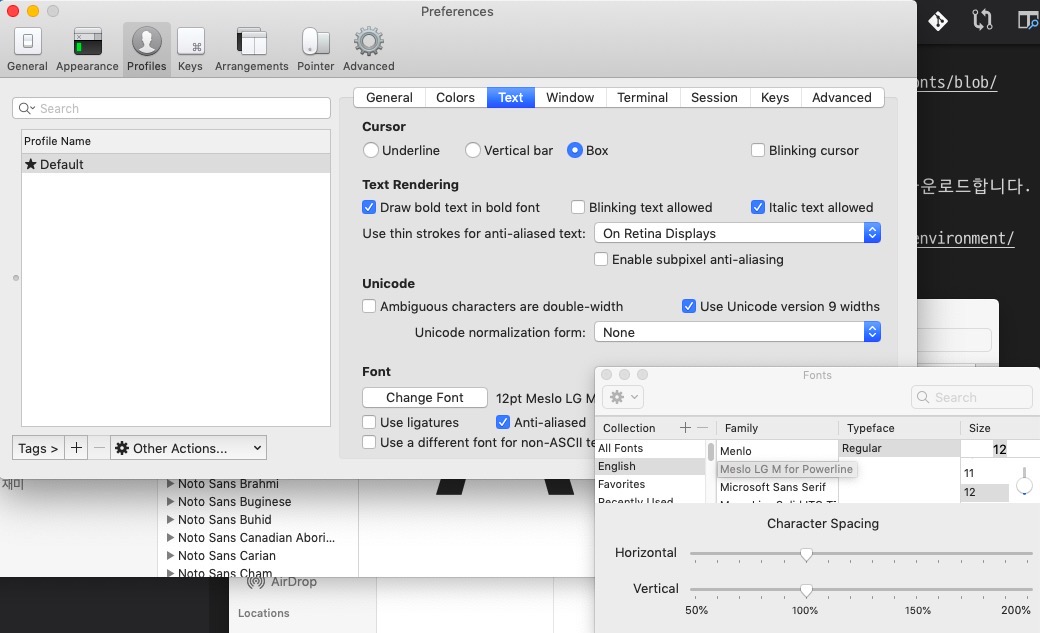
select Meslo LG M Regular for Powerline what we downloaded above.

when you execute iTerm, you can see the screen like above.
I don’t like to show my long username, so I configured it not showing up. execute the command below if you want to hide it.
vi ~/.zshrcadd the content below to the bottom.
prompt_context() {}or you can customize it like below.
POWERLEVEL9K_LEFT_PROMPT_ELEMENTS=(dir_writable dir vcs)
POWERLEVEL9K_RIGHT_PROMPT_ELEMENTS=(status time battery)
you can see the details about the option on the official site.
- official site: https://github.com/bhilburn/powerlevel9k
restart iTerm. you can see the user name not displayed.

Connect vscode and zsh
in here, we’ll set code command of vscode on zsh, and zsh to vscode’s default terminal on vscode.
Configure vscode command to zsh
execute the command below to open zsh configuration file.
vi ~/.zshrcadd the content below to the bottom of the settings file.
export PATH="$PATH:/Applications/Visual Studio Code.app/Contents/Resources/app/bin"restart iTerm and execute the command below to check vscode activated.
code .Configure zsh to vscode
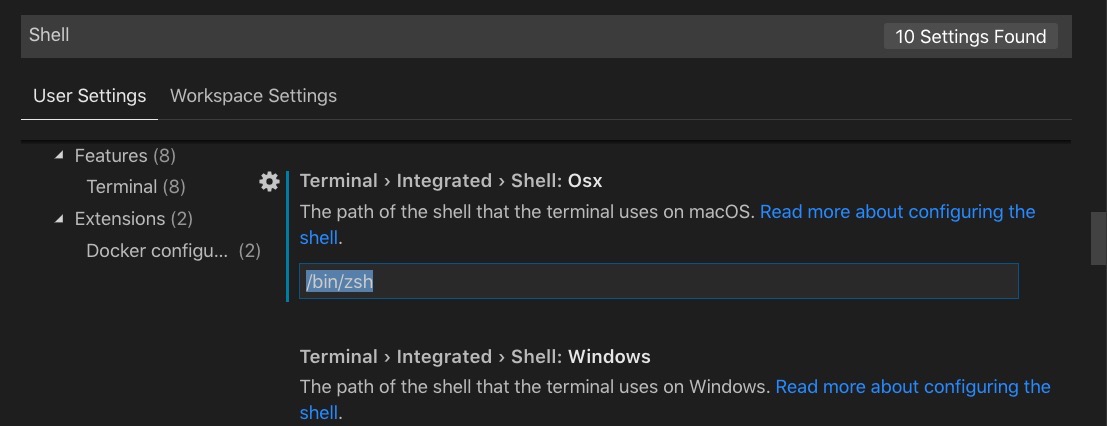
click Code > Preferences > Settings on the left top of the vscode.

search shell and change /bin/bash to /bin/zsh on Terminal > Integrated > Shell: Osx.
if you see Edit in settings.json instead of the screen above, click the link and add the content below.
{
  "terminal.integrated.shell.osx": "/bin/zsh",
  ...
}
also, search fontfamily and set Meslo LG M for Powerline on it like below.
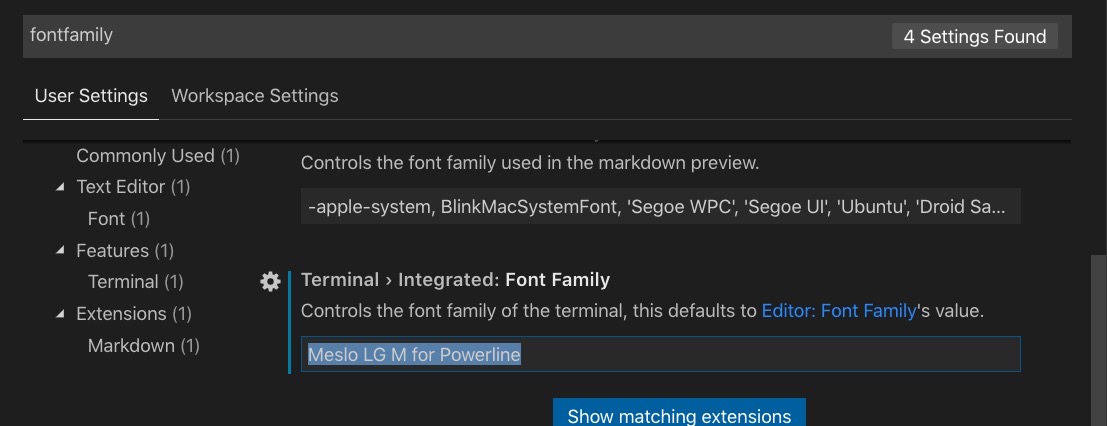
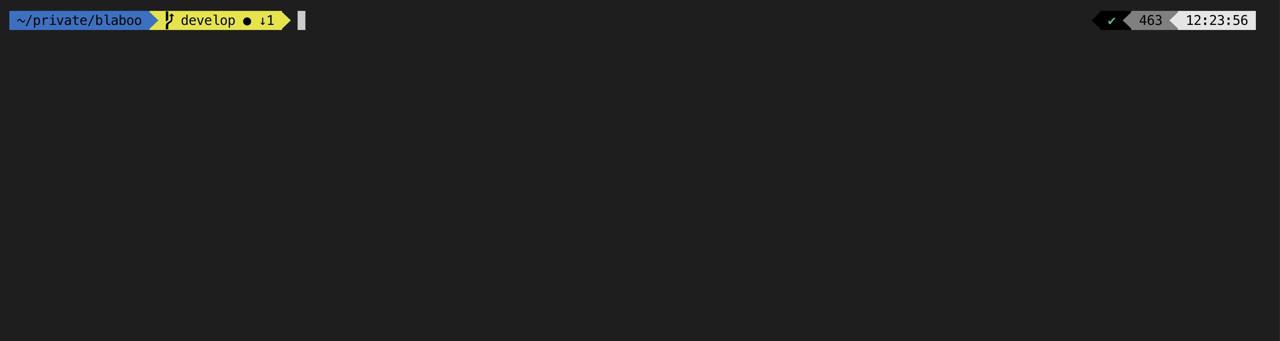
after it, to execute Terminal on vscode, you can see zsh executed.
Was my blog helpful? Please leave a comment at the bottom. it will be a great help to me!
App promotion
Deku.Deku created the applications with Flutter.If you have interested, please try to download them for free.