개요
react-navigation의 버전 V5는 정말 많은 것이 바뀌었네요. V3과 V4는 그래도 조금 비슷한 느낌이 있었는데, V5는 전혀 다른 Navigation이라는 느낌입니다. 그래서 이렇게 react-navigation V5에 관한 블로그 포스트를 작성하게 되었네요.
이전 버전(V3, V4)에 관해서 궁금하신 분들은 이전 블로그 포스트를 참고하시기 바랍니다.
react-navigation의 V5에 관한 공식 사이트는 아래와 같습니다.
- 공식 홈페이지: https://reactnavigation.org
이번 블로그 포스트에서는 react-navigation V5를 사용하는 방법에 대해서 알아봅니다.
react-native 프로젝트 생성
여기서 소개하는 소스코드는 typescript와 styled-components가 적용되었습니다. React Native에 typescript와 styled-components를 적용하는 방법은 이전 블로그를 참고하세요.
react-navigation V5 설치
react-navigation v5 라이브러리를 아래에 명령어를 통해 설치합니다.
npm install --save @react-navigation/native
또한 react-navigation v5를 사용하기 위한 라이브러리들을 아래에 명령어로 설치합니다.
npm install --save react-native-reanimated react-native-gesture-handler react-native-screens react-native-safe-area-context @react-native-community/masked-view
설치가 완료되면 iOS 폴더에 가서 아래에 명령어를 실행합니다.
# cd ios
pod install
추가로 필요한 Navigation 설치
react-navigation V4부터 Navigation을 사용하기 위해서는, 필요한 Navigation을 따로따로 설치해야합니다. V5도 역시 필요한 Navigation을 사용하기 위해서는 추가적으로 Navigation 라이브러리를 설치해야 합니다.
Stack Navigation
한 화면 위에, 다른 화면을 쌓아 올리듯 화면 전환을 하는 Navigation을 Stack Navigation이라고 합니다.

[그림: reactnavigation.org 공식 홈페이지]
Stack Navigation을 사용하기 위해서는 아래와 같은 명령어로 추가 라이브러리를 설치해야 합니다.
npm install --save @react-navigation/stack
Drawer Navigation
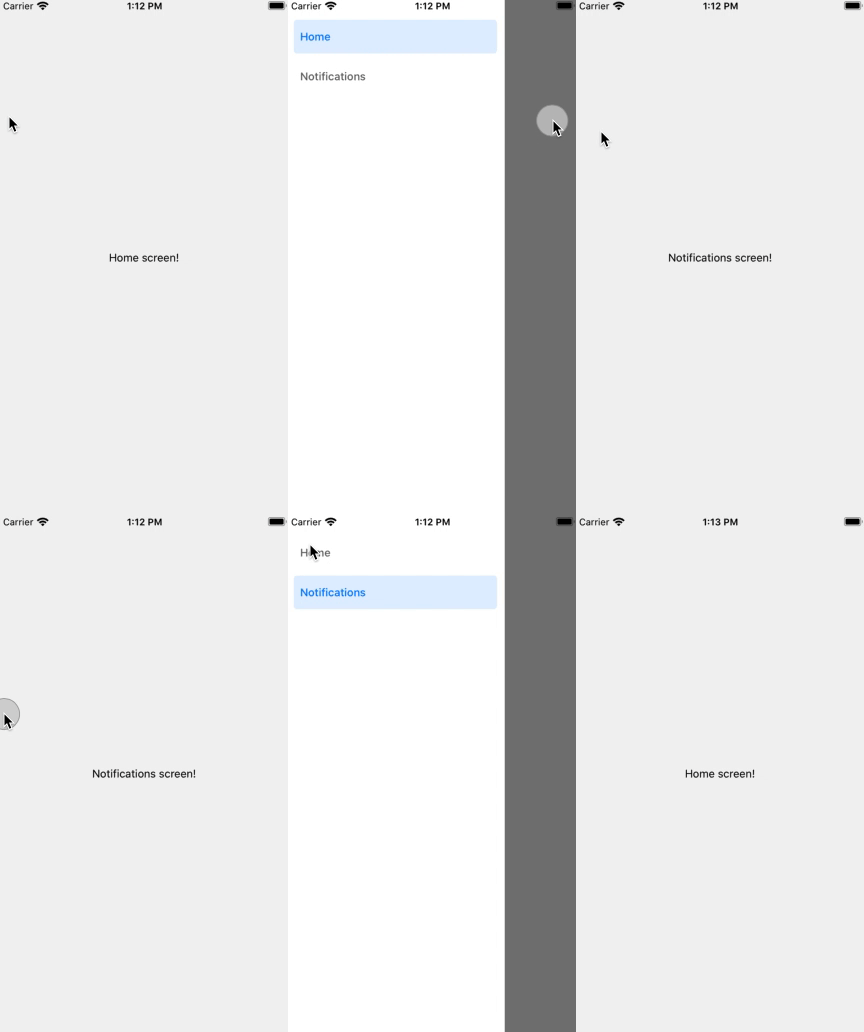
주로 메뉴에 사용되는 Navigation으로 사용자의 Swipe 액션에 반응하여 화면에 표시되는 Navigation입니다.

[그림: reactnavigation.org 공식 홈페이지]
Drawer Navigation을 사용하기 위해서는 아래와 같은 명령어로 추가 라이브러리를 설치해야 합니다.
npm install --save @react-navigation/drawer
Bottom Tab Navigation
화면 하단에서 Tab으로 화면을 전환하는 Navigation입니다.

[그림: reactnavigation.org 공식 홈페이지]
Bottom Tab Navigation을 사용하기 위해서는 아래와 같은 명령어로 추가 라이브러리를 설치해야 합니다.
npm install --save @react-navigation/bottom-tabs
Material Bottom Tab Navigation
Bottom Tab Navigation과 동일하게 화면 하단에서 Tab으로 화면을 전환하는 Navigation입니다. 여기에 Google의 Material 디자인이 적용된 Navigation 입니다.

[그림: reactnavigation.org 공식 홈페이지]
Material Bottom Tab Navigation을 사용하기 위해서는 아래와 같은 명령어로 추가 라이브러리를 설치해야 합니다.
npm install --save @react-navigation/material-bottom-tabs react-native-paper
이 Navigation은 react-native-vector-icons라는 라이브러리가 추가적으로 필요합니다. react-native-vector-icons를 설치하는 방법에 대해서는 아래에 링크를 참고하시기 바랍니다.
Material Top Tab Navigation
Google의 Material 디자인이 적용된 Navigation으로써, 화면 상단에서 Tab으로 화면을 전환하는 Navigation입니다.

[그림: reactnavigation.org 공식 홈페이지]
Material Top Tab Navigation을 사용하기 위해서는 아래와 같은 명령어로 추가 라이브러리를 설치해야 합니다.
npm install -- save @react-navigation/material-top-tabs react-native-tab-view@^2.16.0
사용법
react-navigation를 사용하는 여러가지 방법들이 공식 홈페이지에 자세히 나와있습니다. 자세한 내용은 링크를 참고해주세요.
- 공식 홈페이지: https://reactnavigation.org/docs
이 블로그에서는 공식 홈페이지를 참고하여 기본적인 사용법을 정리한 저장소(Repository)를 만들었습니다. react-navigation을 사용하기 전에 이 저장소(Repository)를 확인한다면 기본적인 구조를 잡을 때, 도움이 될거 같습니다.
- react-navigation-exercise V5: https://github.com/dev-yakuza/react-navigation-v5-exercise
이 저장소(Repository)에 구현된 내용을 설명하도록 하겠습니다.
react-native-gesture-handler
react-navigation을 사용하기 위해서는 react-native-gesture-handler를 import할 필요가 있습니다. index.js 파일 또는 App.js 파일(react-navigation을 사용하는 컴포넌트의 최상위 컴포넌트)을 아래와 같이 수정합니다.
import 'react-native-gesture-handler';
...
NavigationContainer
V4에서 Navigation을 사용하기 위해서는 createAppContainer을 마지막에 사용해야 했습니다.
import {createAppContainer} from 'react-navigation';
...
export default createAppContainer(
  ...
);
V5에서는 V4와 비슷하게 마지막에는 NavigationContainer라는 컴포넌트를 제공할 필요가 있습니다.
import React from 'react';
import {NavigationContainer} from '@react-navigation/native';
...
export default () => {
  return (
    <NavigationContainer>
      ...
    </NavigationContainer>
  );
};
벌써부터 차이점이 느껴지시나요? 기존의 react-navigation은 설정을 하는 느낌이였다면, V5는 React의 컴포넌트를 사용하는 느낌입니다.
Auth 처리
V4에서는 Auth 부분을 처리하기 위해 createSwitchNavigator라는 Navigation을 별도로 제공하였습니다.
import {createSwitchNavigator, createAppContainer} from 'react-navigation';
...
import AuthLoading from './AuthLoading';
import Auth from './Auth';
...
export default createAppContainer(
  createSwitchNavigator(
    {
      AuthLoading,
      Auth,
      MainNavi,
    },
    {
      initialRouteName: 'AuthLoading',
    },
  ),
);
createSwitchNavigator는 위와 같이 사용이 가능한데, AuthLoading이라는 React 컴포넌트에서 로그인 여부를 확인하고, 로그인이 되지 않은 경우 Auth 화면으로, 로그인을 했다면, MainNavi로 화면을 전환하였습니다.
V5에서는 createSwitchNavigator가 없어졌습니다. 위와 같은 Auth 처리를 구현하기 위해서는 아래와 같이 react-navigation을 사용할 필요가 있습니다.
import React, {useContext} from 'react';
import {NavigationContainer} from '@react-navigation/native';
...
import {UserContext} from '~/Context/User';
...
export default () => {
  const {userInfo} = useContext<IUserContext>(UserContext);

  return (
    <NavigationContainer>
      {userInfo ? <MainNavi /> : <LoginStackNavi />}
    </NavigationContainer>
  );
};
V5에서는 createSwitchNavigator가 없습니다. 그대신 V4와 다르게 React 컴포넌트 형식이므로, Navigation안에서 직접 로그인 여부를 판단하고 화면에 표시할 Navigation을 결정하게 됩니다. 공식 홈페이지에서도 위와 같은 방법을 안내하고 있으니 참고해 보시기 바랍니다.
- 공식 홈페이지: react-navigation - Auth flow
Stack Navigation 사용법
react-navigation V4에서는 아래와 같이 Stack Navigation을 사용하였습니다.
...
import {createStackNavigator} from 'react-navigation-stack';
...
const MainNavi = createStackNavigator({
  MainTab: {
    screen: MainTab,
    navigationOptions: ({navigation}) => ({
      header: null,
    }),
  },
  FullDetail,
});
...
react-navigation V5에서는 아래와 같이 Stack Navigation을 사용합니다.
...
import {
  createStackNavigator,
} from '@react-navigation/stack';
...
const Stack = createStackNavigator();
...
const LoginStackNavi = () => {
  return (
    <Stack.Navigator
      screenOptions={{
        headerStyle: {
          backgroundColor: '#f4511e',
        },
        headerTintColor: '#fff',
        headerTitleStyle: {
          fontWeight: 'bold',
        },
      }}>
      <Stack.Screen
        name="SignIn"
        component={SignIn}
        options={{
          headerShown: false,
        }}
      />
      <Stack.Screen
        name="SignUp"
        component={SignUp}
        options={{headerBackTitleVisible: false}}
      />
      <Stack.Screen name="ResetPassword" component={ResetPassword} />
    </Stack.Navigator>
  );
};
react-navigation V5에서 Stack Navigation 전체에 공통적으로 속성을 적용하고 싶으면 Stack.Navigator의 screenOptions을 사용합니다.
반대로, 각 화면에만 속성을 적용하고 싶으면 Stack.Screen의 options를 사용합니다.
위에 예제에서는 자주 사용하는 Header Bar를 숨기기 위해 options의 headerShown을 사용하였습니다.
<Stack.Screen
  name="SignIn"
  component={SignIn}
  options={{
    headerShown: false,
  }}
/>
또한 뒤로 돌아가는 버튼의 타이틀을 숨기기 위해 options의 headerBackTitleVisible도 사용해 보았습니다.
<Stack.Screen
  name="SignUp"
  component={SignUp}
  options={{headerBackTitleVisible: false}}
/>
Drawer Navigation 사용법
react-navigation V5에서는 아래와 같이 Drawer Navigation을 사용합니다.
...
import {
  createDrawerNavigator,
  DrawerContentScrollView,
  DrawerItemList,
  DrawerItem,
  DrawerContentComponentProps,
  DrawerContentOptions,
  DrawerNavigationProp,
} from '@react-navigation/drawer';
...
const Drawer = createDrawerNavigator();
...
const CustomDrawerContent = (
  props: DrawerContentComponentProps<DrawerContentOptions>,
  logout: () => void,
) => {
  return (
    <DrawerContentScrollView {...props}>
      <DrawerItemList {...props} />
      <DrawerItem label="Logout" onPress={() => logout()} />
    </DrawerContentScrollView>
  );
};
const DrawNavi = () => {
  const {logout} = useContext<IUserContext>(UserContext);

  return (
    <Drawer.Navigator
      drawerContent={props => CustomDrawerContent(props, logout)}>
      <Drawer.Screen name="TabNavi" component={TabNavi} />
      <Drawer.Screen name="MaterialTabNavi" component={MaterialTabNavi} />
      <Drawer.Screen
        name="MaterialTopTabNaviStackNavi"
        component={MaterialTopTabNaviStackNavi}
      />
    </Drawer.Navigator>
  );
};
...
여기에서는 Logout 기능을 구현하기 위해 조금 복잡해졌습니다. Logout 기능을 빼고 보면 아래와 같습니다.
...
import {
  createDrawerNavigator,
} from '@react-navigation/drawer';
...
const Drawer = createDrawerNavigator();
...
const DrawNavi = () => {
  return (
    <Drawer.Navigator>
      <Drawer.Screen name="TabNavi" component={TabNavi} />
      <Drawer.Screen name="MaterialTabNavi" component={MaterialTabNavi} />
      <Drawer.Screen
        name="MaterialTopTabNaviStackNavi"
        component={MaterialTopTabNaviStackNavi}
      />
    </Drawer.Navigator>
  );
};
...
Stack Navigation과 굉장히 비슷합니다. 위에 예제에서는 여기에 Logout이라는 항목을 추가로 표시하고 Logout 항목을 선택하면 Logout되도록 추가하면서 좀 복잡한 형태를 가지게 되었습니다.
Bottom Tab Navigation 사용법
react-navigation V5에서는 Bottom Tab Navigation은 아래와 같이 사용합니다.
...
import {createBottomTabNavigator} from '@react-navigation/bottom-tabs';
import Icon from 'react-native-vector-icons/MaterialIcons';
...
const Tab = createBottomTabNavigator();
...
const TabNavi = () => {
  return (
    <Tab.Navigator>
      <Tab.Screen
        name="TabFirstStackNavi"
        component={TabFirstStackNavi}
        options={{
          tabBarLabel: 'First',
          tabBarIcon: ({color}) => <Icon name="home" color={color} size={26} />,
        }}
      />
      <Tab.Screen
        name="TabSecond"
        component={TabSecond}
        options={{
          tabBarLabel: 'Second',
          tabBarIcon: ({color}) => (
            <Icon name="people" color={color} size={26} />
          ),
        }}
      />
      <Tab.Screen
        name="TabThird"
        component={TabThird}
        options={{
          tabBarLabel: 'Third',
          tabBarIcon: ({color}) => (
            <Icon name="message" color={color} size={26} />
          ),
        }}
      />
      <Tab.Screen
        name="TabFourth"
        component={TabFourth}
        options={{
          tabBarLabel: 'Fourth',
          tabBarIcon: ({color}) => (
            <Icon name="settings" color={color} size={26} />
          ),
        }}
      />
    </Tab.Navigator>
  );
};
...
위에 예제에서는 Tab의 Label과 Icon을 각각 표시하기 위해 Tab.Screen의 options를 사용하였습니다.
<Tab.Screen
  ...
  options={{
    tabBarLabel: 'Fourth',
    tabBarIcon: ({color}) => (
      <Icon name="settings" color={color} size={26} />
    ),
  }}
/>
Material Bottom Tab Navigation 사용법
react-navigation V5에서 Material Bottom Tab Navigation은 아래와 같이 사용합니다.
...
import {createMaterialBottomTabNavigator} from '@react-navigation/material-bottom-tabs';
import Icon from 'react-native-vector-icons/MaterialIcons';
...
const MaterialTab = createMaterialBottomTabNavigator();
...
const MaterialTabNavi = () => {
  return (
    <MaterialTab.Navigator>
      <MaterialTab.Screen
        name="TabFirstStackNavi"
        component={TabFirstStackNavi}
        options={{
          tabBarColor: '#281b39',
          tabBarLabel: 'First',
          tabBarIcon: ({color}) => <Icon name="home" color={color} size={26} />,
        }}
      />
      <MaterialTab.Screen
        name="TabSecond"
        component={TabSecond}
        options={{
          tabBarColor: '#0e141d',
          tabBarLabel: 'Second',
          tabBarIcon: ({color}) => (
            <Icon name="people" color={color} size={26} />
          ),
        }}
      />
      <MaterialTab.Screen
        name="TabThird"
        component={TabThird}
        options={{
          tabBarColor: '#E64A19',
          tabBarLabel: 'Third',
          tabBarIcon: ({color}) => (
            <Icon name="message" color={color} size={26} />
          ),
        }}
      />
      <MaterialTab.Screen
        name="TabFourth"
        component={TabFourth}
        options={{
          tabBarColor: '#524365',
          tabBarLabel: 'Fourth',
          tabBarIcon: ({color}) => (
            <Icon name="settings" color={color} size={26} />
          ),
        }}
      />
    </MaterialTab.Navigator>
  );
};
Material Bottom Tab Navigation를 사용할 때는 Tab Bar에 Icon을 설정해야 합니다.
<MaterialTab.Screen
  ...
  options={{
    ...
    tabBarIcon: ({color}) => (
      <Icon name="settings" color={color} size={26} />
    ),
  }}
/>
또한 각 탭을 선택할 때마다, 색상을 변경하고 싶다면, tabBarColor를 설정하면 됩니다.
<MaterialTab.Screen
  ...
  options={{
    ...
    tabBarColor: '#524365',
    ...
  }}
/>
tabBarIcon은 필수적으로 추가해야하지만, tabBarColor는 필요한 상황에서만 사용하시면 됩니다.
Material Top Tab Navigation 사용법
react-navigation V5에서 Material Top Tab Navigation은 아래와 같이 사용합니다.
...
import {createMaterialTopTabNavigator} from '@react-navigation/material-top-tabs';
...
const MaterialTopTab = createMaterialTopTabNavigator();
...
const MaterialTopTabNavi = () => {
  return (
    <MaterialTopTab.Navigator>
      <MaterialTopTab.Screen name="TabFirst" component={TabFirst} />
      <MaterialTopTab.Screen name="TabSecond" component={TabSecond} />
      <MaterialTopTab.Screen name="TabThird" component={TabThird} />
      <MaterialTopTab.Screen name="TabFourth" component={TabFourth} />
    </MaterialTopTab.Navigator>
  );
};
...
const MaterialTopTabNaviStackNavi = ({navigation}: DrawerProp) => {
  return (
    <Stack.Navigator
      screenOptions={{
        headerLeft: (props: StackHeaderLeftButtonProps) => (
          <IconButton
            iconName="menu"
            onPress={() => navigation.openDrawer()}
            color="black"
          />
        ),
      }}>
      <Stack.Screen name="MaterialTopTabNavi" component={MaterialTopTabNavi} />
    </Stack.Navigator>
  );
};
...
Material Top Tab Navigation은 아래와 같이 간단하게 선언하여 사용할 수 있습니다.
const MaterialTopTabNavi = () => {
  return (
    <MaterialTopTab.Navigator>
      <MaterialTopTab.Screen name="TabFirst" component={TabFirst} />
      <MaterialTopTab.Screen name="TabSecond" component={TabSecond} />
      <MaterialTopTab.Screen name="TabThird" component={TabThird} />
      <MaterialTopTab.Screen name="TabFourth" component={TabFourth} />
    </MaterialTopTab.Navigator>
  );
};
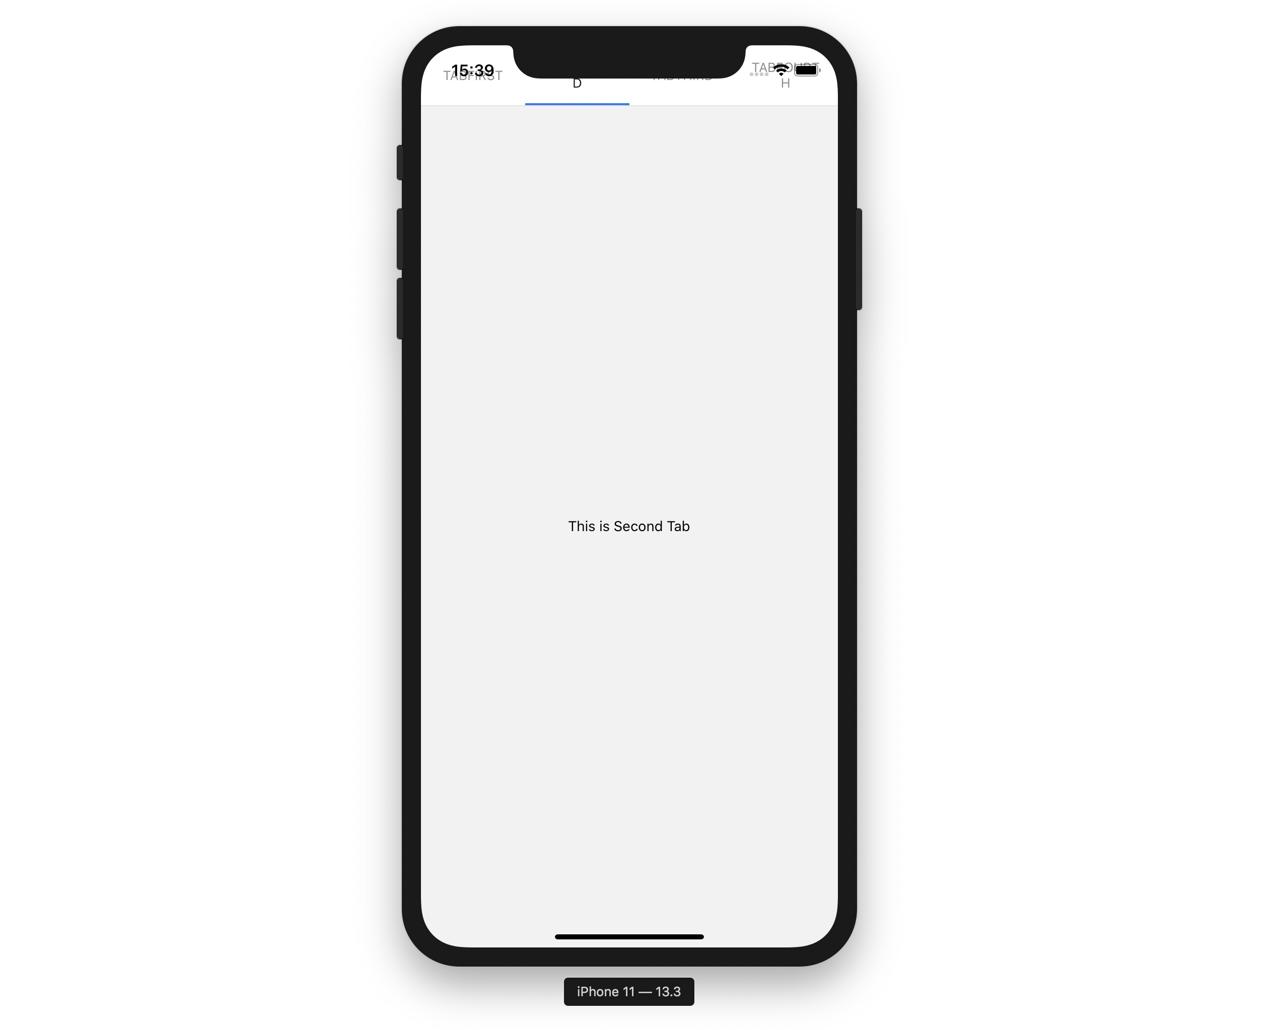
하지만, Notch Design에서는 Navigation이 제대로 보이지 않습니다.

이 문제를 해결하기 위해, Stack Navigation으로 감싸서 제공하기를 권장합니다.
...
const MaterialTopTabNavi = () => {
  return (
    <MaterialTopTab.Navigator>
      <MaterialTopTab.Screen name="TabFirst" component={TabFirst} />
      <MaterialTopTab.Screen name="TabSecond" component={TabSecond} />
      <MaterialTopTab.Screen name="TabThird" component={TabThird} />
      <MaterialTopTab.Screen name="TabFourth" component={TabFourth} />
    </MaterialTopTab.Navigator>
  );
};
...
const MaterialTopTabNaviStackNavi = ({navigation}: DrawerProp) => {
  return (
    <Stack.Navigator
      screenOptions={{
        headerLeft: (props: StackHeaderLeftButtonProps) => (
          <IconButton
            iconName="menu"
            onPress={() => navigation.openDrawer()}
            color="black"
          />
        ),
      }}>
      <Stack.Screen name="MaterialTopTabNavi" component={MaterialTopTabNavi} />
    </Stack.Navigator>
  );
};
...
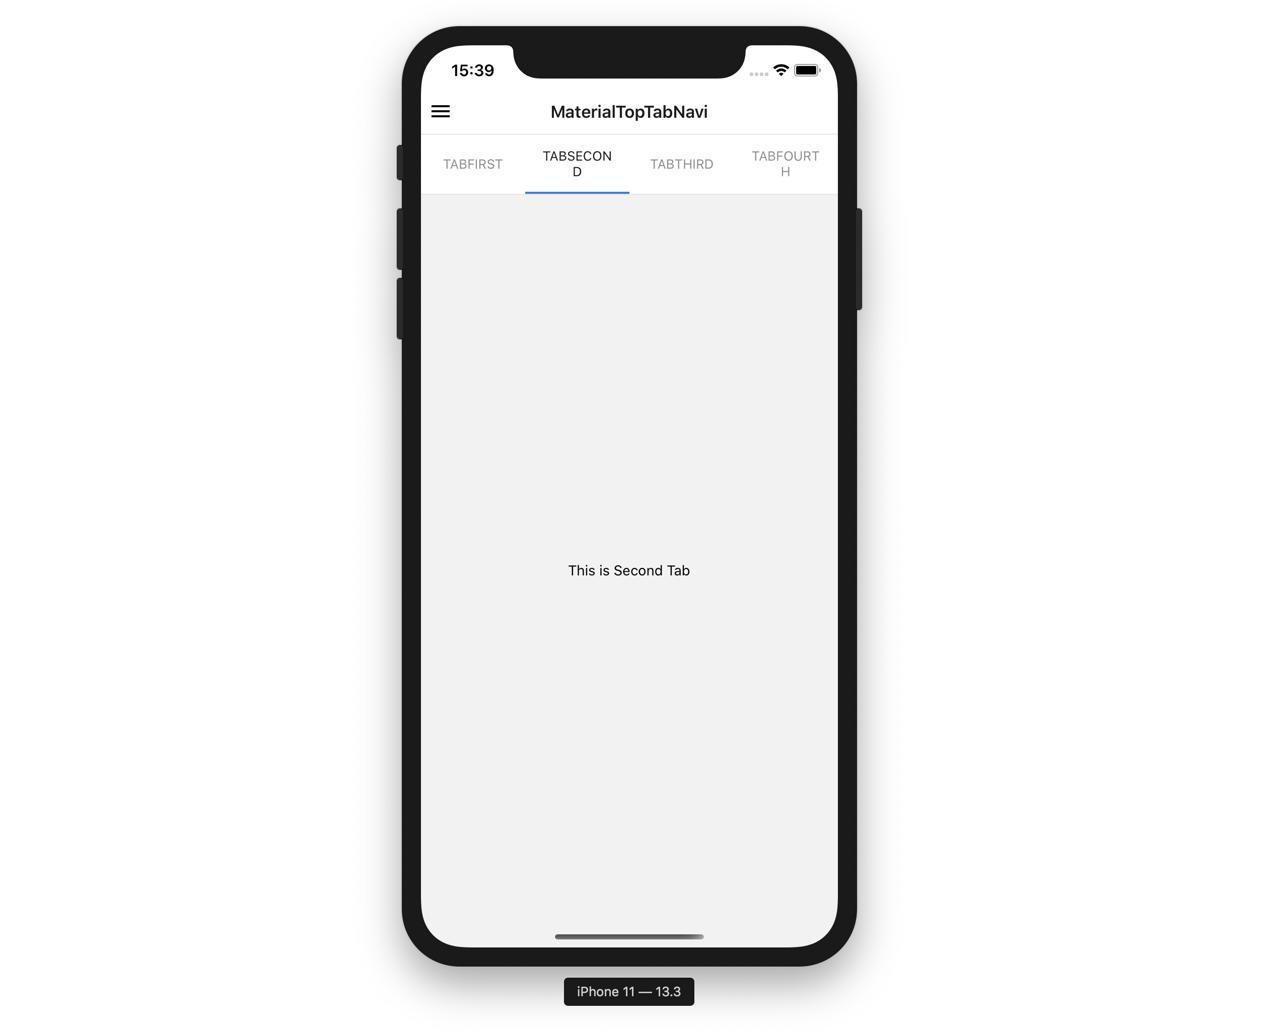
Stack Navigation으로 감싸서 제공하면 아래와 같은 화면을 볼 수 있습니다.

Drawer Open
보통 Drawer Navigation만 사용하면 아래와 같은 화면을 볼 수 있습니다.

[그림: reactnavigation.org 공식 홈페이지]
위와 같이 왼쪽에서 오른쪽으로 Swipe를 해야 Drawer Navigation을 확인할 수 있습니다.
하지만 보통, Navigation의 Header에 메뉴 아이콘을 표시하고, 메뉴를 선택하면 Drawer Navigation을 표시하도록 만듭니다.
이렇게 하기 위해서는 Stack Navigation으로 Navigation Header를 표시하고, Header의 왼쪽에 메뉴 아이콘을 표시한 후, 메뉴 아이콘을 선택하면 openDrawer라는 함수를 사용하여 Drawer Navigation을 열도록 구현해야 합니다.
...
import {
  ...
  DrawerNavigationProp,
} from '@react-navigation/drawer';
...
type TypeDrawerProp = DrawerNavigationProp<
  {
    TabNavi: undefined;
    MaterialTabNavi: undefined;
    MaterialTopTabNaviStackNavi: undefined;
    Logout: undefined;
  },
  'TabNavi'
>;
interface DrawerProp {
  navigation: TypeDrawerProp;
}
...
const MaterialTopTabNaviStackNavi = ({navigation}: DrawerProp) => {
  return (
    <Stack.Navigator
      screenOptions={{
        headerLeft: (props: StackHeaderLeftButtonProps) => (
          <IconButton
            iconName="menu"
            onPress={() => navigation.openDrawer()}
            color="black"
          />
        ),
      }}>
      <Stack.Screen name="MaterialTopTabNavi" component={MaterialTopTabNavi} />
    </Stack.Navigator>
  );
};
DrawerActions
위에 예제처럼 Drawer Navigation에 직접 연결된 화면에서는 navigation의 Props를 사용하여 Drawer를 열고 닫을 수 있습니다. 하지만 아래와 같이 Drawer Navigation에 직접 연결되지 않은 경우에는 navigation의 Props를 사용하여 Drawer를 열고 닫을 수 없습니다.
...
const MainTabs = () => {
  return (
    <BottomTab.Navigator tabBarOptions={{activeTintColor: 'black'}}>
      <BottomTab.Screen name="MyFeed" component={MyFeed}/>
      <BottomTab.Screen name="Feeds" component={Feeds}/>
      <BottomTab.Screen name="Upload" component={Upload}/>
      <BottomTab.Screen name="Notification" component={Notification}/>
      <BottomTab.Screen name="Profile" component={Profile}/>
    </BottomTab.Navigator>
  );
};
...
const MainNavigator = () => {
  return (
    <Drawer.Navigator
      drawerPosition="right"
      drawerType="slide"
      drawerContent={props => <CustomDrawer props={props} />}>
      <Drawer.Screen name="MainTabs" component={MainTabs} />
    </Drawer.Navigator>
  );
};
그 이유는 Screen에서 받는 navigation의 Props는 바로 상위에 있는 Navigation에서 Props를 전달 받기 때문입니다. 위에 예제에서 MainTab에 있는 Profile 화면의 navigation Props는 Drawer Navigation이 아닌 Bottom Tab Navigation의 Props가 됩니다. 따라서 Profile 화면에서는 navigation.openDrawer()를 사용할 수 없습니다.
이와 같은 경우 사용하는 것이 DrawerActions입니다.
Drawer Navigation의 바로 하단에 있지는 않지만, 위와 같이 상단에 Drawer Navigation을 사용할 때, 아래와 같이 Drawer를 열고 닫을 수 있습니다.
...
import {DrawerActions} from '@react-navigation/native';
...
type NavigationProp = StackNavigationProp<ProfileTabParamList, 'Profile'>;
interface Props {
  navigation: NavigationProp;
}

const Profile = ({navigation}: Props) => {
  return (
    <ScrollView>
      ...
      <IconButton
        iconName="menu"
        onPress={() => navigation.dispatch(DrawerActions.openDrawer())}
      />
      ...
    </ScrollView>
  );
});

export default Profile;
위와 같이 navigation.dispatch(DrawerActions.openDrawer())을 사용하여 Drawer Navigation을 열 수 있습니다. 그 외에도 아래와 같은 함수를 지원합니다.
navigation.dispatch(DrawerActions.openDrawer());
navigation.dispatch(DrawerActions.closeDrawer());
navigation.dispatch(DrawerActions.toggleDrawer());
setParams / getParams
react-navigation V4에서는 아래와 같이 화면간 데이터를 주고 받을 수 있었습니다.
...
navigation.setParams({
  showSearch: false,
});
...
const showSearch = navigation.getParam('showSearch');
react-navigation V5에서는 setParams는 사용할 수 있지만, getParams는 사용할 수 없습니다.
navigation.setParams({
  showSearch: false,
});
react-navigation V5에서는 getParams 대신 route.params을 사용하게 됩니다.
...
import { RouteProp } from '@react-navigation/native';
...

type ProfileScreenRouteProp = RouteProp<MovieNaviParamList, 'MovieDetail'>;
interface Props {
  route: ProfileScreenRouteProp;
}

const MovieDetail = ({ route }: Props) => {
  const { id } = route.params;
  ...
});

export default MovieDetail;
typescript가 적용이 되어 조금 복잡해 보이지만,
const MovieDetail = ({ route, navigation }) => {
  const { id } = route.params;
  ...
});
위와 같이 navigation Props와 함께 오는 route Props를 사용하여 데이터를 습득하게 됩니다.
Typescript
react-navigation v5에서 typescript를 사용하는 방법에 대해서 알아봅니다.
navigation
화면을 전환하기 위해서는 navigation Props를 아래와 같이 사용하게 됩니다.
const Feeds = ({navigation}: Props) => {
  ...
  navigation.navigate('FeedListOnly');
  ...
});
이 때, Props는 아래와 같이 작성합니다.
...
import {StackNavigationProp} from '@react-navigation/stack';
...
// Stack Navigation
type NavigationProp = StackNavigationProp<FeedsTabParamList, 'Feeds'>;
interface Props {
  navigation: NavigationProp;
}

const Feeds = ({navigation}: Props) => {
  ...
  navigation.navigate('FeedListOnly');
  ...
});
위에 예제에서 FeedsTabParamList는 같은 Stack Navigation에서도 사용하게 되므로 @types/index.d.ts 파일을 생성하고 아래와 같이 선언합니다.
type FeedsTabParamList = {
  Feeds: undefined;
  FeedListOnly: undefined;
};
이 Stack Navigation은 Feeds라는 화면과 FeedListOnly라는 화면을 가지고 있으며, 화면을 전환할 때, 특별히 전달할 파라메터가 없으므로 undefined를 대입하였습니다.
만약 화면 전환시 파라메터가 필요한 경우,
type FeedsTabParamList = {
  Feeds: undefined;
  FeedListOnly: {
    id: number;
  };
};
위와 같이 필요한 파라메터를 정의한 후,
const Feeds = ({navigation}: Props) => {
  ...
  navigation.navigate('FeedListOnly', {
    id: 1,
  });
  ...
});
위와 같이 파라메터를 전달할 수 있습니다. 이렇게 복잡하게 하는 이유는 전달하는 파라메터의 타입을 정확하게 체크하기 위해서입니다.
위에서는 Stack Navigation을 소개하였지만 아래와 같이 각 Navigation별로 Props를 사용할 수 있습니다.
import {BottomTabNavigationProp} from '@react-navigation/bottom-tabs';
import {DrawerNavigationProp} from '@react-navigation/drawer';
import {MaterialBottomTabNavigationProp} from '@react-navigation/material-bottom-tabs';
import {MaterialTopTabBarProps} from '@react-navigation/material-top-tabs';
사용법은 Stack Navigation과 동일합니다.
type NavigationProp = BottomTabNavigationProp<FeedsTabParamList, 'Feeds'>;
type NavigationProp = DrawerNavigationProp<FeedsTabParamList, 'Feeds'>;
type NavigationProp = MaterialBottomTabNavigationProp<FeedsTabParamList, 'Feeds'>;
type NavigationProp = MaterialTopTabBarProps<FeedsTabParamList, 'Feeds'>;
route
위에서 설명하였지만 navigation.setParams를 활용하여 화면간 데이터를 주고 받을 수 있습니다. 이때, 데이터를 받는 쪽에서는 route.params를 사용하게 됩니다.
이 route 파라메터를 사용하기 위해서는 아래와 같이 typescript를 사용합니다.
...
import { RouteProp } from '@react-navigation/native';
...
type ProfileScreenRouteProp = RouteProp<MovieNaviParamList, 'MovieDetail'>;
interface Props {
  route: ProfileScreenRouteProp;
}

const MovieDetail = ({ route }: Props) => {
  const { id } = route.params;
  ...
});

export default MovieDetail;
여기서 MovieNaviParamList도 여러 화면에서 사용되기 때문에 별도의 @types/index.d.ts 파일을 만들고 작성합니다.
type MovieNaviParamList = {
  MovieHome: undefined;
  MovieDetail: {
    id: number;
  };
};
완료
이것으로 react-navigation V5를 설치하는 방법과 사용하는 방법에 대해서 알아보았습니다. V4만 사용하다가 V5를 보니, 많이 달라진 점때문에 놀랐습니다. 하지만 React 컴포넌트를 사용하는 형태로 변경되면서, 좀 더 React에 친화적인 형태로 개발이 된거 같다고 느꼈습니다.
기존에 사용하던 기능들이 모두 구현 가능하다고 생각합니다. 일단 react-navigation V4 예제에서 구현한 모든 내용을 react-navigation V5에서도 구현해 보았습니다. react-navigation V5를 사용하고자 하시는 분들은 아래에 예제 소스를 꼭 참고해 보시기 바랍니다.
- react-navigation-exercise V5: https://github.com/dev-yakuza/react-navigation-v5-exercise
참고
- 공식 홈페이지: react-navigation
제 블로그가 도움이 되셨나요? 하단의 댓글을 달아주시면 저에게 큰 힘이 됩니다!
앱 홍보
Deku가 개발한 앱을 한번 사용해보세요.Deku가 개발한 앱은 Flutter로 개발되었습니다.관심있으신 분들은 앱을 다운로드하여 사용해 주시면 정말 감사하겠습니다.


![[심통]현장에서 바로 써먹는 리액트 with 타입스크립트 : 리액트와 스토리북으로 배우는 컴포넌트 주도 개발, 심통](https://img1c.coupangcdn.com/image/affiliate/banner/7cba8cb0601eebaf88a17a0c3cf65a63@2x.jpg)