개요
RN(React Native)로 앱을 개발하다보면 로컬 데이터베이스(DB)를 사용할 경우가 있습니다. 예를 들어 제가 개발한 단어장 앱(일단공부(일본어 단어 공부) - JLPT 단어 공부)은 단어를 서버에서 받아오는게 아니라 앱과 함께 배포하고 있습니다. 이 블로그에서는 이렇게 앱내에서 데이터베이스(DB)를 사용하는 방법에 대해서 알아보겠습니다.
여기에서 소개할 DB는 sqlite이며, RN(React Native)에서 react-native-sqlite-storage 라이브러리로 DB를 사용하는 방법에 대해서 살펴보겠습니다.
- react-native-sqlite-storage 공식 홈페이지: https://github.com/andpor/react-native-sqlite-storage
DB 준비
RN(React Native)에서 사용할 DB를 준비합니다. 여기서는 샘플 DB를 제작하는 방법을 설명합니다. 이미 Sqlite DB를 가지고 계신분들은 이 섹션을 건너뛰셔도 됩니다.
아래는 제가 사용하고 있는 sqlite 툴의 링크입니다. 링크를 눌러 OS에 맞는 툴을 다운로드합니다.
- sqlite 툴 다운로드: https://sqlitebrowser.org/dl/
다운로드 및 설치가 끝나면 툴을 실행합니다.
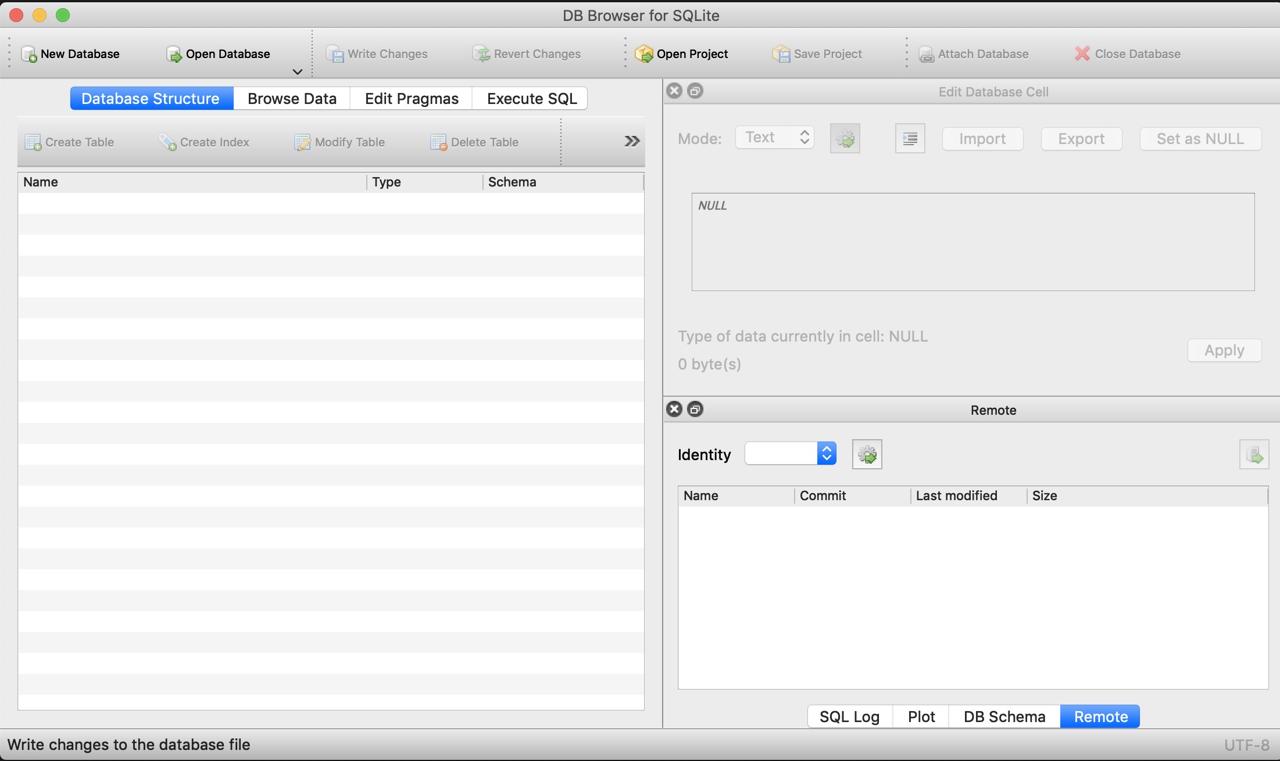
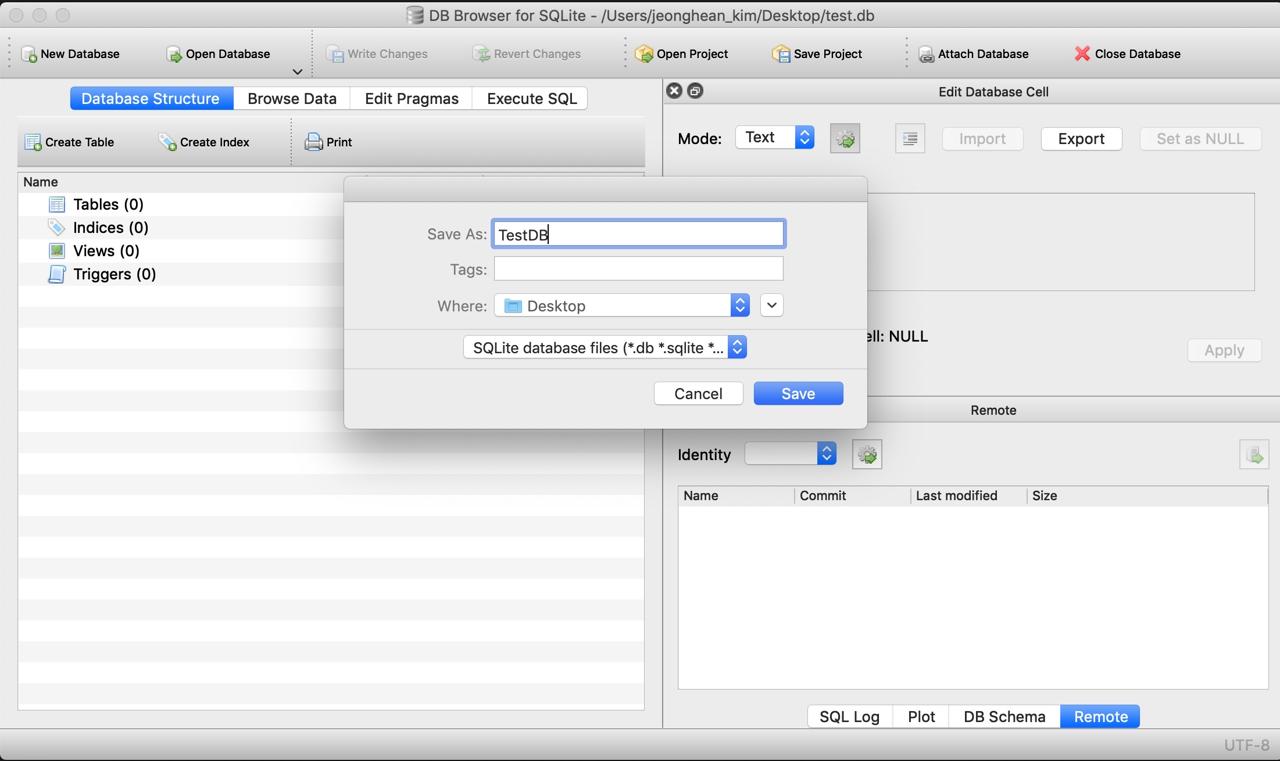
왼쪽 위에 New Database를 선택하여 새로운 TestDB라는 이름으로 데이터베이스를 생성합니다.
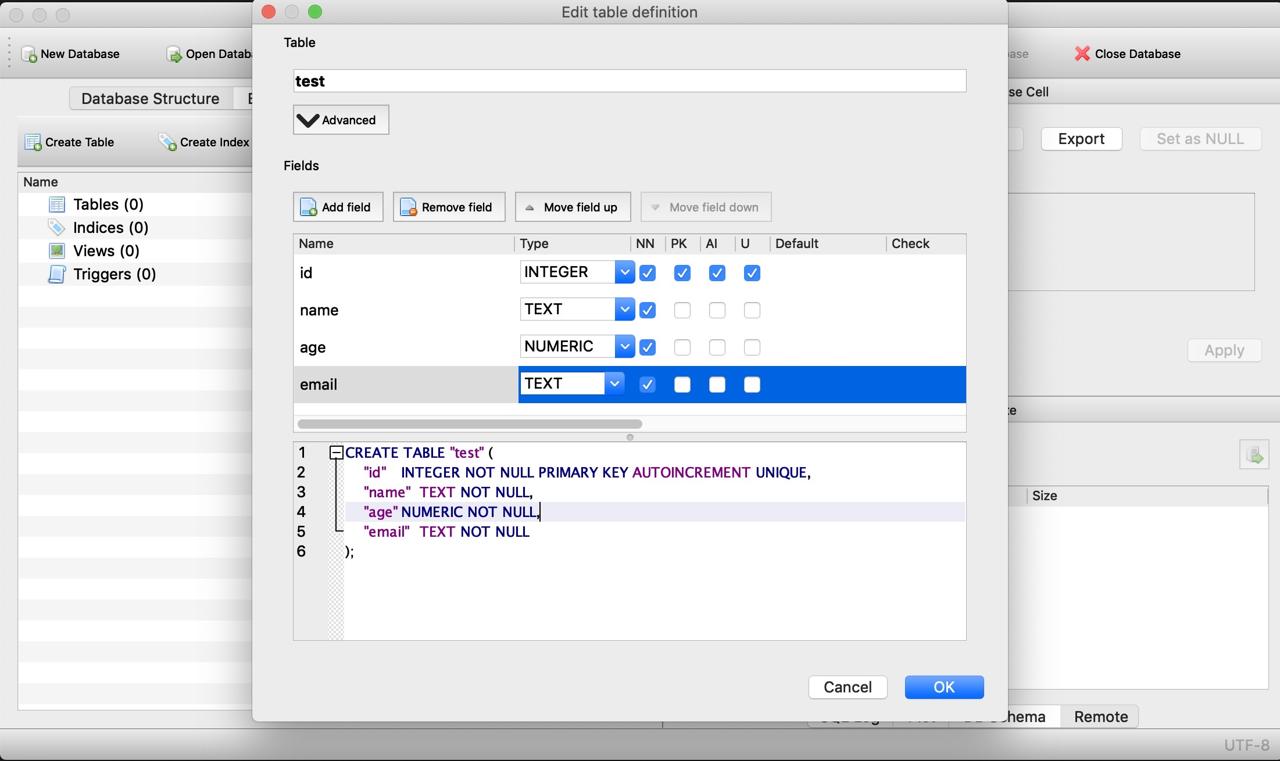
아래와 같이 test라는 이름의 테이블을 생성하고 id, name, age, email 필드를 추가합니다.
아래에 sql문으로 더미 데이터를 추가합니다.
INSERT INTO
	test
	(name, age, email)
VALUES
	("aaa",  20, "[email protected]"),
	("bbb",  25, "[email protected]"),
	("ccc",  30, "[email protected]")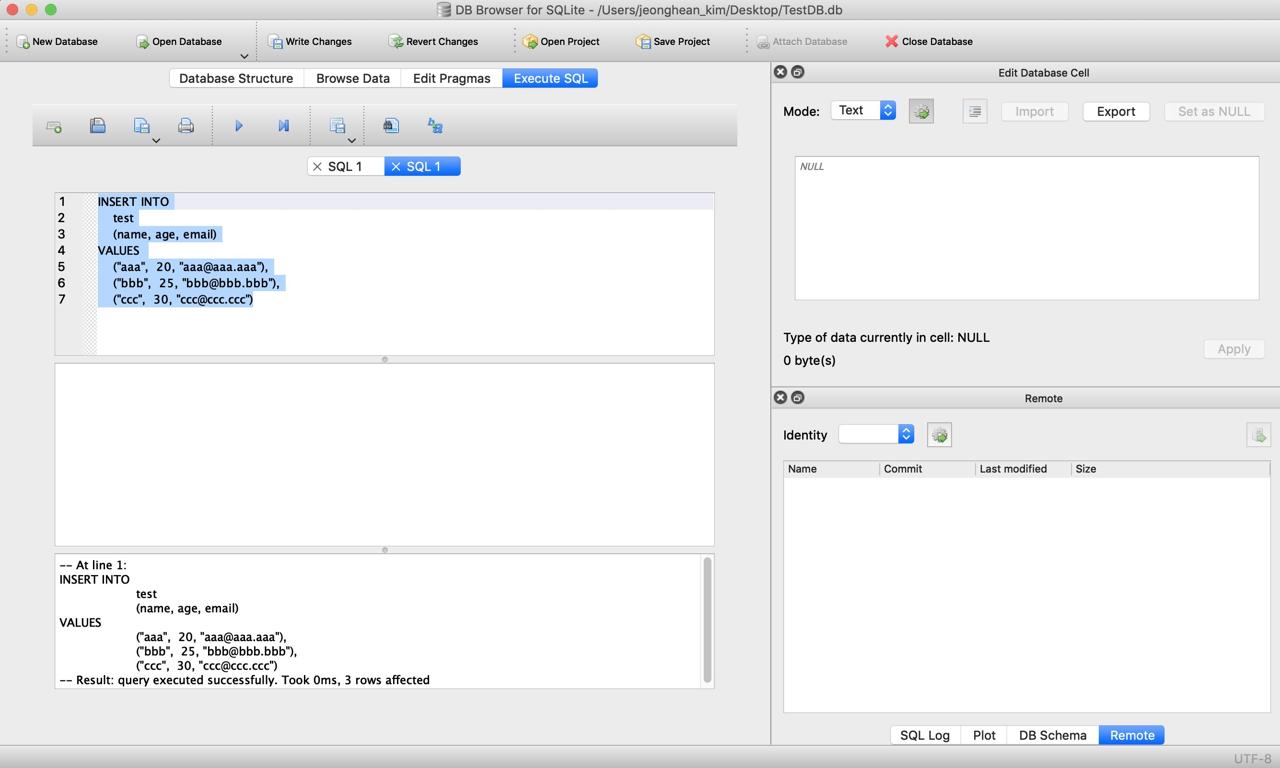
데이터가 잘 추가되었는지 아래에 sql문으로 확인합니다.
SELECT * FROM test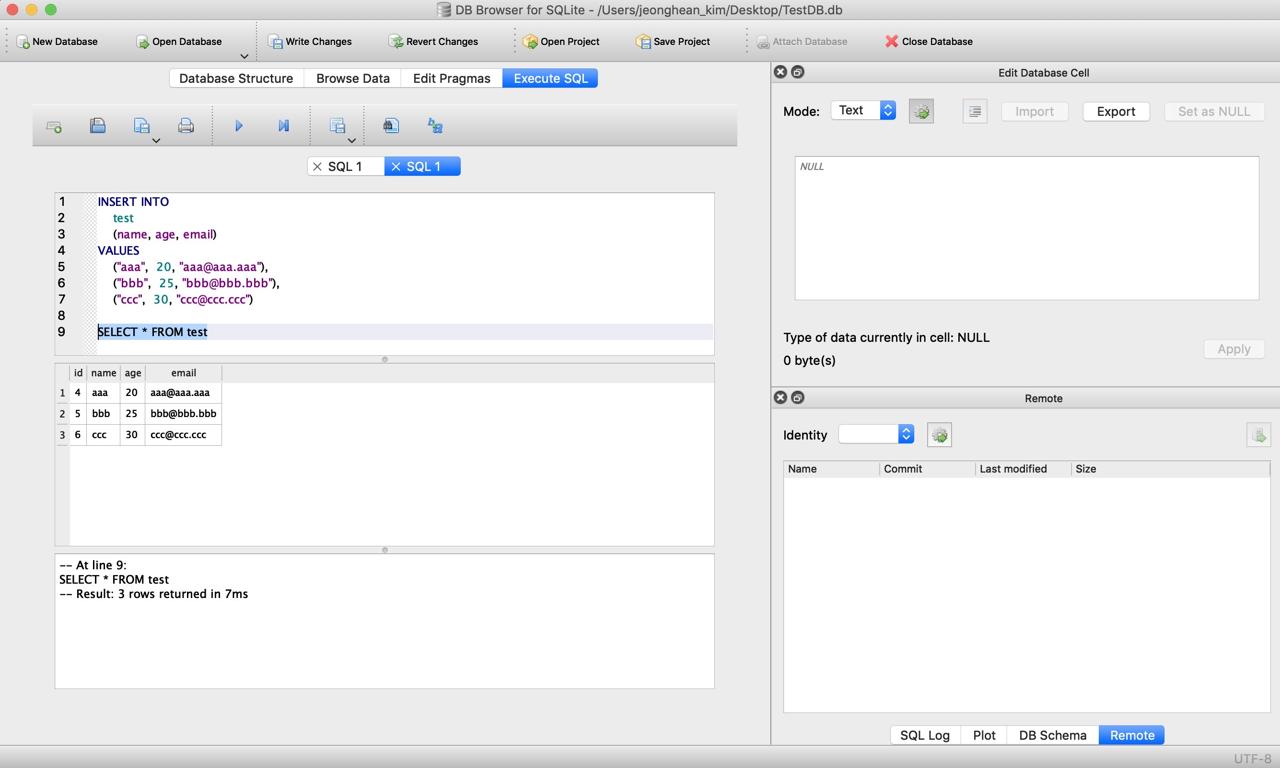
이제 데이터베이스가 준비되었습니다. RN(React Native)에서 사용해 봅시다.
react-native-sqlite-storage 라이브러리 설치
sqlite를 사용하고 싶은 RN(React Native) 프로젝트에서 아래에 명령어로 react-native-sqlite-storage를 설치합니다.
npm install --save react-native-sqlite-storage
# for typescript
npm install --save-dev @types/react-native-sqlite-storage
그리고 아래에 명령어를 통해 설치한 react-native-sqlite-storage를 RN(React Native) 프로젝트와 연결합니다.
react-native link react-native-sqlite-storagepod을 이용하시는 분들은 수동으로 라이브러리를 연결하는 걸 권장합니다. 수동으로 라이브러리를 연결하는 방법은 공식 홈페이지를 참고해 주세요.
- react-native-sqlite-storage 공식 홈페이지: https://github.com/andpor/react-native-sqlite-storage
결과적으로 아래와 같이 설정이 되면 react-native-sqlite-storage 라이브러리를 사용할 수 있습니다.

DB 추가
위에서 작성한 DB를 앱안에 사용할 수 있도록 각 OS에 맞게 DB를 추가합니다.
iOS
iOS에서 미리 만든 sqlite DB를 사용하기 위해서는 아래와 같은 절차를 따라야 합니다.
-
ios/[project name]/www폴더를 만들고 미리 생성한 sqlite DB를 복사합니다.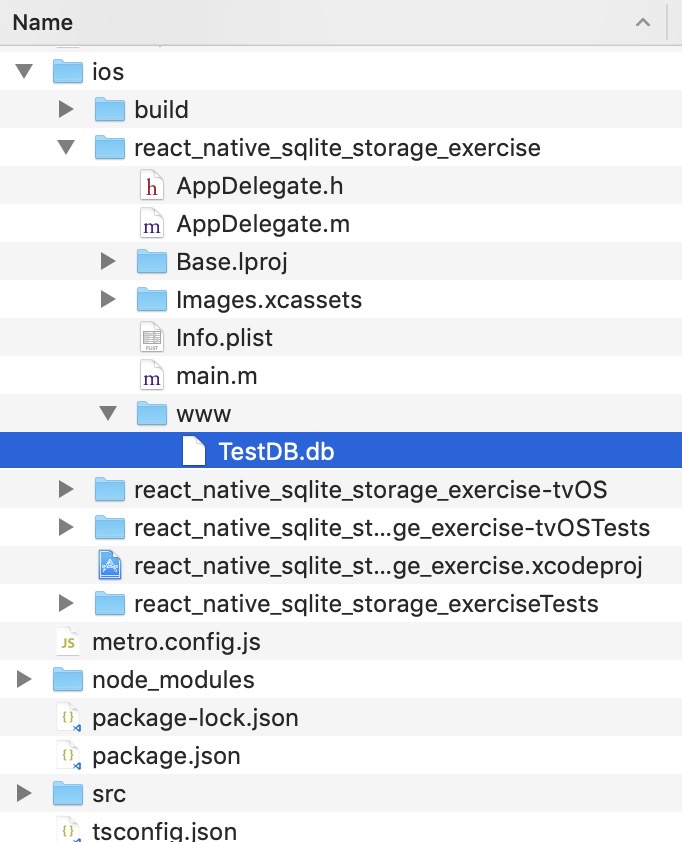
-
[project name].xcodeproj또는[project name].xcworkspace파일을 실행하여 xcode를 실행합니다. -
왼쪽 상단에
[project name]하단의[project name]폴더를 우클릭하고,Add Files to [project name]을 선택합니다.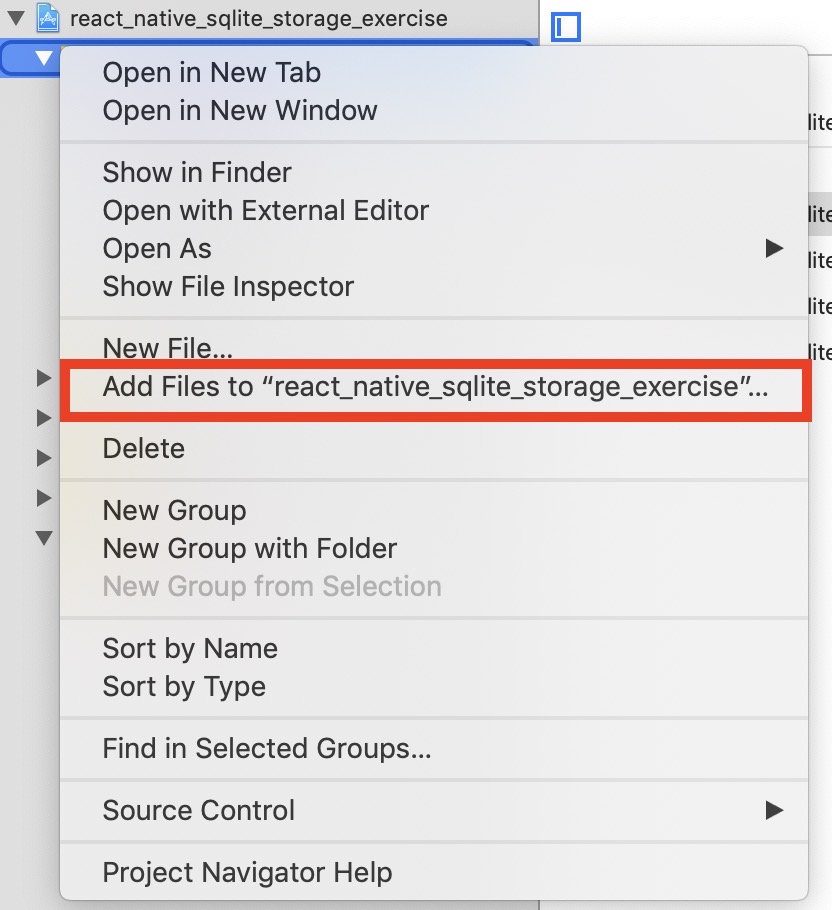
-
파일 선택 대화창이 나오면
(1)에서 만든www폴더를 선택하고Create folder references를 선택한 후Add버튼을 눌러 추가합니다.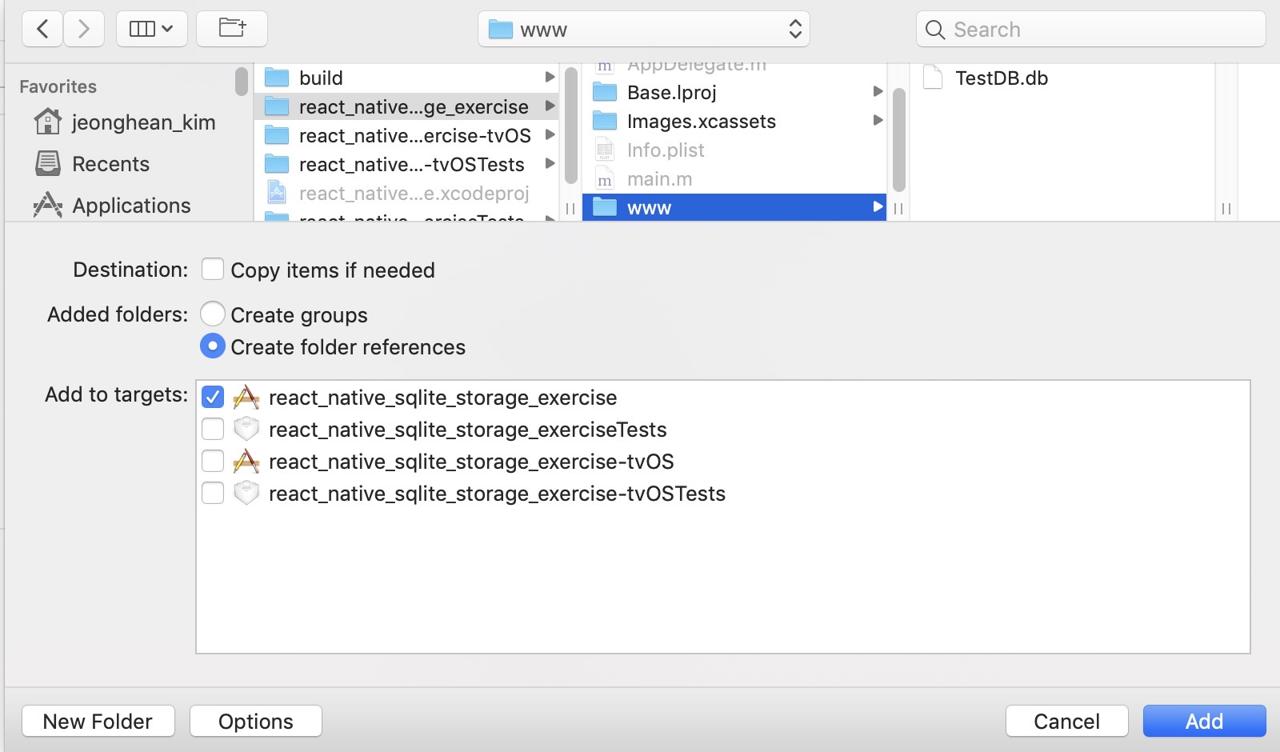
안드로이드
안드로이드에서 미리 만든 sqlite DB를 사용하기 위해서는 아래와 같은 절차를 따라야 합니다.
android/settings.gradle파일을 열고 아래와 같이 수정합니다.
rootProject.name = 'react_native_sqlite_storage_exercise'
...
include ':react-native-sqlite-storage'
project(':react-native-sqlite-storage').projectDir = new File(rootProject.projectDir, '../node_modules/react-native-sqlite-storage/src/android')
...
include ':app'android/app/build.gradle파일을 열고 아래와 같이 수정합니다.
...
dependencies {
    implementation fileTree(dir: "libs", include: ["*.jar"])
    implementation "com.android.support:appcompat-v7:${rootProject.ext.supportLibVersion}"
    implementation "com.facebook.react:react-native:+"  // From node_modules
  ...
    implementation project(':react-native-sqlite-storage')
}
...MainApplication.java파일을 열고 아래와 같이 수정합니다.
...
import org.pgsqlite.SQLitePluginPackage;
...
public class MainApplication extends Application implements ReactApplication {
  ...

  ...
  @Override
  protected List<ReactPackage> getPackages() {
    return Arrays.<ReactPackage>asList(
      ...
      new SQLitePluginPackage(),
      ...
      new MainReactPackage()
    );
  }
}android/app/src/main/assets/www폴더를 만들고 미리 생성한 sqlite DB를 복사합니다.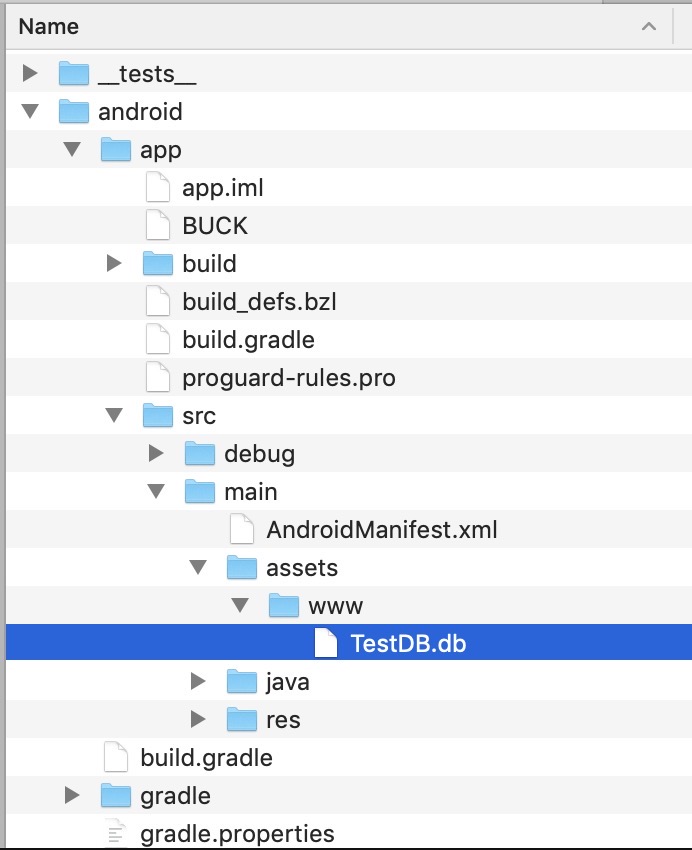
DB 사용하기
각 OS 설정이 끝났다면, 이제 sqlite DB를 사용하기 위해 아래와 같이 소스를 추가합니다.
import * as React from 'react';
import Styled from 'styled-components/native';
import SQLite from 'react-native-sqlite-storage';

const Container = Styled.View`
  flex: 1;
  justify-content: center;
  align-items: center;
  background-color: #F5FCFF;
`;
const UserContainer = Styled.View`
  flex-direction: row;
`;
const UserInfo = Styled.Text`
  padding: 8px;
`;

interface Props {}
interface State {
  db: SQLite.SQLiteDatabase;
  users: Array<IUser>;
}

export default class App extends React.Component<Props, State> {
  constructor(props: Props) {
    super(props);

    const db = SQLite.openDatabase(
      {
        name: 'TestDB.db',
        location: 'default',
        createFromLocation: '~www/TestDB.db',
      },
      () => {},
      error => {
        console.log(error);
      }
    );

    this.state = {
      db,
      users: [],
    };
  }

  render() {
    const { users } = this.state;
    return (
      <Container>
        {users.map((user: IUser, index: number) => (
          <UserContainer key={`user-info${index}`}>
            <UserInfo>{user.id}</UserInfo>
            <UserInfo>{user.name}</UserInfo>
            <UserInfo>{user.age}</UserInfo>
            <UserInfo>{user.email}</UserInfo>
          </UserContainer>
        ))}
      </Container>
    );
  }

  componentDidMount() {
    const { db } = this.state;

    db.transaction(tx => {
      tx.executeSql('SELECT * FROM test;', [], (tx, results) => {
        const rows = results.rows;
        let users = [];

        for (let i = 0; i < rows.length; i++) {
          users.push({
            ...rows.item(i),
          });
        }

        this.setState({ users });
      });
    });
  }

  componentWillUnmount() {
    const { db } = this.state;

    db.close();
  }
}
완료
이로써 react-native-sqlite-storage 라이브러리를 사용하여 sqlite DB를 사용하는 방법에 대해서 알아보았습니다. 여러분도 DB를 함께 배포하는 앱을 제작할 경우 sqlite를 사용하는 것을 고려해 보시는 건 어떨까요?
아래는 위에 내용을 이용하여 만든 git 저장소(repository)입니다. 소스가 궁금하신 분들은 아래에 링크를 참고하세요
- git 저장소(repository): react_native_sqlite_storage_exercise
제 블로그가 도움이 되셨나요? 하단의 댓글을 달아주시면 저에게 큰 힘이 됩니다!
앱 홍보
Deku가 개발한 앱을 한번 사용해보세요.Deku가 개발한 앱은 Flutter로 개발되었습니다.관심있으신 분들은 앱을 다운로드하여 사용해 주시면 정말 감사하겠습니다.


