목차
개요
이번 블로그 포스트에서는 React Native에서 현재 위치 정보를 가져오는 방법에 대해서 알아봅니다. 위치 정보를 가져오기 위해 사용할 라이브러리는 react-native-geolocation-service이며 아래에 링크를 통해 자세한 내용을 확인할 수 있습니다.
블로그를 작성하면서 만든 예제 소스코드가 있습니다. 소스코드를 확인하고 싶은 분들은 아래에 링크를 참고하시기 바랍니다.
예제 소스코드는 아래에 내용이 적용되어 있으니, 궁금하신 분들은 아래에 내용도 참고하시기 바랍니다.
react-native-geolocation-service 설치
아래에 명령어를 사용하여 react-native-geolocation-service를 설치합니다.
npm install --save react-native-geolocation-service라이브러리 연결
설치한 라이브러리를 React Native 프로젝트에 연결할 필요가 있습니다.
0.60 이상
아래에 명령어를 사용하여 iOS에서 라이브러리를 연결합니다.
cd ios
pod install
React Native 프로젝트에서 react-native-geolocation-service를 사용하기 위해서는 Swift를 지원하도록 해야합니다. Swift를 지원하기 위해서는 ios/[project name]xcworkspace 파일을 실행하여 Xcode를 실행합니다.
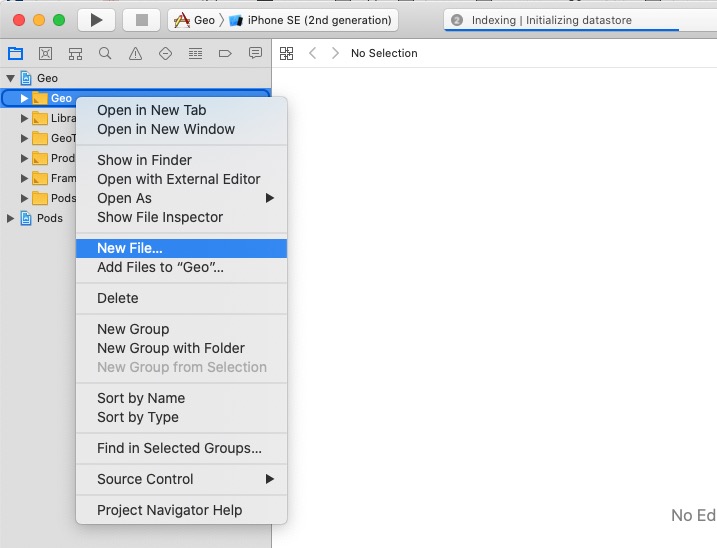
Xcode를 실행하면 왼쪽 상단의 프로젝트에 폴더를 마우스 오른쪽으로 클릭하고 New File...을 선택합니다.
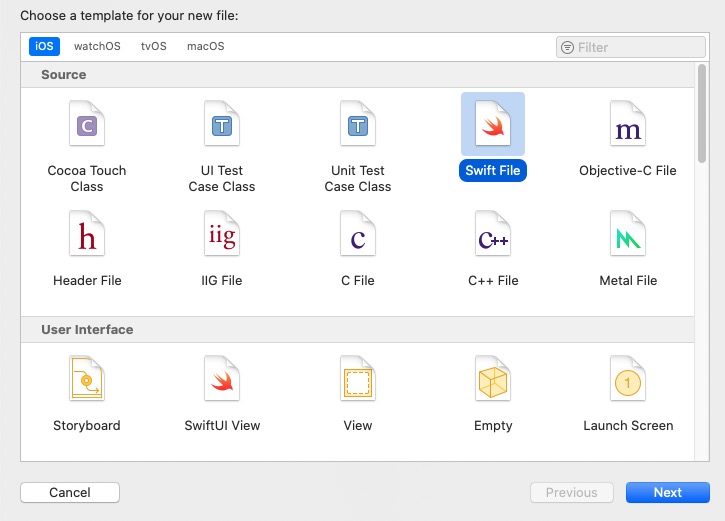
위와 같은 화면이 보인다면 Swift File을 선택하고 오른쪽 하단의 Next를 선택합니다.
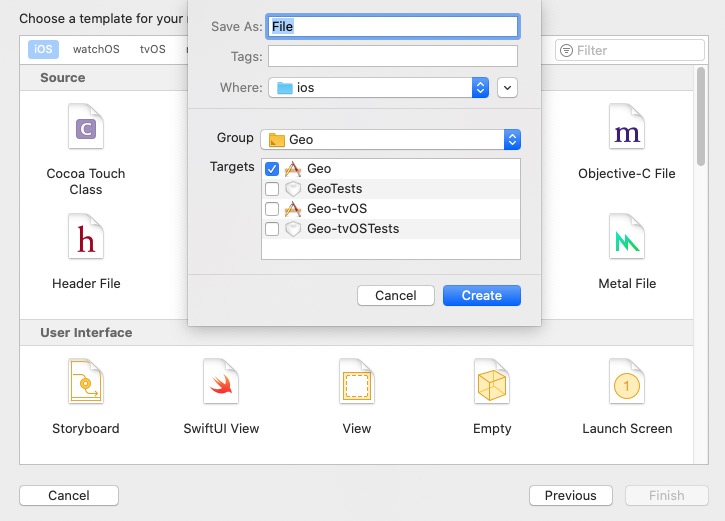
아무 파일 이름이나 설정한 후, 오른쪽 아래의 Create 버튼을 선택합니다.
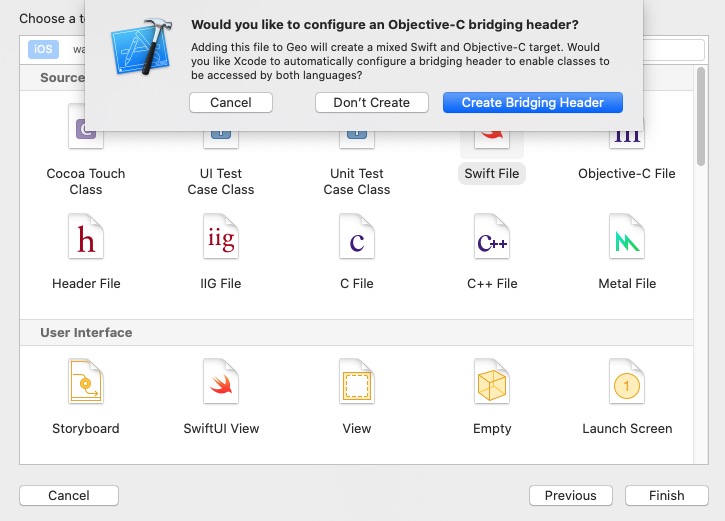
위와 같은 화면이 나오면 오른쪽 하단의 Create Bridging Header를 선택하여 Swift를 지원하도록 합니다.
0.59 이하
React Native 버전이 0.59 이하이신 분들은 공식 사이트를 참고하여 연결하시기 바랍니다.
권한 설정
iOS 권한 설정
iOS에서 위치 정보를 사용하기 위해서는, ios/[Project Name]/info.plist에 아래와 같은 권한을 설정할 필요가 있습니다.
<?xml version="1.0" encoding="UTF-8"?>
<!DOCTYPE plist PUBLIC "-//Apple//DTD PLIST 1.0//EN" "http://www.apple.com/DTDs/PropertyList-1.0.dtd">
<plist version="1.0">
<dict>
  ...
  <key>NSLocationWhenInUseUsageDescription</key>
  <string>Program requires GPS to track cars and job orders</string>
  <key>NSLocationAlwaysUsageDescription</key>
  <string>Program requires GPS to track cars and job orders</string>
  <key>NSLocationAlwaysAndWhenInUseUsageDescription</key>
  <string>Program requires GPS to track cars and job orders</string>
  ...
</dict>
</plist>
앱이 기동되었을 때만, 위치 정보를 습득하는 경우, NSLocationWhenInUseUsageDescription만 설정하면 됩니다.
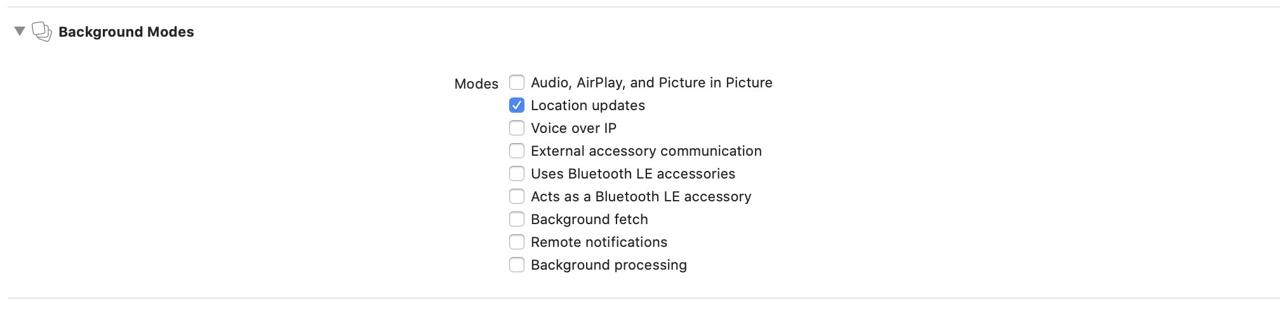
앱이 백그라운드에서도 위치 정보를 습득할 필요가 있으면 NSLocationAlwaysUsageDescription과 NSLocationAlwaysAndWhenInUseUsageDescription도 설정할 필요가 있으며, 아래와 같이 Background Modes의 Location updates를 설정할 필요가 있습니다.
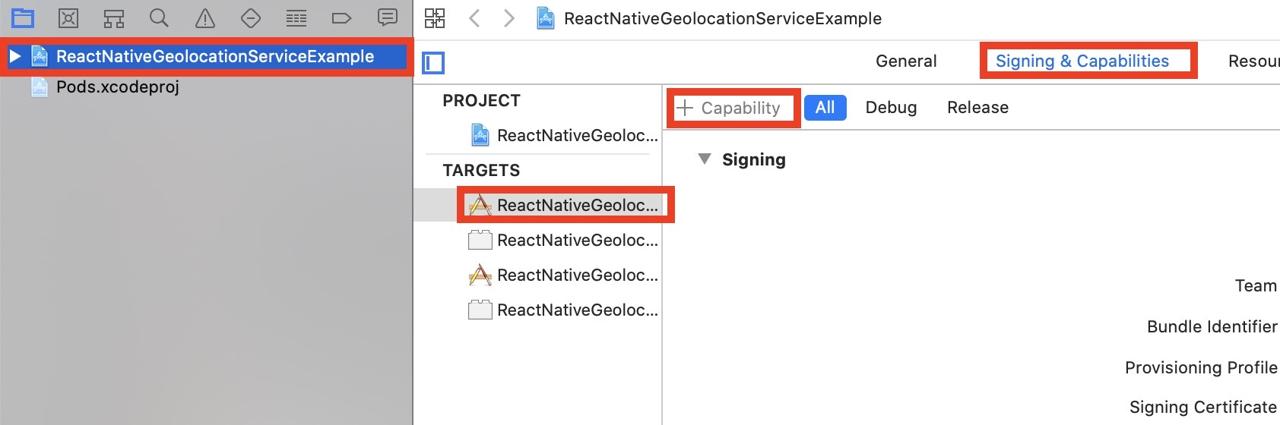
백그라운드에서 위치 정보를 습득하기 위해서 Xcode를 실행하고 아래와 같이 + Capability를 선택합니다.
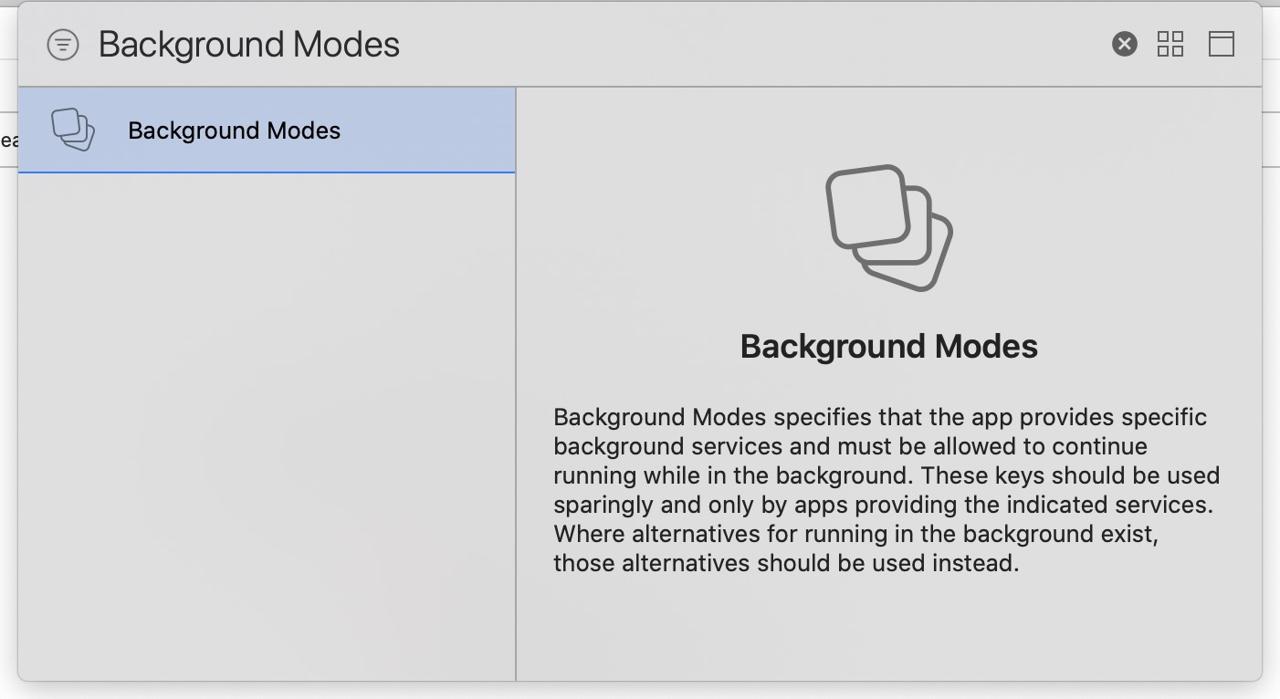
아래와 같이 Capability를 검색하는 화면이 나오면 Background Modes를 검색하고, 검색 결과를 더블클릭하여 추가합니다.
더블클릭하여 Background Modes를 추가하였다면, Background Modes의 Location updates를 선택하여 추가합니다.
이렇게 설정을 완료하였다면, Javascript에서 아래와 같은 소스를 사용해서 권한을 얻어야합니다.
import {Platform} from 'react-native';
import Geolocation from 'react-native-geolocation-service';
...
useEffect(() => {
  if (Platform.OS === 'ios') {
    Geolocation.requestAuthorization('always');
  }
}, []);
...
안드로이드 권한 설정
안드로이드에서 위치 정보를 사용하기 위해서 android/app/src/main/AndroidManifest.xml 파일을 열고 아래와 같이 수정합니다.
<manifest xmlns:android="http://schemas.android.com/apk/res/android"
  package="com.reactnativegeolocationserviceexample">

    ...
    <uses-permission android:name="android.permission.ACCESS_COARSE_LOCATION" />
    <uses-permission android:name="android.permission.ACCESS_FINE_LOCATION" />
    ...

    <application
사용법
react-native-geolocation 라이브러리를 사용하여 아래와 같이 위치 정보를 가져올 수 있습니다.
현재 위치 가져오기
현재 위치를 가져오기 위해서는 아래에 코드를 사용합니다.
Geolocation.getCurrentPosition(
    (position) => {
        console.log(position);
    },
    (error) => {
        // See error code charts below.
        console.log(error.code, error.message);
    },
    { enableHighAccuracy: true, timeout: 15000, maximumAge: 10000 }
);
현재 위치를 화면에 표시하는 예제는 아래와 같습니다.
import React, {useState, useEffect} from 'react';
import Styled from 'styled-components/native';
import Geolocation from 'react-native-geolocation-service';
const Container = Styled.View`
flex: 1;
justify-content: center;
align-items: center;
`;
const Label = Styled.Text`
font-size: 24px;
`;
interface ILocation {
latitude: number;
longitude: number;
}
const CurrentPosition = () => {
const [location, setLocation] = useState<ILocation | undefined>(undefined);
useEffect(() => {
Geolocation.getCurrentPosition(
position => {
const {latitude, longitude} = position.coords;
setLocation({
latitude,
longitude,
});
},
error => {
console.log(error.code, error.message);
},
{enableHighAccuracy: true, timeout: 15000, maximumAge: 10000},
);
}, []);
return (
<Container>
{location ? (
<>
<Label>Latitude: {location.latitude}</Label>
<Label>Latitude: {location.longitude}</Label>
</>
) : (
<Label>Loading...</Label>
)}
</Container>
);
};
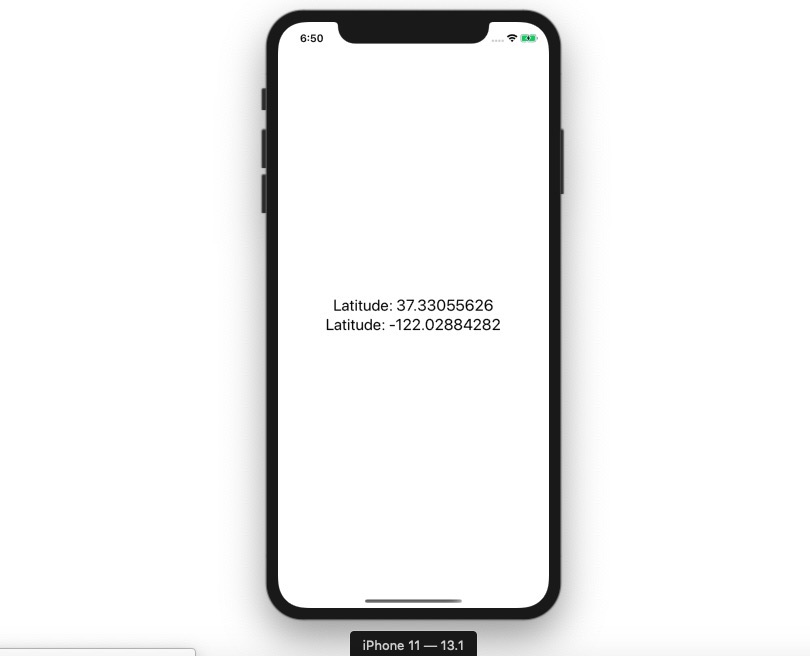
export default CurrentPosition;위에 소스코드의 결과 화면은 다음과 같습니다.
사용자 위치 정보 추적
react-native-geolocation-service를 사용하면 사용자의 현재 위치뿐만 아니라, 사용자의 위치 정보를 추적할 수 있습니다.
사용자 위치 추적에 사용되는 코드는 아래와 같습니다.
_watchId = Geolocation.watchPosition(
  position => {
    const {latitude, longitude} = position.coords;
    setLocation({latitude, longitude});
  },
  error => {
    console.log(error);
  },
  {
    enableHighAccuracy: true,
    distanceFilter: 0,
    interval: 5000,
    fastestInterval: 2000,
  },
);
사용자 위치 추적을 종료할 시에는 아래와 같은 코드를 사용합니다.
if (_watchId !== null) {
  Geolocation.clearWatch(_watchId);
}
사용자 위치 추적에 관한 전체 소스는 다음과 같습니다.
import React, {useState, useEffect} from 'react';
import Styled from 'styled-components/native';
import Geolocation from 'react-native-geolocation-service';
const Container = Styled.View`
flex: 1;
justify-content: center;
align-items: center;
`;
const Label = Styled.Text`
font-size: 24px;
`;
interface ILocation {
latitude: number;
longitude: number;
}
const WatchLocation = () => {
const [location, setLocation] = useState<ILocation | undefined>(undefined);
useEffect(() => {
const _watchId = Geolocation.watchPosition(
position => {
const {latitude, longitude} = position.coords;
setLocation({latitude, longitude});
},
error => {
console.log(error);
},
{
enableHighAccuracy: true,
distanceFilter: 0,
interval: 5000,
fastestInterval: 2000,
},
);
return () => {
if (_watchId) {
Geolocation.clearWatch(_watchId);
}
};
}, []);
return (
<Container>
{location ? (
<>
<Label>Latitude: {location.latitude}</Label>
<Label>Latitude: {location.longitude}</Label>
</>
) : (
<Label>Loading...</Label>
)}
</Container>
);
};
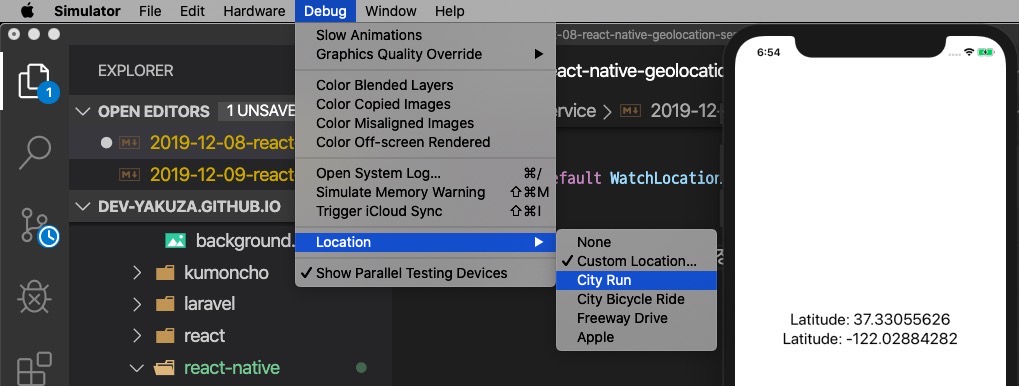
export default WatchLocation;시뮬레이터에서 사용자 위치 정보를 추적하기 위해서는 다음 그림과 같이 Debug > Location 메뉴에서 City Run, City Bicycle Ride, Freeway Drive 중 하나의 메뉴를 선택하면 위치 정보가 갱신 되는 것을 확인할 수 있습니다.
완료
이것으로 react-native-geolocation-service를 사용하여 사용자의 위치 정보를 가져오는 방법에 대해서 알아보았습니다. 또한 watchPosition을 사용하여 사용자의 위치 정보를 추적하는 방법에 대해서도 알아보았습니다.
제 블로그가 도움이 되셨나요? 하단의 댓글을 달아주시면 저에게 큰 힘이 됩니다!
앱 홍보
Deku가 개발한 앱을 한번 사용해보세요.Deku가 개발한 앱은 Flutter로 개발되었습니다.관심있으신 분들은 앱을 다운로드하여 사용해 주시면 정말 감사하겠습니다.


