개요
GitHub Actions를 사용하다보면 수동으로 GitHub Actions를 실행해야 할 때가 있습니다. 이번 블로그 포스트에서는 GitHub Actions를 수동으로 실행하는 방법에 대해서 알아보겠습니다.
workflow_dispatch
GitHub Actions를 수동으로 실행하기 위해서는 workflow_dispatch를 사용해야 합니다.
이때, workflow_dispatch의 inputs을 통해 파라미터를 전달할 수 있습니다.
workflow_dispatch는 다음과 같이 설정할 수 있습니다.
name: GITHUB ACTIONS NAME

on:
  workflow_dispatch:
inputs 타입
workflow_dispatch의 inputs에는 다음과 같은 종류가 있습니다.
boolean: true 또는 falsechoice: 미리 지정된 옵션 중 하나를 선택할 수 있는 SelectBoxnumber: 숫자string: 문자열environment: GitHub에 설정한 환경 변수 사용
공식 문서에서도 사용 가능한 inputs 타입을 확인할 수 있습니다.
workflow_dispatch의 inputs은 다음과 같이 설정할 수 있습니다.
name: GITHUB ACTIONS NAME

on:
  workflow_dispatch:
    inputs:
      input_boolean:
        description: 'This is a boolean input'
        required: true
        default: false
type: booleaninputs은 type이외에도 description, required, default를 설정할 수 있습니다. type이외에는 모두 선택 사항입니다.
예제
그럼 workflow_dispatch를 사용하여 GitHub Actions를 수동으로 실행하는 예제를 살펴보겠습니다.
boolean
수동으로 실행하는 GitHub Actions를 만들기 위해 .github/workflows/manual_test.yml 파일을 생성하고 다음과 같이 수정합니다.
name: GITHUB ACTIONS NAME

on:
  workflow_dispatch:
    inputs:
      input_boolean:
        description: 'This is a boolean input'
        required: true
        default: false
        type: boolean

jobs:
  deploy-to-staging:
    runs-on: ubuntu-latest
    steps:
      - name: Print the input
        run: echo ${{ inputs.input_boolean }}
이렇게 작성한 파일을 commit하고 push한 후, GitHub의 Actions 탭으로 이동하면 다음과 같은 화면을 확인할 수 있습니다.
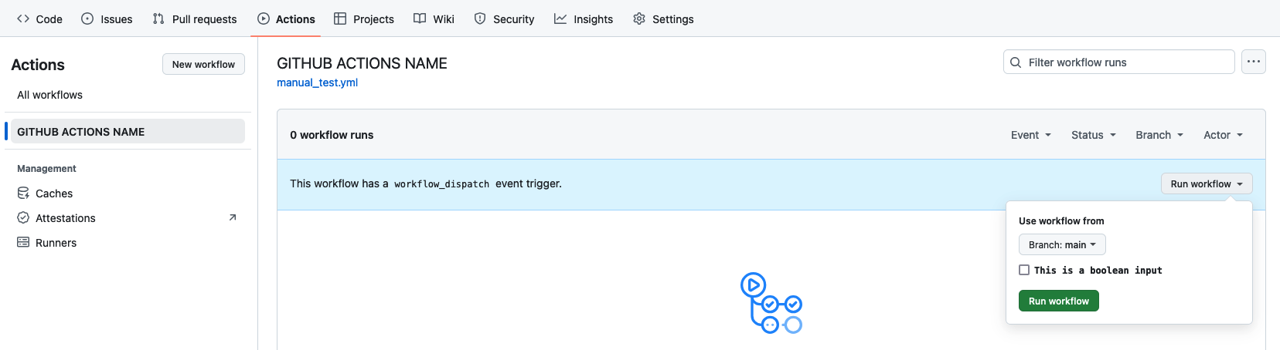
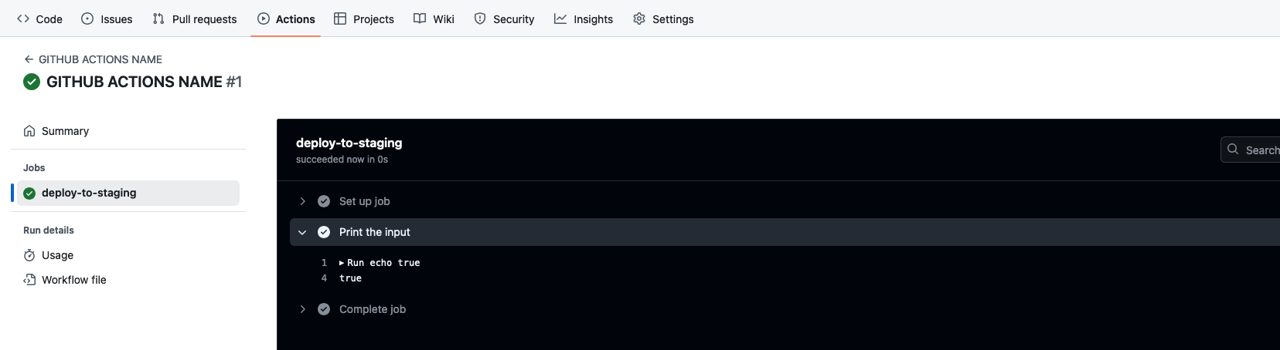
오른쪽에 표시된 Run workflow를 클릭하면 우리가 설정한 boolean 타입의 inputs를 확인할 수 있습니다. 이를 실행하면 다음과 같은 결과를 얻을 수 있습니다.
choice
수동으로 실행하는 GitHub Actions를 만들기 위해 .github/workflows/manual_test.yml 파일을 생성하고 다음과 같이 수정합니다.
name: GITHUB ACTIONS NAME

on:
  workflow_dispatch:
    inputs:
      input_choice:
        description: 'This is a choice input'
        required: true
        default: 'warning'
        type: choice
        options:
          - info
          - warning
          - debug

jobs:
  deploy-to-staging:
    runs-on: ubuntu-latest
    steps:
      - name: Print the input
        run: echo ${{ inputs.input_choice }}
이렇게 작성한 파일을 commit하고 push한 후, GitHub의 Actions 탭으로 이동하면 다음과 같은 화면을 확인할 수 있습니다.
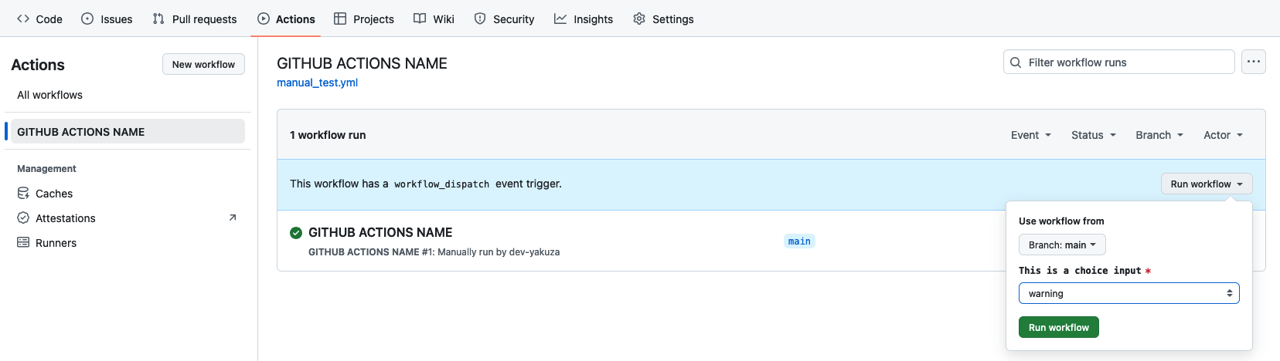
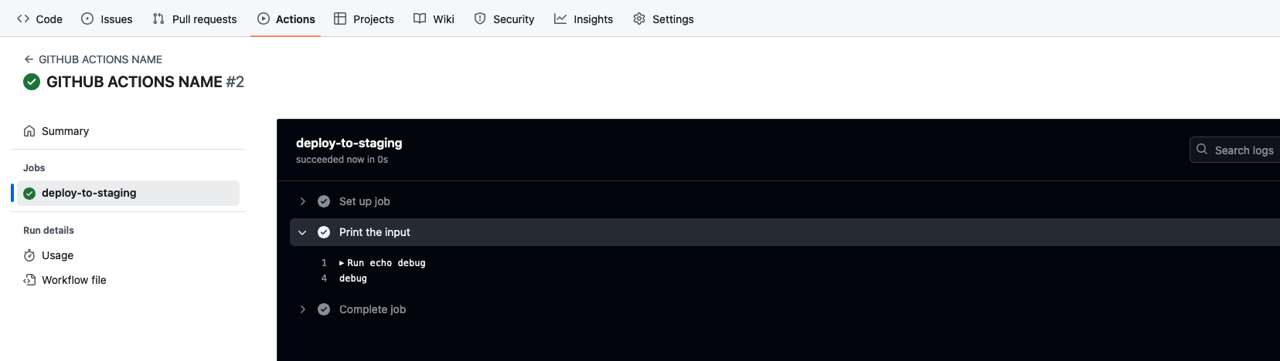
오른쪽에 표시된 Run workflow를 클릭하면 우리가 설정한 choice 타입의 inputs를 확인할 수 있습니다. 이를 실행하면 다음과 같은 결과를 얻을 수 있습니다.
number
수동으로 실행하는 GitHub Actions를 만들기 위해 .github/workflows/manual_test.yml 파일을 생성하고 다음과 같이 수정합니다.
name: GITHUB ACTIONS NAME

on:
  workflow_dispatch:
    inputs:
      input_number:
        description: 'This is a number input'
        required: true
        default: 20
        type: number

jobs:
  deploy-to-staging:
    runs-on: ubuntu-latest
    steps:
      - name: Print the input
        run: echo ${{ inputs.input_number }}
이렇게 작성한 파일을 commit하고 push한 후, GitHub의 Actions 탭으로 이동하면 다음과 같은 화면을 확인할 수 있습니다.
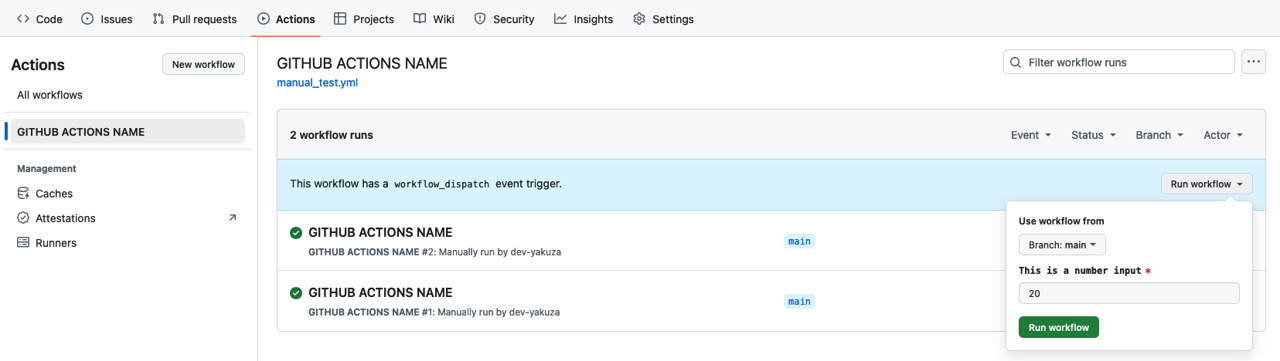
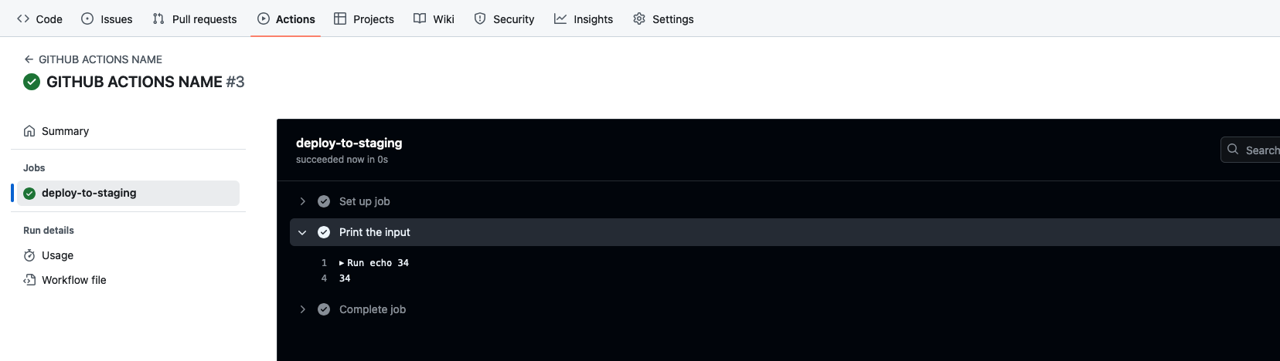
오른쪽에 표시된 Run workflow를 클릭하면 우리가 설정한 number 타입의 inputs를 확인할 수 있습니다. 이를 실행하면 다음과 같은 결과를 얻을 수 있습니다.
string
수동으로 실행하는 GitHub Actions를 만들기 위해 .github/workflows/manual_test.yml 파일을 생성하고 다음과 같이 수정합니다.
name: GITHUB ACTIONS NAME

on:
  workflow_dispatch:
    inputs:
      input_string:
        description: 'This is a string input'
        required: true
        default: 'Hello, World!'
        type: string

jobs:
  deploy-to-staging:
    runs-on: ubuntu-latest
    steps:
      - name: Print the input
        run: echo ${{ inputs.input_string }}
이렇게 작성한 파일을 commit하고 push한 후, GitHub의 Actions 탭으로 이동하면 다음과 같은 화면을 확인할 수 있습니다.
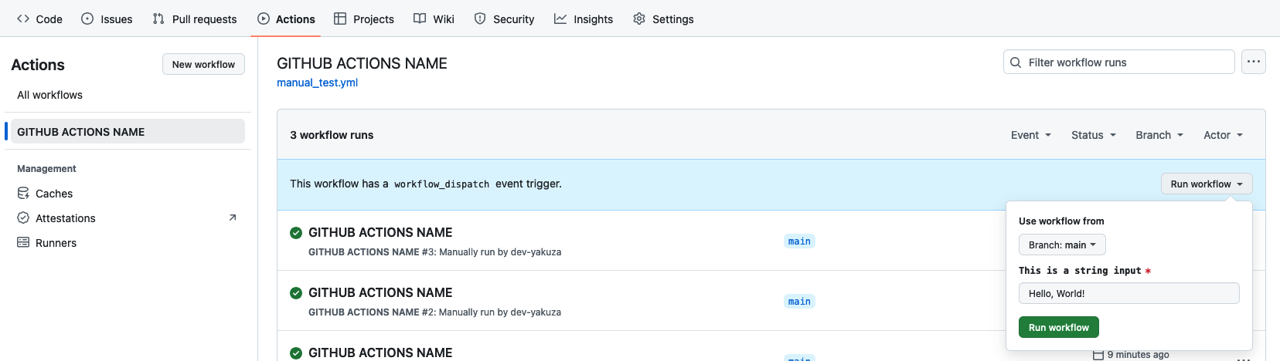
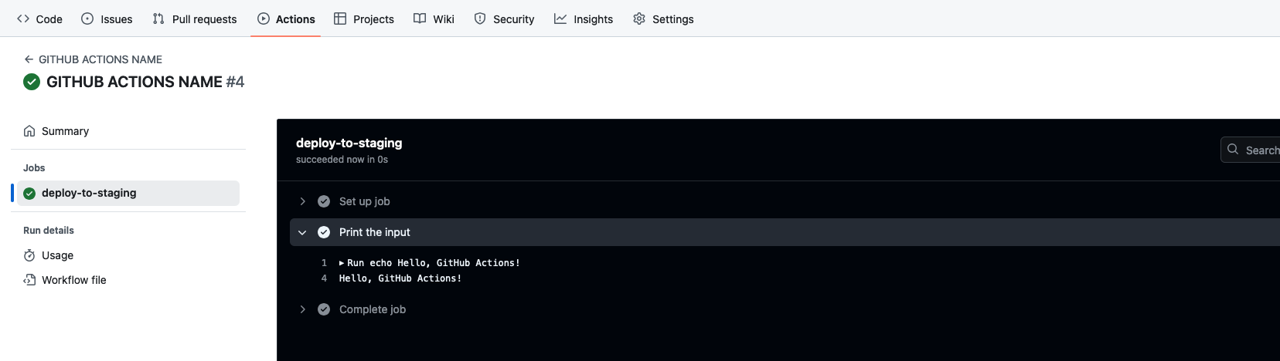
오른쪽에 표시된 Run workflow를 클릭하면 우리가 설정한 string 타입의 inputs를 확인할 수 있습니다. 이를 실행하면 다음과 같은 결과를 얻을 수 있습니다.
environment
workflow_dispatch의 에서 environment 타입을 사용하기 위해서는 GitHub의 Settings에서 Environment를 설정해야 합니다.
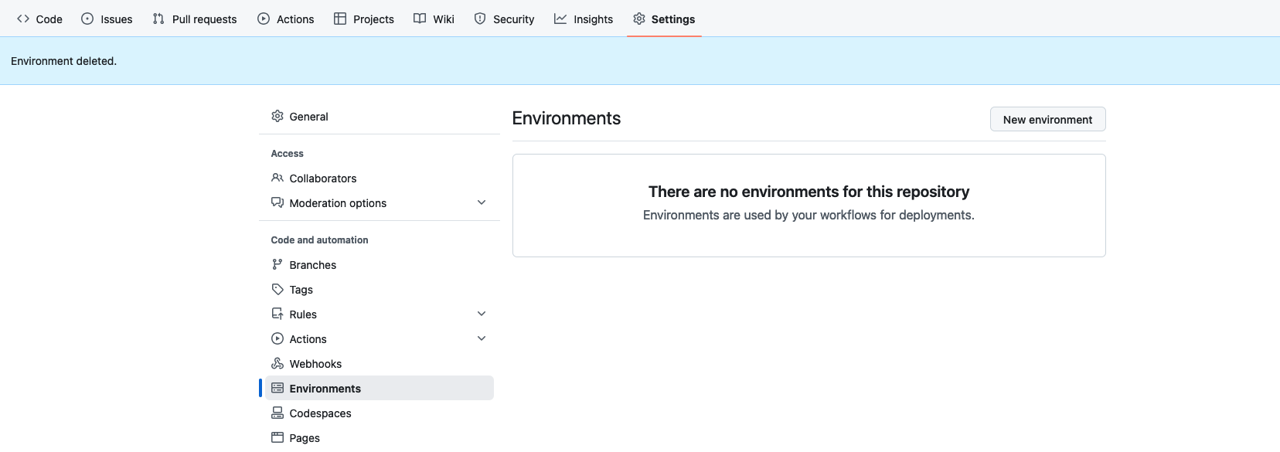
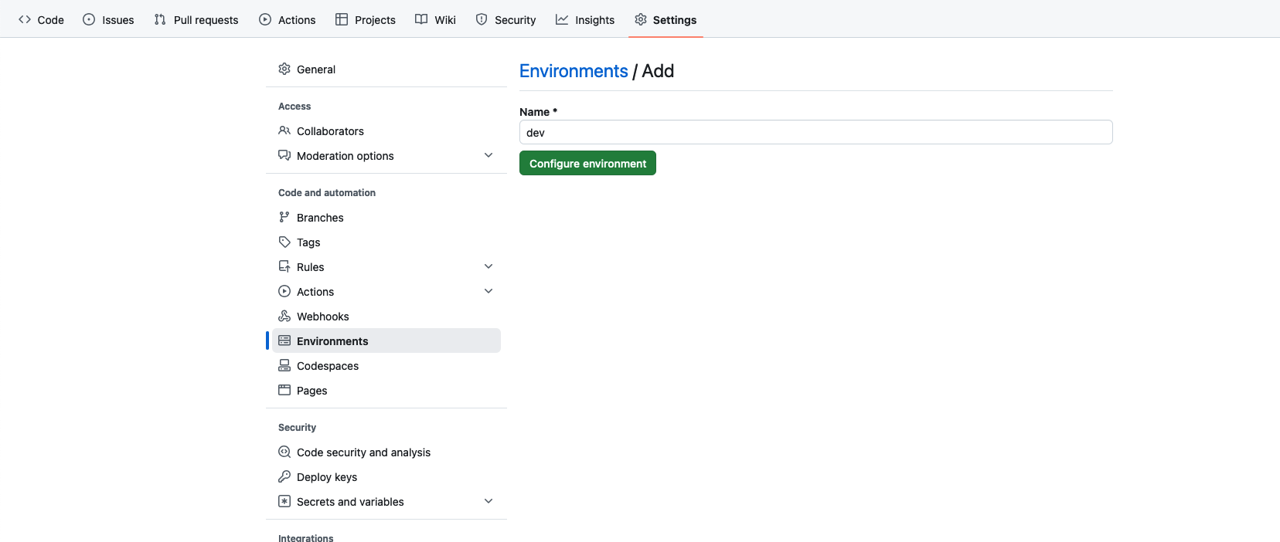
New environment를 클릭하고 다음과 같이 Name에 dev를 입력한 후, Configure environment를 클릭합니다.
그런 다음 Environment variables의 Add environment variable 버튼을 누르고 다음과 같이 Variable을 추가합니다.
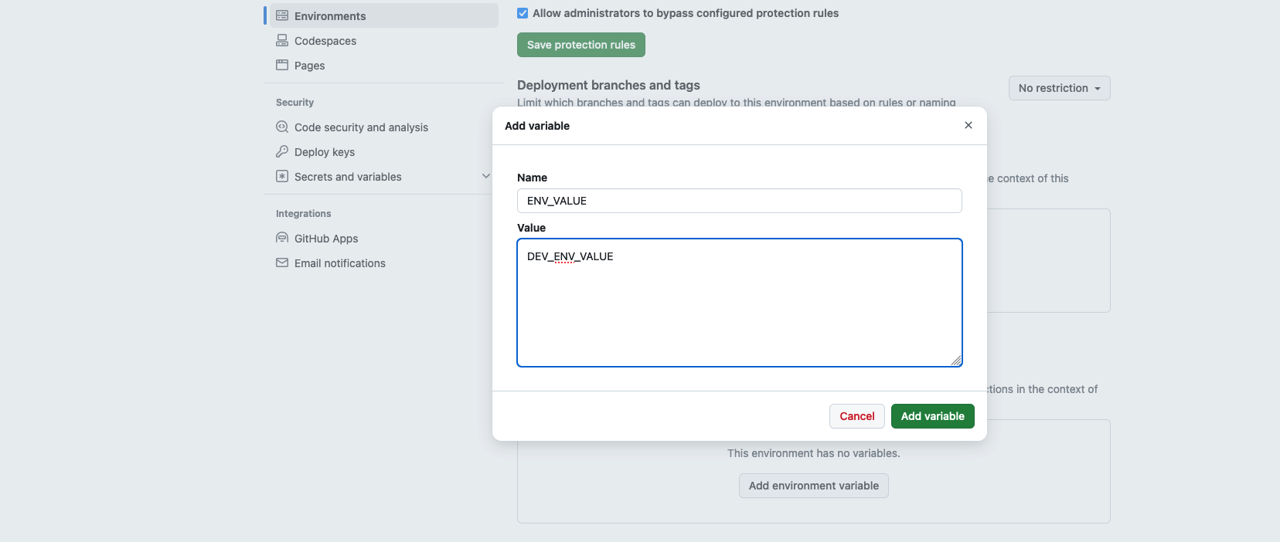
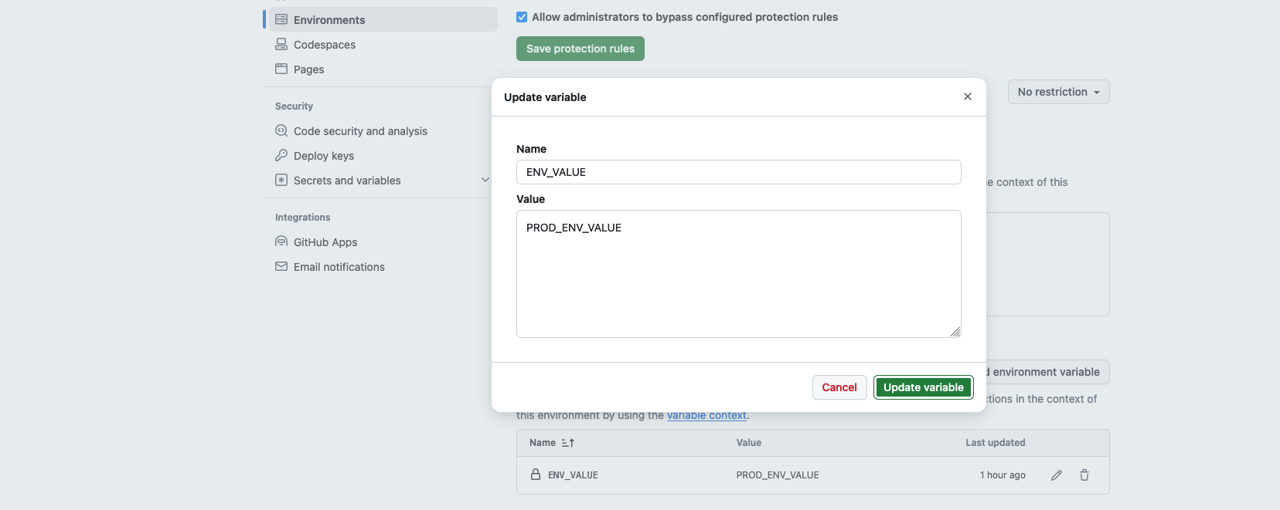
동일한 방식으로 prod라는 환경에도 동일한 변수를 추가합니다.
이제 수동으로 실행하는 GitHub Actions를 만들기 위해 .github/workflows/manual_test.yml 파일을 생성하고 다음과 같이 수정합니다.
name: GITHUB ACTIONS NAME

on:
  workflow_dispatch:
    inputs:
      input_environment:
        description: 'This is a environment input'
        required: true
        type: environment

jobs:
  deploy-to-staging:
    runs-on: ubuntu-latest
    environment: ${{ inputs.input_environment }}
    steps:
      - name: Print the input
        run: echo ${{ vars.ENV_VALUE }}
이렇게 작성한 파일을 commit하고 push한 후, GitHub의 Actions 탭으로 이동하면 다음과 같은 화면을 확인할 수 있습니다.

오른쪽에 표시된 Run workflow를 클릭하면 GitHub의 Settings에서 Environment에 설정한 값이 표시되는 것을 확인할 수 있습니다. 이를 실행하면 다음과 같은 결과를 얻을 수 있습니다.
- dev 환경
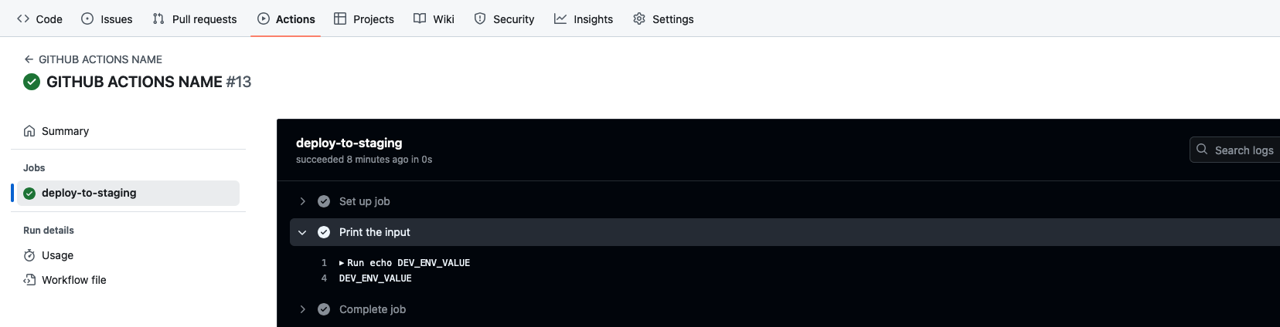
- prod 환경

완료
이것으로 GitHub Actions를 수동으로 실행하는 방법에 대해서 알아보았습니다. 또한 설정 가능한 inputs 타입에 대해서도 알아보았습니다.
여러분도 workflow_dispatch와 다양한 타입의 inputs을 사용하여 GitHub Actions를 수동으로 실행해보세요.
제 블로그가 도움이 되셨나요? 하단의 댓글을 달아주시면 저에게 큰 힘이 됩니다!
앱 홍보
Deku가 개발한 앱을 한번 사용해보세요.Deku가 개발한 앱은 Flutter로 개발되었습니다.관심있으신 분들은 앱을 다운로드하여 사용해 주시면 정말 감사하겠습니다.


