목차
개요
이번 블로그 포스트에서는 GetX를 사용하여 테마(Theme)를 사용하는 방법에 대해서 알아보도록 하겠습니다. 이 블로그 포스트에서 소개하는 소스 코드는 아래에 링크에서 확인할 수 있습니다.
블로그 시리즈
이 블로그 포스트는 Flutter에서 GetX를 사용하는 방법에 관해 시리즈로 제작되었습니다. GetX의 다른 사용법을 알고 싶으시다면, 다음 링크를 참고하시기 바랍니다.
- [GetX] 상태 관리
- [GetX] 라우트 관리
- [GetX] 종속성 관리
- [GetX] 다국어 지원
- [GetX] 테마
- [GetX] BottomSheet
- [GetX] Dialog
- [GetX] 스낵바
- [GetX] 화면 유틸리티 기능
GetX 설치
Flutter에서 GetX의 사용법을 확인하기 위해 다음 명령어를 사용하여 Flutter의 새로운 프로젝트를 생성합니다.
flutter create theme
그런 다음 명령어를 실행하여 GetX 패키지를 설치합니다.
flutter pub add get
이제 이렇게 설치한 GetX를 사용하여 테마를 사용하는 방법에 대해서 알아보도록 하겠습니다.
테마 설정
GetX를 사용하여 앱의 테마를 적용하고 변경하기 위해서는 GetMaterialApp에 theme과 darkTheme을 설정할 필요가 있습니다. lib/main.dart 파일을 열고 다음과 같이 수정합니다.
import 'package:get/get.dart';

class MyApp extends StatelessWidget {
  const MyApp({Key? key}) : super(key: key);

  @override
  Widget build(BuildContext context) {
    return GetMaterialApp(
      title: 'Flutter Demo',
      theme: ThemeData(primarySwatch: Colors.blue),
      darkTheme: ThemeData.dark().copyWith(primaryColor: Colors.red),
      home: const MyHomePage(),
    );
  }
}
여기서 설정한 theme은 light 모드에서 표시될 테마이며, darkTheme은 dark 모드에서 표시될 테마입니다. 자신의 앱에 맞게 각각 테마를 만들어 설정해 줍니다.
테마 변경하기
이렇게 설정한 테마를 GetX를 사용하여 변경할 수 있습니다. 테마를 변경할 때에는 다음과 같이 Get.changeTheme 함수를 사용합니다.
Get.changeTheme(ThemeData.dark());
테마 확인하기
GetX의 Get.isDarkMode을 사용하면 현재 테마가 다크 모드인지 확인할 수 있습니다. 이를 테마를 변경할 때, 활용할 수 있습니다.
Get.changeTheme(
  Get.isDarkMode ? ThemeData.light() : ThemeData.dark(),
);
디바이스 설정 가져오기
보통 앱을 처음 실행하면 디바이스의 테마에 맞게 앱의 테마를 설정합니다. Flutter에서는 다음과 같이 현재 디바이스의 테마 설정을 가져올 수 있습니다.
import 'package:flutter/scheduler.dart';
...
final isLight = SchedulerBinding.instance?.window.platformBrightness == Brightness.light;
이를 활용하면, 앱을 처음 실행할 때, 디바이스의 테마에 맞게 앱의 테마를 설정할 수 있습니다.
예제
지금까지의 내용을 확인하기 위해 lib/main.dart 파일을 다음과 같이 수정합니다.
class MyHomePage extends StatelessWidget {
  const MyHomePage({Key? key}) : super(key: key);

  @override
  Widget build(BuildContext context) {
    return Scaffold(
      appBar: AppBar(
        systemOverlayStyle: Get.isDarkMode
            ? SystemUiOverlayStyle.light
            : SystemUiOverlayStyle.dark,
        title: Text(
          Get.isDarkMode ? 'Dark Theme' : 'Light Theme',
          style: Theme.of(context).textTheme.headline4,
        ),
      ),
      body: Center(
        child: OutlinedButton(
          onPressed: () {
            Get.changeTheme(
              Get.isDarkMode ? ThemeData.light() : ThemeData.dark(),
            );
          },
          child: const Text('Change Theme'),
        ),
      ),
    );
  }
}
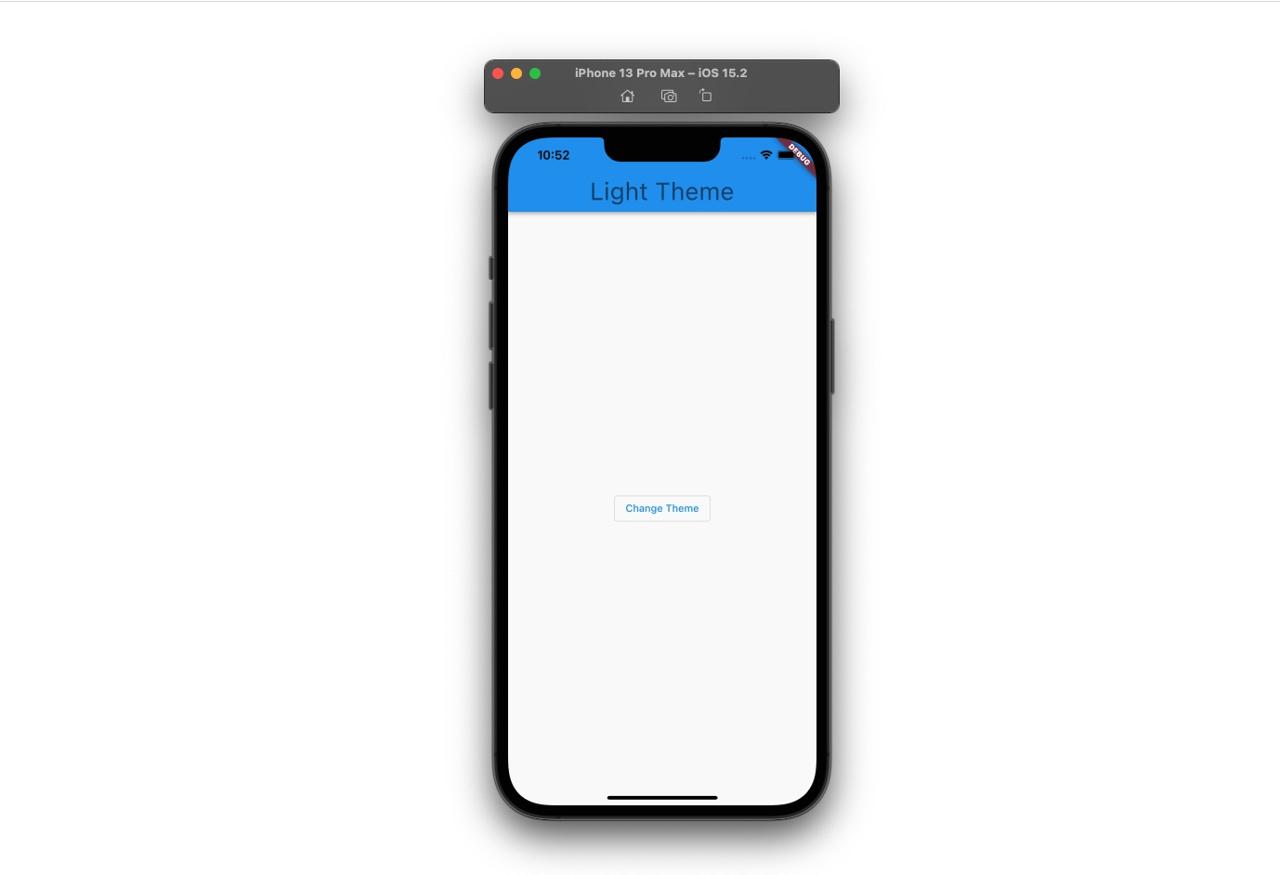
이를 실행하면 다음과 같이 Light 모드로 실행된 앱을 확인할 수 있습니다.

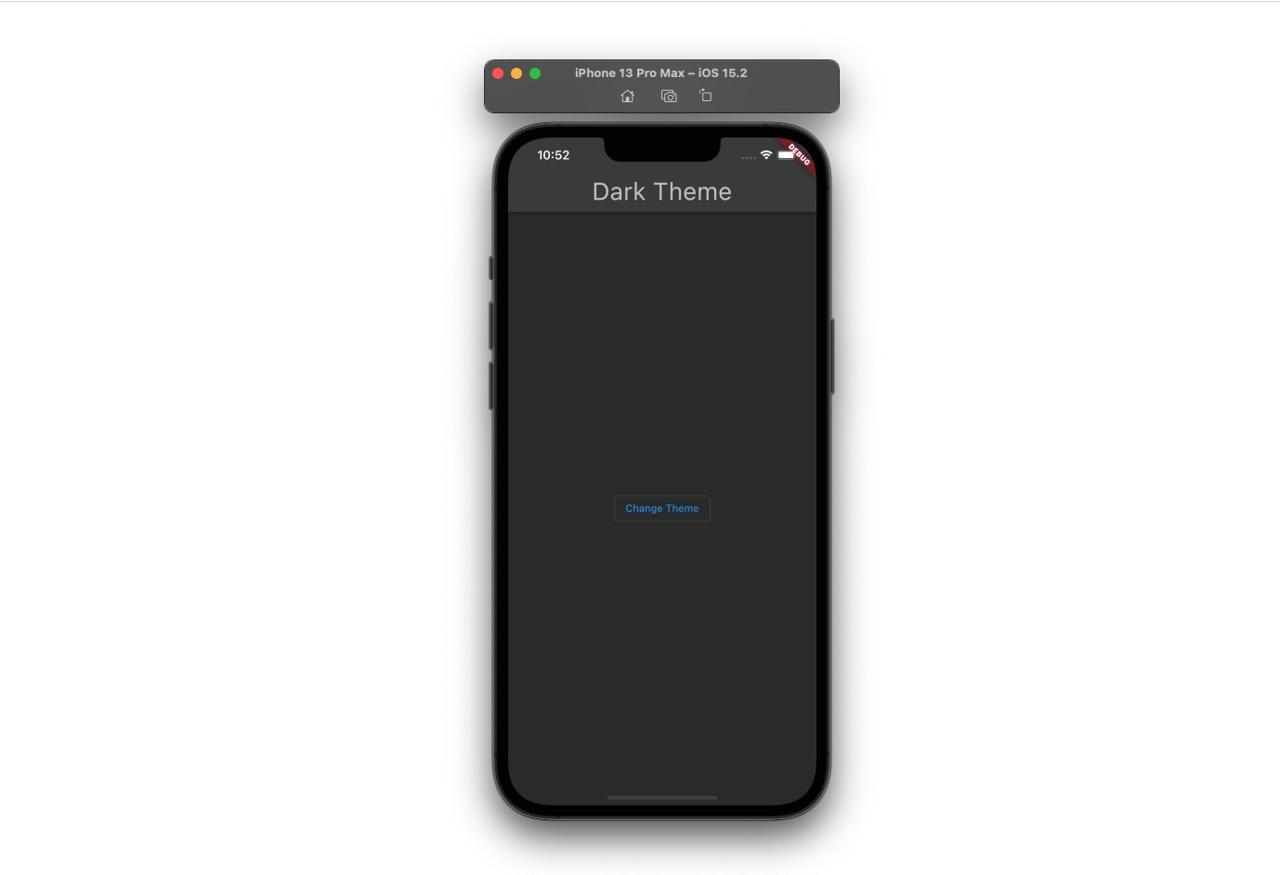
이제 화면에 표시된 버튼을 누르면, 다음과 같이 Dark 모드로 테마가 변경되는 것을 확인할 수 있습니다.

설정 가능한 테마
다음은 제가 앱을 개발하면서 변경한 테마들을 정리한 것입니다. 보통 테마를 설정할 때, 모든 테마를 다 설정할 수 없으므로 다음과 같이 Flutter가 제공하는 테마를 복사하여 사용하게 됩니다.
final themeData = Get.isDarkMode ? ThemeData.dark() : ThemeData.light();
...
themeData.copyWith(
  ...
);
AppBar 테마
다음과 같이 AppBar의 글자와 아이콘 색상을 설정할 수 있습니다.
themeData.copyWith(
  ...
  appBarTheme: AppBarTheme(
    color: white,
    titleTextStyle: TextStyle(color: black),
    iconTheme: IconThemeData(color: black),
  ),
  ...
);
Scaffold 배경색
다음과 같이 Scaffold의 배경색을 설정할 수 있습니다.
themeData.copyWith(
  ...
  scaffoldBackgroundColor: white,
  ...
);
Primary와 Secondary 색상
다음과 같이 Primary와 Secondary 색상을 설정할 수 있습니다.
themeData.copyWith(
  ...
  primaryColor: black,
  colorScheme: themeData.colorScheme.copyWith(
    primary: black,
    secondary: black,
  ),
  ...
);
텍스트 테마
다음과 같이 Flutter에서 표시되는 글자들의 기본 테마를 설정할 수 있습니다.
final textStyle = TextStyle(color: black);
final textTheme = TextTheme(
  headline1: textStyle,
  headline2: textStyle,
  headline3: textStyle,
  headline4: textStyle,
  headline5: textStyle,
  headline6: textStyle,
  subtitle1: textStyle,
  subtitle2: textStyle,
  bodyText1: textStyle,
  bodyText2: textStyle,
  caption: textStyle,
  button: textStyle,
  overline: textStyle,
);

themeData.copyWith(
  ...
  textTheme: textTheme,
  primaryTextTheme: textTheme,
  ...
);
Divider 색상
다음과 같이 Divider의 색상을 설정할 수 있습니다.
themeData.copyWith(
  ...
  dividerColor: lightGray,
  ...
);
아이콘 테마
다음과 같이 아이콘 테마를 설정할 수 있습니다.
themeData.copyWith(
  ...
  iconTheme: iconTheme,
  primaryIconTheme: iconTheme,
  ...
);
TextButton 테마
다음과 같이 TextButton 테마를 설정할 수 있습니다.
themeData.copyWith(
  ...
  textButtonTheme: TextButtonThemeData(
    style: TextButton.styleFrom(primary: black),
  ),
  ...
);
OutlinedButton 테마
다음과 같이 OutlinedButton 테마를 설정할 수 있습니다.
themeData.copyWith(
  ...
  outlinedButtonTheme: OutlinedButtonThemeData(
    style: TextButton.styleFrom(
      primary: black,
      side: BorderSide(color: black, width: 1),
    ),
  ),
  ...
);
TextField의 선택 영역 테마
다음과 같이 TextField의 선택 영역 테마를 설정할 수 있습니다.
themeData.copyWith(
  ...
  textSelectionTheme: TextSelectionThemeData(
    cursorColor: Constants.black,
    selectionColor: Colors.blue.shade200,
  ),
  ...
);
완료
이것으로 GetX에서 테마를 설정하고 변경하는 방법에 대해서 알아보았습니다. 또한 제가 앱을 개발하면서 변경해 본 테마를 공유하였습니다. 여러분도 GetX를 사용하여 테마를 적용, 변경해 보시기 바랍니다! 제가 변경해보지 못한 테마의 변경 방법에 대해 아시는 분들은 댓글에 남겨주시면 좋겠습니다.
제 블로그가 도움이 되셨나요? 하단의 댓글을 달아주시면 저에게 큰 힘이 됩니다!
앱 홍보
Deku가 개발한 앱을 한번 사용해보세요.Deku가 개발한 앱은 Flutter로 개발되었습니다.관심있으신 분들은 앱을 다운로드하여 사용해 주시면 정말 감사하겠습니다.


![[심통]현장에서 바로 써먹는 리액트 with 타입스크립트 : 리액트와 스토리북으로 배우는 컴포넌트 주도 개발, 심통](https://img1c.coupangcdn.com/image/affiliate/banner/7cba8cb0601eebaf88a17a0c3cf65a63@2x.jpg)