概要
GitHub Actions を使ってると、手動で GitHub Actions を実行する必要がある場合があります。このブログポストでは、GitHub Actions を手動で実行する方法について説明します。
workflow_dispatch
GitHub Actionsを手動で実行するには、workflow_dispatchを使う必要があります。
この場合、workflow_dispatchの inputsを使ってパラメータを渡すことができます。
workflow_dispatchは次のように設定できます。
name: GITHUB ACTIONS NAME

on:
  workflow_dispatch:
inputs タイプ
workflow_dispatchの inputsには次のような種類があります。
boolean: true または falsechoice: 事前に指定されたオプションの中から選択できる SelectBoxnumber: 数字string: 文字列environment: GitHub に設定された環境変数を使用
公式ドキュメントでも使える inputs タイプを確認することができます。
workflow_dispatchの inputsは次のように設定できます。
name: GITHUB ACTIONS NAME

on:
  workflow_dispatch:
    inputs:
      input_boolean:
        description: 'This is a boolean input'
        required: true
        default: false
type: booleaninputsは type 以外にも description, required, default を設定することができます。type 以外はすべて任意です。
例題
それでは workflow_dispatchを使って GitHub Actions を手動で実行する例を見ていきましょう。
boolean
手動で実行する GitHub Actions を作成するために .github/workflows/manual_test.yml ファイルを作成し、次のように修正します。
name: GITHUB ACTIONS NAME

on:
  workflow_dispatch:
    inputs:
      input_boolean:
        description: 'This is a boolean input'
        required: true
        default: false
        type: boolean

jobs:
  deploy-to-staging:
    runs-on: ubuntu-latest
    steps:
      - name: Print the input
        run: echo ${{ inputs.input_boolean }}
このように作成したファイルを commit して push した後、GitHub の Actions タブに移動すると、次のような画面を確認できます。
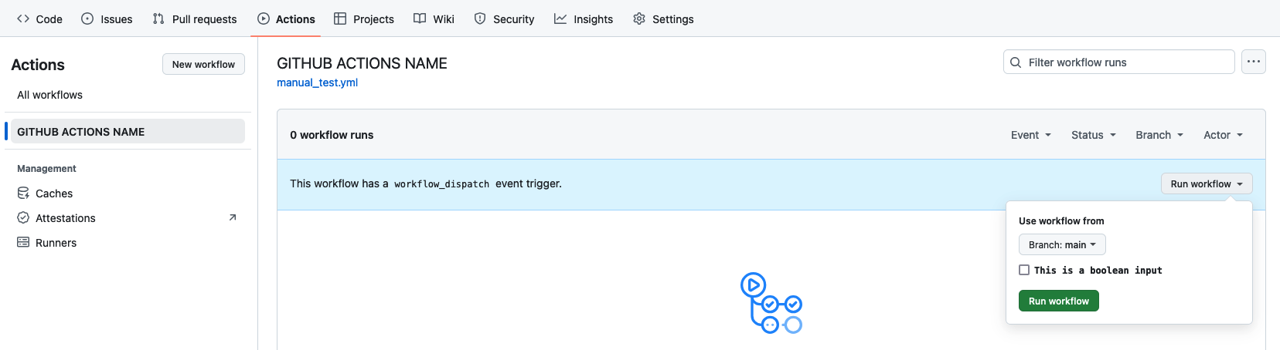
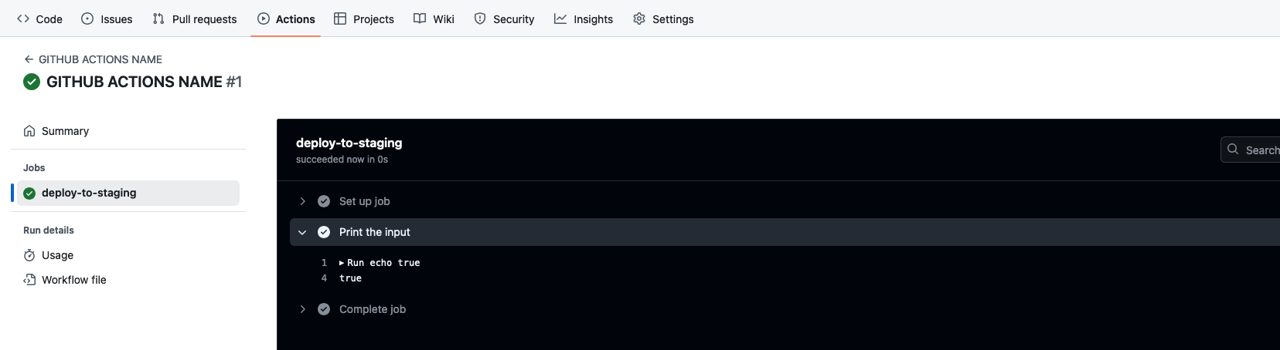
右側に表示された Run workflow をクリックすると、設定した boolean タイプの inputs を確認できます。これを実行すると次のような結果を得ることができます。
choice
手動で実行する GitHub Actions を作成するために .github/workflows/manual_test.yml ファイルを作成し、次のように修正します。
name: GITHUB ACTIONS NAME

on:
  workflow_dispatch:
    inputs:
      input_choice:
        description: 'This is a choice input'
        required: true
        default: 'warning'
        type: choice
        options:
          - info
          - warning
          - debug

jobs:
  deploy-to-staging:
    runs-on: ubuntu-latest
    steps:
      - name: Print the input
        run: echo ${{ inputs.input_choice }}
このように作成したファイルを commit して push した後、GitHub の Actions タブに移動すると、次のような画面を確認できます。
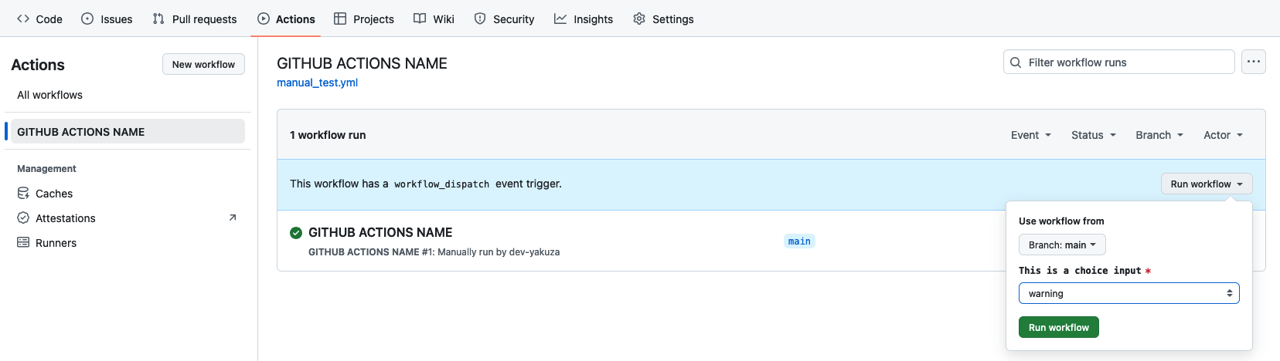
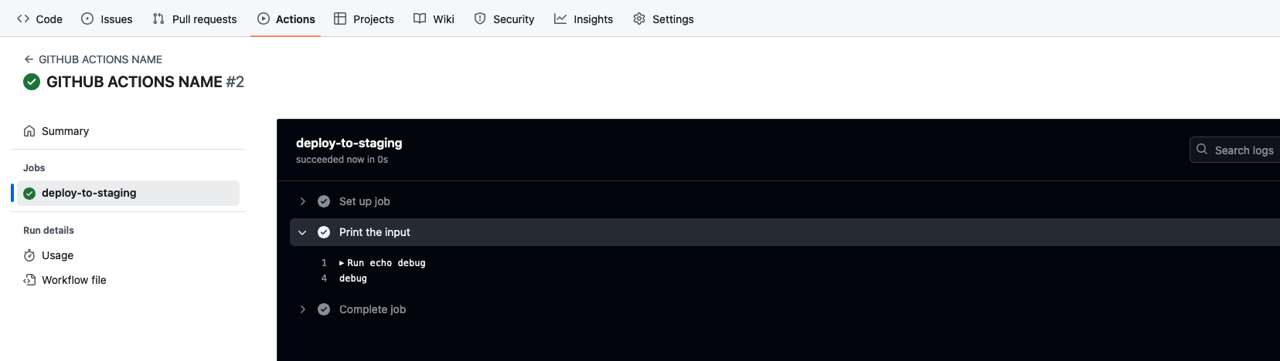
右側に表示された Run workflow をクリックすると、設定した choice タイプの inputs を確認できます。これを実行すると次のような結果を得ることができます。
number
手動で実行する GitHub Actions を作成するために .github/workflows/manual_test.yml ファイルを作成し、次のように修正します。
name: GITHUB ACTIONS NAME

on:
  workflow_dispatch:
    inputs:
      input_number:
        description: 'This is a number input'
        required: true
        default: 20
        type: number

jobs:
  deploy-to-staging:
    runs-on: ubuntu-latest
    steps:
      - name: Print the input
        run: echo ${{ inputs.input_number }}
このように作成したファイルを commit して push した後、GitHub の Actions タブに移動すると、次のような画面を確認できます。
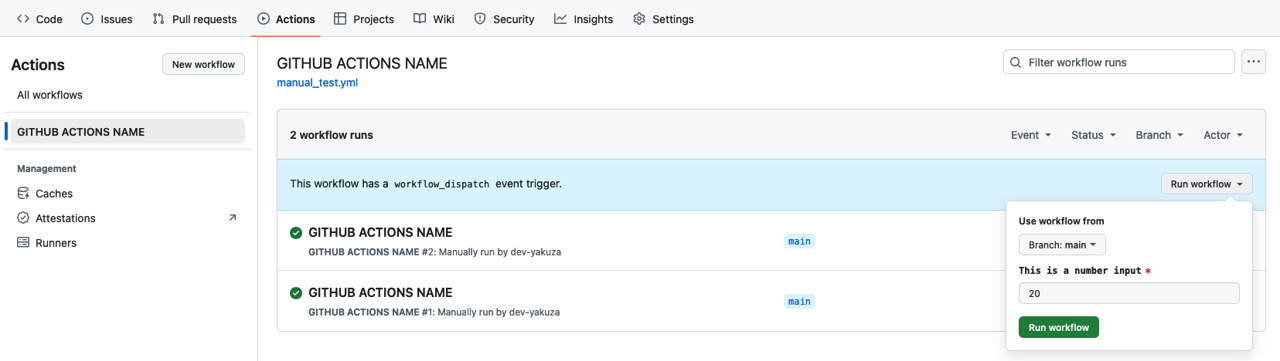
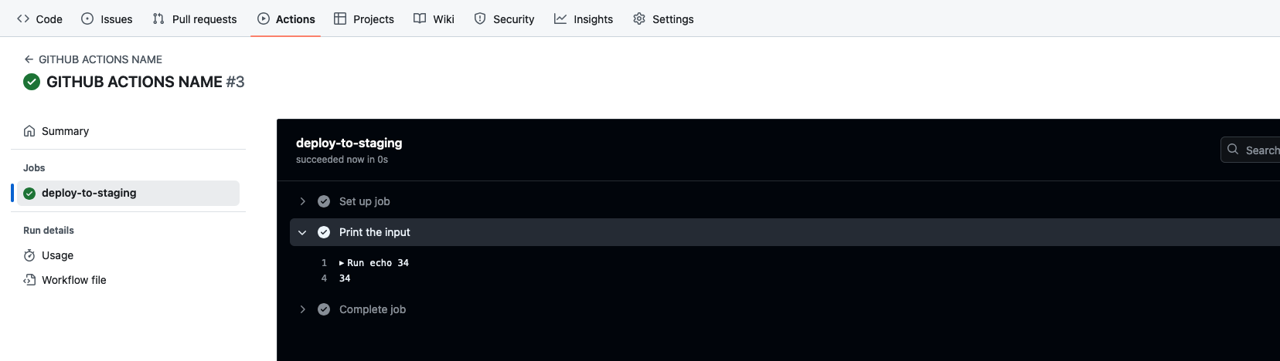
右側に表示された Run workflow をクリックすると、設定した number タイプの inputs を確認できます。これを実行すると次のような結果を得ることができます。
string
手動で実行する GitHub Actions を作成するために .github/workflows/manual_test.yml ファイルを作成し、次のように修正します。
name: GITHUB ACTIONS NAME

on:
  workflow_dispatch:
    inputs:
      input_string:
        description: 'This is a string input'
        required: true
        default: 'Hello, World!'
        type: string

jobs:
  deploy-to-staging:
    runs-on: ubuntu-latest
    steps:
      - name: Print the input
        run: echo ${{ inputs.input_string }}
このように作成したファイルを commit して push した後、GitHub の Actions タブに移動すると、次のような画面を確認できます。
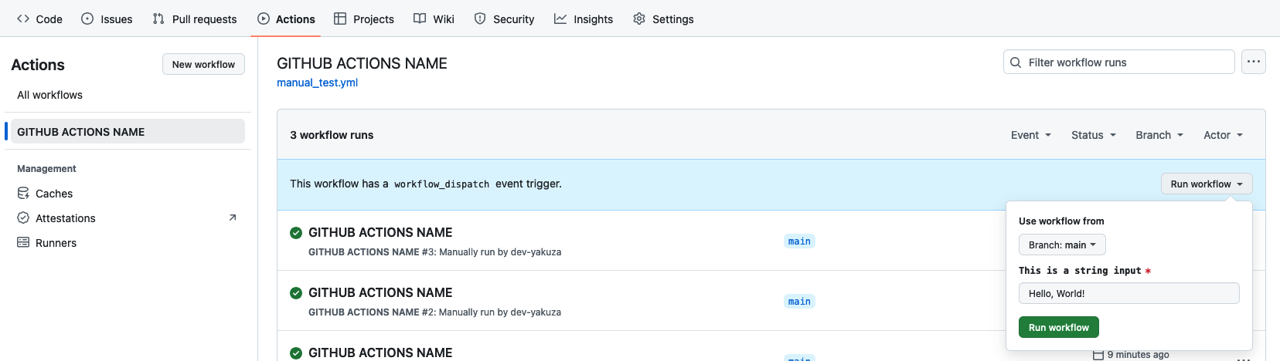
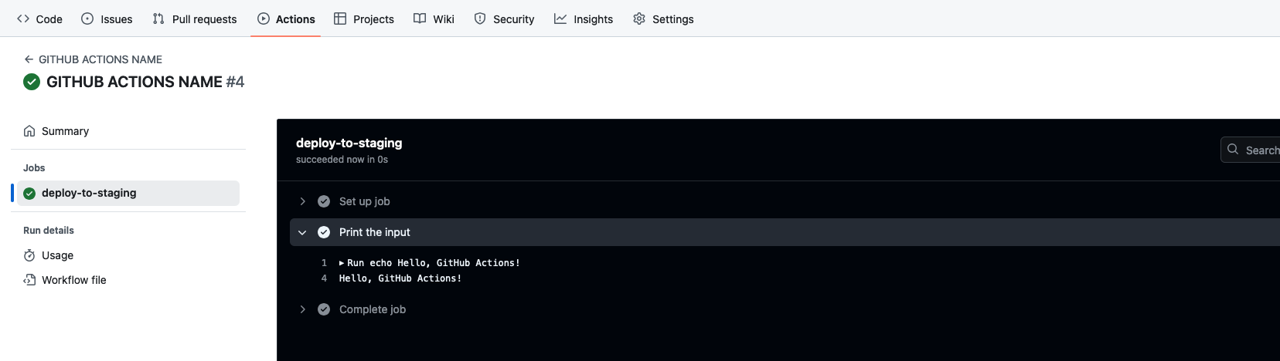
右側に表示された Run workflow をクリックすると、設定した string タイプの inputs を確認できます。これを実行すると次のような結果を得ることができます。
environment
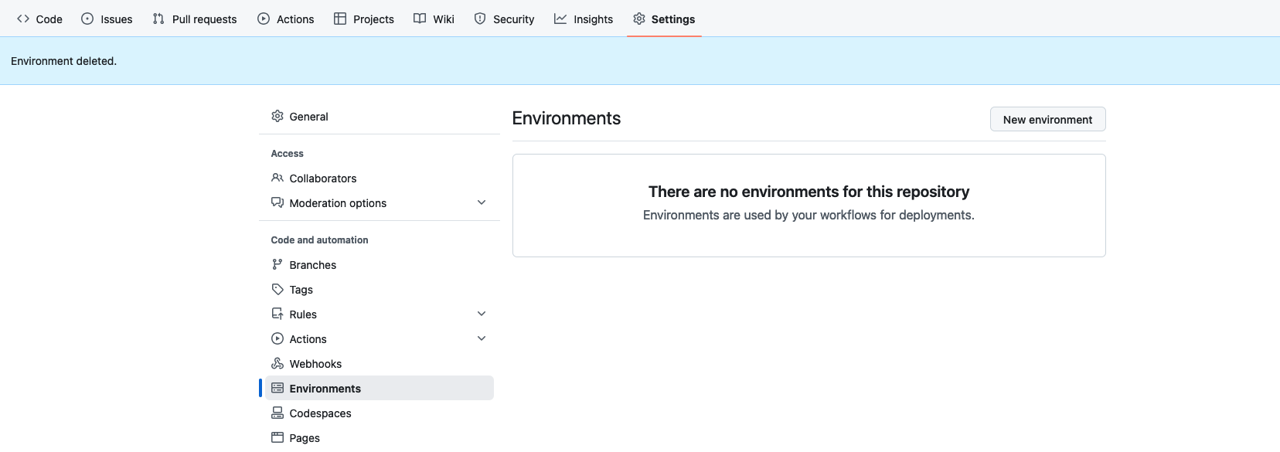
workflow_dispatchの environment タイプを使用するには、GitHub の Settings で Environment を設定する必要があります。
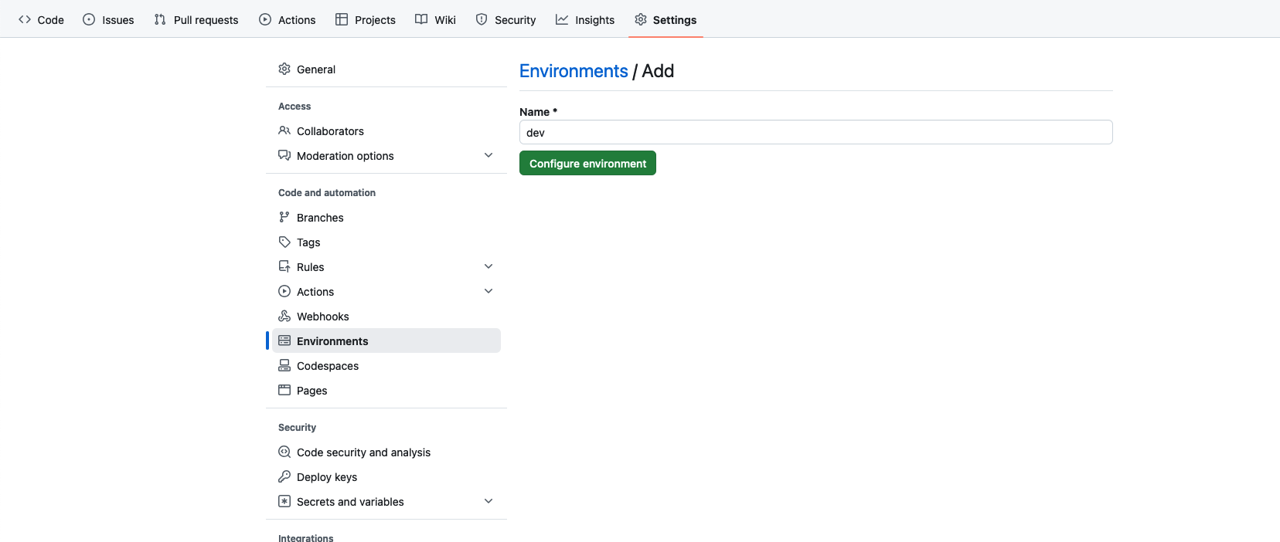
New environment をクリックして、次のように Name に dev を入力してから、Configure environment をクリックします。
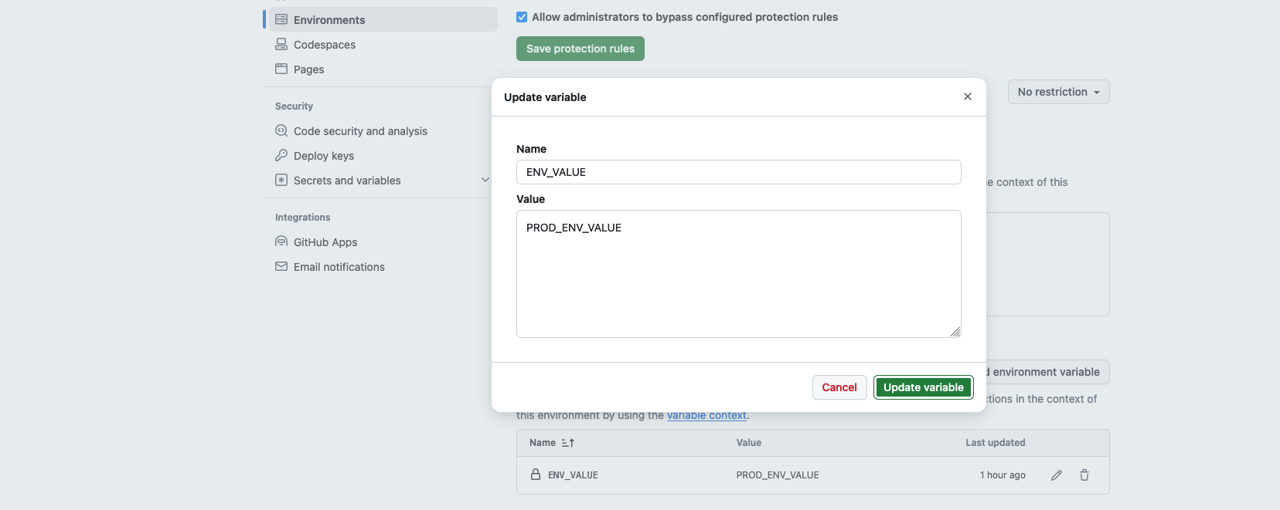
その後、Environment variables の Add environment variable ボタンをクリックして、次のように Variable を追加します。
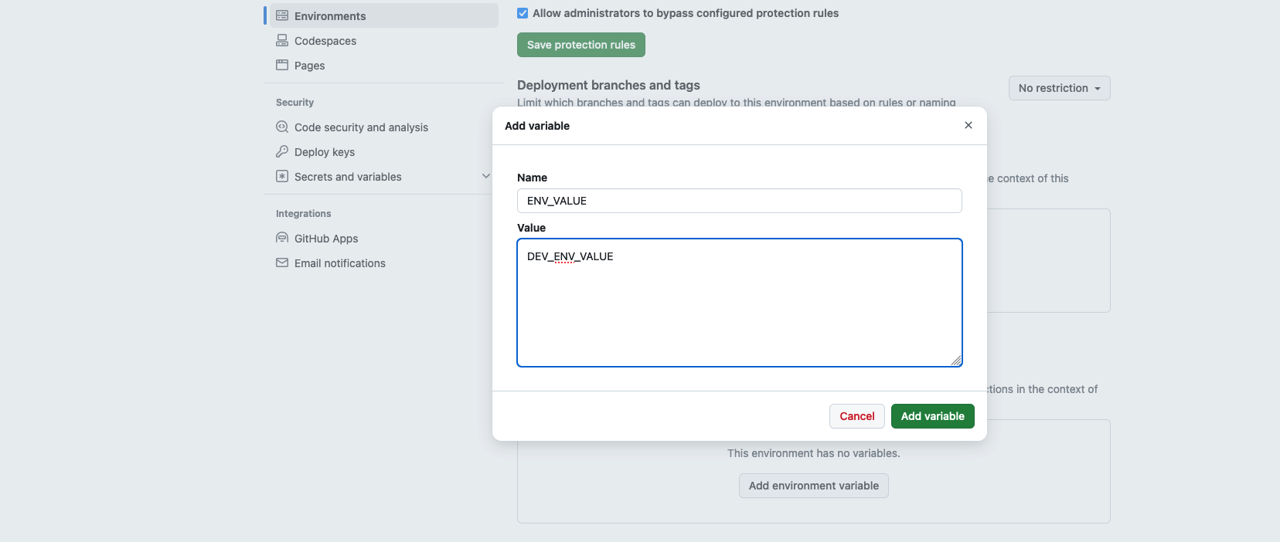
同じように prod という環境にも同じ変数を追加します。
次は、手動で実行する GitHub Actions を作成するために .github/workflows/manual_test.yml ファイルを作成し、次のように修正し
name: GITHUB ACTIONS NAME

on:
  workflow_dispatch:
    inputs:
      input_environment:
        description: 'This is a environment input'
        required: true
        type: environment

jobs:
  deploy-to-staging:
    runs-on: ubuntu-latest
    environment: ${{ inputs.input_environment }}
    steps:
      - name: Print the input
        run: echo ${{ vars.ENV_VALUE }}
このように作成したファイルを commit して push した後、GitHub の Actions タブに移動すると、次のような画面を確認できます。

右側に表示された Run workflow をクリックすると、GitHub の Settings で Environment に設定した値が表示されることを確認できます。これを実行すると次のような結果を得ることができます。
- dev 環境
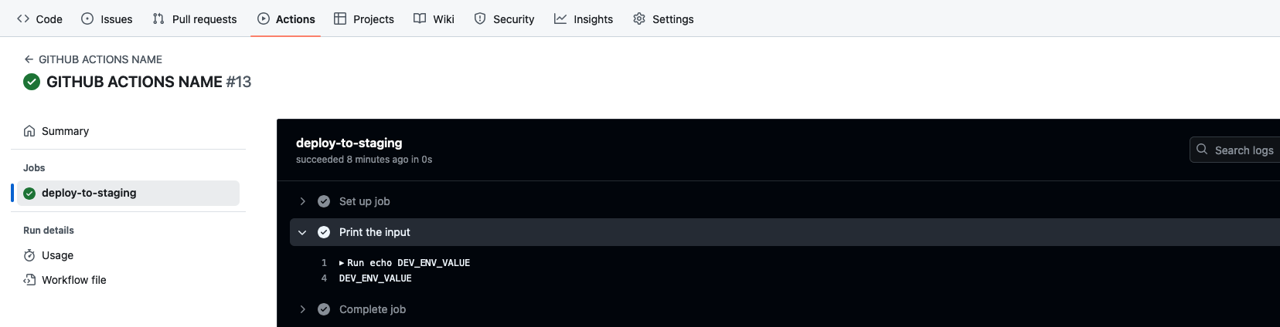
- prod 環境

完了
これで GitHub Actions を手動で実行する方法について説明しました。また、設定可能な inputs タイプについても説明しました。
皆さんも workflow_dispatch とさまざまなタイプの inputs を使って GitHub Actions を手動で実行してみてください。
私のブログが役に立ちましたか?下にコメントを残してください。それは私にとって大きな大きな力になります!
アプリ広報
Dekuが開発したアプリを使ってみてください。Dekuが開発したアプリはFlutterで開発されています。興味がある方はアプリをダウンロードしてアプリを使ってくれると本当に助かります。