概要
Flutterで簡単なアニメーションを使うためAnimatedContainerウィジェットとAnimatedOpacityウィジェットを使う方法について説明します。
このブログポストで紹介するソースコードは下記のリンクで確認できます。
- GitHub: AnimatedContainer
- GitHub: AnimatedOpacity
Flutterプロジェクト生成
Flutterで簡単なアニメーションを使う方法を練習するため、次のコマンドを使って新しFlutterプロジェクトを生成します。
flutter create my_app
cd my_app
AnimatedContainer
プロジェクトを生成したら、main.dartファイルを次のように修正してAnimatedContainerウィジェットを表示します。
import 'dart:math';

import 'package:flutter/material.dart';

void main() {
  runApp(MyApp());
}

class MyApp extends StatelessWidget {
  @override
  Widget build(BuildContext context) {
    return MaterialApp(
      title: 'Flutter Demo',
      theme: ThemeData(
        primarySwatch: Colors.blue,
      ),
      home: MyHomePage(),
    );
  }
}

class MyHomePage extends StatefulWidget {
  @override
  _MyHomePageState createState() => _MyHomePageState();
}

class _MyHomePageState extends State<MyHomePage> {
  double _width = 0;
  double _height = 0;
  Color _color = Colors.green;
  double _borderRadius = 0;

  @override
  Widget build(BuildContext context) {
    return Scaffold(
      appBar: AppBar(
        title: Text('AnimatedContainer'),
      ),
      body: Center(
        child: AnimatedContainer(
          duration: Duration(seconds: 1),
          curve: Curves.fastOutSlowIn,
          width: _width,
          height: _height,
          decoration: BoxDecoration(
              color: _color,
              borderRadius: BorderRadius.circular(_borderRadius)),
        ),
      ),
      floatingActionButton: FloatingActionButton(
        onPressed: () {
          setState(() {
            final random = Random();
            _width = random.nextInt(300).toDouble();
            _height = random.nextInt(300).toDouble();
            _color = Color.fromRGBO(random.nextInt(256), random.nextInt(256),
                random.nextInt(256), 1);
            _borderRadius = random.nextInt(150).toDouble();
          });
        },
        child: Icon(Icons.play_arrow),
      ),
    );
  }
}
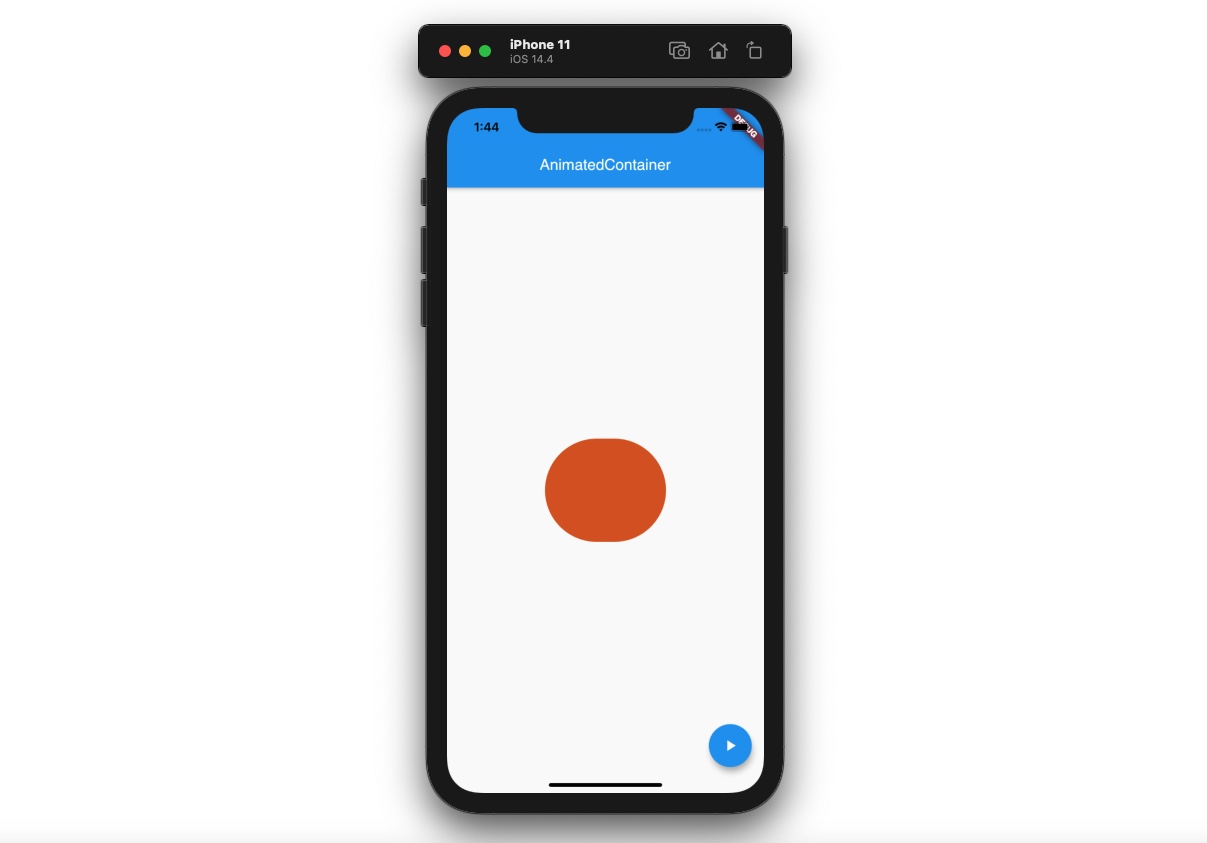
上のとうにコードを作成したら次のような画面が確認できます。

そしたらAnimatedContainerウィジェットを使う部分を詳しくみてみましょう。
class _MyHomePageState extends State<MyHomePage> {
  double _width = 0;
  double _height = 0;
  Color _color = Colors.green;
  double _borderRadius = 0;
  ...
}
Stateful widgetを使ってアニメーションに使える変数を定義しました。
class _MyHomePageState extends State<MyHomePage> {
  ...
  @override
  Widget build(BuildContext context) {
    return Scaffold(
      ...
      body: Center(
        child: AnimatedContainer(
          duration: Duration(seconds: 1),
          curve: Curves.fastOutSlowIn,
          width: _width,
          height: _height,
          decoration: BoxDecoration(
              color: _color,
              borderRadius: BorderRadius.circular(_borderRadius)),
        ),
      ),
      ...
    );
  }
}このように定義した変数をAnimatedContainerウィジェットを生成する時、使いました。
class _MyHomePageState extends State<MyHomePage> {
  ...
  @override
  Widget build(BuildContext context) {
    return Scaffold(
      ...
      floatingActionButton: FloatingActionButton(
        onPressed: () {
          setState(() {
            final random = Random();
            _width = random.nextInt(300).toDouble();
            _height = random.nextInt(300).toDouble();
            _color = Color.fromRGBO(random.nextInt(256), random.nextInt(256),
                random.nextInt(256), 1);
            _borderRadius = random.nextInt(150).toDouble();
          });
        },
        child: Icon(Icons.play_arrow),
      ),
    );
  }
}最後にFloatingActionButtonを押した時、setStateを使ってアニメーションに使えてる変数の値を変更しました。FloatingActionButtonボタンを押すと、色んな四角形が画面に表示されることが確認できます。
AnimatedOpacity
AnimatedOpacityウィジェットはAnimatedContainerウィジェットと違って、単純に透明度(Opacity)に関するアニメーションを適用する時使います。main.dartファイルを開いて下記のように修正します。
import 'package:flutter/material.dart';

void main() {
  runApp(MyApp());
}

class MyApp extends StatelessWidget {
  @override
  Widget build(BuildContext context) {
    return MaterialApp(
      title: 'Flutter Demo',
      theme: ThemeData(
        primarySwatch: Colors.blue,
      ),
      home: MyHomePage(),
    );
  }
}

class MyHomePage extends StatefulWidget {
  @override
  _MyHomePageState createState() => _MyHomePageState();
}

class _MyHomePageState extends State<MyHomePage> {
  bool _isVisible = true;

  @override
  Widget build(BuildContext context) {
    return Scaffold(
      appBar: AppBar(
        title: Text('AnimatedOpacity'),
      ),
      body: Center(
        child: AnimatedOpacity(
          opacity: _isVisible ? 1.0 : 0,
          duration: Duration(seconds: 1),
          child: Container(
            width: 200,
            height: 200,
            color: Colors.green,
          ),
        ),
      ),
      floatingActionButton: FloatingActionButton(
        onPressed: () {
          setState(() {
            _isVisible = !_isVisible;
          });
        },
        child: Icon(Icons.play_arrow),
      ),
    );
  }
}
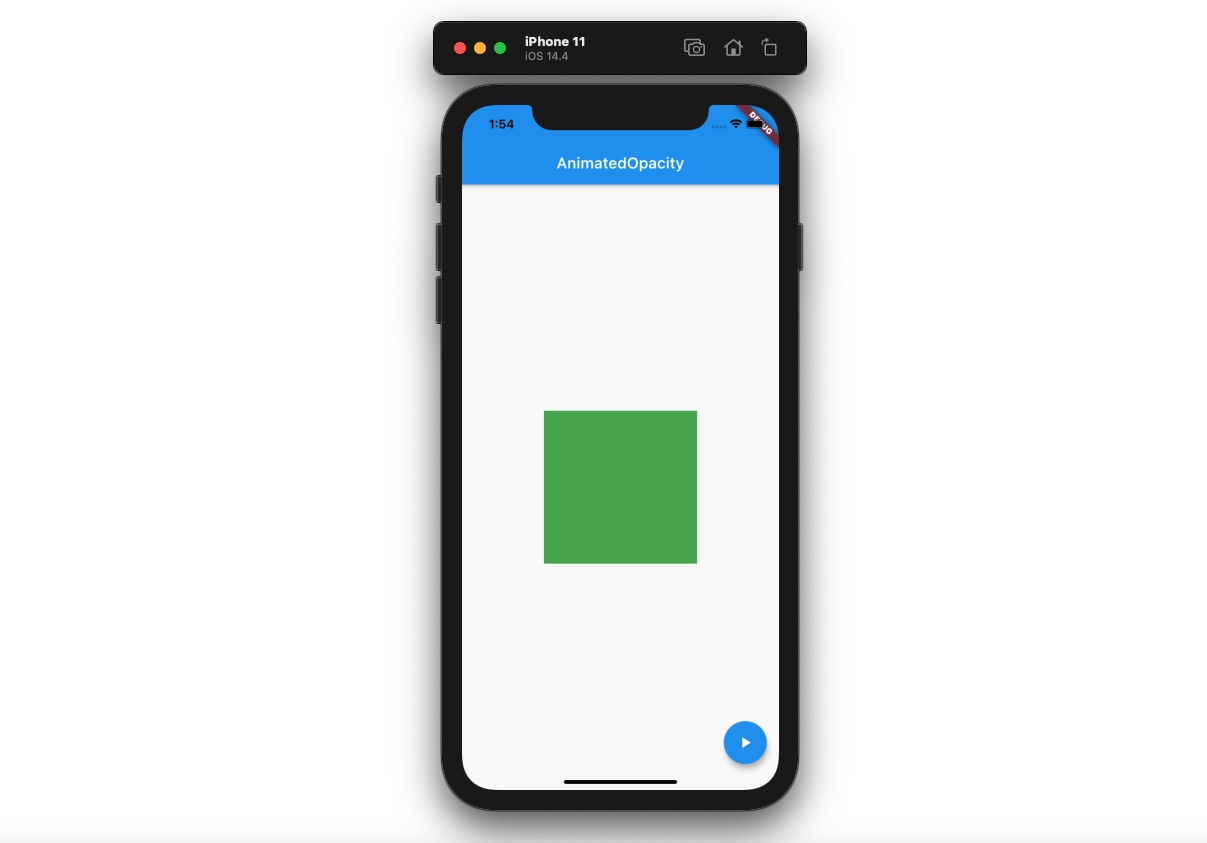
コードを上のように修正したら、次のような画面が確認できます。

そしたらAnimatedOpacityウィジェットを使う部分をもっと詳しくみてみましょう。
class _MyHomePageState extends State<MyHomePage> {
  bool _isVisible = true;
  ...
}今回の例題では_isVisible変数を使って、trueの場合はAnimatedOpacityウィジェットを画面に表示して、falseの場合はウィジェットを見えないようにする予定です。
class _MyHomePageState extends State<MyHomePage> {
  ...
  @override
  Widget build(BuildContext context) {
    return Scaffold(
      ...
      body: Center(
        child: AnimatedOpacity(
          opacity: _isVisible ? 1.0 : 0,
          duration: Duration(seconds: 1),
          child: Container(
            width: 200,
            height: 200,
            color: Colors.green,
          ),
        ),
      ),
      ...
    );
  }
}AnimatedOpacityウィジェットはchildでウィジェットを必須で貰います。この時、opacityをセットすることで透明度のアニメーションを適用することができます。
class _MyHomePageState extends State<MyHomePage> {
  ...
  @override
  Widget build(BuildContext context) {
    return Scaffold(
      ...
      floatingActionButton: FloatingActionButton(
        onPressed: () {
          setState(() {
            _isVisible = !_isVisible;
          });
        },
        child: Icon(Icons.play_arrow),
      ),
    );
  }
}次はFloatingActionButtonウィジェットを使って_isVisibleを変更して、AnimatedOpacityウィジェットの透明度を変更しました。
完了
これでFlutterでAnimatedContainerウィジェットとAnimatedOpacityウィジェットを使って簡単なアニメーションを適用する方法についてみてみました。
私のブログが役に立ちましたか?下にコメントを残してください。それは私にとって大きな大きな力になります!
アプリ広報
Dekuが開発したアプリを使ってみてください。Dekuが開発したアプリはFlutterで開発されています。興味がある方はアプリをダウンロードしてアプリを使ってくれると本当に助かります。


